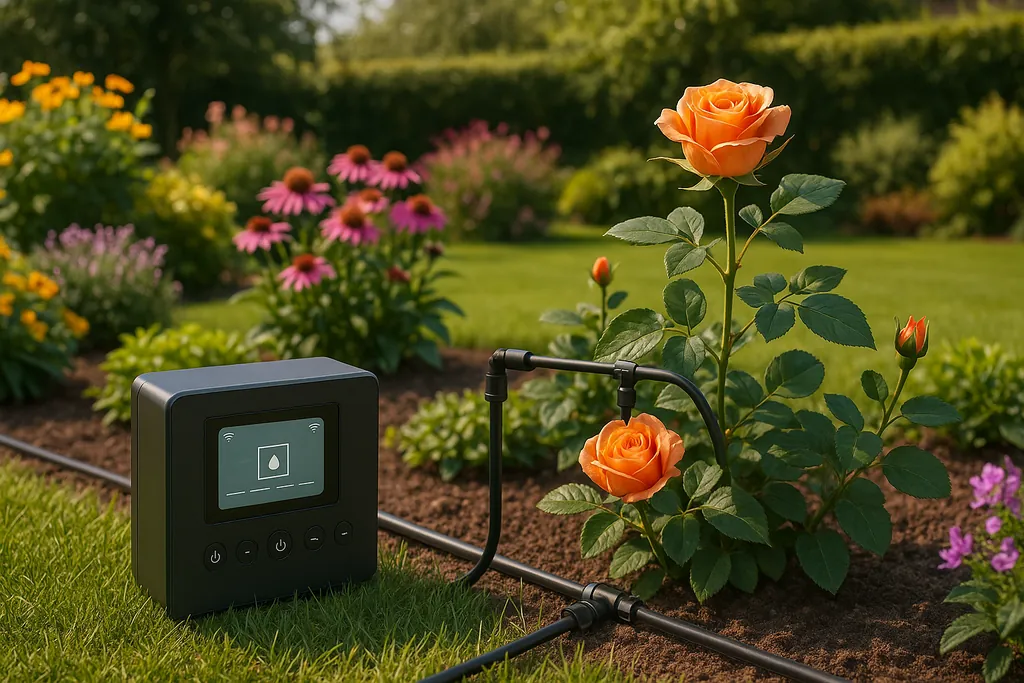
Learn how to create a smart irrigation system to save water and enhance your garden's health with our step-by-step DIY guide.
DIY Smart Irrigation System: Step-by-Step Guide
Want to save water and keep your garden thriving? A DIY smart irrigation system could be the answer. These systems use automation, sensors, and weather data to deliver the right amount of water at the right time - cutting water waste by up to 50%. Here's a quick overview of what you'll learn:
- Benefits: Save water, lower bills, and grow healthier plants. For example, homeowners can reduce outdoor water use by 30%-50%.
- Costs: Basic setups start at $150-$300, while advanced systems can cost $500-$600.
- Key Components: Microcontrollers, soil moisture sensors, PVC pipes, and sprinklers.
- Installation Steps: Map your garden, set up zones, install sensors, and program the controller.
- Maintenance Tips: Seasonal adjustments, leak detection, and regular system checks.
Why it matters: With outdoor watering accounting for up to 50% of household water use, switching to a smart irrigation system is a practical way to conserve water and reduce utility bills. Ready to get started? Let's dive in!
How to Build Your Own Smart Irrigation System: DIY Home Assistant Controlled Valve
System Planning
Planning your irrigation system thoughtfully can improve efficiency, conserve water, and support healthier plants.
Garden Layout Analysis
Start by sketching a scaled map of your garden. Include key features like planting areas, measurements, and structures. Pay special attention to sun exposure across different sections, as this will guide your watering strategy.
For example, your garden might have:
- Full sun areas: Receive 6+ hours of direct sunlight.
- Partial sun areas: Get 3–6 hours of sunlight.
- Shaded areas: Receive less than 3 hours of sunlight.
Testing soil texture and composition in these zones is equally important. Dividing your garden into separate irrigation zones allows you to customize water delivery based on each area's specific needs, such as sun exposure and soil type.
A good example of this method comes from Structure Landscapes, which creates detailed yard maps with color-coded zones showing sun exposure and soil variations. This approach ensures water is distributed efficiently, cutting down on waste.
Water Sources and Zone Setup
Choose a water source that is both reliable and of good quality. As Burdette Barker, an Irrigation Specialist with Utah State University Extension, explains:
> "Understanding irrigation water quality is an important part of irrigation water management"
This is especially crucial since outdoor watering can account for 30% to 50% of a household's total water use.
When designing irrigation zones, consider these factors:
- Plant Water Needs
Group plants with similar water requirements to avoid overwatering or underwatering. For instance:
- High-water plants: Vegetables and flowering plants.
- Moderate-water plants: Established perennials.
- Low-water plants: Native species.
- Terrain Features
Align zones with your garden's natural contours to reduce runoff and ensure even watering. Use moisture sensors to monitor different terrain types:
| Zone Type | Characteristics | Recommended Sensor Placement |
|---|---|---|
| Flat Areas | Even water distribution | One sensor per zone |
| Sloped Areas | Risk of runoff | Multiple sensors at various elevations |
| Specialty Gardens | Specific water needs | Sensors near key plants |
- Managing Water Sources
If you're using multiple water sources, program your irrigation controller to handle them effectively:
- Assign primary and secondary source priorities.
- Set flow rates and pressure levels.
- Monitor water levels in secondary sources.
- Use automatic shutoffs to avoid system damage.
Once your zones are planned, you're ready to move on to installing and calibrating the system for optimal performance.
Required Materials and Tools
To put together a smart irrigation system, you'll need to carefully choose the right components. Here's a breakdown of what you'll need.
Main System Parts
Control Components:
- Arduino Nano or similar microcontroller: Around $5
- RS458 relay board with 4 relays: Approximately $15
- Nokia 5110 display with level shifter: About $10
- Menu encoder: Roughly $5
- MAX485 module for TTL to RS-485 conversion: $1.50 for a pack of five
Sensing and Monitoring:
- Chirp soil moisture sensors: $20 each
- RS458 soil moisture sensors: $25 each
- Pressure regulator (30 PSI): Includes necessary fittings
Water Distribution:
- 1/2" PVC pipes and fittings
- 200 ft of 1/2" main line hose
- 100 ft of 1/4" micro tubing
- Sprinkler heads and drippers, such as:
- 30 mini jet sprayers (180°)
- 10 mini jet sprayers (90°)
- 15 shrubblers on 5" stakes
- 2 mini sprinklers (low flow)
| Component Type | Essential Parts | Optional Upgrades |
|---|---|---|
| Basic System | Microcontroller, sensors, relays | Smart controller ($179.10) |
| Water Lines | PVC pipes, main line hose | Drip irrigation kit ($39.99) |
| Monitoring | Basic moisture sensors | Advanced soil meters ($12.99) |
> "The system can be used for house plants, raised beds, but also for plants in the garden or larger green areas, because the number of connected plants is scalable." - Patrick Hallek
Once you've gathered these components, you'll also need the right tools to install and configure the system.
Installation Tools
Essential Tools:
- Basic hand tools: pipe cutters, adjustable wrenches, deburring tool, Teflon tape, and a shovel
- Pressure gauge
- Nozzle pull-up tool
- Dripline punch tool
Optional Equipment:
- Pipe-pulling machine or trencher (renting may be a good option)
- Air compressor for winterizing the system
- Specialized cutting tools for poly pipes
Cost and Starting Tips
For a basic DIY system, expect to spend between $150 and $300. If you're aiming for a more advanced setup with all the bells and whistles, the cost may rise to $500–$600. However, this investment often pays off quickly, as smart irrigation systems can cut water usage by up to 30% compared to traditional methods.
If you're new to this, it's best to start with the basic components and tools. This lets you experiment with a simpler setup, giving you time to learn and make adjustments as you gain confidence with the technology.
Installation Instructions
Hardware Setup
Start by planning your trench layout. Before digging, contact local utility companies to mark underground lines to avoid any accidental damage.
For the main supply lines, use 3/4" or 1" schedule 40 PVC pipes. Dig level trenches that are 6–12 inches deep, ensuring they are free of rocks. When connecting PVC pipes, follow these steps:
- Thoroughly clean the ends of the pipes and fittings.
- Apply PVC cement to both the fitting's interior and the pipe's exterior.
- Insert the pipe into the fitting and give it a quarter turn for a secure connection.
When assembling the valve manifold:
- Install Backflow Prevention
Attach a backflow preventer to protect your home's water supply.
- Set Up the Valve Manifold
Connect solenoid valves to the manifold and install a filter before each valve to ensure proper operation.
- Connect Distribution Lines
Run distribution lines from the manifold to the sprinkler locations. If you live in an area prone to freezing, consider using flexible poly pipes for added durability.
Controller and Sensor Setup
Once the hardware is installed, it's time to set up sensors and configure the controller. Place soil moisture sensors strategically based on your garden's zones:
| Sensor Placement | Minimum Distance |
|---|---|
| From buildings or surfaces | 5 feet |
| From irrigation heads | 5 feet |
| From planted beds | 3 feet |
| Burial depth (turfgrass) | 3 inches |
Ensure sensors are installed within plant root zones. Michael D. Dukes from UF/IFAS Extension emphasizes the importance of proper sensor thresholds:
> "The soil water content after 24 hours is now the sensor threshold used to allow or bypass scheduled irrigation events."
Program your controller with these key steps:
- Assign zones based on plant types.
- Set appropriate watering thresholds.
- Enable weather-based adjustments for efficient irrigation.
- Test each zone manually to confirm proper operation.
Finally, ensure all components are protected and test the system for optimal performance.
Weather Protection and Testing
- Controller Protection
Use a weatherproof enclosure, such as the Rachio Weatherproof Outdoor Enclosure ($31.99, IP54), to shield the controller from the elements.
- Winterization
Insulate exposed components with foam insulation tape. Focus on the main shut-off valve, above-ground piping, backflow preventers, and any exposed valves.
- System Testing
Before wrapping up the installation, perform these checks:
- Flush the lines before attaching sprinkler heads.
- Inspect all connections for leaks.
- Verify that sprinkler coverage is even.
- Test sensor responsiveness to ensure accuracy.
- Double-check controller programming to confirm all settings are correct.
System Management
Once you've installed your smart irrigation system, keeping it running efficiently and effectively requires ongoing care and adjustments.
Seasonal Adjustments
Irrigation needs change with the seasons. During summer, plants may require up to 40% more water, while spring rainfall can reduce water needs by 30–50%. Adjusting your controller settings to reflect these seasonal shifts is key. For example, watering early in the morning can help cut down on evaporation. If you're using a smart controller with weather-based features, it can automatically adapt to these changes, potentially reducing annual water use by 20–30%.
> "Adjusting your irrigation controller throughout the year ensures your garden is getting the water it needs according to our climate, without wasting a drop." - Water Corporation
Once you've set your system for the season, it's just as important to address any problems that arise.
Common Problems and Fixes
Even with well-tuned seasonal settings, issues with your system can pop up. Here's how to handle some of the most common ones:
- Low Pressure: Check the pressure regulator and inspect the main water supply line for any restrictions.
- Uneven Water Distribution: Misaligned or damaged sprinkler heads can cause this. Clean clogged emitters and replace any broken parts.
- Controller Malfunctions: Problems with your controller may be due to electrical connections, dead batteries, faulty solenoids, or incorrect programming. Double-check these areas.
For added peace of mind, consider installing flow sensors. These can alert you to discrepancies between the actual and expected gallons per minute (GPM), helping you catch issues early.
Maintenance Schedule
A consistent maintenance routine is essential for keeping your system in top shape. Here's a breakdown of tasks to keep things running smoothly:
- Monthly Tasks:
- Look for leaks or broken components.
- Clean screens and filters.
- Ensure sprinkler heads are properly aligned.
- Seasonal Maintenance:
- Spring Activation: Test backflow preventers and adjust the controller settings to match the season.
- Summer Monitoring: Keep an eye on water usage and adjust zones to meet the needs of your plants.
- Fall Preparation: Gradually reduce watering frequency and flush out the system.
- Winter Protection: Drain pipes, insulate exposed parts, and safeguard the controller from freezing temperatures. In harsher climates, professional winterization might be a good idea.
Wrap-Up
Key Points
Setting up a DIY smart irrigation system is a fantastic way to keep your garden thriving while cutting back on water use. These systems can slash water usage by as much as 30%, and the upfront cost often pays off within 1.5 to 2 years, thanks to lower water bills and improved efficiency.
Here's a quick look at what your new smart irrigation system brings to the table:
| Feature | Benefit | Result |
|---|---|---|
| Weather-Based Control | Adjusts schedules automatically | Saves up to 40% on water use |
| Remote Management | Control via smartphone | Less manual effort |
| Leak Detection | Identifies problems early | Stops unnecessary water loss |
| Zone Control | Tailored watering by plant type | Healthier, better-nourished plants |
Next Home Projects
After mastering smart irrigation, why not tackle a few more water-efficient upgrades? Here are some ideas to consider:
- Rainwater harvesting system: A simple rain barrel setup costs around $75 to $150. It's an eco-friendly way to collect and use rainwater, reducing your dependence on municipal supplies.
- Rain garden: This project not only manages stormwater runoff but also creates a stunning, low-maintenance landscape that needs very little watering.
- Indoor water conservation improvements: Switch to WaterSense-labeled fixtures like low-flow showerheads ($30–$100), faucet aerators (under $10), smart leak detectors, and hot water pipe insulation. These upgrades can help a typical household save about 700 gallons of water every year.
FAQs
Where should I place soil moisture sensors in my garden for the best results?
To ensure precise measurements, position soil moisture sensors close to the root zones of your plants - this is where water availability matters most. If your garden has different soil types, either select spots that represent the dominant soil type or focus on areas where plants thrive.
Place the sensors at a depth of 6 to 12 inches, depending on your plants' root depth. Steer clear of compacted areas, like tractor paths, as they can interfere with accurate readings. For the best results, space the sensors roughly 12 inches apart to effectively track moisture levels throughout your garden.
How can I fix low water pressure or uneven watering in my smart irrigation system?
If you're dealing with low water pressure or uneven watering, the first step is to take a close look at your sprinkler heads. Clogs or misalignment are often to blame, so give them a good cleaning and make any necessary adjustments. It's also a good idea to inspect the system for leaks - even a small one can cause a noticeable drop in pressure.
Make sure your water pressure falls within the recommended range for your sprinkler system. If the pressure is too low, installing a booster pump could be the solution. On the flip side, if the pressure is too high, a pressure regulator can help reduce misting and prevent water waste. Staying on top of regular maintenance and inspections will keep your system running efficiently and ensure your yard or garden gets the even watering it needs.
How do I winterize my smart irrigation system to protect it during freezing temperatures?
To get your smart irrigation system ready for winter and protect it from freezing damage, here's what you need to do:
- Shut off the water supply: Turn off the main water source to prevent water from remaining in the pipes, where it could freeze and cause cracks.
- Drain the system: Clear out all water from the pipes using drain valves or compressed air. If you're using compressed air, make sure to remove end fittings first to avoid any damage.
- Insulate exposed parts: Cover above-ground pipes, backflow preventers, and shut-off valves with foam insulation or insulating tape to keep them safe from freezing temperatures.
- Bring removable components indoors: Detach and store items like timers, filters, or battery-operated controllers in a dry indoor space. Be sure to remove any batteries to prevent corrosion while in storage.
Taking these precautions will help protect your irrigation system and ensure it's in good shape when spring rolls around.