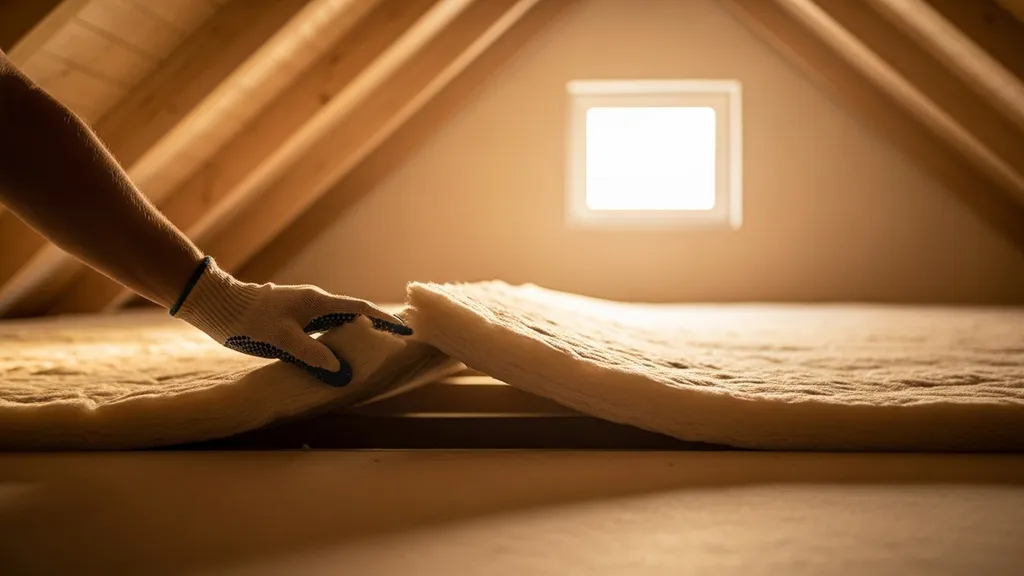
Clear guidance on how much attic insulation you need, R-value targets by climate, material comparisons, DIY measuring, costs, and installation tips.
Attic Insulation: How Much Do You Need?
Attic insulation is one of the most cost-effective upgrades a DIYer can make to reduce heating and cooling bills and improve comfort. Uninsulated roofs can account for roughly 25–30% of heat loss in a typical house, so getting the right attic R-value and insulation depth matters. This guide walks through climate-based R-value targets, how to measure your attic and calculate quantities, material trade-offs (including blown-in cellulose), ventilation and air-sealing priorities, cost and payback examples, and clear DIY vs professional decision points.
TL;DR:
- Aim for R-30 to R-60 in cold climates, R-19 to R-38 in mixed climates, and R-13 to R-30 in warm climates; full attics save about 25–30% of heat loss when upgraded.
- Measure area and average insulation depth, convert depth to R-value using material R/inch, then buy blown or batt quantities plus 10% waste.
- Air-seal before insulating, choose material based on budget and space (blown cellulose is DIY-friendly), and hire pros for spray foam or complex ventilation work.
Related guides: Best insulation for attic materials and r values, R 15 vs r 21 insulation which do you need, R 15 vs r 20 insulation which do you need, and R 13 vs r 23 insulation which do you need.
Attic Insulation: Quick key points you need to know
One-paragraph Summary
Attic insulation prevents heat flow through the roof assembly by increasing thermal resistance (R-value). For many homes, upping attic insulation yields fast energy savings; the U.S. Department of Energy recommends prioritizing attic and roof insulation because attic heat loss is a leading source of energy waste. Passive House assemblies aim higher than typical retrofit targets, so choose an R-value that matches your climate, budget, and whether the attic is ventilated or conditioned.
Three Quick Action Items
- Measure your attic area and existing insulation depth in several spots and identify the material type before buying more.
- Set an R-target for your climate (see the R-value chart below) and convert that to depth for your chosen material.
- Air-seal common leakage points—attic hatch, recessed lights, plumbing chases—before adding insulation to make new insulation work as intended.
For more background on where to insulate in a home, see the Department of Energy's guide to where to insulate in a home.
Attic Insulation: R-value targets by climate zone and building type
Recommended R-value ranges by climate zone
R-value targets depend on heating/cooling loads. The following broad ranges map to common U.S. climate groupings and follow DOE/IECC guidance as a baseline. Passive House targets are noted separately.
- Cold climates (IECC Zones 5–8): R-38 to R-60 for attic floor insulation is a practical target. Many retrofit experts recommend R-49 to R-60 if heating dominates.
- Mixed climates (Zones 3–5): R-30 to R-49 balances cost and comfort.
- Warm climates (Zones 1–3): R-19 to R-38 for attics; prioritizing radiant barriers and air sealing helps in hot climates.
- Hot-humid climates: R-13 to R-30, but ventilation and moisture management are as important as R-value.
The Insulation Institute provides practical installation details for ceiling and attic insulation that align with these ranges: Ceiling and attic insulation installation guidance.
Local code minimums (IECC) are the legal baseline and may be lower than best-practice retrofit targets. Use code as the minimum and the ranges above as performance goals.
Passive House vs standard retrofit targets
Passive House (PHI/PHIUS) prefers much higher overall thermal performance and airtightness; for simple retrofit work, Passive House practitioners often target attic-equivalent insulation levels and prioritize continuous insulation, very high air-tightness, and controlled ventilation with heat recovery. In cold climates, Passive House-equivalent R-values in the roof assembly often exceed R-60, but the overall approach pairs lower space heating loads with mechanical ventilation and stricter air-sealing.
Small homes, tiny houses, and unconditioned attics
Small footprints change priorities. For tiny houses and cabins where roof depth is limited, use high-R materials like closed-cell spray foam or exterior continuous insulation. In unconditioned attics, insulating at the attic floor is generally appropriate; in conditioned attics (mechanical equipment or finished attic rooms), insulate along the roofline and maintain controlled ventilation and vapor control.
Attic Insulation: Measuring your attic and calculating how much you need
How to measure attic area and average insulation depth
Tools: tape measure, telescoping ruler/depth gauge, flashlight, camera, mask, gloves.
Steps:
- Measure the footprint: Multiply the length by the width of the attic area that needs insulation to get square feet (ft²). For irregular shapes, divide into rectangles and add them.
- Measure depth: Take depth readings at 6–8 evenly spaced locations (near eaves, mid-span, and ridge). Record depth in inches.
- Average depth: Add the readings and divide by the number of samples to get average depth.
- Note obstructions: Subtract areas covered by chimneys, skylights, and mechanical stacks from total area or measure these separately.
Tools like a camera and marking tape help document material type and depth locations for later calculations.
How to estimate existing R-value from depth and material
Common conversions:
- Fiberglass batt: ~R-3.1–3.7 per inch
- Blown fiberglass: ~R-2.5–3.0 per inch
- Cellulose (loose-fill): ~R-3.2–3.8 per inch (dense-pack higher)
- Spray foam (open-cell): ~R-3.5–3.7 per inch; (closed-cell): ~R-6.5–7.0 per inch
Estimate existing R-value = average depth (in) × material R/in. Label your measurements and pick mid-range R/in for conservatism.
Step-by-step quantity calculation example (materials and bag counts)
Example attic: 1,200 ft², current cellulose depth 6 inches (loose-fill). Goal: R-49 using blown cellulose.
- Existing R: 6 in × 3.5 R/in ≈ R-21.
- Required R increase: R-49 − R-21 = R-28.
- Cellulose R/in ~3.5, so added depth needed = 28 ÷ 3.5 = 8 inches.
- Total target depth = 6 + 8 = 14 inches.
Bag counting for blown cellulose: Typical bag covers ~40 ft² at 3.5 inches depth (varies by manufacturer). For 1,200 ft² and 8 inches additional:
- Volume factor: (8 in ÷ 3.5 in) × 1,200 ft² ÷ 40 ft² per bag = (2.2857 × 30) ≈ 68.6 → round up to 70 bags.
For dense-pack cellulose, use manufacturer density numbers because depth-to-R conversion differs. The Building America Solution Center explains measurement and air-sealing related to ice dam mitigation: Attics - building america solution center.
Watch this step-by-step guide on determine how much insulation you will need:
The video above demonstrates measuring depth in several spots, identifying material, and converting inches to R-value and bag counts.
Attic Insulation: Materials, R-value per inch, and a comparison table
Common attic materials: overview
- Fiberglass batt: Precut batts for joist spacing; DIY-friendly.
- Blown fiberglass: Machine-applied loose-fill for irregular areas.
- Blown cellulose: Dense-pack or loose-fill; good coverage and made from recycled paper.
- Open-cell spray foam: Fills cavities; moderate R/inch and air-sealing benefit.
- Closed-cell spray foam: High R/inch, acts as vapor retarder and structural adhesive.
- Rigid foam (polyiso, EPS, XPS): Used for continuous exterior insulation or under roof sheathing.
For lifecycle and embodied-impact comparisons, see the site's natural vs synthetic comparison and deeper hybrid analysis in the spray foam vs cellulose article.
Comparison/specs table
| Material | R-value per inch | Typical depth for R-49 | Cost per ft² (installed range) | DIY difficulty |
|---|---|---|---|---|
| Fiberglass batt | 3.1–3.7 | 13–16 in | $0.50–$1.50 | Easy |
| Blown fiberglass | 2.5–3.0 | 16–20 in | $0.60–$1.20 | Moderate |
| Blown cellulose | 3.2–3.8 | 12–16 in | $0.60–$1.40 | Moderate |
| Open-cell spray foam | 3.5–3.7 | 14–16 in (rare) | $1.50–$3.00 | Hard (requires pro) |
| Closed-cell spray foam | 6.5–7.0 | 7–8 in | $2.00–$4.50 | Hard (pro) |
| Polyiso rigid board | 5.5–6.5 | 8–9 in (continuous) | $1.50–$3.00 | Moderate |
Source notes: R/inch ranges from Energy Star insulation fact sheet provide typical values: Insulation fact sheet (Energy Star PDF). Use the site's insulation comparison tool to compare embodied carbon, price sensitivity, and lifecycle performance for specific products.
Pros/cons: cost, DIY-friendliness, embodied carbon, fire and moisture notes
- Blown cellulose: Good value, fair R/inch, excellent gap-filling, made from recycled paper—requires blower rental or contractor and attention to settling; research indicates cellulose performs well for indoor air quality when installed correctly (see studies in scholarly literature).
- Fiberglass batts: Low cost and easy for simple joist bays, but compressing batts reduces R-value; poor fit around obstructions increases air leakage.
- Spray foam: Closed-cell delivers high R and air-sealing but has higher embodied energy and requires professional application and safety controls.
For a deeper lifecycle and carbon-focused comparison, consult the site's spray foam vs cellulose and natural vs synthetic comparison.
Attic Insulation: Recommended depths and practical conversion charts
Depth tables for common materials to hit R-30, R-49, R-60
| Target R | Fiberglass batt (in) | Blown fiberglass (in) | Cellulose loose-fill (in) | Closed-cell spray foam (in) |
|---|---|---|---|---|
| R-30 | 8–10 | 10–12 | 8–9 | 4–5 |
| R-49 | 13–16 | 16–18 | 14–16 | 7–8 |
| R-60 | 16–20 | 20–24 | 18–20 | 9–10 |
These are approximate. Use manufacturer R/inch values for precise planning. For dense-pack cellulose, published densities change the depth needed; consult product spec sheets or the site's comparison tool for exact numbers.
Retrofit vs new-build guidance (space constraints and layering)
- Retrofit: Usually add blown-in material on top of joists; avoid compressing existing batts. Allow for damming at eaves and around fixtures.
- New-build: Provide space for full-depth insulation and consider continuous exterior insulation to reduce thermal bridging.
- Layering: Install rigid foam on the roof deck or top of ceiling sheathing if interior depth is limited, then add batt or blown fill to reach target R. This hybrid approach keeps thermal bridging down and can preserve interior space.
If roof slope or cathedral ceilings limit depth, see the site's complete guide to exterior foam insulation for strategies using exterior continuous insulation and roof assemblies.
How to handle existing partial insulation
If insulation is inconsistent, either level the depth across the attic by adding blown insulation or selectively add batts in joist bays where practical. Avoid simply topping thin batts with new batts that compress the material—a compressed batt has lower effective R-value. When mixing materials, ensure vapor/permeance layering and ventilation strategy remain appropriate.
Research on cellulose performance and indoor air quality is available for those wanting data-driven confidence in material choice: Research on thermal insulation performance and impact on indoor air quality.
Attic Insulation: Installation tips, ventilation, air sealing, and moisture control
Air sealing before insulation: where to focus
Air sealing often gives bigger energy returns than adding a small amount of insulation. Priority leak areas:
- Attic hatch and door (install an insulated, gasketed cover).
- Recessed lighting and fixture boxes (use IC-rated boxes or enclose and seal).
- Plumbing stacks, vent pipes, and electrical penetrations (seal with low-expansion foam or caulk).
- Duct boots and HVAC penetrations.
Use low-expansion spray foam for larger gaps and canned low-expansion foam or gaskets for smaller penetrations. Follow Passive House air-sealing techniques and consult the site's article on air-sealing windows for related sealing methods.
Roof/attic ventilation basics and when to use baffles
Vented attics typically use continuous soffit intake and ridge or roof vents to move air across the attic and control moisture. Key points:
- Maintain a clear airflow path from soffit to ridge; do not block soffit intake with insulation.
- Install rafter or insulation baffles at eaves to keep airflow channels open where insulation meets the roof edge.
- For unvented (sealed) attics, insulate along the roofline and ensure the assembly is designed for moisture and thermal control; sealed attics often pair with spray foam or rigid board at the roof deck.
Guidance on sealed and insulated attics and their thermal/moisture performance is available in the literature review from LBNL: A literature review of sealed and insulated attics.
Vapor control, soffit intake and ridge vents, and moisture risks
Vapor control depends on climate, assembly, and material choice. In cold climates, keep vapor-impermeable layers closer to the warm interior to reduce condensation in assemblies. In hot-humid climates, allow assemblies to dry to the exterior and avoid unvented systems that trap moisture.
For basement and vapor strategies that apply to attics as well, consult the site's vapor barrier guide. When working in attics, use eye, respiratory, and skin protection; follow manufacturer safety for spray foams and adhesives.
Attic Insulation: Costs, payback, and when to DIY vs hire
Ballpark material and installation costs per square foot
Typical installed cost ranges (U.S. averages, 2024):
- Blown cellulose: $0.60–$1.40 per ft² (material + blow rental or contractor).
- Blown fiberglass: $0.60–$1.20 per ft².
- Fiberglass batts (self-installed): $0.50–$1.50 per ft².
- Closed-cell spray foam: $2.00–$4.50 per ft².
- Open-cell spray foam: $1.50–$3.00 per ft².
- Rigid foam board (installed continuous): $1.50–$3.00 per ft².
Rental costs: Attic insulation blowers rent for about $60–$120/day; expect 1–2 days for an average attic. Bags of cellulose typically cost $4–$7 per bag depending on region.
Estimated energy savings and payback periods (example calculations)
Example: 1,200 ft² attic in a mixed climate upgrading from R-21 to R-49 using blown cellulose.
- Project cost: $1,200 (material + blower rental) — variable by region.
- Estimated annual heating/cooling savings: $150–$300 (depends on fuel and house).
- Payback: 4–8 years at typical energy prices.
Higher-cost options like closed-cell spray foam may yield faster payback only when paired with other envelope upgrades or when reducing HVAC sizing is possible. Energy modeling or a Manual J/UA calculation gives the best estimate for high-value decisions.
Permits and inspections vary; some jurisdictions require permits for insulation work, especially when modifying venting, electrical, or structural elements. See the site's building permits guide for when to expect paperwork and inspections.
When to hire a pro: complexity, health, and code considerations
Hire a professional when:
- Planning spray foam (safety and specialized equipment).
- Attic access is unsafe or confined.
- The job requires major air-sealing around chimneys, flues, or complex penetrations.
- Local codes require permits for changes to ventilation, electrical, or structural elements.
DIY is attractive for blown cellulose and fibreglass batts when the attic is accessible and there are no unusual hazards. Contractors bring warranty, proper density for dense-pack cellulose, and handling of hazardous materials.
The Bottom Line: How much attic insulation do you need?
Attic insulation needs depend on climate, whether the attic is ventilated or conditioned, and your material choice. For most DIYers: measure your attic, set an R-target (R-30 to R-60 cold, R-30–R-49 mixed, R-13–R-30 warm), air-seal first, then add enough material to meet the depth conversion for your chosen product. For tight spaces or cathedral ceilings, use higher-R materials or exterior foam strategies.
Three next steps:
- Measure and document your attic area and depth in multiple locations.
- Use the insulation comparison tool to choose material, then calculate bag/roll counts.
- Decide DIY vs hire based on access, spray-foam needs, and permit requirements.
Frequently Asked Questions
How do I tell what type of insulation is in my attic?
Look at texture and color: loose, gray, paper-like material is likely blown cellulose; fluffy yellow or pink tends to be fiberglass; white granular is blown fiberglass; rigid panels are foam board. Photograph samples, check for paper facings on batts, and note presence of foam coatings for spray foam.
Can I add insulation over existing insulation?
Yes, you can add loose-fill or batt insulation over existing material, but avoid compressing batts. For best results, air-seal first and add blown-in insulation to level depths. If existing insulation is moldy, wet, or contaminated, remove and replace it instead of covering.
How do I calculate R-value from inches?
Multiply the depth in inches by the material's R-value per inch. Example: 12 inches of cellulose at R-3.5 per inch gives R-42 (12 × 3.5 = 42). Use manufacturer R/in numbers for precise work, especially for spray foam and dense-pack systems.
Do I need a vapor barrier in my attic?
It depends on climate and assembly. In cold climates, an interior vapor retarder may help prevent condensation; in warm-humid climates, allowing assemblies to dry outward is often safer. Focus first on air sealing and proper ventilation; consult local code and the site's vapor barrier guide for specifics.
Will adding attic insulation stop ice dams?
Adding insulation reduces heat loss that melts snow on the roof, which reduces ice dam risk. However, ice dams also require good attic ventilation and proper eave detailing. Combine air sealing, adequate insulation, and balanced soffit-to-ridge ventilation for the best protection.