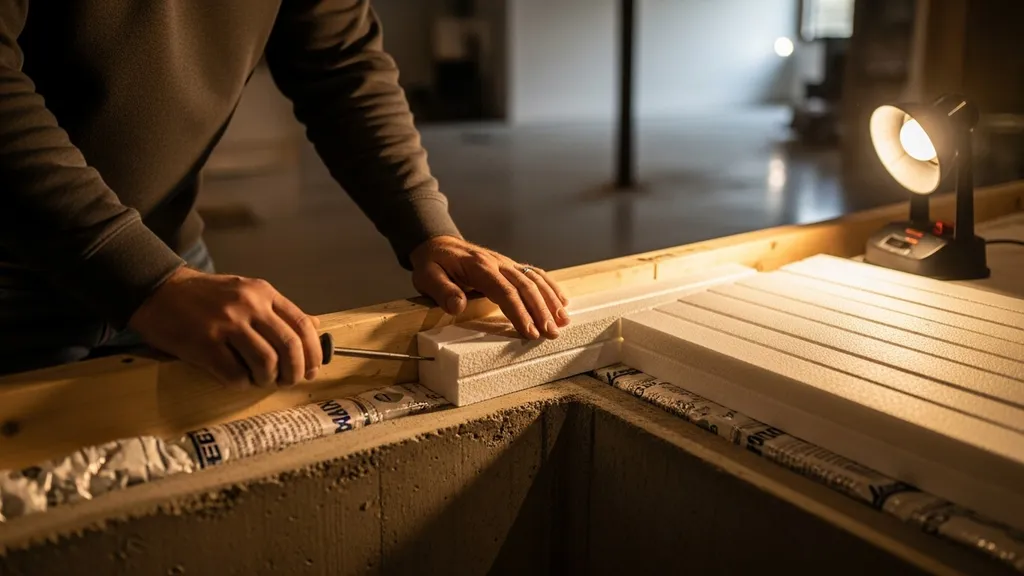
Practical, budget-friendly strategies to finish a basement while minimizing heat loss, moisture and energy bills — step-by-step guidance for DIYers.
Basement Finishing for Energy Efficiency
Finishing a basement is more than adding drywall and flooring — it's an opportunity to cut energy bills, stop moisture problems, and make the space comfortable year‑round. Properly planned basement finishing addresses insulation, air leaks, vapor control and ventilation so the foundation stops acting like a heat sink. This article explains practical, budget-friendly steps DIYers and self-builders can use to reduce heat loss, manage groundwater and maintain comfortable humidity while finishing a basement.
TL;DR:
- Prioritize moisture control first: stop active water entry, add exterior grading/gutters, and install interior drains or a sump if needed to avoid mold and foundation damage.
- Air-seal and insulate rim joists, slab edges and foundation walls with rigid foam or spray foam to cut heat loss by roughly 10–25% depending on house context (Energy.gov case studies).
- Add controlled ventilation and a dehumidifier to keep basement humidity 40–50% and protect finishes; use an ERV/HRV or dedicated dehumidifier depending on climate and airtightness.
Related guides: Ultimate guide to smart lighting energy efficiency, HERS rating home energy score explained, DIY energy monitor calibration guide, and Top 12 energy efficient windows for canadian climate.
Why Basement Finishing Matters for Energy Efficiency
A typical unfinished basement can leak heat through three main weak spots: rim joists and sill plates, uninsulated slab edges, and leaky foundation walls. Research and retrofit case studies show that foundations can account for a notable share of home heat loss; Department of Energy resources and building-science analyses put the range roughly between 10% and 25% of a home's heat loss depending on construction and insulation levels (Net zero building enclosure retrofits for houses). That loss is money down the drain each heating season.
Moisture risk is equally important. The EPA warns that persistent basement humidity above 60% encourages mold growth and dust-mite populations; finished surfaces and stored belongings magnify the cost of a damp basement. DIY self-builders, tiny-house owners converting basements to living quarters, and retrofitters all benefit by treating the basement as part of the conditioned envelope during finishing. A planned approach to basement finishing reduces energy bills, lowers mold risk, and protects framing, finishes and mechanical equipment.
Who benefits? Homeowners working on a tight budget gain the most by prioritizing the highest-impact moves: stop active water, air-seal rim joists, add insulating continuous layers, and provide mechanical humidity control. Contractors and small-scale builders find higher client satisfaction and fewer call-backs when these basics are handled up front.
Assessing Your Basement Before Finishing
A proper assessment saves time and prevents rework. Start with a visual check for evidence of water entry: efflorescence, staining, peeling paint, or a musty odor. Map likely air-leak locations: rim joists, sill plates, top of foundation near floor joists, gaps around plumbing and electrical penetrations, and HVAC or dryer vents.
Diagnostic steps: moisture, air leaks and thermal imaging
- Moisture logging: Place a digital hygrometer in the basement and log relative humidity for at least a week under typical conditions. Target less than 60% year-round; 40–50% is ideal for finished spaces.
- Flood and seep tests: After a rain event, inspect walls and perimeter for wet spots. Small water trails at the slab-to-wall joint indicate poor exterior drainage or failing waterproofing.
- Blower door and infrared scan: Renting a blower door and thermal camera (available at many tool rental centers or through local energy auditors) will reveal air leaks and thermal bridges. A blower door highlights where outside air is entering; an IR scan shows cold spots in the wall or slab.
- Check mechanical systems: Note where HVAC ducts and furnace flue pass through the basement envelope. Duct leaks or an uninsulated furnace in the basement can undermine insulation work.
For background on whole-home diagnostics, see the Department of Energy retrofit case study documenting diagnostics and retrofit steps for older homes (DOE retrofit case study).
Checklist: structural, code and permit basics
- Confirm whether adding sleeping rooms or changing egress requires permits and inspection (local building departments usually require egress for bedrooms).
- Check for load-bearing changes: moving stair openings or altering the foundation walls warrants structural review.
- Review plumbing and electrical code requirements for a finished basement.
- Inventory existing insulation and vapor control; note any insulation with water damage or mold.
When to call a pro
Hire a foundation contractor or structural engineer for active leaks that require excavation, major foundation cracks, or evidence of structural movement. Call a licensed electrician or plumber for service penetrations and code‑required mechanical changes. For complex moisture problems, a foundation waterproofing specialist can assess exterior waterproofing needs.
Insulation Strategies and Materials for Basement Finishing
Insulating a basement differs from wall insulation in that moisture risk, thermal bridging and continuous insulation matter more. Two broad strategies exist: interior insulation (work from inside the basement) and exterior insulation (excavate and insulate outside the foundation). For most DIY retrofits, interior methods are the practical choice.
Interior vs. exterior insulation: pros and cons
- Interior insulation: Lower cost, no excavation, easier for DIY. Best practice is continuous rigid foam against the concrete with a stud wall spaced off the foam. Downsides: potential moisture accumulation if not detailed correctly; must maintain capillary breaks and vapor-control strategy.
- Exterior insulation: Keeps the concrete warm and dry, reduces thermal bridging and preserves interior floor area. It's expensive, requires excavation, and often needs professional waterproofing; best for major renovations or when exterior access is available.
Insulating rim-joists, slabs and cold corners
- Rim joist: Seal gaps, then insulate with closed-cell spray foam or cut rigid foam board into cavities, sealing edges with canned spray foam or acoustical sealant. Rim-joist air sealing is among the highest-ROI DIY moves.
- Slab edge and slab-on-grade: Insulate slab edges with rigid foam (XPS, EPS, or polyiso depending on local codes) and consider a thermal break under floor finishes if installing a living floor over the slab. For cold climates, extend insulation down along the slab edge to the frost line or use recommended continuous insulation R-values per the IECC table in your climate zone.
- Cold corners: Insulate the intersection of foundation wall and slab with continuous foam to avoid thermal bridging and cold spots that cause condensation.
Insulation materials comparison table
| Material | Typical R/in | Moisture tolerance | Cost range | DIY difficulty |
|---|---|---|---|---|
| Closed-cell spray foam | 6–7 | High, air barrier | High | Hard (requires pro or rental rig) |
| Polyiso rigid foam | 5.6–6.5 | Moderate, vapor retarder on warm side | Medium | Medium (cuts easily) |
| XPS rigid foam | 4.5–5 | Good water resistance | Medium | Medium |
| EPS rigid foam | 3.6–4 | Lower cost, OK if detailed | Low | Easy |
| Mineral wool (batts) | 3.1–3.3 | Poor when wet (use above foam) | Low–Med | Easy (in framed walls) |
For more on R-value choices and how they map to climate zones, see the r-value basics. Industry research such as the ACEEE retrofit reports examines trade-offs and outcomes for different insulation approaches (Residential deep energy retrofits).
Air Sealing, Vapor Control and Moisture Management During Finishing
Finishing a basement without addressing air leaks and moisture invites problems: condensation in cold spots, mold behind finishes, and ongoing energy loss. The order matters: stop bulk water, then air-seal, then insulate.
Best air-sealing techniques for basements
- Seal rim joists: Use closed-cell spray foam for best performance; otherwise, fit rigid foam and seal seams with high-quality spray foam or butyl tape.
- Sill plates and top of foundation: Run an air barrier at the top of the foundation and sill plate intersection. Use gaskets under the sole plate where available.
- Penetration sealing: Plug gaps around plumbing, electrical conduit and HVAC with fire-blocking foam or intumescent caulk where required.
- Duct and mechanical interfacing: Seal duct boots and return paths in the basement; ensure combustion appliances either vent properly or are located in a dedicated mechanical room isolated from living spaces.
Practical materials and techniques are covered in the DIY guide to air sealing materials.
Vapor barrier placement: interior vs exterior considerations
There is debate about where to place vapor control; climate determines the best strategy. For cold climates, a vapor retarder on the warm-in-winter side of the insulation is common to avoid condensation in assemblies. For mixed or humid climates, a vapor-open interior approach with continuous exterior control or conditioned interior and mechanical ventilation can be safer. See the deeper discussion in the vapor barrier debate and the step-by-step basement vapor barrier guide for installation details.
Managing groundwater, drainage and capillary moisture
- Exterior grading and gutters: Maintain positive slope away from foundation and extend downspouts 3–6 feet to reduce water at the foundation wall.
- Interior perimeter drain and sump: If water is entering at slab joints, an interior French drain and sump pump are a reliable solution.
- Capillary break: Use rigid foam with taped seams at slab-wall junctions to act as a capillary break and thermal break.
- Document humidity before and after: Measure RH and temperature to validate improvements; consider a data logger for seasonal trends.
Studies from remodeling research summarize how moisture and air leakage contribute to remodeling failures and homeowner complaints (Five Insights from 25 Years of Remodeling Research).
Ventilation, HVAC and Humidity Control for Finished Basements
Once a basement is air-sealed, ventilation and humidity control become essential to avoid stale air and condensation. A sealed basement without controlled ventilation risks poor indoor air quality.
Introduce the video: A short how-to video helps DIYers see rim-joist air sealing, wall insulation detailing, and dehumidifier placement.
Choosing ventilation: spot ventilation, ERV/HRV and mechanical options
- Spot ventilation: Simple exhaust fans in bathrooms or laundry can handle intermittent loads but don't provide whole-space fresh air.
- ERV vs HRV: In cold, dry climates an HRV preserves heat while exchanging air; in cold, humid or mixed climates an ERV balances moisture as well as heat transfer. See the comparison in the ERV/HRV guide (difference erv hrv why matters cold climates).
- Connecting to central HVAC: Tapping conditioned air into the basement via a dedicated register or small fan coil can keep temperatures even; ensure load sizing and duct leakage are acceptable.
Sizing heating and cooling for a conditioned basement
Basement heat loads are lower than above-grade rooms because of thermal mass and earth buffering, but conduction through the slab and foundation can be significant. For small finished basements, options include a ductless mini-split, a small hydronic loop, or balancing the main HVAC with a dedicated supply. Use a simple manual J or consult a local HVAC pro for exact sizing; undersized systems will run constantly and waste energy.
Dehumidification strategies
Target basement dehumidification to hold relative humidity in the 40–50% range. Continuous dehumidification is often required for sealed basements in humid climates; in dry, cold climates intermittent operation may be enough. Dedicated dehumidifiers with built-in humidistats are common; for energy-efficient options, choose ENERGY STAR models and consider condensate routing to a sump or drain.
Budget-friendly dehumidification and DIY tricks are covered in the dehumidifier ideas post. Local building departments may have specific ventilation or mechanical requirements for finished basements — check municipal handouts like the Longmont basement finish guidelines for permit steps and requirements (Basement Finishes - City of Longmont).
Energy-Smart Finishes: Walls, Floors and Material Choices
Finishes should support the thermal and moisture strategy of the assembly. Wrong finishes—like impermeable paint over trapped moisture—can hide problems until mold appears.
Wall assemblies that minimize thermal bridging
- Continuous foam with framed wall: Install 1–2 inches of rigid foam against the concrete, tape seams, then build a 2x4 framed wall a few inches off the foam. This creates a thermal break and reduces cold studs contacting the interior finish.
- Insulated concrete form (ICF) for new builds: For new basements, ICF provides continuous insulation and reduces thermal bridging; not typically a DIY retrofit option.
- Avoid cavity-only approaches: Interior cavity insulation without a continuous layer often leaves studs and plates as thermal bridges and can create cold pockets.
Moisture-resistant flooring and coverings
- Choice of floors: Luxury vinyl plank, tile with proper underlayment, and engineered wood rated for basements are good choices when paired with insulating underlay. Solid hardwood is riskier unless a full moisture control strategy is in place.
- Underlayment and capillary break: Put a thermal slip sheet or foam underlayment over slab areas to add comfort and act as capillary break where needed.
- Paints and finishes: Use low-VOC primers and paints designed for basements that handle slight humidity swings without peeling.
Sustainable low-carbon finish options
- Reused and salvaged materials: Reclaimed flooring and cabinetry save materials and embodied carbon; the site’s sustainable materials guide has product ideas.
- Low-embodied-carbon insulation: EPS and mineral wool have differing carbon footprints; balance upfront cost with lifecycle performance.
- Low-VOC finishes: Select paints and adhesives with low volatile organic compound ratings for healthier indoor air.
Municipal permit guides often list acceptable materials and finish details; check local permit handouts for submission requirements before finishing (Residential Remodel - Basement Finish permit guide).
Cost-Saving Retrofit Pathways and a DIY-Friendly Checklist
A phased retrofit reduces upfront cost and spreads work into manageable projects. Here is a practical priority sequence and an actionable checklist.
Phased retrofit approach (low-cost to full upgrade)
- Stop bulk water: Fix grading and gutters first; it's the cheapest, highest-impact move.
- Air-seal rim joists and penetrations: Use canned foam and gaskets; a few hours of work yields large thermal benefits.
- Insulate rim joists and slab edges: Add rigid foam against the wall and seal seams.
- Add continuous interior foam and framed wall: For a finished look and extra R-value.
- Install controlled ventilation and dehumidification: Address IAQ after the space is tight.
- Finish surfaces: Install floors, drywall and trim only after moisture and air issues are resolved.
Top DIY moves that give the biggest ROI
- Seal rim joists and sill plates: High impact on heat loss and comfort.
- Fix exterior grading and downspouts: Cheap and prevents most water problems.
- Insulate slab edge and apply continuous foam: Reduces radiant cold floors and energy loss.
- Install an ENERGY STAR dehumidifier: Protects finishes and reduces mold risk.
Common DIY mistakes to avoid
- Finishing before solving water entry: That leads to mold and rework.
- Using cavity batts directly against concrete: They absorb moisture and lose R-value.
- Ignoring mechanical ventilation: A sealed basement needs fresh air to avoid stale, humid conditions.
- Cutting corners on sealing seams: Small gaps undermine large insulation investments.
Key Points Checklist:
- Fix exterior drainage and extend downspouts.
- Inspect and repair foundation cracks or active leaks.
- Log humidity and temperature before work.
- Seal rim joists, sill plates and penetrations.
- Insulate with continuous rigid foam at foundation walls.
- Add slab-edge insulation where possible.
- Provide mechanical ventilation (ERV/HRV) or dedicated dehumidifier.
- Use vapor control details matched to climate zone.
- Choose moisture-resistant flooring systems.
- Pull permits for egress changes and sleeping rooms.
- Retain specialists for structural or major waterproofing work.
- Reuse materials to reduce costs and embodied carbon where safe.
For permit pitfalls and recycling ideas, consult local permit guides and the site's recycling checklist posts. Spending more on closed-cell spray foam at rim joists is recommended when infiltration or conditioning concerns require a high-performance air barrier.
The Bottom Line
Basement finishing that focuses on moisture control, air sealing and appropriate insulation cuts heat loss, reduces mold risk and protects your investment. Start with stopping water, then air-seal and insulate, and finish with controlled ventilation or basement dehumidification. A phased DIY approach saves cash while delivering a comfortable, energy-efficient finished space.
Video: Energy Efficiency Upgrade - Basement Overview
For a visual walkthrough of these concepts, check out this helpful video:
Frequently Asked Questions
How do I know if my basement needs exterior waterproofing?
Look for signs of active water entry: standing water, damp spots after rain, efflorescence, or paint blistering at the slab-to-wall joint. If water tracks down the foundation or you see persistent dampness at the base of the wall, exterior waterproofing or an interior perimeter drain plus sump are typical solutions.
Small, isolated leaks can sometimes be repaired with improved grading and downspout extension; recurring seepage or basement flooding usually requires a pro for excavation and membrane work.
Can I insulate a basement myself or should I hire a pro?
Many DIYers can handle rim‑joist sealing, installing rigid foam against foundation walls, and building a framed wall off continuous foam. Closed‑cell spray foam and major exterior waterproofing are best left to licensed contractors due to equipment, code and warranty issues.
When in doubt about structural cracks, significant water entry, or combustion appliance interactions, consult a foundation or HVAC professional before continuing.
Do I need a vapor barrier on interior insulation?
It depends on your climate and assembly. Cold climates often benefit from a vapor retarder on the warm side of insulation; mixed and humid climates may need vapor‑open assemblies or exterior control. Review the vapor barrier debate and the basement vapor barrier guide for climate‑specific guidance.
What is the best way to control basement humidity?
Keep relative humidity in the 40–50% range with a combination of good drainage, sealed assemblies and active dehumidification. For sealed basements in humid climates, a dedicated ENERGY STAR dehumidifier running on a timer or humidistat is usually the most practical solution.
For whole‑house strategies or very tight assemblies, pair ventilation (ERV/HRV) with dehumidification and monitor RH trends seasonally; see our dehumidifier ideas post for budgets and DIY options.
Will finishing my basement increase my heating bills?
If the finished space is properly sealed and insulated as part of the conditioned envelope, operating costs will generally not rise much and can fall because the basement stops acting as a cold sink. Poorly detailed finishing without air sealing or moisture control can increase energy use and lead to condensation problems.
Run a quick energy check: after finishing, measure indoor temperatures and heating runtime; if the basement adds significant load, consider supplemental heating like a mini‑split sized to the actual load rather than oversized systems that waste energy.