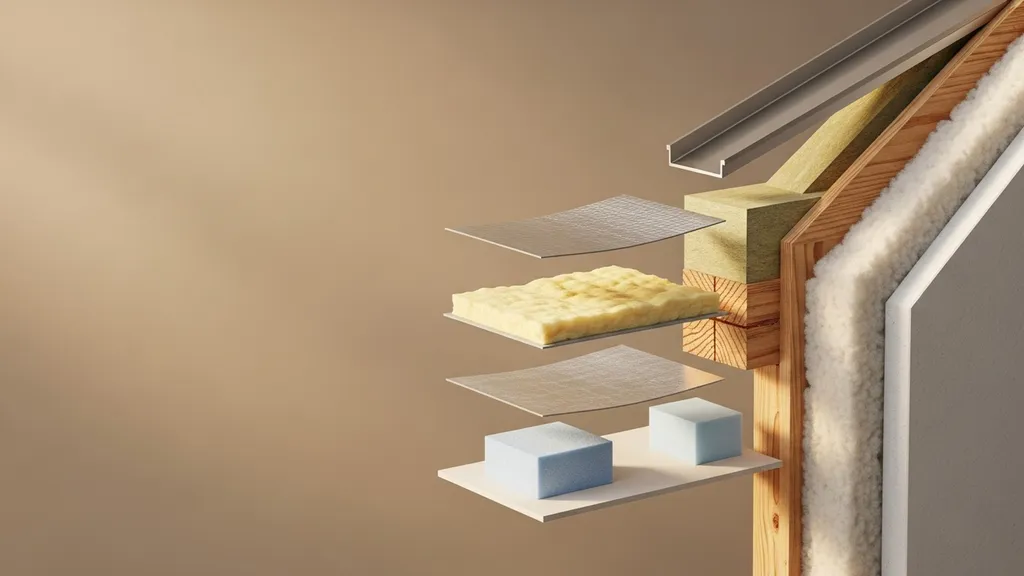
Clear, practical guide to R-value for DIY builders — what it is, how it works, and how to choose insulation for energy-efficient, budget-friendly homes.
Understanding R-Value: Insulation Basics Explained
R-value is the standard measure of an insulation material’s ability to resist heat flow — critical information for DIY builders planning energy-efficient, budget-minded homes. This guide explains what R-value means in plain terms, why it matters for comfort and bills, how manufacturers test and report it, and how to choose and apply materials for walls, roofs, floors, and foundations. Readers will get practical rules of thumb for target R-values by climate, simple math for thickness decisions, and trade-offs that affect performance beyond the number on the label.
TL;DR:
- Aim for attic R-values of R-38–R-60 and wall R-values of R-13–R-30 depending on climate; attic upgrades often return the most energy savings (20–40% heating reduction in cold climates).
- Use continuous exterior insulation and air sealing to avoid thermal bridging; calculate required thickness as: inches = target R / (R per inch).
- Prioritize correct installation and moisture control over chasing small R increases; improve airtightness and window performance if envelope leaks are present.
Related guides: Best insulation for attic materials and r values, Window orientation for passive solar basics explained, HERS rating home energy score explained, Safer alternatives spray foam insulation performance, and Ultimate guide to natural fiber insulation.
What R-Value Means: A simple, practical definition
Everyday analogy: R-value like clothing layers
Think of R-value like wearing layers of clothing: a single thin shirt has low resistance to heat loss; a fleece jacket adds resistance; a down coat adds even more. Higher R-value slows the movement of heat, keeping indoor air warmer in winter or cooler in summer.
Formal definition: thermal resistance per unit area
R-value is a measure of thermal resistance — how well a material resists conductive heat flow. In the imperial system R-value (often written R-value or R-value per inch) is used in the U.S.; in metric countries the equivalent is RSI (R‑SI). Higher R-value means better resistance to heat flow for a given thickness.
Units and conversions: imperial R-value vs metric RSI
R-value (imperial) and RSI (metric) are related: R ≈ 5.678 × RSI. For building code and retrofit planning, check local standards (for example, IECC or Energy Star guidance) because they may specify R or RSI. The U-value is the inverse of whole-assembly thermal resistance and is often used in Passive House and window specs; a lower U-value indicates better overall thermal performance. For a single layer: U = 1 / R_total.
For basic planning, keep in mind: higher R = better thermal resistance, but the number on the label assumes ideal, uncompressed installation under dry conditions.
(Authoritative overview of recommended home insulation R-values is available from Energy Star: https://www.energystar.gov/saveathome/seal_insulate/identify-problems-you-want-fix/diy-checks-inspections/insulation-r-values)
Why R-Value Matters for DIY Eco Homes
Energy bills and comfort: real-world impact
R-value directly affects heating and cooling loads. Studies and field data show that improving attic insulation often yields the fastest payback: insulating an under-insulated attic can cut heating costs by 10–30% in many climates; in cold regions the savings can be larger. Wall upgrades deliver savings too, but payback is usually longer because walls have less heat flow per square foot than roofs.
Practical example: upgrading attic insulation from R-19 to R-49 in a cold-climate home can reduce annual heat loss through the roof by roughly 30–40%, depending on air sealing and ventilation. That can translate into hundreds of dollars saved per year on a typical single-family home.
Climate zones and target R-values (rules of thumb)
Use these quick targets as starting points. Local building codes and programs (IECC, Energy Star, Passive House) provide detailed guidance.
- Cold climate (IECC zones 6–8): Attic R-49 to R-60, Walls R-20 to R-30, Floors over unheated space R-30–R-38, Basement walls R-10 to R-20.
- Mixed/temperate climate (zones 4–5): Attic R-38, Walls R-13 to R-21, Floors R-19.
- Mild/warm climate (zones 1–3): Attic R-30 to R-38, Walls R-13, targeted floor R-values lower.
These are starting points; Passive House projects will target much lower U-values (higher effective R) and rely on whole-envelope strategies rather than only high cavity R-values. The Insulation Institute's DOE recommendation memo provides detailed regional tables useful for planning (https://insulationinstitute.org/wp-content/uploads/2016/01/BI491.pdf).
When R-value alone is not enough: air sealing and thermal bridging
R-value describes resistance to conduction through a material, not air leakage or thermal bridging. A poorly sealed ceiling or a wall full of uninsulated studs will underperform its nominal R-value. In many retrofits, improving airtightness reduces heating load more than increasing cavity R by a few points. For a high-performing eco home, combine target R-values with careful air sealing, continuous insulation strategies, and attention to window U-values.
How R-Value Works: the physics, testing, and limits
Heat transfer modes: conduction, convection, radiation
Insulation primarily resists conduction — heat moving through materials. Convection (air movement carrying heat) and radiation (heat transfer across gaps) also matter. Fibrous insulations like fiberglass and cellulose slow conduction and trap air to limit convection; reflective foils reduce radiative transfer in assemblies that include an air gap.
Testing and labeling: how manufacturers report R-values
Manufacturers report R-value per inch and R-value of standard product thickness, typically based on ASTM test methods such as ASTM C177 or C518. The Federal Trade Commission enforces labeling rules about R-value marketing (see the FTC R-Value Rule for details: https://www.ftc.gov/legal-library/browse/rules/r-value-rule). Real-world performance can differ due to compression, gaps, or installation errors.
A lab demo or infrared test can help visualize heat flow and effective thermal resistance. For a clear visual explanation, watch this homeowner-friendly demo showing how R-value is measured and visualized:
This video explains the fundamentals:
Limitations: compression, gaps, moisture, aging
Insulation listed R per inch only applies when installed at the intended density and thickness. Compression reduces R-value: stuffing a thicker batt into a shallower cavity lowers its effective R. Gaps and voids dramatically reduce performance — a 1–2 inch gap at the top of a stud bay can reduce whole-wall R more than expected. Moisture reduces R for cellulose and fiberglass; closed-cell foam and board foam resist moisture better. Over time some products settle or lose loft; cellulose can settle slightly but remains effective when dense-packed.
Material comparisons (typical R per inch):
| Material | R per inch |
|---|---|
| Fiberglass batt | 2.5–3.8 |
| Cellulose (loose/dense-packed) | 3.2–3.8 |
| Mineral wool | 3.0–3.3 |
| Expanded polystyrene (EPS) | 3.6 |
| Extruded polystyrene (XPS) | 3.8 |
| Polyiso board | 5.0–6.5 (varies with temperature) |
| Closed-cell spray foam | 6.0–7.0 |
These ranges guide thickness calculations and cost decisions. For a deeper material pros/cons comparison including air-sealing and moisture interactions, see our coverage of spray foam vs cellulose insulation pros, cons, and carbon impact.
Applying R-Value: choosing materials and setting target ratings
Comparing common insulations by R-value, cost, and carbon
Budget builders often balance upfront cost, ease of DIY installation, and embodied carbon. Common practical choices:
- Dense-packed cellulose: good wall R per dollar, low embodied carbon for many sources, effective for DIY with rented blower; good in retrofits.
- Fiberglass batts: low cost, DIY-friendly for new walls and attics, but sensitive to gaps and compression.
- Mineral wool: similar to fiberglass with better fire resistance and moisture tolerance.
- Board foam (EPS/XPS/polyiso): used as continuous exterior insulation to break thermal bridging; polyiso has high R per inch but performance varies with temperature — more on board-foam trade-offs in our polyiso comparison: polyiso insulation methods.
- Closed-cell spray foam: high R per inch and air barrier properties but higher cost and embodied carbon; often used for tight cavities or where vapor control is needed.
For a broader embodied-carbon and cost comparison, see our analysis: natural vs synthetic insulation cost and efficiency comparison.
Placement rules: where to prioritize R-value (attic, walls, floors, foundation)
Prioritize based on heat flow and access for retrofit:
- Attic/Ceiling: Highest priority for most homes. The large area and direct exposure to outside mean attic improvements yield strong savings.
- Roof (insulated cathedral ceilings): Requires high R and often exterior continuous insulation for best performance.
- Walls: Important, but continuous exterior insulation often gives more benefit than simply increasing cavity R because it reduces thermal bridging.
- Floors over unheated spaces: Moderate priority, aim to insulate where cold floors cause heat loss.
- Foundation and basements: Insulate walls or under slab depending on design and frost-line; insulate to reduce heat loss and condensation risk.
A helpful guide to continuous exterior strategies is available here: complete guide to exterior foam insulation and energy-efficient roofs.
Practical tips: layering, depth, and avoiding compression
- Layering different materials is acceptable: place rigid continuous insulation outside sheathing and cavity insulation inside to combine air-barrier benefits and reduce thermal bridging.
- Avoid compressing batts in stud bays; they need full loft to reach rated R.
- When combining layers, add R-values directly (R_total = sum of each layer’s R). For reflective components, follow manufacturer guidance for airspace requirements.
- Account for reduced polyiso R at cold temperatures if specifying thin layers in cold climates; check polyiso manufacturer data and our polyiso insulation methods.
Small-project example: insulated shed or tiny home wall build-up
Example goal: tiny house wall target R-20 (cold-mixed climate compromise).
Assembly (outside → inside):
- 1 in polyiso board exterior (approx R-6 at room temp; assume R-5 for conservative calc) — polyiso insulation methods
- 2x4 stud cavity filled with dense-packed cellulose, 3.5 in @ R-3.5/in → R-12.25
- Interior drywall (negligible R)
R_total ≈ 5 + 12.25 = R-17.25; add 1 in interior continuous foam or thicker exterior foam to reach R-20 target.
Bill of materials (approx):
- 1 in polyiso exterior continuous board, 200 sq ft: ~10 sheets (4'×8'), cost ≈ $300–$600 depending on brand.
- Dense-packed cellulose for 200 sq ft wall at 3.5 in depth: ~2–3 bags if blown, cost ≈ $150–$300 + blower rental.
- Fasteners, tape, sealant, and vapor control: $150–$300.
Use the insulation comparison tool to compare thickness, cost, and embodied carbon for alternate assemblies.
R-Value Trade-offs, common misconceptions, and when to focus elsewhere
Myth-busting: higher R always equals better performance?
Higher R helps, but only if installed correctly and used alongside airtighting and proper detailing. For instance, increasing cavity R without addressing stud thermal bridging yields less-than-expected improvement. In many retrofits, sealing leaks around windows and penetrations reduces heat loss more than jumping from R-13 to R-19 in walls.
Thermal bridging and whole-envelope thinking
Studs, metal fasteners, and floor joists create thermal bridges that bypass cavity insulation. Continuous exterior insulation is the most effective way to reduce bridging. Without continuous insulation, the effective wall R can be 10–20% lower than nominal. Passive House practice emphasizes whole-envelope metrics (U-values and airtightness) over cavity R alone.
For window-related leakage and detailing that affects whole-envelope performance, our guide on window air-sealing tips explains common failure points and sealing techniques.
Moisture and ventilation interactions
Some high-R materials (like closed-cell foam) act as vapor retarders and can trap moisture if not paired with appropriate ventilation and drying paths. Cellulose and mineral wool are vapor-permeable and can dry to either side but need proper drainage and vapor control strategy. Always integrate insulation decisions with moisture control, flashing, and ventilation strategy to avoid mold risk.
When to prioritize air sealing, windows, or mechanical systems
If a blower-door test shows significant air leakage (e.g., ACH50 > 8 in retrofits), reducing leakage will often yield quicker comfort and energy improvements than adding a few points of R in walls. Similarly, high-performance windows reduce heat loss and solar gains; in many cases, upgrading to low-U windows and improving shading yields better net comfort than pursuing marginal increases in wall cavity R. Mechanical ventilation with heat recovery (HRV/ERV) becomes more important as airtightness increases to maintain indoor air quality with minimal heat loss.
(The FTC R-Value Rule explains labeling and consumer expectations about R-values and performance: https://www.ftc.gov/legal-library/browse/rules/r-value-rule)
The Bottom Line
R-value is a useful measure of insulation performance but should be used as part of whole-envelope planning: combine appropriate R targets (attic R-38–R-60, walls R-13–R-30 by climate) with continuous exterior insulation, rigorous air sealing, and moisture control. Prioritize attic upgrades and airtightness for best payback; calculate thickness by dividing target R by material R per inch and avoid compression or gaps.
Frequently Asked Questions
How do I compare R-value between products?
Compare the R per inch and the rated R for the product thickness, then check test methods and installation requirements. Use manufacturer data sheets and look for ASTM-tested values; the Federal Trade Commission enforces truthful R-value labeling which helps ensure comparable reporting (see the FTC R-Value Rule).
Also consider real-world factors: polyiso loses some R at low temperatures, and loose-fill materials need correct density. For a quick side-by-side, use our insulation comparison tool.
Can I layer different insulation types to reach target R-value?
Yes. Layering rigid board outside the sheathing with cavity insulation inside is an effective approach because it reduces thermal bridging and lets each material do what it does best. Make sure to avoid compressing fibrous insulation and follow vapor control guidance for your climate so layers can dry if they get wet.
Does thicker always mean better?
Only if thickness is the correct material and it’s installed without compression, gaps, or moisture issues. Thicker batts stuffed into smaller cavities can underperform. Thicker continuous exterior insulation is more effective at reducing thermal bridging than simply adding cavity depth in many wall systems.
How does insulation affect moisture control?
Insulation type influences vapor movement and drying potential. Closed-cell spray foam acts as a vapor retarder, which can be helpful in some assemblies but risky if moisture gets trapped. Vapor-permeable insulations like cellulose and mineral wool allow assemblies to dry and are often safer in retrofit walls. Design the vapor control layer and ventilation strategy to match your chosen insulation.
What R-value should I use for a DIY tiny house?
For tiny homes in mixed climates, aim for walls R-15 to R-20, roof R-30 to R-38, and floor R-19–R-30 depending on whether you have a crawlspace. In cold climates increase those targets (walls R-20–R-30, roof R-49+). Use continuous exterior insulation where possible to reduce bridging; for compact builds polyiso is popular for its high R per inch (see Get to Know R-Value | Polyiso for board characteristics).