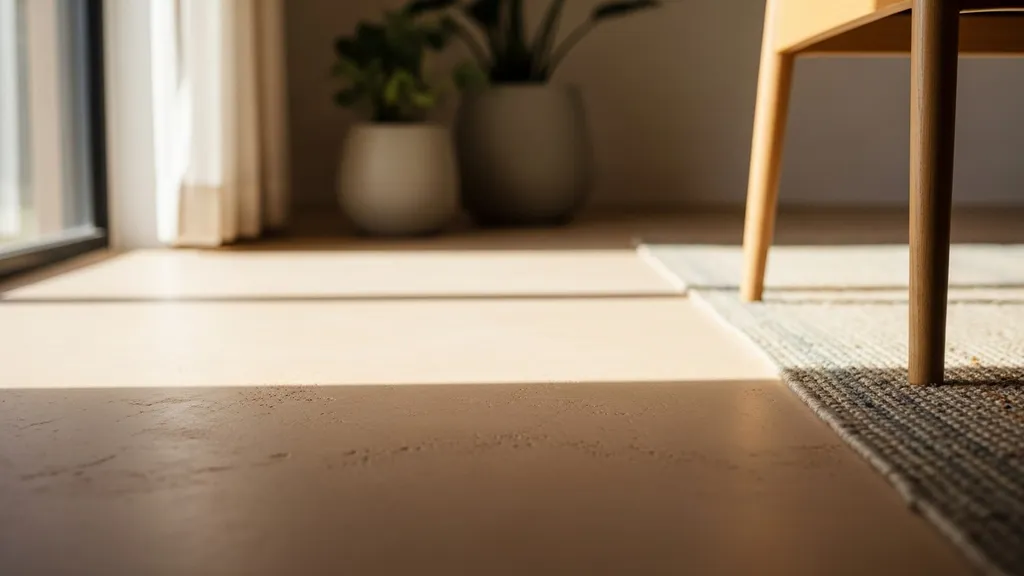
Practical guide to installing and maintaining earthen floors for DIY builders — mixes, substrate prep, finishes, repairs, costs, and sustainability tips.
Earthen Floors: Installation and Maintenance
An earthen floor is a finished interior floor made from clay, sand, aggregate and natural fibers, sealed with oils or waxes. For DIY builders, an earthen floor offers low upfront material costs, low embodied carbon, and a breathable living surface that can add thermal mass to a passive-house or off-grid build. This guide walks through what an earthen floor is, when it makes sense, how to test and mix materials, step-by-step installation (with a video), finishes and sealers, and practical maintenance and repair routines.
TL;DR:
- Use a coarse base (20–50 mm) plus a fine finish (6–15 mm); expect 2–8 weeks drying for interior finishes in temperate conditions.
- Test mixes on small patches (jar test + 1 sq ft patch) to check shrinkage and adhesion before committing a whole room.
- Choose oil or wax finishes for breathability; avoid Portland cement stabilization unless moisture control is fixed.
Related guides: Bamboo Flooring vs Reclaimed Hardwood: Sustainable Choices for Eco-Friendly Interiors, DIY mini split installation step by step guide, Vapor barrier installation for walls step by step guide, and Ultimate guide to solar installation safety.
What is an earthen floor and why choose one?
Definition and core components
An earthen floor combines clayey loam (clay), graded sands, a small aggregate (crushed brick, gravel or limestone screenings), and short fibers such as chopped straw or cellulose to reduce shrinkage. A binder or sealer is applied to the surface—commonly boiled linseed oil, tung oil, or a hard wax—to increase wear resistance. Typical systems use a thicker base layer (commonly 20–50 mm) that provides structure and a finish coat of 6–15 mm that is floated smooth and sealed.
Earthen floors are vapor-permeable when no impermeable cement-rich stabilizer is used; that breathability helps regulate indoor humidity when combined with good ventilation. Compared to polished concrete and hardwood, earthen floors generally have lower embodied energy if local soils and reclaimed aggregates are used.
Traditional uses and modern DIY revival
Historically, packed-earth or adobe floors have been used for millennia—from adobe dwellings in the American Southwest to cob and clay floors in Europe. Contemporary DIY and natural-building communities have revived these methods for sustainable homes and tiny houses. Research and practice show that modern earthen floors, when sealed correctly and protected from constant water exposure, perform well as durable interior surfaces. For an introduction to the modern practice and how it differs from simplistic “dirt floors,” see this overview on why and how earthen floors are used from Resilience.
Pros, limitations, and suitability for DIY builders
Advantages: cost, embodied carbon, breathability
- Lower material cost: Local soils and reclaimed aggregate can cut material costs dramatically. Labor is the main cost in DIY installations.
- Low embodied carbon: Raw earth has minimal processing compared with kiln-fired wood or Portland cement. Using reclaimed sand or recycled brick further reduces embodied carbon.
- Breathability and indoor air quality: A non-cement-stabilized earthen floor is vapor-permeable, which helps buffer humidity swings when paired with controlled ventilation and avoids trapping moisture in timber subfloors.
- Thermal mass: Over a solid subfloor, an earthen floor gives usable thermal mass for passive solar designs, helping stabilize indoor temperatures.
Industry resources like Lowimpact.org’s earthen floor guide summarize these benefits and show examples.
Limitations: moisture sensitivity, load and use constraints
- Moisture sensitivity: Earthen floors are not suitable for wet zones (showers, exterior entryways without detail work) unless robust drainage and waterproof detail are installed.
- Abrasion and point loads: High heels, concentrated loads, or dragging heavy objects can wear the finish—furniture needs felt pads and careful placement.
- Stabilizer trade-offs: Adding Portland cement or other cementitious stabilizers increases hardness but reduces breathability and raises embodied carbon.
- Not an instant surface: Total project time includes drying and curing. Weather and indoor humidity can extend schedules to months in some climates.
Site and climate suitability checklist
- Prefer temperate or dry climates for simplest installations; in humid or coastal areas, include a capillary break and robust moisture control.
- Subfloor dry and stable: Structural slab, compacted sub-base, or a well-ventilated suspended subfloor is required.
- Ventilation and humidity control: Targets of 35–55% relative humidity are recommended for longevity; see ventilation strategies in the passive-house context in our ventilation design guide.
- DIY skill level: Beginner to intermediate DIYers can install small to medium areas with testing and supervision; hire a pro for complex moisture or structural issues.
Planning, testing, and materials: what to buy and how to test mixes
Materials list and sourcing tips
- Clayey loam / natural clay: Test local soil or buy bagged natural clay. Avoid soils with excessive organic matter.
- Coarse and fine sand: Use graded sand; coarse for base, fine for finish. Aim for well-graded particles to reduce shrinkage.
- Aggregate: Crushed brick, recycled concrete chips, or limestone screenings can add body.
- Short fibers: Chopped straw, hemp, or cellulose (1–2% by volume) reduce cracking.
- Binders & stabilizers: Lime or natural hydraulic lime is preferable to Portland cement for breathability. For stronger floors, small percentages (5–10% by volume) of lime or screened crushed brick can help. See our note on lime mixes in the limecrete foundations resource.
- Finishes: Boiled linseed oil, polymer-modified natural oils, tung oil, or hardwax oils. For higher wear, consider a penetrating acrylic sealer but account for VOCs and reduced vapor permeability.
- Tools: Trowels, float, screed rails, mixing tub or cement mixer, moisture meter, mixing shovel, wheelbarrow.
Sourcing tips: Salvage sand or brick from demolition, and consult the recycled materials checklist for safe reclaimed inputs.
On-site mix testing and test patch
- Jar test for soil: Combine soil and water in a jar, shake, and observe settling layers to gauge clay vs sand content. Aim for a loam with balanced clay (not >40% clay).
- Small trial batches: Mix ratios to begin with: clay : sand : fiber = 1 : 2–3 : 0.01–0.02 (by volume) for finish coats; base mixes use more coarse aggregate (example start: 1 clay : 3 sand : 1 crushed brick).
- 1 sq ft test patch: Apply a 10–15 mm finish patch on the intended substrate. Observe drying behavior and shrinkage for 1–2 weeks. Check adhesion and abrasion resistance after sealing.
- Dry strength and abrasion: After curing, test by placing a heavy object and scanning for surface impressions.
Moisture and substrate considerations
- Measure substrate moisture with a pin or pinless moisture meter prior to application. Subfloor should be below manufacturer or practice-specific thresholds (varies by substrate; often <5–8% moisture content for timber).
- Capillary break / vapor control: Install a capillary break layer where ground moisture is a risk. For below-grade or slab-on-grade conditions, consult best practices and our guide on how to install a vapor barrier.
- Edge details: Leave expansion gaps at perimeters; use flexible edge strips to isolate the earthen layer from rigid walls and trim.
- Code and standards: Consider local building codes and IECC/LEED/Passive House guidance when earthen floors are part of an insulated assembly; professional consultation is advisable for energy-code compliance.
For academic context on integrating earthen materials into mainstream builds, see this study on earthen materials and production from IOP science.
Step-by-step earthen floor installation
Key points before you begin:
- Control moisture: Confirm subfloor dryness and a capillary break where needed.
- Make and test mixes: Perform jar tests and 1 sq ft patches to tune ratios.
- Use thin finish coats: Aim for 6–15 mm finish to reduce cracking.
- Cure slowly: Cover and shade to avoid rapid drying that causes shrinkage.
- Isolate edges: Leave perimeter gaps and use flexible trims.
Substrate and sub-base preparation
- Inspect the existing slab or subfloor for cracks, oil, and contaminants. Repair and level as needed.
- Install a capillary break or vapor control layer where required; see the step-by-step vapor barrier guide in install a vapor barrier.
- For ground-bearing installations, compact a granular sub-base (pea gravel or crushed stone) and add a sand blinding layer. Compact to firm bearing.
- If installing over a suspended timber floor, ensure joists and sheathing are stable, ventilated, and include an appropriate mechanical fixing layer or a rigid sub-screed as support.
Building base and leveling layers
- Mix a coarse base: coarse sand + clay + aggregate + fibers. Apply at 20–50 mm for base layers; for heavily used rooms, multiple layers up to 50 mm may be used with internal reinforcement.
- Compact each layer by tamping and screeding to level. Allow partial drying between layers to cut shrinkage cracking.
- Once base is firm, apply a thin screed layer (6–15 mm) using a finer sand/clay mix for the finish coat.
Applying finish coats and texturing
- Float the final finish with a steel float or wooden float to the desired texture. A smooth trowel finish requires more passes and light dampening as it dries.
- After initial set (surface no longer wet but still plastic), lightly pre-oil with a diluted first coat of linseed or tung oil to help binder penetration—follow manufacturer or product guidelines.
- Wait until the floor is fully dry (see next section) before applying the full sealer system: typically two to three coats of oil or hardwax per manufacturer directions.
Curing, drying times, and common installation mistakes
- Drying times: Thin interior finishes in dry climates can be walkable in 2–4 weeks; full cure may take 4–12 weeks depending on humidity and coat thickness. In humid or cool climates, allow extra time.
- Common mistakes: Applying too-thick finish coats; skipping test patches; insufficient edge isolation; rapid drying from direct sun or heater which causes cracking.
- Video demonstration: The following video shows substrate prep, base application, and troweling technique. Viewers will see real-world mixing proportions and finishing tips: Watch this step-by-step guide on installing decomposed granite (dg) step by step.:
Reference guidance from UN-Habitat on earth construction for context on quick, economical assemblies: earthen structures and their properties.
Finishes and sealers: oils, waxes, and modern sealants
Natural oil finishes and application tips
Natural oils penetrate and polymerize to form a breathable, wear-resistant surface. Boiled linseed oil, tung oil, and polymer-modified natural oils are common. Application tips:
- Apply a thin initial coat after the floor is completely dry—often after 2–8 weeks depending on thickness.
- Allow each coat to dry fully (24–72 hours for natural oils; follow product recommendations).
- Use 2–3 top coats for residential traffic. Buff or burnish the surface lightly between coats for sheen.
- For step-by-step application technique, see the guide on natural oil finishes.
Wax and hardwax options
- Hardwax oil: A hybrid that leaves a more durable film than raw oil while staying breathable. Good for kitchens and living areas.
- Paste wax: Adds surface protection but requires more frequent maintenance. Apply thin layers and buff well.
When to use modern sealants (and trade-offs)
- Penetrating acrylics / urethanes: Provide strong abrasion resistance and lower maintenance, but reduce vapor permeability and may emit VOCs. Use when heavy wear is expected and moisture sources are controlled.
- Trade-offs: For passive-house or sustainable builds prioritizing breathability and indoor air quality, natural oils or hardwax oils are preferred. For commercial or high-traffic installations where downtime and maintenance cost outweigh breathability concerns, modern sealants may be appropriate.
For soil classification and how particle size affects finish performance, consult the Healthy Materials Lab overview on modern earth construction.
Maintenance intervals: light maintenance (cleaning and spot oiling) annually; reapply full oil/hardwax every 3–7 years depending on wear.
Repair, maintenance routines, and troubleshooting common problems
Small cracks, lifting, and patch repairs
- Small cracks: Clean the area, remove loose material, and apply a feathered patch mix of finish recipe (small amount of clay, fine sand, fiber). Press into the crack, smooth and allow to dry. Seal the patch with the same finish system.
- Lifting/delamination: Often moisture-related. Investigate substrate moisture before patching; if due to high moisture, address moisture source first (drainage, vapor barrier, ventilation) before repairs.
- Larger damage: For extensive failures, remove the affected area back to sound material, reapply base layers and finish, then reseal.
Dealing with moisture and mold risks
- Diagnosis: If mold or persistent dampness appears, measure relative humidity and subfloor moisture. Use continuous monitors to spot trends.
- Actions: Improve ventilation, lower indoor RH to 35–55%, and repair water entry points. For guidance on moisture control tied to airtightness and whole-building performance see passive house retrofit tips and our ventilation design resource.
- Mold remediation: Small surface mold can be cleaned with mild detergent and then allowed to dry thoroughly; persistent mold may indicate structural moisture issues requiring professional remediation.
Refinishing and long-term maintenance schedule
- Routine cleaning: Sweep and dry-mop regularly. Avoid abrasive cleaners and excessive water.
- Yearly check: Inspect high-traffic zones and reapply a maintenance coat of oil or buff wax as needed.
- Furniture protection: Use felt under legs; avoid casters without protective pads.
- Longevity: With proper care, earthen floors can last decades. Monitor and manage indoor humidity and moisture entry to prolong lifespan.
For historical construction practices and design considerations that inform repair approaches, see the Texas A&M overview on earthen home construction.
Cost, lifespan, and a materials comparison table
Typical cost drivers and budget estimates
Cost varies widely by region and whether materials are salvaged. Typical ranges (material only) for DIY:
- Earthen floor mixes and finishes: $3–$15 per sq ft (materials only). Labor is the dominant cost for professional installs.
- Polished concrete: $5–$20 per sq ft (materials + finish).
- Hardwood flooring: $6–$20+ per sq ft (material only for common species).
- Linoleum / vinyl: $2–$8 per sq ft.
Key cost drivers:
- Material sourcing: Local soil vs purchased clays and imported sands.
- Labor: Mixing and multiple drying/cure cycles add time.
- Finish choice: Natural oils are lower cost up-front but may require more frequent maintenance than industrial sealants.
Comparison table: earthen floor vs concrete vs hardwood vs linoleum
| Material | Upfront cost (per sq ft ranges) | Embodied carbon | Lifespan (years) | Maintenance level | Best use cases |
|---|---|---|---|---|---|
| Earthen floor | $3–$15 | Low | 20–50 | Medium (annual oil/wax) | Living rooms, halls, passive-solar interiors |
| Polished concrete | $5–$20 | Medium–High | 30–100 | Low–Medium | Modern interiors, slab-on-grade |
| Hardwood (solid) | $6–$20+ | Medium–High | 30–100 | Medium (refinish cycles) | Living spaces, heritage interiors |
| Linoleum / vinyl | $2–$8 | Low–Medium | 10–30 | Low | Kitchens, utility rooms |
Sustainability and embodied carbon considerations
- Reclaimed inputs: Using recycled aggregate or crushed reclaimed brick reduces embodied carbon. Compare approaches in the recycled aggregate concrete guide.
- Stabilizers: Lime stabilization (lower embodied carbon than Portland cement) preserves breathability; read about design and trade-offs in the limecrete foundations overview.
- Certifications: Projects seeking LEED or Passive House credit should document material sourcing and VOC levels of finishes; low-VOC oil and hardwax products support indoor air quality goals.
The Bottom Line
An earthen floor is a cost-effective, low-carbon finish for interiors where moisture is controlled and creative DIY labor is available. For best results, test mixes, control subfloor moisture, use thin finish coats, pick breathable sealers, and plan for routine maintenance. Choose professional help for large-scale installs or unresolved moisture problems.
Frequently Asked Questions
Are earthen floors suitable for bathrooms?
Short answer: generally no for direct shower or wet-room use unless the system is specially detailed. Earthen floors are moisture-sensitive, so they work best in dry interior rooms. If considering a bathroom, the installation needs a waterproof sub-base, a raised waterproofed area for wet zones, and non-porous tiles or a contained shower tray in the shower area.
Where bathrooms connect to earthen floors, seal transitions carefully and use robust surface finishes or membranes in wet areas to keep the earthen layer dry.
How long before you can walk on an earthen floor?
After applying a thin finish coat (6–15 mm) in a temperate, dry environment, light foot traffic may be possible in 2–4 weeks. Full cure and optimum strength typically take 4–12 weeks depending on humidity, coat thickness, and ventilation. Always confirm by touch and a small abrasion test before regular use.
Can earthen floors be used with underfloor heating?
Yes, but design matters. Hydronic low-temperature underfloor heating pairs best with earthen floors because the mass can store and slowly release heat. Ensure the heating system is embedded in a stable sub-screed layer beneath the earthen finish rather than directly under a thin clay finish. Heat should be ramped up slowly during commissioning to avoid rapid drying and cracking.
How do I stop an earthen floor from cracking?
Control shrinkage by using graded sands, chopped fibers, and applying thin, well-cured finish coats. Allow base layers to dry partially before adding finish layers, leave perimeter expansion gaps, and cure slowly (avoid direct sun or heat). Do small test patches to refine mix ratios before full installation—this greatly reduces cracking risk.
Are earthen floors pet-friendly?
Yes, when sealed properly. Choose a durable finish such as a hardwax oil and maintain it regularly. Use rugs in high-traffic paths and keep pet nails trimmed to avoid surface abrasion. For households with very active pets, consider a more abrasion-resistant sealer or plan for more frequent touch-ups.