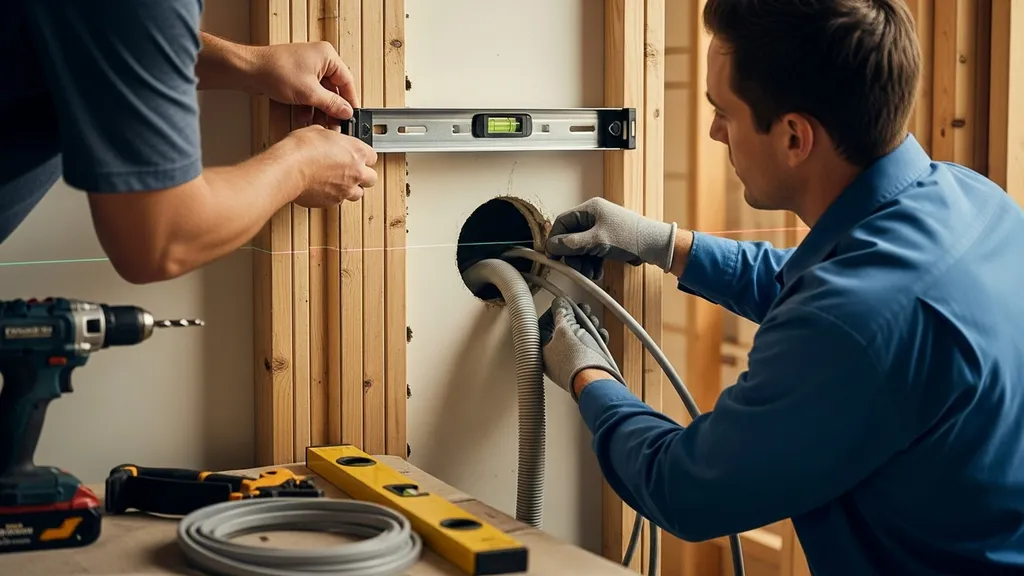
Practical, beginner-friendly guide to installing a DIY mini split: sizing, site prep, line sets, electrical, commissioning, and troubleshooting.
DIY Mini Split Installation: Step-by-Step Guide
A DIY mini split can deliver efficient heating and cooling to a small home, tiny house, or off-grid cabin while cutting energy use and ductwork costs. This guide on installing a DIY mini split shows how to size a system, pick the right parts, prepare the site, run line sets and wiring, perform evacuation or use factory-sealed lines, and troubleshoot common problems. Readers will learn practical numbers (6k–36k BTU capacities, common breaker sizes), safety rules (EPA Section 608, electrical permits), and step-by-step checks needed for a safe, warranty-friendly install.
TL;DR:
- Use 20–35 BTU/ft² as a ballpark for load estimates; typical mini-splits come in 6k–36k BTU sizes and pre-charged line-set limits often run 15–25 ft.
- Choose factory-sealed, pre-charged systems for true DIY installs; for systems requiring refrigerant charging, hire a certified tech under EPA Section 608 rules.
- Pull a deep vacuum (<500 microns) and hold it for a 10–30 minute leak test on new refrigerant circuits, or follow manufacturer purge/startup steps for pre-charged lines.
Related guides: The ultimate guide to recycled aggregate concrete for DIY builders 2026, DIY energy monitor calibration guide, Ultimate guide to recycled materials for DIY homes, Vapor barrier installation for walls step by step guide, Framing a house complete DIY guide, Air sealing existing homes DIY guide, and The Ultimate Guide to Recycled Aggregate Concrete for DIY Builders (2026).
Step 1: Plan, size and verify permits (prerequisites and checklist)
Start with a realistic load estimate and a permit check. For quick sizing, use 20–35 BTU per square foot as a ballpark: lean toward 20–25 BTU/ft² for well-insulated, airtight homes in moderate climates, and 30–35 BTU/ft² for poorly insulated or cold-climate rooms. Typical residential mini-split capacities run from 6,000 BTU (6k) up to 36,000 BTU (36k). Industry guidance from the Department of Energy’s evaluation of ductless mini-splits provides performance context for retrofit and low-load homes: Ductless mini-split heat pump comfort evaluation pdf.
A few sizing caveats:
- Use a full Manual J load calculation if the home is large, has complex heat gains/losses, or if multiple rooms will be served by one multi-zone outdoor unit.
- Account for envelope quality: improving air sealing reduces required capacity. See the site’s guide to air sealing tips for simple upgrades.
- Insulation matters: reference insulation R-value basics when deciding whether to downsize a unit after upgrades.
Electrical and breaker checklist:
- Typical indoor unit circuits call for 15–30A breakers depending on model; check the manufacturer’s data plate and installation manual. Many single-zone systems require a 20A or 30A dedicated breaker for the outdoor condenser.
- Confirm main service capacity before adding a condenser; a home with limited spare capacity may need a service upgrade.
- Prepare conduit runs, a fused disconnect (or local code-approved switch), and space for a subpanel if necessary.
Permits and refrigerant regulations:
- Most jurisdictions require an electrical permit for new circuits and an HVAC permit for refrigerant-containing equipment. Contact the local building department for specifics.
- EPA Section 608 restricts handling of refrigerants; only certified technicians may perform refrigerant recovery and charging of regulated refrigerants such as R-410A. For more on legal handling and performance background, consult the Building America and research reports linked above.
Prereq checklist to have on hand:
- Tools: drill, 2 3/4"–3" hole saw, level, torque wrench, vacuum pump, micron gauge (if evacuating), manifold gauge set, multimeter.
- Materials: indoor head, outdoor condensing unit, pre-charged line set (recommended for DIY), condensate drain, disconnect box, breaker and appropriate wire, communication cable, mounting bracket.
- PPE: protective eyewear, gloves, knee pads.
- Helper: at least one helper for placing the condenser and routing lines.
- Documentation: manufacturer installation manual, local code requirements, and proof of equipment specifications (AHRI or spec sheet).
Step 2: Choose the right DIY mini split and parts (equipment selection)
Selecting the right system reduces headaches later. Decide between single-zone and multi-zone systems first. Single-zone systems are simpler and typically cheaper, with one outdoor unit and one indoor head. Multi-zone systems allow several indoor heads on one outdoor condenser; they save outdoor footprint but add complexity and longer line-set runs.
Single-zone vs Multi-zone: Pros and Cons
- Single-zone: Lower install complexity, easier commissioning, and usually compatible with pre-charged factory line sets—good for single rooms, tiny homes, or simple retrofits.
- Multi-zone: Better for whole-house solutions and shared outdoor condensers; allow varied indoor head capacities. They need careful load balancing and usually longer maximum total line length limits.
Indoor Head Styles and Placement:
- Wall-mounted heads are most common and efficient for quick installs; place 12–18 inches below the ceiling and centered on the served space for even airflow.
- Floor-mounted, ceiling cassette, and low-wall units exist; choose based on room layout and clearance needs.
Key specs to compare:
- BTU capacity: match room load (see Step 1). Example: a 12' x 15' bedroom (~180 ft²) with moderate insulation often uses a 9k–12k unit (20–35 BTU/ft²).
- SEER2 and HSPF2 ratings: higher numbers mean better season-long efficiency—use Energy Star criteria when available.
- Sound levels: indoor SPL in the high 20s dB is typical for quiet units.
- Min/max line length and elevation change: many DIY-friendly units list 15–25 ft for factory pre-charged lines; some models allow much longer lines but may require field charging by a pro.
- Refrigerant type: common refrigerants include R-410A and, increasingly, R-32. Remember EPA rules: do not advise refrigerant charging unless the system is designed for factory-sealed operation or a certified technician performs charging.
Recommended parts list:
- Outdoor condensing unit (single- or multi-zone)
- Indoor head(s) and mounting bracket(s)
- Factory-sealed pre-charged line set (if available) OR insulated copper line, flare/brazing fittings
- Condensate drain line and wall sleeve
- Disconnect box and appropriately sized breaker
- Communication/control cable (often 18/3 or as manufacturer specifies)
- Conduit or protective sleeve for exposed lines
- Basic tools and test equipment (micron gauge, vacuum pump, manifold set)
Research and third-party evaluations help. For performance and energy-use comparisons across systems, see ACEEE’s evaluation of mini-split heat pumps: Evaluation of Mini-Split Heat Pumps as Supplemental and Full ... PDF. Consider brands with strong DIY support and clear manuals—examples include Mitsubishi Electric, Fujitsu, Daikin, and consumer-focused lines from Gree or Midea. For cold-climate installations, review insulation strategies like polyiso insulation methods to help the heat pump run efficiently.
Step 3: Prepare the site and mount the indoor and outdoor units
Careful siting avoids service problems. Choose indoor head locations for even airflow, easy filter access, and minimal obstructions. Avoid siting the head directly over heat sources or behind tall furniture. Typical clearances for indoor units are 6–12 inches from the ceiling and 12–24 inches from side walls—follow the manufacturer manual.
Drilling the Wall Hole and Installing Wall Sleeve:
- Typical hole diameter for a single wall head line set is 2 3/4" to 3". Measure twice and center the hole with the mounting bracket.
- Install a wall sleeve or short length of rigid conduit to protect lines and seal the penetration with a flexible, low-expansion foam or backer rod plus exterior-grade sealant to maintain airtightness. For best practice on airtight wall penetrations, see the airtight membrane installation guide: How to install airtight membrane for walls and roofs.
- Ensure the drain line has a slight downward slope from the indoor pan to the exterior (see Step 4 for exact slope guidance).
Mounting the outdoor pad or bracket and placing the condenser:
- Outdoor condensers need a flat, level pad—concrete slab, pre-formed composite pad, or anti-vibration bracket attached to a wall. Maintain manufacturer clearances (often 12–24 inches) on the back and sides and more clearance above for airflow.
- If mounting near or on a roof, consult recycled roofing installation techniques to avoid water intrusion and load issues.
- Place condensers on risers or pads to prevent ponding and snow burial in winter. For low-clearance installs, consider an anti-vibration bracket or adjustable pad kit.
This DIY video shows you the hands-on process:
Sustainable disposal and cleanup:
- Minimize waste from packaging and scrap; follow a local construction waste reduction checklist to recycle cardboard, copper scraps, and metal brackets.
Final mounting checklist:
- Indoor bracket is level and secured to studs or blocking.
- Wall penetration protected and sealed to maintain air barrier integrity.
- Outdoor pad is level, raised above grade, and allows drainage.
- Clearances meet the manufacturer’s specified distances.
Step 4: Run refrigerant lines, condensate drain and low-voltage wiring (safe routing and connections)
Routing refrigerant lines and condensate requires neat, insulated runs. Protect exposed line sets with rigid conduit or UV-resistant split-loom. Keep power wiring and low-voltage control cable separated—follow local code for conductor separation.
Best Practices for Routing Line Sets and Insulating Refrigerant Lines:
- Use closed-cell foam insulation on the suction (larger, cold) line—typical thickness 3/8" to 3/4" depending on diameter and ambient conditions.
- Keep the suction line continuous; minimize sharp bends and avoid kinking. Secure lines every 3–4 feet.
- If using pre-charged factory line sets, confirm the maximum pre-charge length; many kits have 15–25 ft pre-charged limits. For field-run copper, brazing or flare fittings will be required, and a certified technician should handle refrigerant charging.
- Consult manufacturer guidance for minimum bend radii and elevation limits.
Condensate Drain Routing and Trap Placement:
- Maintain a positive slope on horizontal condensate drain runs—minimum 1/8" per foot is standard practice to avoid standing water.
- For long vertical drops, an external condensate pump may be necessary. Consider an internal condensate overflow switch (common in many indoor heads) to prevent accidental leaks.
- Use rigid pipe or UV-rated hose for exposed exterior runs and install an accessible cleanout near the indoor head.
Low-voltage Control Wiring and Electrical Safety Notes:
- Most systems use a communication/control cable (18/3 or proprietary multi-pin) between indoor and outdoor units. Confirm gauge and type in the manual.
- Power off at the main and use lockout/tagout during wiring. If unsure about permanent electrical connections, hire a licensed electrician.
- Keep wiring runs neat, labeled, and protected with conduit where required.
Flare vs brazed connections:
- Flared fittings are common on DIY-friendly, pre-charged kits and allow mechanical connections without brazing. They must be properly torqued and sealed.
- Brazing requires experience and nitrogen purge to prevent oxidation; brazing also typically breaks a factory charge, requiring recovery and recharge by a certified tech.
Safety reminders:
- Do not open refrigerant circuits unless qualified and permitted by EPA Section 608 and local rules.
- Use a refrigerant-specific leak detector or soap solution to test all joints after pressure testing.
For field performance insights on refrigerant handling and system behavior in low-load homes, refer to Advanced Energy’s field performance summary: Field performance of mini-split heat pumps in southeastern low ....
Step 5: Electrical connection, system evacuation (or using pre-charged lines) and start-up
Electrical installation and commissioning make or break a successful install. Follow the manufacturer’s data plate and wiring diagrams for breaker size, wire gauge, and disconnect requirements.
Installing the Disconnect, Breaker Sizing and Wiring Tips:
- Install a fused disconnect or switch within sight of the outdoor unit as required by code.
- Size breakers per the manufacturer's maximum fuse and minimum circuit ampacity (MCA). A 30A breaker is common for many single-zone condensers, but always verify the label.
- Torque electrical connections to the spec listed in the manual; loose terminations cause overheating.
Using a Vacuum Pump: Target Vacuum and Leak Check
- For systems where the refrigerant circuit is opened, use a two-stage vacuum pump and a micron gauge. Target a stable vacuum below 500 microns; many installers prefer <300 microns for a new system and then perform a hold test for 10–30 minutes to ensure no leaks.
- After achieving the target vacuum, isolate the pump and watch the micron gauge. A rising pressure suggests a leak or moisture/air presence.
- Use nitrogen for pressure testing if pressure testing before brazing; never use oxygen or compressed air on refrigerant lines.
If using factory-sealed pre-charged lines:
- Pre-charged systems often use a mechanical connection that preserves the factory charge. These require a vacuum only if a leak has been suspected or if the installer breaks a seal.
- Follow the manufacturer’s purge and startup procedure—some units require running through specified modes to purge air from the system.
Initial Startup, Controller Setup and Simple Commissioning Checklist:
- After electrical hookup, run the indoor and outdoor units and check basic operation: fan speeds, modes (cool, heat), and remote control communication.
- Verify temperature delta: typical cooling should produce a 12–20°F drop across the evaporator; heating delta differs by mode and outdoor ambient.
- Monitor head pressures and superheat/suction temp readings for advanced checks—consult the manual for expected pressure ranges at given ambient temperatures.
- Check inrush current and locked-rotor info on the data nameplate if sizing surge protection or verifying breaker behavior.
For comparisons of ducted versus ductless commissioning and performance metrics, see the Purdue comparative study: Comparison Study of a Traditional Ducted Heat Pump and a Multi ... PDF.
Step 6: Common mistakes, troubleshooting and maintenance tips
Top DIY errors to avoid:
- Oversizing the unit, which causes short cycling and discomfort. Refer back to the 20–35 BTU/ft² guidance and use Manual J for accuracy.
- Skipping the vacuum or improper evacuation, leaving moisture or non-condensable gas in the system.
- Poor condensate slope or missing trap leading to leaks.
- Failing to insulate the suction line properly, causing frosting and efficiency loss.
- Wiring to the wrong breaker size or improper torque on connections.
Quick Troubleshooting Flow (no Power, Low Cooling, Compressor Short-cycling):
- No power: Check the main breaker, outdoor disconnect, and any protective fuses. Verify voltage at the condenser with a multimeter.
- Weak cooling: Inspect filters and indoor coil for dirt; confirm indoor fan operation and proper airflow; check for blocked outdoor coil or low refrigerant (note: refrigerant diagnosis requires a certified technician).
- Compressor short-cycling: Could be caused by oversized unit, thermostat or sensor problems, or electrical protection tripping. Check fault codes on the outdoor unit and consult the manual.
Routine Maintenance Tasks:
- Clean or replace washable filters monthly during heavy use seasons.
- Clear debris and vegetation from the outdoor condenser and clean fins annually.
- Verify condensate drain is clear and the trap is functioning; clean as needed.
- Annual electrical torque check on connections and confirm mounting hardware is secure.
- Schedule a professional inspection every 1–3 years to check refrigerant charge, meter superheat/subcooling, and compressor health.
When to call a professional:
- Any refrigerant recovery, recharge, or sealed-system repairs must be handled by an EPA-certified technician.
- Major electrical upgrades, service panel changes, or inconsistent high inrush/locked-rotor currents.
- Compressor replacement or suspected mechanical failures.
For an authoritative summary of ductless system limitations and maintenance issues, consult the Building America Solution Center’s guide: Ductless (mini-split) heat pumps | building america solution center.
The Bottom Line
A correctly sized, properly sited, and well-sealed DIY mini split can provide efficient heating and cooling for small homes while keeping installation costs low. For true DIY installs, choose factory-sealed, pre-charged systems and follow the manufacturer and local permit rules; for any refrigerant work or major electrical changes, hire qualified contractors.
Frequently Asked Questions
Can I legally charge refrigerant myself for a DIY mini split?
The short answer: usually no. EPA Section 608 requires certification for recovery and handling of regulated refrigerants such as R-410A. If the unit uses factory-sealed pre-charged line sets and the manufacturer’s manual permits homeowner connection without breaking the sealed circuit, a homeowner can often complete the mechanical connections. For any situation where the sealed system is opened, refrigerant must be recovered/charged by an EPA-certified technician to comply with federal law and to protect the environment.
Why is the indoor unit freezing up after installation?
Freezing is commonly caused by low airflow (dirty filters, blocked returns), low refrigerant charge, or incorrect fan settings. Start by checking and cleaning filters, ensuring the indoor fan runs at the expected speed, and verifying unobstructed airflow. If the problem persists and the unit shows frost on the suction line or evaporator fins, contact a certified technician—frost is often a sign of refrigerant or metering device issues that require specialized diagnosis.
What size mini split do I need for my 12' x 15' room?
Use the rule-of-thumb range: 20–35 BTU per square foot. A 12' x 15' room is 180 ft², so a ballpark capacity is 3,600–6,300 BTU; however, that range is too low because typical residential mini-splits start at 6k. For a normal bedroom with moderate insulation, a 9k–12k (9,000–12,000 BTU) unit is common. This assumes average ceiling heights and typical insulation; if the room is poorly insulated or sees large heat gains, choose the higher capacity or perform a Manual J load calculation for accuracy.
How often should I service my mini split?
Basic homeowner maintenance should happen seasonally: clean or wash filters monthly during heavy use and inspect condensate drains and outdoor coils annually. Have a professional HVAC inspection every 1–3 years to check refrigerant levels, electrical connections, and blower and compressor condition. Regular upkeep preserves efficiency and helps avoid warranty issues that can arise after incorrect installation or neglect.