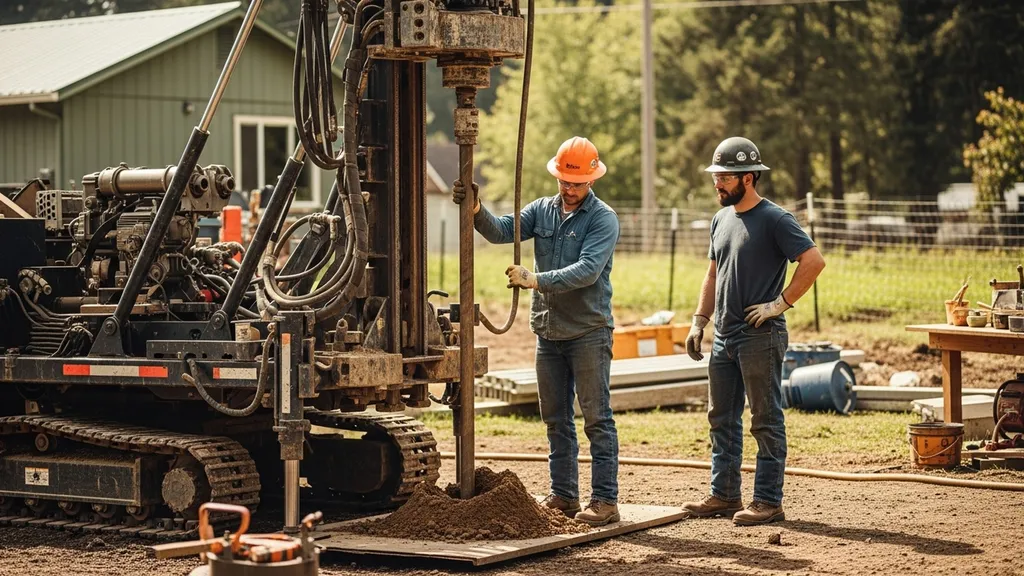
Practical guide to planning, drilling, and setting up a residential well water system for DIY and budget-conscious self-builders.
Well Water Systems: Drilling and Setup
A well water system provides an independent, long-term water supply for homes, cabins, and remote properties. This guide explains how a residential well water system is planned, drilled, and set up, and it walks DIYers through site selection, permits, drilling methods, pump choices, water testing and treatment, and low-cost off-grid options. Read on to learn what to budget for, which tests to run first, and how to match pump and pressure components to your static water level and household demand.
TL;DR:
- Expect to pay roughly $30–$75 per foot to drill a residential well; budget $3,000–$12,000 total for a typical household well and pump system.
- Run baseline tests for coliform and nitrates immediately after development; prioritize disinfection and filtration if bacteria or high nitrates are present.
- Match pump type and horsepower to static level, drawdown, and peak flow; consider a solar water pump for off-grid service with battery storage or direct-coupled DC for shallow wells.
How Well Water Systems Work: Basics for Diyers
Groundwater sits in porous rock and sediment layers called aquifers. When a borehole intercepts a water-bearing formation, water fills the well and stabilizes at a static water level. Key terms to know are aquifer, static water level (distance from ground to water surface when pump is off), yield (gallons per minute, GPM), and drawdown (drop in water level when pumping). For household service, industry practice looks for steady yields of at least 5 GPM for full-service use; yields under 1 GPM are low and usually require storage plus conservation strategies.
Typical well types and depth ranges:
- Dug wells: 10–25 ft; shallow, large diameter, higher contamination risk.
- Driven (point) wells: 15–50 ft; use a driven pipe into unconsolidated material; low cost but limited depth.
- Drilled wells: 50–500+ ft; rotary or cable-tool rigs penetrate rock and deep aquifers and are standard for reliable domestic supply.
Well casing provides structural support and sanitary protection. A sanitary seal or grout at the surface blocks surface water and contamination. Well development after drilling—surging and pumping—cleans fines and improves yield. For an accessible, practical overview, see the homeowner-focused guide at The complete guide to private well water systems (TheWell.Guide), which explains the full system from aquifer to faucet.
Quick Key Points: What Diyers Need to Know Up Front
- Permits required: Most jurisdictions require a permit and an inspection; fees commonly range from $50 to $500 depending on county.
- Drilling vs. hand-digging: Drilling is faster, reaches deeper, and is safer; hand-dug wells are cheaper upfront but carry higher contamination risk.
- Pump selection matters: Choose by depth and demand — shallow jet, deep-set jet, or submersible pumps. See pump comparison later.
- Testing and treatment: Run a baseline bacterial test (coliform/E. coli) and test for nitrates, iron, pH, hardness, and TDS after development.
- Budget contingency: Add 15–30% contingency for unexpected geology, deeper drilling, or treatment needs.
Typical ballpark costs:
- Drilling: $30–$75 per foot (regional variation).
- Casing and well cap: $500–$1,500.
- Pump and pressure system: $700–$3,500 depending on type and horsepower.
- Initial lab testing: $50–$300 for a basic panel.
For more on conservation to reduce demand on a new well, see the low-flow fixtures guide. Ottawa Public Health’s private well manual is a concise primer on user responsibilities and testing recommendations: Private well water manual (ottawa public health).
Preparing for Drilling: Site Selection, Permits, and Budgeting
Site selection is practical and legal. Pick a spot that balances access for a drill rig and distance from contamination sources:
- Setbacks: Keep the well at least 50–100 ft from septic tanks and drain fields and 100–200 ft from livestock and fuel tanks where possible; local rules vary.
- Topography: Place the well upslope of potential contamination sources to reduce surface runoff risk.
- Access: Ensure a 12–20 ft wide, level drive for the rig and delivery trucks; bedrock or rocky outcrops may require larger rigs.
Permitting steps usually include application to your county health department or state well program, a site plan showing setbacks, and an inspection after drilling and before connecting to the house. The USDA operator's guide provides checklists for small water systems and operator responsibilities useful for planning: Water system operator's guide (usda).
Budget worksheet (sample):
- Drilling (200 ft at $40/ft): $8,000
- Casing and sanitary seal: $1,000
- Submersible pump, wiring, and drop pipe: $1,500
- Pressure tank and switch: $500
- Baseline lab testing and water treatment contingency: $600
- Permit and inspection: $200
- Contingency (20%): $2,260
- Estimated total: $14,060
Before drilling, call utility-locate services to mark buried utilities, and check neighboring wells for depth and yield if available. For remote properties, integrate the well plan with a broader water strategy; our off-grid water guide explains how wells pair with storage and rainwater capture.
Drilling a Well: Methods, Equipment, and What to Expect
Drilling methods differ by soil and rock conditions. Below is a compact comparison table for common methods.
| Method | Typical depth range | Best conditions | Average cost per foot |
|---|---|---|---|
| Rotary (mud/air) | 50–500+ ft | Bedrock, hard formations | $35–$75 |
| Cable-tool | 100–500+ ft | Bedrock drilling, older tech | $40–$80 |
| Auger | 10–100 ft | Soft soils, clay, shallow aquifers | $20–$45 |
Expectations and timeline:
- Site prep (1 day): Level pad, rig access, water and mud handling set up.
- Drilling (hours to days): Small rural jobs often complete within 1–3 days depending on depth and formation; deeper or difficult rock may take longer.
- Well development (several hours): Flushing, surging, and pumping to clear fines.
- Testing and sanitary sealing (1–2 days): Static water level measurement, pump test, bacteriological sampling, and grout at the surface.
On safety: OSHA-style precautions for rig crews include PPE, securing rig components, and controlling drilling fluids. Insist on a licensed driller for deep wells or where local code requires certification. For a visual walkthrough of drilling, development, and initial testing you can learn a lot from watching a field job — viewers will see rig setup, drilling, and cleanup in action: Watch this step-by-step guide on installing your own well with a sledge hammer for free off grid water:
.Contractor vs DIY Drilling:
- Contractor: Faster, safer, and typically required for deep wells. Contractors bring experience locating aquifers, proper casing choices, and guaranteed sanitary seals.
- DIY (hand auger or small rig rental): Feasible for very shallow wells in soft soils; higher contamination and performance risk. DIYers should only attempt where local codes permit and with proper training.
For technical treatment and drilling implications, see the Clean Water Store’s guide to well water treatment and construction techniques: The definitive guide to well water treatment (cleanwaterstore).
Setting Up the Well Water System: Casing, Pump Choices, and Pressure Systems
Choosing the right pump starts with knowing the static water level, pump depth, and required flow. The main pump categories:
| Pump type | Typical depth capability | Typical cost | Pros | Cons |
|---|---|---|---|---|
| Shallow jet | <25 ft | $300–$900 | Low cost, easy service | Not for deep wells |
| Deep jet (two-pipe) | 25–100 ft | $500–$1,200 | Better depth capability | Lower efficiency than submersible |
| Submersible | 50–500+ ft | $700–$2,500+ | Efficient, quiet, high flow | Requires downhole servicing |
| Surface pump (for cistern) | N/A | $200–$1,000 | Easy access | Needs storage tank or shallow source |
Power needs: submersibles require 240V or 120V depending on model; horsepower commonly ranges 0.5–2.0 HP for household use. For off-grid options, the term solar water pump often refers to either a direct-coupled DC pump or an AC pump run through an inverter and battery bank. We'll cover sizing later.
Pressure systems:
- Pressure tanks reduce on/off cycles. Tanks are rated in gallons (e.g., 20–80 gal). Sizing is a balance: larger tanks reduce cycling but cost more. A simple rule: for typical households, a 40–80 gallon tank gives good cycle reduction. Check the pump’s recommended pre-charge and set pressure (commonly 30/50 psi).
- Pressure switch controls cut-in and cut-out (e.g., 30/50). Smart controllers and variable frequency drives (VFDs) can extend pump life and save energy. For readers integrating automation, see our smart water hub setup and connect smart water hubs.
Piping and protection:
- Drop pipe: Use schedule 40 PVC, polyethylene, or stainless steal riser pipe for submersibles as specified by the pump maker.
- Check valves: Install one-way check valves to prevent backflow and to keep the column charged.
- Freeze protection: Insulate piping in cold climates or route below frost line; install heat-traced or buried piping where needed.
TappWater and EnviSupply provide practical diagrams and parts lists for common system layouts; for treatment component selection see Well Water Guide: construction, maintenance, and safe operation (TappWater). Include spare parts on hand: pressure switch, check valve, wiring connectors, and an extra inline filter cartridge.
Water Quality: Testing, Treatment Options, and Ongoing Maintenance
Which tests to run:
- Essential: total coliform/E. coli, nitrates, pH.
- Secondary: iron, manganese, hardness, TDS, sulfate, arsenic in certain regions.
Labs: Use a certified lab through your state or county health department. Typical turnaround: 2–7 days. Costs: $30–$150 for basic bacterial plus chemical panels.
Treatment decision flow:
- Bacteria present: Shock chlorination followed by repeat testing; consider continuous disinfection like UV or chlorination if contamination recurs.
- Nitrates high (>10 mg/L as nitrate-nitrogen): Treatment using ion exchange or reverse osmosis and avoid using water for infant formula until fixed.
- Iron: Aeration and filtration (greensand, air-sand) for moderate levels.
- Hardness: Water softeners using ion-exchange reduce scale; salt-free conditioners alter scale chemistry but do not remove hardness.
A typical maintenance schedule:
- Annually: Bacterial testing for coliform/E. coli.
- Every 1–3 years: Check pressure tank pre-charge and inspect pressure switch.
- As needed: Replace sediment filters (3–12 months) and UV lamp annually per manufacturer.
For a homeowner-friendly system diagram and component descriptions, see A complete guide to understanding your well water system (EnviSupply). Also coordinate water demand reduction and fixture efficiency with treatment choices — our water-efficient plumbing guide helps lower household consumption and reduces strain on treatment systems.
Off-grid and Low-cost System Options: Solar Pumps, Backups, and Conservation
Solar pump basics:
- Direct-coupled DC pumps: Run directly from solar PV during the day; very efficient for daily water delivery to storage tanks but require enough sunshine and head that matches pump output.
- Solar + battery + inverter: Allows pumping day or night and smooths variable production; higher upfront cost but greater reliability.
- Sizing approach: Estimate daily demand (gallons/day) and required lift (vertical feet + friction losses). Then select a pump curve that meets gallons/day at available peak sun hours. For help with solar array and battery sizing, see our solar pump sizing.
Backup strategies:
- Use an above-ground storage tank sized to daily use plus reserve — common sizes are 500–2,000 gallons for households seeking multi-day autonomy.
- Simple manual switchover: install a pump-to-cistern connection with a valve arrangement to select source. For automated transfer and level control, integrate float switches and relays.
Conservation lowers required well capacity:
- Indoor: Low-flow shower heads, 1.28 gpf toilets, efficient washing machines. See designing water-efficient plumbing.
- Outdoor: Smart irrigation controllers and xeriscaping reduce irrigation demand; see smart irrigation how-to and xeriscaping tips.
- Rainwater as supplement: Use rainwater for irrigation and non-potable uses; check local rules with the rainwater legal rules page and read practical methods in our water collection guide.
Off-grid appliance tips: for laundry and dishwasher loads consider off-grid laundry tips that reduce water and energy use. A combined approach of modest storage, a solar pump sized to refill tanks during daylight, and aggressive conservation can let small systems function reliably without grid power.
Common Problems, Troubleshooting, and When to Call a Pro
Low yield or dry well:
- Immediate steps: Stop high-demand use, run a measured pump test (record GPM over an hour), check for recent drilling nearby or seasonal changes. If yield is below needs, consider storage and demand reduction. If drawdown is excessive, drilling deeper or re-developing the well may help.
Pump cycling and pressure loss:
- Symptoms: Rapid on/off cycling, short runs, or low pressure at fixtures.
- Checks: Measure pressure tank pre-charge (air side) with a tire gauge when system is depressurized; inspect for waterlogged tanks. Check pressure switch settings and wiring. Look for leaks in distribution piping.
Air in the system may indicate a leaking foot valve, cracked drop pipe, or fluctuating water table. Inspect the wellhead and piping for loose fittings.
Contamination events:
- Bacterial detection: Issue a boil-water advisory for drinking and cooking until the problem is fixed; shock chlorinate the well and retest. If repeated bacteria appearances occur, investigate surface drainage, cracked casing, or a nearby contamination source and call public health.
- Chemical contamination: For nitrate or volatile organics call state environmental or public health authorities for guidance; certain contaminants require point-of-entry or point-of-use treatment or connecting to an alternate clean supply.
When to call a pro:
- If the well needs deeper drilling, if you suspect structural well problems, if contamination persists after shock chlorination, or if electrical troubleshooting shows complex faults — engage a licensed well contractor and the local health department. For moisture or basement issues that might mimic leaks, see our crawl space moisture fixes and moisture absorber options.
The Bottom Line
A reliable well water system starts with good site selection, permits, and a realistic budget; drilling outcomes vary with geology, so plan for contingencies. Match the pump and pressure components to measured static level, drawdown, and household demand, and run baseline well water testing immediately after development. Next steps: contact your county health department, obtain 2–3 drilling bids, and schedule a baseline bacterial and nitrate test.
Frequently Asked Questions
How much does it cost to drill a residential well?
Costs vary by depth, geology, and region. A common range is $30–$75 per foot for drilling, so a 100–300 ft drilled well typically runs $3,000–$22,500 when you include casing, pump, pressure tank, permits, and initial testing. Most homeowners see totals between $3,000 and $12,000 for a typical domestic installation. Add a 15–30% contingency for unexpected conditions.
How often should I test my well water?
Industry practice recommends bacterial tests for total coliform and E. coli at least once per year and after any work on the well. Test for nitrates, iron, pH, and TDS every 1–3 years, or sooner if you notice taste, color, or odor changes. Use a certified lab and follow local public health guidance; Ottawa Public Health and other agencies provide testing checklists and frequency recommendations.
Can I power a well pump with solar panels?
Yes. Options include direct-coupled DC pumps that run during sunlight hours or AC pumps powered through a solar array plus batteries and inverter for 24-hour operation. Sizing depends on daily water demand, required lift, and local peak sun hours. For rough sizing help, consult our solar array guidance and pump curves in the 5 kW solar sizing guide.
What treatment is required if bacteria are found?
Initial action is shock chlorination of the well and distribution system, followed by retesting. If contamination recurs, continuous disinfection such as a UV system or a fed chlorine system may be required, along with identifying and fixing the contamination source (e.g., poor sanitary seal, surface inflow). Work with your local health department for approved procedures.
How deep should my well be?
Depth is site-specific. Dug wells are shallow (10–25 ft), driven wells 15–50 ft, and drilled wells commonly extend 50–500+ ft to reach reliable aquifers. Local hydrogeology and neighboring well records are the best predictors. A licensed driller or local well program can advise on expected depths in your area.