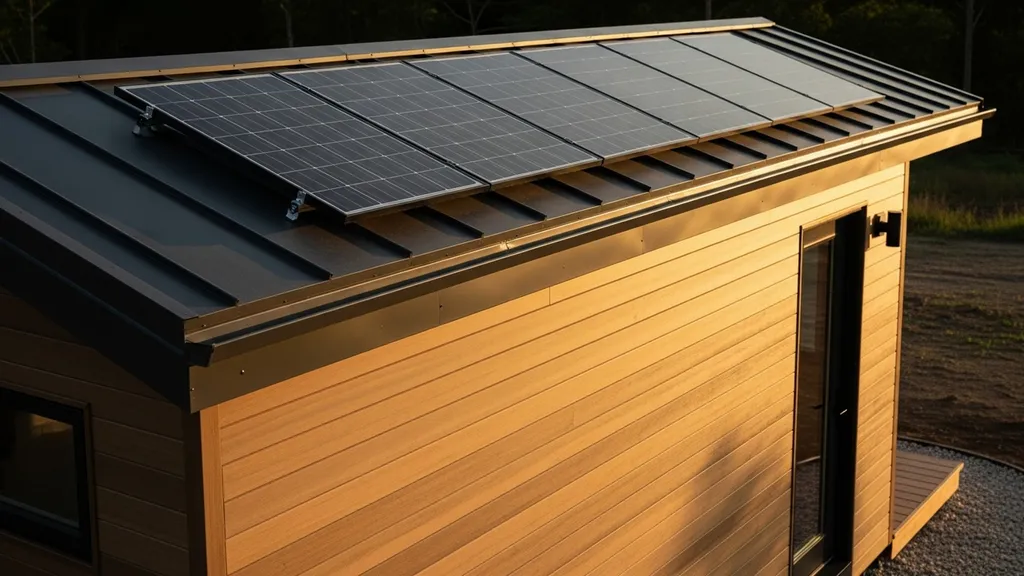
Practical, step-by-step sizing guide for a 1KW solar system for a tiny house — loads, panels, batteries, costs, and installation tips for DIYers.
1KW Solar System for Tiny House: Complete Sizing Guide
A 1KW solar system for tiny house owners is a common starting point for off-grid or grid-offset setups. This guide explains how much energy a 1 kW array actually produces, how to match that output to realistic loads, how to choose panels, inverters and batteries, and what to expect for installation, permits and costs. Read on to learn the math, see example load profiles, and get concrete component recommendations for a budget-conscious DIY install.
TL;DR:
- A 1KW solar system produces roughly 2.5–6 kWh per day depending on location and season; expect 10–25% system losses.
- For typical tiny-house loads, 1 kW suits minimalist or modest DC/light loads (1–4 kWh/day); size batteries using kWh/day × days of autonomy ÷ usable DoD.
- Choose 3–4 panels (300–350W or 250W options), a 1,000–1,500W inverter, MPPT charge controller, and a battery bank sized to your autonomy and chemistry preference.
Related guides: 1kw solar system for cabin complete sizing guide, Solar power costs by house size ultimate guide, Framing a house complete DIY guide, and The Complete Guide to Water-Efficient Plumbing and Moisture Control: Design, Off-Grid and Smart Water Systems, Composting Toilets, and Crawl Space Solutions.
How much energy will a 1KW solar system produce for a tiny house?
Typical daily kWh output (peak sun hour examples)
A simple way to estimate daily generation is: 1 kW × peak sun hours = kWh/day. Peak sun hours (PSH) are the equivalent full-sun hours per day at a location. Common ranges:
- Low-sun areas (north, heavy cloud): 2.5 PSH → ~2.5 kWh/day
- Moderate areas (many U.S. inland locations): 3.5 PSH → ~3.5 kWh/day
- High-sun areas (desert, southern states): 5–6 PSH → 5–6 kWh/day
Real systems lose energy to temperature, wiring, inverter/charge controller inefficiencies and soiling. Industry practice applies a 10–25% derate factor; multiply the raw output by 0.75–0.9 to get useful AC or battery-charged kWh. Tools such as the NREL PVWatts calculator provide location-specific estimates and model losses for a more accurate prediction.
Seasonal and location variability
Solar output swings with season and tilt. In winter, shorter days and lower sun angles can cut production by 30–60% compared with summer in many locations. Cloudy climates can reduce annual yield substantially. For planning, use a conservative average of annualized PSH, then model worst-month output if off-grid reliability is essential. The U.S. Energy Information Administration (EIA) reports growth in distributed solar but also highlights regional differences in small-scale generation, which reinforces the need to check local insolation data: EIA small-scale solar outlook.
Real-world examples from tiny-house setups
A common case: a tiny house with a 1 kW array and ~3.5 PSH yields roughly 3.5 kWh raw; after ~15% system losses that becomes ~3.0 kWh/day available for loads. In practice, that supports LED lighting, phone/laptop charging, a DC water pump, and a small 12V absorption or propane fridge with strict use patterns. Households that report full electric heat or larger AC refrigerators find 1 kW insufficient without large batteries or a generator backup.
Sizing a 1KW solar system for your tiny house loads
How to build a simple load spreadsheet
Create a load sheet with three columns: device, wattage, hours per day. Multiply watts × hours to get Wh/day, sum to kWh/day. Include duty cycles and standby draws (many devices draw power even when "off"). Example steps:
- List each appliance (LED light, fridge, laptop, pump).
- Record wattage from the nameplate or measure with a wattmeter.
- Estimate daily hours of use (for cyclical devices use average cycles).
- Compute Wh/day and convert to kWh/day (divide by 1,000).
Use the Department of Energy's homeowner guide to solar for basic device efficiency tips and to help refine estimates.
Example load profiles: minimalist, average, off-grid comfort
- Minimalist: LED lights (30 Wh), phone charging (20 Wh), propane fridge with small DC assist (500 Wh) → ~0.6–1.0 kWh/day.
- Moderate: LED lighting, laptop/office gear, efficient 12V fridge, DC pump, occasional microwave via inverter → ~3–4 kWh/day.
- Off-grid comfort: Electric space heating, full-size AC fridge, electric cooktop → >8–12 kWh/day (exceeds practical output for a single 1 kW array).
Key points:
- A 1 kW solar system is well-suited to Minimalist and many Moderate profiles with careful use.
- If your load exceeds ~4–5 kWh/day, consider upsizing panels, batteries, or adding a backup generator.
For a deeper design walkthrough and load spreadsheet templates, see our off-grid system design.
Sizing for critical vs non-critical circuits
Split loads into critical (lights, communications, fridge) and non-critical (electric heating, high-power appliances). For off-grid tiny houses, place critical loads on a dedicated inverter or automatic transfer system so battery energy covers essentials during low-sun periods. When using a 1 kW system, prioritize low-energy essentials and avoid high startup/surge demands that can overload a small inverter.
Core components of a 1KW solar system for a tiny house (and how to choose them)
Solar panels: wattage, type, and number of panels
A 1 kW array can be assembled from various panel sizes:
- 250W panels → 4 panels
- 300W panels → 3–4 panels (4 gives headroom)
- 350W panels → 3 panels
Panel efficiency typically ranges from 16% to 22%. Typical panel dimensions:
- 60-cell panels (~250–330W): ~1.6 m × 1.0 m
- 72-cell panels (~350–400W): ~2.0 m × 1.0 m
Match the panel footprint to available roof area. For instance, four 250W panels require roughly 6.4 m² of clear roof space including mounting gaps.
Inverters and charge controllers: MPPT vs PWM, inverter sizing
- MPPT charge controllers are strongly recommended for off-grid tiny houses because they extract more energy under varying voltage conditions and when panel voltage is higher than battery voltage.
- PWM controllers are inexpensive but only recommended for very small 12V systems with matched panel voltages.
- Inverter sizing: choose an inverter that handles continuous loads and expected surge. For a 1 kW PV array, a 1,000–1,500W continuous inverter with a surge rating 2–3× continuous is common. Brands often used by DIYers include Victron, Renogy and Morningstar for charge controllers and hybrid inverters.
See the AC/DC coupling guide to decide whether to use an AC-coupled inverter with battery or a DC-first (battery-centric) configuration.
Mounts, wiring, fuses, and safety equipment
- Use roof-rated racking matched to panel footprint and roof pitch. Ensure rail spacing and fasteners penetrate into structural framing or blocking.
- Wire with proper gauge to limit voltage drop; use MC4 connectors for PV runs.
- Include DC fuses, DC disconnect, and an AC disconnect per code. Install a system ground and lightning protection if local practice recommends it.
- For inverter safety, consider integrated isolators and follow NEC (NFPA 70) requirements for PV systems and battery installations. For system components, specify the manufacturer and model on procurement list and use UL-listed equipment where available.
| Component | Typical options | Notes |
|---|---|---|
| Panels | 250W, 300W, 350W | 3–4 panels for ~1 kW; check rooftop footprint |
| Charge controller | MPPT (e.g., Victron MPPT, Morningstar MPPT) | MPPT improves harvest, especially in cold/partial-shade |
| Inverter | 1000–1500W pure sine (Victron, Renogy) | Check continuous and surge ratings |
| Wiring & protection | PV-rated cable, DC fuses, AC breakers | Follow NEC and local code |
Battery storage: sizing and chemistry for a 1KW tiny house system
How to calculate battery capacity for days of autonomy
Battery bank size (kWh) = daily load (kWh/day) × days of autonomy ÷ usable depth of discharge (DoD). Examples:
- For 3 kWh/day, 1 day autonomy:
- Lead-acid at 50% DoD → 3 kWh × 1 ÷ 0.5 = 6 kWh battery bank
- Lithium at 80% DoD → 3 kWh × 1 ÷ 0.8 = 3.75 kWh battery bank
- For 3 kWh/day, 3 days autonomy:
- Lead-acid 50% DoD → 18 kWh bank
- Lithium 80% DoD → 11.25 kWh bank
When constrained to a 1 kW PV array, longer autonomy increases battery size and cost; it may be more practical to adjust loads or add generator backup.
Lead-acid vs lithium: cost, lifespan, usable capacity
- Flooded lead-acid: low upfront cost, frequent maintenance (watering, ventilation), usable DoD ~40–50%, cycle life 300–800 cycles depending on depth of discharge and maintenance.
- AGM/gel: sealed, less maintenance, slightly higher cost, similar usable DoD and shorter lifespan than flooded for deep cycles.
- Lithium iron phosphate (LiFePO4): higher upfront cost, usable DoD ~80–90%, cycle life typically 2,000–5,000 cycles, lighter weight and smaller footprint. Lithium requires a battery management system (BMS) and appropriate charging algorithm.
Cost-per-kWh varies by market and time; compare lifecycle cost (initial price ÷ usable kWh × expected cycles) rather than sticker price alone. For maintenance and cycle management, see our battery lifespan tips.
Battery bank layout, BMS, and maintenance
- Arrange cells/modules per manufacturer wiring diagrams. For parallel strings, match age and state-of-charge across modules.
- Include a BMS for lithium to manage cell balancing, over/under voltage protection and temperature cutoffs.
- For flooded cells, provide ventilated enclosure and regular hydrometer checks.
- Safety: follow local electrical code, place batteries on non-combustible, level supports, and avoid storing flammable materials nearby.
Grid-tied vs off-grid for a 1KW solar system on a tiny house
When a 1KW system works best grid-tied
A grid-tied 1 kW system primarily offsets utility consumption and reduces bills; it requires minimal battery storage (or none) if the grid remains available. Net-metering policies determine how valuable exported electricity is — check local programs and interconnection rules. For incentives and program listings, consult state incentive databases such as DSIRE.
Off-grid realities with a 1KW system
Off-grid with a 1 kW array demands strict load management, sufficient battery capacity, and likely a generator backup for extended cloudy stretches. Off-grid systems must be sized for the worst-case week or include contingency for fuel-powered generation. Research suggests many successful tiny-house off-grid installs pair modest PV arrays with conservative loads and a small propane or diesel generator for resilience.
Hybrid approaches and permits
Hybrid setups combine grid connection with batteries and can help maximize self-consumption and backup capability. Permit and interconnection rules vary by jurisdiction; contact the local Authority Having Jurisdiction (AHJ) and utility to determine required inspections, meter upgrades and anti-islanding protections. For a general discussion of trade-offs, consult our grid vs off-grid guide.
Roof, mounting and installation considerations for tiny houses with a 1KW array
Roof weight, spacing, and panel orientation
Tiny house roofs have limited area and variable pitch. Typical panel layouts for 1 kW:
- Three 350W panels: often fit on a narrow roof ridge with minimal spacing
- Four 250W panels: require wider usable roof width
Roof structure must handle panel and racking loads plus wind uplift. For mobile tiny houses or trailer-mounted roofs, consult a structural engineer to confirm framing, fastener patterns, and tongue weight limits.
Ground mounts and tilt alternatives for tiny homes
If the roof area or orientation isn’t ideal, a small ground mount or pole-mounted tilt frame lets you optimize tilt angle for seasonality. Portable tilt racks can increase winter yield by angling panels for low sun angles. Ground mounts add theft and exposure considerations; secure mounts and tamper-resistant fasteners.
Wiring run, conduit, and safety best practices
Minimize DC run length by locating charge controller and batteries close to the array or use a combiner to reduce multiple long runs. Use conduit where local code requires and clamp cables to avoid chafing. Include a clearly labeled AC and DC disconnect at accessible locations for emergency shutoff.
Watch this step-by-step guide on installing solar panels on a tiny home:
Equipment and tool checklist for a DIY install:
- Safety gear: fall protection, gloves, eye protection
- Tools: drill/driver, torque wrench, crimper, multimeter
- Electrical: PV-rated cable, MC4 connectors, DC fuses, breakers
- Racking: rails, clamps, flashing kits for roof penetrations
Check roof sheathing and fastener lengths to ensure penetration into framing. If uncertain about load or mobility stresses, secure a structural review.
Costs, upgrades, and how to scale beyond 1KW
Typical installed cost ranges and component breakdown
DIY component-only budgets for a 1 kW system (ballpark ranges):
- Panels (3–4): $300–$1,000
- Inverter/charger: $400–$1,200
- MPPT charge controller: $150–$600
- Batteries (lead-acid or lithium): $300–$5,000+ depending on chemistry and capacity
- Mounting, wiring, breakers, conduit: $200–$800
Professional installed prices vary widely; small residential installs often have higher per-watt labor and permit costs. The Solar Energy Industries Association (SEIA) publishes market trends that can help benchmark installed pricing in your region: SEIA market insights.
Incremental upgrades: batteries, inverter, more panels
- Add panels: Increase daily generation; ensure the charge controller and inverter can accept higher PV input or add a second MPPT.
- Expand battery bank: Increase autonomy; check inverter/charger maximum battery voltage and charging current.
- Replace inverter: Swap to a larger inverter when planning big AC loads; consider AC-coupled hybrid inverters for easy panel expansion.
When to choose a larger system instead of optimizing a 1KW setup
If average daily loads exceed ~4–5 kWh or you plan electric heating/cooking, select a larger PV array (2–4 kW) and a bigger battery bank. Also upsize when you want lower generator runtime or more forgiving autonomy during winter. For scaling strategies and system design steps, consult our off-grid system design.
Maintenance, monitoring and common problems for 1KW tiny house systems
Routine maintenance checklist
- Monthly: Inspect panels for dirt, debris; clean if performance drops.
- Quarterly: Check mounting hardware torque, cable clamps and conduit fittings.
- Biannual: Test battery specific gravity (flooded) or check BMS logs (lithium).
- Annual: Update inverter/charge controller firmware, verify grounding and system labeling.
Common inverter and charging issues and quick fixes
Common issues include ground-fault alarms, battery low-voltage disconnects, and erratic charging. Quick checks:
- Verify battery voltage and connections are tight.
- Inspect PV wiring for water intrusion or damaged MC4 connectors.
- Reset inverter per manufacturer instructions after troubleshooting.
For step-by-step fixes, see our guide on inverter fixes.
Monitoring options for DIYers
Options range from a simple battery monitor (Victron BMV) to cloud-enabled inverter portals that show real-time PV and battery metrics. A low-cost energy monitor plus CT clamp can track whole-house consumption. For setup and calibration of DIY monitors, consult our energy monitor calibration.
The Bottom Line
- A 1KW solar system for tiny house use typically delivers 2.5–6 kWh/day depending on location; plan for 10–25% losses and use PVWatts for precise modeling.
- A 1 kW array suits minimalist to moderate tiny-house loads (1–4 kWh/day) when paired with an appropriately sized battery bank and efficient appliances.
- If you need larger daily energy or electric heating/cooking, upgrade the array and inverter rather than relying on battery expansion alone.
- Next steps: run a load spreadsheet, use NREL’s PVWatts for location-specific output, and select panels, MPPT controller, inverter and battery chemistry that match your autonomy goals.
Frequently Asked Questions
Can a 1KW solar system run a tiny house full-time?
A 1 kW array can run a tiny house full-time only if the daily energy demand is very low (roughly 1–4 kWh/day) and occupants practice strict load management. Systems that rely on propane for cooking/heating and use efficient DC appliances and LED lighting are the best fit. In colder or low-sun months a generator or a larger battery bank is often required to maintain full-time off-grid comfort.
How many solar panels do I need for a 1KW system on my tiny house?
The number depends on panel wattage: four 250W panels, three to four 300W panels, or three 350W panels are common configurations for ~1 kW. Panel dimensions and roof area will determine which option fits best; measure usable roof space before buying. Also account for spacing for rails and tilt when calculating the footprint.
What size battery bank do I need with a 1KW system?
Calculate battery size as daily load (kWh/day) × desired days of autonomy ÷ usable DoD. For example, a 3 kWh/day load with 1 day autonomy requires ~6 kWh of lead-acid at 50% DoD, or ~3.75 kWh of lithium at 80% DoD. Choose chemistry based on budget, maintenance willingness, weight limits and cycle-life goals.
Is a 1KW solar system worth installing if I’m grid-tied?
Yes—on-grid a 1 kW system reduces utility consumption and your electric bills, especially if net metering or time-of-use rates are favorable. The payback depends on local electricity prices, incentives and interconnection rules. Check local incentive databases such as [DSIRE](https://www.dsireusa.org/) and compare installed cost vs. expected annual generation to estimate simple payback.
Can I install a 1KW system myself or do I need a pro?
DIY installation is achievable for people with electrical skills, roof work experience and knowledge of local code. Basic PV wiring, grounding, and battery safety must be followed. For grid interconnection, many utilities require licensed electrician sign-off. If unsure about structural mounting, wiring, or permitting, hire a pro for those steps and consider doing the simpler, low-risk tasks yourself.