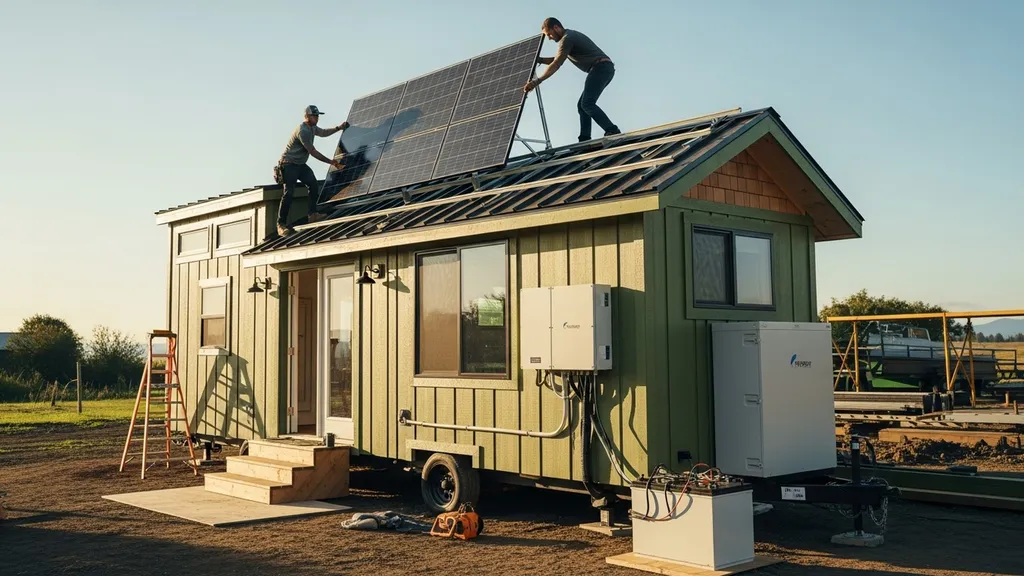
A practical, step-by-step guide to sizing a 7kW solar system for a tiny house — panels, batteries, roof space, costs, and an example build.
7KW Solar System for Tiny House: Complete Sizing Guide
A 7kw solar system for tiny house owners can supply daytime power, run a heat pump or induction cooktop for much of the year, and provide meaningful battery-backed autonomy. This guide walks through estimating loads, choosing panels and batteries, calculating roof space, sizing inverters and charge controllers, and a worked example for a realistic tiny-house build. Read on to learn exactly how a 7 kW array performs in different climates, what components you need, and when a 7 kW array is more than you need.

TL;DR:
- A 7 kW array typically produces 21–35 kWh/day before storage, depending on 3–5 peak sun hours and system derate — enough for many modern tiny houses using heat-pump HVAC and efficient appliances.
- Estimate battery capacity as: desired days of autonomy × daily kWh ÷ usable depth-of-discharge (example: 1 day × 18 kWh ÷ 0.8 ≈ 22.5 kWh battery).
- For 350 W panels plan ~20 modules (≈32–40 m² roof area), a 5–8 kW inverter depending on simultaneous loads, and MPPT controllers matched to array voltage.
How a 7KW Solar System Fits a Tiny House: Quick Overview
A 7 kW PV array is a sizeable rooftop system for a tiny house. It’s large enough to cover everyday needs in many climates and to support higher draws like a mini-split heat pump, induction cooktop, or occasional EV charging if the homeowner staggers use. Industry guidelines and some county permitting pages set minimum sizing rules for off-grid systems; for example, Santa Cruz County references a 2 kW minimum array and 12 kWh minimum battery storage for off-grid permits, which shows a 7 kW array meets typical local design criteria for capacity and inverter rating (see the county’s off-grid solar requirementsSystemBatteryPermits/Off-GridSolarDesign/Off-GridSolarRequirements.aspx) for specifics: Santa Cruz County off-grid solar requirementsSystemBatteryPermits/Off-GridSolarDesign/Off-GridSolarRequirements.aspx).
Who benefits from a 7 kW system
- Small households that want daytime comfort with modest battery backup.
- Tiny-house owners planning a heat pump, induction cooking, or light workshop tools.
- Off-grid setups where larger production reduces generator runtime.
High-level Pros and Constraints for Tiny Houses
- Pros: Covers larger seasonal loads, shortens generator use, and allows faster battery charging on sunny days.
- Constraints: Requires significant roof or ground area and higher upfront cost; may be overkill for ultra-frugal tiny-house setups.
Key production rule of thumb
- Daily production ≈ array size (kW) × peak sun hours × system derate (0.75–0.85). Example: 7 kW × 4 hours × 0.80 ≈ 22.4 kWh/day usable.
Typical tiny-house daily use bands
- Very frugal: 3–8 kWh/day
- Modest modern tiny-house: 12–25 kWh/day
- Heavy usage (heat pump, EV, tools): 25–50 kWh/day
If you want daytime autonomy plus one night of battery backup for a modest modern tiny house, a 7 kW array paired with 10–25 kWh of usable battery capacity is often a practical match. For help choosing an off-grid wiring topology, see the guide to off-grid electrical options.
Estimate Your Tiny House Energy Needs — Step-by-step
A clear, itemized estimate of daily use is the starting point. Create a simple worksheet and list each appliance, its wattage, and expected runtime per day.
List and Categorize Loads
- Essential loads: fridge/freezer, LED lighting, water pump, router, safety/ventilation.
- Comfort loads: mini-split heat pump, baseboard or space heater (if used), induction cooktop.
- Intermittent/heavy loads: power tools, EV charging, resistive water heater.
How to Convert Appliance Watts and Run-hours Into Daily Kwh
- Find rated wattage (or measure with a plug monitor).
- Multiply watts × hours used = Wh/day.
- Sum all Wh and divide by 1,000 = kWh/day.
Example worksheet (typical modest tiny house)
- Refrigerator: 150 W effective average × 24 h = 3,600 Wh → 3.6 kWh/day
- LED lighting: 80 W × 4 h = 320 Wh → 0.32 kWh/day
- Induction cooktop (moderate use): 1,800 W × 0.5 h = 900 Wh → 0.9 kWh/day
- Mini-split heat pump (average winter): 1,200 W × 6 h = 7,200 Wh → 7.2 kWh/day
- Laptop and devices: 100 W × 6 h = 600 Wh → 0.6 kWh/day
- Water pump: 200 W × 0.5 h = 100 Wh → 0.1 kWh/day
Total ≈ 12.72 kWh/day
Factor in Seasonality and Diversity
- HVAC often dominates winter loads. Measure or estimate seasonal hours for mini-splits using manufacturer specs; the mini split power draw guide gives typical input power ranges by size.
- Diversity means not all appliances run simultaneously; use this to size inverter and breakers but not to reduce total daily kWh.
Practical measurement tips
- Use a plug energy monitor (e.g., Kill A Watt) for smaller appliances.
- Install a temporary energy monitor at the main during commissioning to record real usage; the monitor calibration walkthrough helps verify production against estimates.
When to hire data collection
- If heat load is uncertain, a short-term logging thermostat or heat-pump performance monitoring will reduce guesswork and prevent undersizing.
For off-grid wiring and distribution choices that affect how loads are supplied and prioritized, see the off-grid electrical options guide.
Sizing a 7KW Array: Panels, Orientation and Roof Space for Tiny Houses
Panel Wattage and How Many Panels You Need
- Panel count = 7,000 W ÷ panel wattage. With 350 W modules: 7,000 ÷ 350 ≈ 20 panels.
- With 400 W modules: 7,000 ÷ 400 = 17.5 → round up to 18 panels.
- Typical modern panel footprint: 1.6–2.0 m² each (17–22 ft²).
Roof area estimate
- For 350 W panels at 1.8 m² each → 20 × 1.8 = 36 m² (≈387 ft²) of clear, unobstructed area.
- Allow extra area for spacing, edge clearances, and tilt. On a tiny-house roof, that often means using both roof sides or a small ground/pole mount.
Peak Sun Hours and Production Examples
- Production ≈ 7 kW × peak sun hours × derate.
- Example (3 peak sun hours): 7 kW × 3 h × 0.80 ≈ 16.8 kWh/day
- Example (5 peak sun hours): 7 kW × 5 h × 0.80 ≈ 28 kWh/day
Orientation and tilt
- In the northern hemisphere, south-facing with an angle near your latitude typically maximizes year-round output.
- Flatter, low-tilt installations often work well on tiny houses to reduce wind loads; expect modest winter production loss. Use a tilt that balances winter heating needs and roof constraints.
When roof space is limited
- Consider higher-wattage panels (up to 550 W residential modules) to reduce count and footprint.
- Use ground mounts, pole mounts, or a small carport. For small outbuildings, compare with the 7kW shed comparison.
- Run a site check using the solar site checklist before final panel layout.
Local market context
- The Solar Energy Industries Association (SEIA) publishes market data useful for planning and cost benchmarking; their market insight reports provide seasonal production and installation trends (see the SEIA market insight page: Us solar market insight).
If you’d like a smaller comparative example to see how roof area and costs scale, review the 3kW sizing example.
Battery, Inverter and Charge Controller Sizing for a 7KW Tiny-house System
How to Pick Battery Capacity (kwh) for Your Needs
- Formula: Battery size (kWh) = desired days of autonomy × daily kWh ÷ usable depth-of-discharge (DoD).
- Example: One night autonomy for 15 kWh/day with 80% usable DoD → 1 × 15 ÷ 0.8 ≈ 18.75 kWh battery bank.
- Typical tiny-house usable battery ranges: 6–20 kWh for modest setups; 20–40 kWh for owners who want multiple days off-grid.
Battery chemistry and practical advice
- Lithium Iron Phosphate (LiFePO4) offers longer cycle life, higher usable DoD (70–90%), and better depth-of-discharge than lead-acid but costs more per kWh.
- Lead-acid is cheaper upfront in some markets but needs larger nominal capacity for the same usable kWh and requires maintenance.
Inverter Sizing: Continuous vs Surge Ratings
- Continuous rating should be equal to or greater than the expected simultaneous continuous load. For many tiny houses a 5–8 kW inverter is a workable choice when paired with a 7 kW array, depending on loads.
- Surge rating matters for motor-start loads (compressors, pumps). A mini-split may need 2–3× its running current at startup. Ensure the inverter’s surge rating covers start-up needs.
- Example: If peak simultaneous loads could reach 6 kW (mini-split + induction + chargers), choose a continuous inverter ≥6 kW with higher surge capability, or split heavy loads across two inverters or an inverter plus dedicated AC coupling.
MPPT Charge Controller and Voltage Matching Basics
- For grid-tied string inverters, MPPT is usually built-in. For battery-based systems with separate charge controllers, size the MPPT to handle array current (Isc × 1.25) and match array voltage to the battery/inverter input.
- Use the panel-to-battery matching guide for specific PV string voltage recommendations: panel-to-battery matching.
Practical components guidance
- Hybrid inverters (battery-ready) simplify wiring and often have integrated MPPT. They are convenient for tiny-house installs where space and simplicity matter.
- For troubleshooting and maintenance of battery banks, see these battery troubleshooting tips.
- For a worked inverter sizing case, compare with the inverter sizing example.
Safety and fusing
- Fuse PV strings according to NEC or local code, size combiner boxes correctly, and provide DC disconnects between array and charge controllers/inverters.
- Follow manufacturer wiring diagrams and use appropriately rated breakers on AC outputs.
Equipment Checklist and 7KW System Comparison Table
Minimal Parts List for a Safe 7 Kw Tiny-house System
- PV modules (quantity based on panel wattage)
- Racking and attachments suitable for the roof type
- Inverter (string, microinverter cluster, or hybrid inverter)
- Battery bank sized for desired autonomy
- MPPT charge controller(s) if applicable
- Combiner box and DC disconnect(s)
- AC disconnect and distribution panel with proper breakers
- Grounding and surge protection
- Conduit, conduit fittings, and wire sized to code
- Monitoring device or energy meter
- Permits, inspection fees, and labor (if not DIY)
Comparison/specs table: panels, inverters, batteries, mounting
| Component | Minimum spec | Typical option | Notes |
|---|---|---|---|
| Panel | 350 W | 350–400 W mono PERC | 20×350 W ≈ 7 kW; high-efficiency panels reduce footprint |
| Inverter | 5 kW continuous | 5–8 kW hybrid inverter | Choose based on simultaneous load and surge needs |
| Battery | 10 kWh usable | 10–25 kWh LiFePO4 | LiFePO4 preferred for cycle life and DoD |
| Charge controller | MPPT sized to array | 60 A+ MPPT or built-in hybrid | Size for Isc × 1.25 |
| Mounting | Roof flashings + rails | Flush or tilt racks | Reinforce roof framing as needed |
Cost sensitivity notes
- Installed costs vary widely: panel brand, labor rates, roof complexity, and permitting. See the cost breakdown by size for comparative figures.
- Hybrid systems with batteries typically add 30–80% to grid-tied PV costs depending on battery size; consult the hybrid system costs page for a detailed view.
- Choose lower-impact materials and suppliers listed in the sustainable component choices guide when environmental footprint is a priority.
Permits and safety
- Always acquire electrical and building permits before installation. Local codes (NEC in the U.S.) set grounding, disconnect, and labeling requirements.
Example 7KW Tiny-house Build + Video Walkthrough
Sample Loads and a Worked Sizing Calculation
- Assumed daily load: 18 kWh/day (heater use split seasonally).
- Production estimate with 4 peak sun hours: 7 kW × 4 h = 28 kWh gross; derate 0.8 → 22.4 kWh usable/day.
- Result: Production comfortably covers 18 kWh/day with headroom for charging batteries and running intermittent heavy loads.
Battery sizing for this example
- Desired autonomy: 1 day.
- Battery = 1 × 18 kWh ÷ 0.8 usable DoD ≈ 22.5 kWh nominal → choose a 24 kWh LiFePO4 bank for margin.
Panel count and roof footprint
- Using 350 W panels → 7,000 ÷ 350 ≈ 20 panels.
- Estimated footprint ≈ 20 × 1.8 m² = 36 m² (allow extra for spacing).
Layout, Stringing and Basic Wiring Overview
- Typical wiring flow: array → combiner/AC/DC disconnect → MPPT/inverter → battery → AC distribution panel.
- For hybrid inverter installs: array strings sized to inverter input voltage; multiple MPPT inputs allow separating east/west roof faces.
- Panel string design must respect maximum Voc at cold temperatures and match MPPT voltage windows; reference panel-to-battery matching.
For a visual demonstration, check out this video on complete hybrid solar inverter wiring installation:
What viewers learn in the video
- Panel placement strategies on a tiny-house roof, typical ground mount options, combiner and inverter siting, and real-world challenges like shade and roof penetrations.
Estimated Costs and Payback Rough Check
- Installed cost ranges can swing from $10,000 to $30,000+ depending on location, labor, and battery size. Incentives and local rebates materially change net cost. Use the off-grid home example for another build comparison.
- Payback varies by energy prices and incentives; compare expected annual savings against system cost and maintenance to estimate simple payback. Verify production with an energy monitor and follow the monitor calibration steps.
Site Constraints, Permits and Installation Tips for Tiny Houses
Common Site Issues: Shading, Roof Strength, and Access
- Shade analysis: Evaluate seasonal shading from trees and neighboring structures. Even small shading can disproportionately reduce string inverter output. Consider microinverters or power optimizers in heavily shaded setups.
- Roof framing: Confirm rafters and sheathing can carry panel loads, wind uplift, and installer traffic. Reinforce framing where necessary.
- Access and safety: Secure safe installer access and plan for long-term maintenance space around inverters and batteries.
Permits, Inspections and Code Basics to Check Early
- Electrical permit, building permit, and inspections for PV and battery systems are typically required. Local AHJ rules vary; read municipal guidance early in the design.
- Keep documentation: single-line diagrams, equipment cut sheets, and structural attachments plan for the inspector.
DIY vs Pro Install: Safety, Warranties and When to Call a Contractor
- DIY saves labor costs but voids many manufacturer warranties if not done to spec. Battery and inverter warranties often require certified installation.
- Call a licensed electrician for final AC connections and permit sign-off if you’re not certified.
For a full pre-install checklist and shade assessment tools, see the site selection tips. For passive design considerations that affect seasonal production, consult window orientation basics. For remote tiny-house sites that pair water and energy systems, refer to remote property water planning.
The Bottom Line: is a 7KW System Right for Your Tiny House?
A 7kw solar system for tiny house setups is a practical choice when roof or ground space allows and when daily energy needs fall in the 12–30 kWh range or when owners plan to run a heat pump, induction cooking, or occasional EV charging. Choose a smaller system plus efficiency upgrades if roof area, budget, or simple daily loads make a large array unnecessary. Scale up if multiple heavy loads or multi-day autonomy are required.
Frequently Asked Questions
How many panels do I need for a 7 kW system on a tiny house?
Panel quantity depends on module wattage. With 350 W panels you need about 20 modules (7,000 ÷ 350). With 400 W modules you need roughly 18 panels. Account for spacing, tilt, and roof obstructions when laying out the array; typical panel area is 1.6–2.0 m² per module, so plan for roughly 35–40 m² total footprint for 20 mid-size panels.
What size battery do I need with a 7 kW array?
Decide how many days of autonomy you want, then use: battery kWh = days of autonomy × daily kWh ÷ usable depth-of-discharge. For example, one day of autonomy for an 18 kWh/day load at 80% usable DoD needs about 22.5 kWh nominal capacity (round up to a 24 kWh bank). Many tiny houses use 6–20 kWh usable battery banks; LiFePO4 chemistry is common for space-constrained, long-life installs.
Will a 7 kW system fit on a tiny-house roof?
Sometimes. A 7 kW array usually needs 17–20 panels, which translates to roughly 32–40 m² of clear roof area depending on panel size. If roof area is tight, consider higher-wattage modules, split arrays across multiple roof facets, or a small ground/pole mount. Assess shading and structure first using a site checklist to avoid surprises.
Do I need a special inverter with a 7 kW array?
Choose an inverter based on expected simultaneous loads, continuous and surge ratings, and whether battery integration is needed. For many tiny houses, a 5–8 kW hybrid inverter works well; ensure the inverter’s surge capability handles heat-pump or motor starts. If shading is an issue, microinverters or power optimizers can improve energy harvest per panel.
What permits and inspections should I expect?
Expect to pull an electrical permit and often a building permit for rooftop attachments and battery installations. Inspections typically include PV electrical, structural attachments, and battery location/venting (if required). Check local AHJ guidance early and prepare single-line diagrams and equipment cut sheets for permit review. Santa Cruz County’s off-grid requirements are an example of local rules for array and battery minimums (see their guidance at [Santa Cruz County off-grid solar requirements](https://cdi.santacruzcountyca.gov/UPC/BuildingPermitsSafety/ApplyforaBuildingPermit/Solar(PV)SystemBatteryPermits/Off-GridSolarDesign/Off-GridSolarRequirements.aspx).