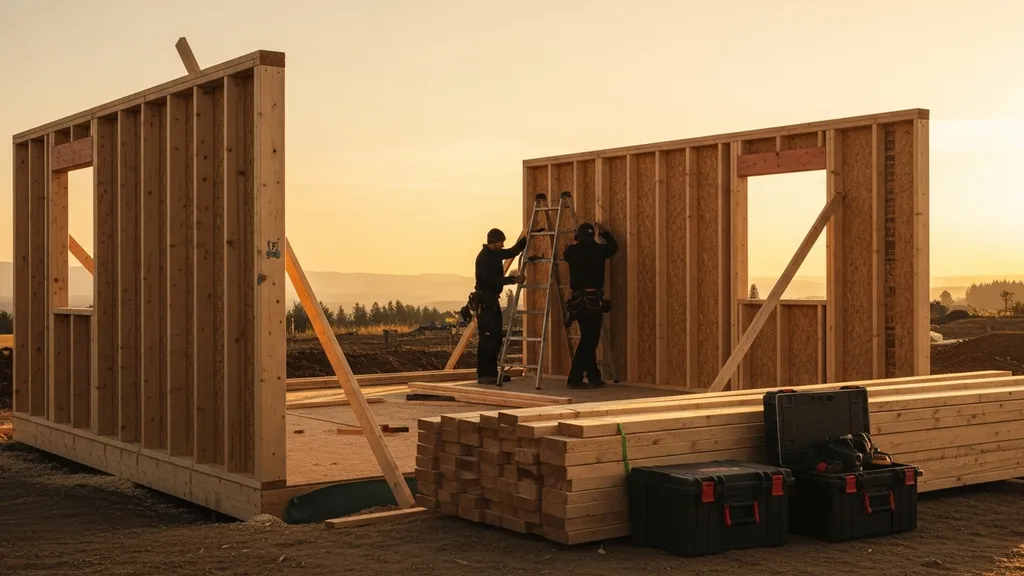
Step-by-step DIY guide to framing a house: planning, wall and roof framing, materials, safety, and cost-smart tips for eco-minded self-builders.
Framing a House: Complete DIY Guide
Framing a house is the structural step that turns foundation and drawings into a standing building. For a budget-conscious self-builder, learning framing house DIY skills cuts labor costs, improves control over material choices, and sets the stage for high-performance walls and roofs. This guide covers planning, permits, foundation interfaces, wall and roof framing step-by-step, materials and fasteners, safety and workflow, and a practical checklist so a homeowner can move from plan to raised frame with confidence.
TL;DR:
- Typical framing phase: 2–6 weeks with a small crew; framing accounts for roughly 15–25% of total build cost.
- Focus decisions: choose 2x4 vs 2x6 walls for insulation depth, plan continuous insulation strategy, and pick trusses or rafters based on attic use and schedule.
- Start by securing permits, confirming foundation anchor layout, practice building one wall panel, then schedule wall lifts and inspections.
Key points
- Budget for both materials and a reliable small crew or short-term subcontractor help for lifts.
- Prioritize airtightness at wall-to-foundation and window/door openings for energy performance.
- Keep a copy of local code requirements and the International Residential Code (IRC) span tables on site.
Related guides: 1kw solar system for tiny house complete sizing guide, The ultimate guide to recycled aggregate concrete for DIY builders 2026, Solar power costs by house size ultimate guide, DIY energy monitor calibration guide, Ultimate guide to recycled materials for DIY homes, and DIY mini split installation step by step guide.
Framing a House: What DIYers Need to Know
Who This Guide Is for
- Homeowners building a 1,200–2,000 ft² wood-framed house who want to complete most framing tasks themselves or with a small crew.
- DIYers who want to balance cost savings with passive-house-informed choices like thicker walls, continuous insulation, and careful air-sealing.
Big-picture Timeline and Typical Labor Split
- Typical framing duration: 2–6 weeks for a one-story or modest two-story with a small crew (3–6 people). Complex roofs or long clear spans add time.
- Cost split: framing materials and labor combined usually make up 15–25% of total project cost. Labor tends to concentrate during wall panel assembly, lifts, roof truss setting/rafter layout, and roof sheathing.
- Checkpoints that affect cost and performance: wall thickness (2x4 vs 2x6), continuous exterior insulation (CI) plan, roof type (trusses vs rafters), and header design. Research and design examples for wood framing calculations are available in the HUD framing design guidance for load and member sizing (CHAPTER 5: Design of Wood Framing - HUD User).
When to hire an engineer
- Hire a structural engineer for unusual load conditions: long clear spans, multi-story shear wall design, heavy roof loads (solar arrays, rooftop decks), or when foundation/floor framing deviates from typical practice. For standard rectangular plans and common spans, following IRC span tables often suffices, but consult a pro if doubt exists.
Framing a House: Planning, Permits, and Site Prep
Checking local codes and permit steps
- Building permit: Submit plans showing foundation, floor framing, wall and roof framing layouts, and energy compliance documentation (code varies by jurisdiction). Expect permit review time from a few days to several months; plan a buffer.
- Structural and energy compliance: Many jurisdictions require structural drawings for framing and verification of compliance with local energy codes like the IECC. Industry data shows wood framing remains dominant in new home construction (NAHB data on wood-framed homes).
- Paperwork: Typical submit items include foundation/floor plan, wall elevations, roof framing plan, and sometimes a framing schedule. Refer to the DIY building permits guide for a step-by-step permit checklist and sample drawings.
Setting grades, batter boards, and layout stakes
- Site prep checks: Confirm soil bearing capacity, drainage paths, and frost depth for foundation choice. Regional frost requirements affect foundation depth and foundation-to-wall interface details.
- Layout tools: Use batter boards and layout string to establish foundation corners and wall plate lines. Transfer building corners precisely from foundation to plate using the anchor bolt layout.
- Inspection buffer: Before framing, schedule foundation inspection and verify anchor bolt spacing. Anchor bolts commonly are set at 6'–8' on center but check local code for required spacing and embedment.
Framing a House: Foundation and Floor Framing Essentials
Choosing a foundation compatible with DIY framing
- Common DIY-friendly foundations:
- Slab-on-grade: Simplest for single-story homes; reduces crawlspace moisture issues but requires careful slab edge insulation for cold climates.
- Crawlspace with stem wall: Easier to run utilities and inspect framing from below; raises floor off damp ground.
- Frost-protected shallow foundation (FPSF): Saves excavation in cold climates when designed correctly.
- Foundation decisions affect wall plate location, sill detail, and anchor bolt layout. See the slab prep guide for practices that make plate layout accurate.
Platform floor framing: sill, rim joist, joist layout
- Anchor bolts and sill: Verify anchor bolts are set in the foundation at the planned plate dimensions; typical spacing is 6'–8' maximum but follow local code. Use sill sealer beneath plate to avoid direct wood-to-masonry contact.
- Joist sizing and spans: Typical spans (approximate, based on species and grade):
- 2x8 floor joists: safe spans up to roughly 12–14 feet depending on load and species
- 2x10 floor joists: safe spans up to roughly 16–18 feet
- 2x12 floor joists: used for longer spans or heavier loads
Refer to IRC or manufacturer span tables for exact numbers based on spacing and species.
- Attachment notes: For cantilevers and ledgers (decks), follow ledger hardware guidelines and install flashing. Check basement vapor barrier tips for moisture control at floor-to-wall transitions.
Foundation comparison table
| Foundation type | Pros | Cons |
|---|---|---|
| Slab-on-grade | Simpler, lower cost, fewer steps | Harder to run under-slab utilities, edge insulation needed in cold climates |
| Crawlspace/stem wall | Easier access for services, raises floor | Requires ventilation or encapsulation to control moisture |
| FPSF | Shallower excavation in cold climates | Design-sensitive, needs correct insulation and detailing |
Pre-framing inspection checklist
- Anchor bolts installed and at correct spacing
- Plate level and dimensions verified
- Foundation walls square and within tolerance
- Vapor barrier and drainage details inspected if applicable
Framing a House: Wall Framing — Step-by-Step Guide
Layout, plates, and stud placement (16" vs 24" o.c.)
- Sequence to build a typical platform-framed wall:
- Mark wall lines on plates: transfer layout from floor to top/bottom plates and mark stud locations and openings.
- Cut and assemble flat: lay out plates on sawhorses, snap chalk lines for stud layout, cut studs to length, and toe-nail or use framing nails/screws to fasten studs to plates.
- Assemble openings: set cripple studs, jack studs, and header assemblies at window and door openings.
- Lift and brace: lift the wall panel, temporarily brace at 45° to keep plumb, and fasten the bottom plate to the subfloor or sill.
- Tie top plates: double top plates are common for tying intersecting walls and transferring loads.
- Stud spacing: 16" o.c. is the standard for most load-bearing walls and supports drywall and sheathing well. 24" o.c. can be used for non-load-bearing walls or with engineered sheathing and headers — consult span tables and sheathing schedules.
Framing openings: windows, doors, and headers
- Header sizing: Header size depends on span and load. For example, a typical 3-foot exterior door opening in a one-story building might use a 2-2x10 or a manufactured LVL sized per span tables. For accurate header sizing, refer to span tables or American Wood Council guidance on member sizing.
- Installation tips: Use sill and jamb details matching the window manufacturer. Install flashing and a continuous nailing flange or trim to create a weather- and air-resistant opening. Keep a plan for interior bucking or framing stops that make window installation and sealing easier.
Sheathing, bracing, and prepping for airtightness
- Sheathing choices affect strength and airtightness. For material selection and airtightness detailing, see the guide to wall sheathing.
- Bracing: Use temporary diagonal bracing before sheathing and permanent bracing per code (let-in bracing or structural sheathing).
- Airtightness tips:
- Seal top and bottom plates at foundation and between plates using caulk or gasket.
- Plan a continuous air barrier layer—either the sheathing taped (OSB/plywood with taped seams) or a separate membrane over sheathing.
- Apply flashing and through-wall seals at openings and transition points to reduce air leakage.
This video explains the fundamentals:
For readers who want to reduce thermal bridging and improve insulation performance, the advanced wall framing tips resource provides methods like single top plates, two-stud corners, and optimized header design.
Framing a House: Roof and Ceiling Framing Basics and Options
Rafters vs. factory trusses — pros and cons
- Factory trusses:
- Pros: Speed of installation, engineered reliability, consistent geometry, typically less onsite cutting.
- Cons: Delivery logistics (truck/truss company), potential need for a crane or lift equipment, limited attic access if using conventional designs.
- Stick-framed rafters:
- Pros: Flexibility for nonstandard roof pitches, easier to create conditioned attic or cathedral spaces, can be built with basic tools.
- Cons: Slower onsite, requires more layout skill, potential for more cutting waste.
Common rafter layout, ridge beams, and collar ties
- Rafter basics: Rafters transfer roof loads to exterior walls. Use common rafter layout with ridge board or ridge beam depending on design. Collar ties (installed in upper third of rafter height) resist rafter spread; rafter ties (ceiling joists) resist outward thrust at the wall plate.
- Ridge beam sizing: A ridge beam that supports rafters over long spans may be required when rafters don't bear at each end. An engineered beam is needed for nonconventional loads or open interior spaces—seek structural guidance.
Ceiling joists and attic ventilation considerations
- Ceiling joists act as ties and support ceiling finishes. Spacing and sizing follow load/span tables like those referenced earlier.
- Ventilation: Provide continuous soffit (intake) and ridge or roof vents (exhaust) to move air through attic spaces, but maintain a continuous thermal and air barrier for conditioned or semi-conditioned attics. Remember: attic ventilation strategy affects insulation approach and air sealing requirements for high-performance builds.
Roof framing comparison (quick list)
- Speed: Trusses win.
- Cost: Trusses often lower labor cost; material cost varies.
- Roof pitch flexibility: Stick framing wins.
- Attic access and passive-house friendliness: Stick framing or designed trusses that allow conditioned attics are better.
Framing a House: Materials, Fasteners, and a Quick Comparison Table
Lumber grades, dimensional choices, and engineered lumber
- Common framing lumber: 2x4 and 2x6 members in #2 SPF (spruce-pine-fir) are typical. 2x6 walls allow more cavity insulation and lower thermal bridging with the same stud spacing.
- Engineered options: LVL (laminated veneer lumber), PSL, and glulam for headers, beams, and long spans. LVLs provide consistent strength for header and beam applications where solid-sawn lumber would be oversized.
- Environmental considerations: Engineered lumber can reduce waste and use lower-grade wood veneers, but production has higher embodied energy for some products. The USDA Forest Products Laboratory has extensive material property data and durability guidance.
OSB vs plywood for sheathing (short comparison table)
- For a detailed comparison, see the in-depth OSB vs plywood comparison.
| Feature | OSB | Plywood |
|---|---|---|
| Strength for nailing | Good, consistent | Slightly better shear strength in some grades |
| Moisture resistance | Susceptible to swelling at edges if exposed | Better edge moisture resistance, generally more durable |
| Cost | Typically lower cost | Typically higher cost |
| Environmental notes | Uses smaller trees, efficient manufacturing | Higher raw material intensity but recyclable in some channels |
Fasteners and hardware
- Nails: 16d common for studs-to-plates, 10d for lighter connections. Use ring-shank nails for decking or areas requiring extra withdrawal resistance.
- Structural screws: Increasingly used for framing connections (deck ledger, hanger screws) and can replace some nail applications where manufacturers specify.
- Hardware: Hurricane ties, rim joist hangers, hold-downs, and anchor bolts improve connection performance. Use galvanized or stainless steel in humid/coastal environments for corrosion resistance.
Reference materials for sizing and spans include the American Wood Council's span guidance (American wood council publications) and material properties from the USDA Forest Products Laboratory.
Framing a House: Tools, Safety, and Efficient DIY Workflow
Essential tools for DIY framing (hand and power tools)
- Must-have tools:
- Circular saw with guide, framing nailer and compressor, speed square, chalk line, tape measure, 4' and 8' levels.
- Ladders, scaffolding or a small man lift for roof work.
- Sawhorses for panel assembly and marking jigs.
- Hammer, nail set, pry bar, and impact driver for screws.
- Tool rental vs purchase:
- Rent high-cost, low-use items (truss lifter, generators, man-lift). Buy commonly used tools like a circular saw and framing nailer if planning multiple projects.
Site safety, fall protection, and crew organization
- Safety basics: Use fall protection (guardrails, harnesses, anchors) per OSHA guidance on fall protection (OSHA fall protection guidance). Require PPE: hard hats, safety glasses, work gloves, and hearing protection for nailers.
- Crew workflow: Pre-build wall panels flat, number each panel, and coordinate lifting roles. A three-person crew can typically raise and brace a 10–12 ft wall panel safely; larger walls or roof lifts need more helpers.
- Sample framing day plan (team of 3–4):
- Person A: Layout and mark plates; Person B: cut studs, assemble panels; Person C: set and brace panels; Person D: fasten plates/top plates and check plumb.
- Time estimates:
- Build a 10-ft wall panel: 20–45 minutes flat assembly depending on openings.
- Lift and temporarily brace: 10–20 minutes with coordinated crew.
- For safety standards and more detailed rules, consult OSHA construction guidelines and local jobsite safety rules.
Framing a House: Common Mistakes, Key Checklist, and The Bottom Line
Top 8 framing mistakes DIYers make
- Skipping temporary bracing during raises.
- Incorrect stud spacing or nailing schedule.
- Undersized or poorly supported headers.
- Poorly marked layout leading to out-of-square walls.
- Incorrect anchor bolt spacing or insufficient embedment.
- Failing to plan for window/door flashing and air-sealing.
- Using untreated lumber where it contacts masonry or damp locations.
- Rushing roof sheathing without blocking and fastener layout.
Framing checklist — before you call the inspector
- Plates square and top/bottom plates aligned with foundation layout.
- Anchor bolts present at required spacing and torque; sill sealer installed.
- Studs placed per layout (16" or 24" o.c.) and double top plate installed where required.
- Temporary bracing in place; walls plumb and taped or sheathed per plan.
- Headers and trimmers installed to span tables or engineer specs.
- Sheathing nailed to schedule and seams taped or sealed per air-barrier plan.
- Roof ties, collar ties/rafter ties installed where specified.
- Fire-blocking installed at required locations and penetrations noted.
The Bottom Line
Framing house DIY work is sensible for simple, rectangular plans with a committed schedule and reliable crew; it saves labor dollars and lets builders control material and insulation choices. For complex roofs, long-span beams, or multi-story shear issues, hire a structural pro. Next steps: order lumber after confirming permit approval and foundation anchor layout, practice one wall panel on sawhorses, then schedule wall lifts and the first framing inspection.
Frequently Asked Questions
Can I frame a whole house by myself?
The short answer is: sometimes. A single experienced builder can handle small structures like tiny houses or sheds, but framing a full-sized house alone is physically demanding and slow. Tasks like lifting full-height wall panels and setting roof trusses usually require two to six people to be safe and efficient.
Plan to subcontract or recruit help for lifts and roof work. For complex roofs, large spans, or projects with tight schedules, hiring a professional crew or subcontractor for those phases is recommended.
Should I use 2x4 or 2x6 walls for energy efficiency?
2x6 walls allow deeper cavity insulation and often reduce thermal bridging by spacing studs farther apart or pairing with continuous exterior insulation. For cold climates, 2x6 plus a layer of continuous insulation delivers better whole-wall R-value than 2x4 alone.
However, 2x6 increases material and potentially foundation costs. Consider advanced framing techniques and exterior continuous insulation to improve performance without moving to 2x6 in some cases.
How do I size headers for doors and windows?
Header sizing depends on span width, number of stories above, and roof loads. Common practice uses LVL or built-up solid wood headers sized per span tables in the IRC or American Wood Council publications. For any header exceeding typical door/window spans or when loads are concentrated, consult an engineer or use manufacturer span tables.
When in doubt, follow published span tables or ask a structural engineer—undersized headers can lead to deflection, cracking, or structural failure over time.
Are trusses cheaper than stick-framing?
Trusses often reduce onsite labor time and can be cost-competitive because they use engineered layouts and factory fabrication. They speed up roof erection but require delivery logistics and sometimes lifting equipment. Stick-framing may cost less for very small or irregular roofs and offers more flexibility for attic use.
Weigh labor availability, roof complexity, and desire for attic/storage space when deciding between trusses and rafters.
What inspections happen during framing?
Typical inspections include foundation and anchor bolts before framing starts, rough framing inspection after walls and roof framing (checking nailing, bracing, headers, plate attachments), and a sheathing/air barrier review in some jurisdictions. Electrical and mechanical rough-ins usually occur after framing but before insulation.
Check local building department requirements early and schedule inspections ahead of work to avoid delays.