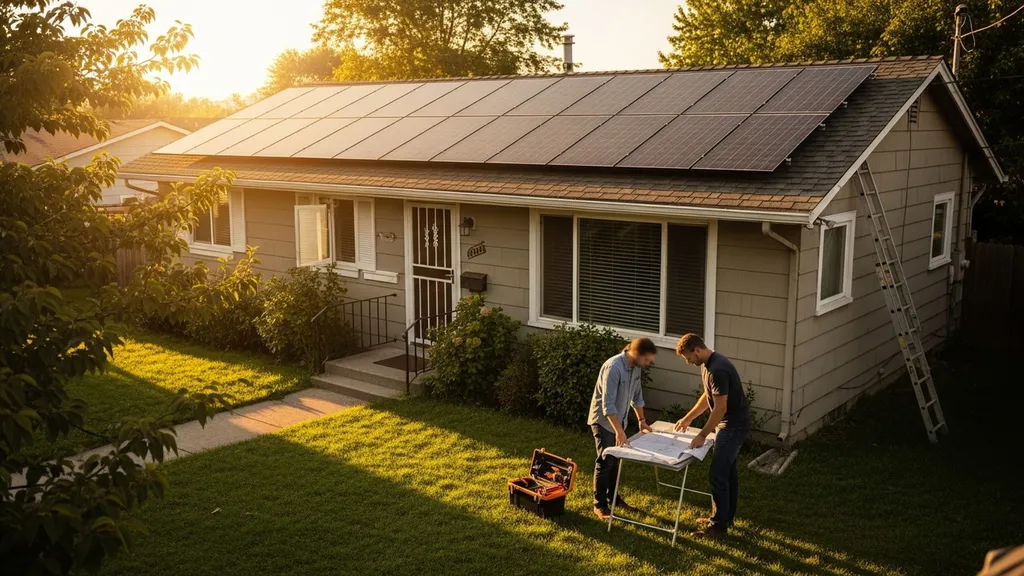
Practical guide to retrofitting solar on an existing home: site assessment, sizing, costs, permits, equipment choices, and DIY vs pro tradeoffs.
Adding Solar to Existing Home: Considerations
Adding solar to an existing home is a practical way to lower electric bills, increase resilience, and reduce carbon emissions. This guide on retrofitting a solar existing home shows how to assess your roof and site, size a system from real utility bills, budget for equipment and permits, and decide which tasks a DIYer can safely handle versus when to hire a pro. Read on for concrete examples, sample math, and links to official tools and studies.
TL;DR:
- Aim for 1,000–1,800 kWh/kW-year local production; a 1.0 kW system typically produces that range depending on location.
- Use 12 months of bills and add 10–20% capacity if planning EV charging or a heat pump—example: 9,600 kWh/year ÷ 1,200 kWh/kW = ~8 kW system.
- Start with efficiency upgrades, verify roof condition, and get three quotes; check federal/state incentives to cut upfront costs.
Related guides: Air sealing existing homes DIY guide, Passive solar shading winter vs summer, and HERS rating home energy score explained.
Is your existing home a good candidate for solar?
Start with three quick checks: roof condition, orientation and pitch, and shading. Roofs older than about 15–20 years often need replacement before panels go on; if shingles or flashings are due within five years, plan to reroof first. South-facing roofs in the northern hemisphere give the highest year-round yield; east- or west-facing roofs still work but may produce 10–30% less energy depending on tilt and local sun angles.
Solar production per installed kilowatt varies widely by climate. Use NREL’s PVWatts or local solar maps to estimate production (typical range ~1,000–1,800 kWh per kW per year across U.S. climates). For a conservative estimate, assume 1,200 kWh/kW-year unless you check PVWatts for your exact location.
Shading is often the biggest hidden problem. Conduct a simple midday and early-afternoon scan of the roof across seasons; long shadows from trees or neighboring structures can cut output dramatically. For a precise analysis, upload a site photo to tools like NREL PVWatts or get a professional shading study. The Department of Energy’s homeowner guide to solar offers a useful overview of these tradeoffs and recommends professional surveys when shading or complex roof geometry exists (https://www.energy.gov/eere/solar/homeowners-guide-solar).
If the roof is unsuitable, consider ground-mounted arrays, carport canopies, or trackers if land is available. Each alternative has different permitting and foundation needs but can achieve higher yield per kW by allowing optimal tilt and orientation.
Structural capacity: check rafter spacing, sheathing condition, and attic framing. Typical residential racking adds roughly 3–5 psf (pounds per square foot); many roofs can handle this, but older or water-damaged sheathing might need reinforcement. Order an engineer report if the home has unusual rafters, prior roof damage, or if you plan heavy ballasted systems. A roofer or installer’s site survey is the best next step when any doubt remains.
How to size a retrofit solar system for an existing home
Sizing begins with accurate energy use. Pull 12 months of utility bills and total the kWh. If bills are inconsistent, install an energy monitor for 2–4 weeks to validate patterns—see the energy monitor setup for calibration tips.
Example calculation:
- Annual use = 9,600 kWh
- Local production estimate = 1,200 kWh/kW-year
- Required system = 9,600 ÷ 1,200 ≈ 8.0 kW
If the goal is partial offset (for example, cover lighting and appliances but not EV charging), a 3–5 kW retrofit can cut bills substantially with fewer panels and lower upfront cost. Example scenarios:
- Modest retrofit: 4 kW × 1,200 kWh/kW = 4,800 kWh/year (~50% of a 9,600 kWh load)
- Full offset with future EV: 9,600 kWh + expected EV load (3,000 kWh/year) = 12,600 kWh → 12,600 ÷ 1,200 ≈ 10.5 kW; add 10–20% margin and plan for ~12 kW
Account for panel degradation (typically 0.5%–1%/year), inverter efficiency (95%–98%), and shading losses; adding a 5–10% design margin is common. If battery backup is planned, include expected round-trip efficiency (typically 85%–95% depending on chemistry and inverter architecture) when determining needed storage capacity.
For future-proofing, add capacity for high-load appliances: a level 2 EV charger can add 1.5–3.5 kW continuous while charging. Heat pumps can add variable loads; estimate annual kWh from manufacturer specs or past winter bills.
Sizing choices affect roof area. Typical modern panels produce 350–420 W each and require about 15–20 sq ft per panel. An 8 kW system using 400 W modules needs ~20 panels, roughly 300–400 sq ft of roof area. For tight roof space, consider higher-efficiency modules; for limited budget, choose more lower-cost panels and less-efficiency tradeoffs.
Comparing system types and equipment for retrofits (panels, inverters, batteries)
Choosing components depends on shading, budget, monitoring needs, and future expansion.
| Component | Pros | Cons | Typical cost range | Typical warranty/lifespan |
|---|---|---|---|---|
| Monocrystalline panels | Higher efficiency (18–22%), smaller footprint | Higher cost per watt | $0.35–$0.80/W module cost (installed varies) | 25-year performance warranty |
| Polycrystalline panels | Lower cost, decent durability | Lower efficiency (~15–17%), larger area | $0.30–$0.60/W module cost | 10–25 year warranty (varies) |
| String inverter | Lower cost, simple | Single-point failure, shading affects whole string | $500–$2,000 | 5–12 years typical |
| Microinverters | Panel-level MPPT, better with shading | Higher upfront cost | $100–$300 per panel extra | 10–25 years on some models |
| Power optimizers | Panel-level optimization with string inverter | Middle ground cost, complexity | $50–$150 per panel | 10–25 years depending on brand |
| LFP battery (LiFePO4) | Long cycle life, safe chemistry, high DoD | Higher upfront cost | $400–$700/kWh installed | 10–15+ years |
| NMC battery | Higher energy density | Shorter cycle life, thermal considerations | $300–$600/kWh | 5–10 years |
| Lead-acid battery | Low upfront cost | Heavy, short cycle life, maintenance | $100–$200/kWh | 2–5 years |
Panel efficiencies generally range from about 17% to 22% for residential modules. Inverters have become more reliable; string inverters are cost-effective when shading is limited, while microinverters or power optimizers are better for complex roofs or partial shading. The SEIA residential consumer guide to solar energy is a solid primer on inverter and financing options (https://seia.org/research-resources/residential-consumer-guide/).
Battery chemistry choice matters: lithium iron phosphate (LFP/LiFePO4) offers long cycle life and safety advantages; nickel manganese cobalt (NMC) has higher energy density but shorter life; lead-acid is cheapest upfront but requires replacement and maintenance. Round-trip efficiency for modern lithium batteries typically reaches 85%–95%.
Architectural choices: hybrid inverters integrate battery charging with PV, simplifying install but may limit flexibility. Alternatively, AC-coupled systems pair a separate battery inverter, which eases retrofits on existing grid-tied systems. See the AC/DC coupling guide for architecture tradeoffs. If off-grid capability is desired, consult the grid vs off-grid comparison to evaluate costs and reliability.
Costs, incentives, and payback for retrofitting solar on an existing house
Installed costs vary by region, installer, and system size. As of recent market averages, residential installed prices commonly range from $2.00–$4.00 per watt before incentives, though larger systems and competitive markets can push that lower. That equates to roughly $6,000–$12,000 for a 3 kW retrofit and $16,000–$40,000 for an 8–10 kW full-offset system. These numbers move over time; always get local quotes.
Federal, state, and local incentives can reduce upfront cost substantially. The federal Investment Tax Credit (ITC) has historically provided a percentage credit for residential solar systems—verify the current rate and eligibility before assuming it in payback math. Other incentives include state tax credits, utility rebates, performance-based incentives, PACE financing, and favorable net metering policies. The expert 5-step guide to navigating home solar installation offers a useful walkthrough of financing and contract comparisons (https://avaenergy.org/insight/how-to-navigate-home-solar-installation-a-5-step-expert-guide/). For local rebates and up-to-date programs, use DSIRE or your state energy office.
Simple payback example (conservative):
- Installed cost (after equipment & labor): $24,000 for 8 kW
- Incentives/ITC (example 26%): −$6,240 → net $17,760
- Annual production: 8 kW × 1,200 kWh/kW = 9,600 kWh
- Retail electricity price: $0.18/kWh → annual savings ≈ $1,728
- Simple payback ≈ $17,760 ÷ $1,728 ≈ 10.3 years
Factor in inverter replacement (~10 years), battery replacement if used, and maintenance. To estimate lifetime cost, calculate Levelized Cost of Energy (LCOE) by spreading upfront and replacement costs over expected lifetime energy production. Rising utility rates shorten payback; running the numbers with several escalation scenarios helps homeowners decide.
Permits, interconnection, and electrical upgrades for retrofits
Solar retrofits trigger local building and electrical permits. Typical steps include permit application (electrical, sometimes structural), a rough inspection during installation, and a final inspection before interconnection approval. Permit fees and timelines vary; plan for 2–6 weeks for permitting and another 2–8 weeks for utility interconnection in many areas.
Interconnection requires paperwork with the local utility, and net metering rules differ by state. Some utilities use full retail net metering, while others use net billing or value-of-solar tariffs; these policies affect payback. Contact the utility early to learn their interconnection checklist and expected timeline.
Older homes may need service panel or meter upgrades. A home with 100A service or a fused panel often struggles with modern loads plus solar and EV charging. Upgrading to 200A service is common and may be required to meet code and to safely install a home with battery backup. The Pew Research Center notes growing homeowner adoption of rooftop solar and the infrastructure implications for communities (https://www.pewresearch.org/short-reads/2022/10/14/home-solar-panel-adoption-continues-to-rise-in-the-u-s/).
Electrical work frequently falls under licensed electrician scope per local code and NEC requirements. DIYers should consult the DIY building permits resource before attempting permit paperwork or electrical work. Remember that utilities usually require their-approved meter socket or anti-islanding protections before permitting live interconnection.
Practical steps for DIY, partial DIY, and working with installers
Video walkthrough: viewers will see common retrofit challenges and safe mounting techniques before attempting DIY tasks.
For a visual demonstration, check out this video on installing solar panels:
Which tasks are realistic for a capable DIYer? Site prep, trimming trees, upgrading attic insulation, and sealing air leaks are low-risk ways to reduce system size and cost. Advanced DIYers may handle racking installation if local code permits, but rooftop electrical connections often require a licensed electrician and signed permit inspections. Research indicates rooftop solar reduces household energy burden, but the best outcomes come from professional-quality electrical work combined with homeowner-led efficiency improvements (https://pmc.ncbi.nlm.nih.gov/articles/PMC11144185/).
Prepare the site to cut costs:
- Fix roof flashings and replace failing shingles before installer arrives.
- Add insulation and air sealing—see the guide to how to seal windows for passive house to reduce heating/cooling loads.
- Trim trees and mark utility easements to avoid delays.
Evaluating Installer Quotes:
- Request at least three proposals with identical scope: panel model, inverter model, racking type, tilt/azimuth, production estimates, and warranties.
- Compare production estimates expressed in kWh/year, not just watts.
- Ask about performance guarantees and who handles permit and interconnection paperwork.
- Verify installer licensing, liability insurance, local references, and Better Business Bureau record.
Contracting tips: get a clear timeline, payment schedule tied to milestones, and a clause for roof warranty issues. If a solar installer offers financing, cross-check APRs and total interest against credit unions or home equity options.
Maintenance, monitoring, and common retrofit issues
Monitoring is the homeowner’s best tool to detect problems. At minimum, use the inverter vendor’s app or a third-party monitor to track daily production against expected values from PVWatts or the installer’s estimate. Key metrics: daily kWh, performance ratio, and inverter fault codes.
Common issues and troubleshooting:
- Inverter faults: often show clear error codes; refer to vendor docs or use inverter troubleshooting tips.
- Loose or corroded DC connections: can cause power loss and should be addressed immediately by a qualified electrician.
- Soiling and shading: panel soiling reduces output unevenly; schedule visual inspections every 6–12 months.
- Roof leaks from poor flashing or penetrations: verify racking flashings are properly installed and sealed.
Inspection cadence: visual check every 6–12 months, inverter log review monthly, and a professional electrical inspection every 3–5 years or per warranty triggers. For battery systems consult the vendor on recommended maintenance; general battery care includes maintaining temperature within rated ranges and avoiding deep, repeated full discharges.
To extend battery life, follow proven practices: set appropriate depth-of-discharge limits, avoid extremes of temperature, and use a charge management system. For detailed battery longevity strategies, see battery lifespan tips.
Key considerations checklist (quick reference)
- Collect 12 months of bills: Total kWh and seasonal patterns for accurate sizing.
- Check roof age and condition: Replace or repair if shingles are older than 15–20 years.
- Perform a shading scan: Midday and afternoon, and consider a professional shading study.
- Run PVWatts estimate: Use NREL for local kWh/kW-year baseline.
- Get three quotes: Ensure apples-to-apples equipment and production comparisons.
- Verify incentives: Confirm federal and state credits before final budgeting.
- Plan for panel layout: Confirm usable roof area and clearances for fire code.
- Inspect service panel: Upgrade to 200A if needed to accommodate future loads.
- Decide on batteries: Match chemistry and capacity to backup needs and budget.
- Prepare site: Trim trees, fix roof flashings, and add insulation where possible.
- Confirm permits and interconnection: Start paperwork with the utility early.
- Set up monitoring: Inverter app or third-party monitor for production tracking.
- Understand warranties: Panels ~25-year performance, inverters 5–12 years, batteries 5–15 years.
- Plan maintenance: Visual checks 6–12 months, professional electrical review per warranty.
The Bottom Line
A solar existing home retrofit delivers real savings when paired with efficiency upgrades and careful site assessment. Start with an energy audit, gather 12 months of bills, and obtain three detailed quotes before committing. Prioritize roof condition and permits to avoid costly rework.
Frequently Asked Questions
Can I install solar panels on an old roof?
Yes, but it depends on roof age and condition. If shingles, flashings, or sheathing are near end of life (commonly 15–20 years for asphalt shingles), replace the roof first to avoid removing panels later. Have a roofer inspect for rot or structural issues and, when in doubt, request an engineer report before installation.
Do I need batteries with a grid-tied retrofit?
No. Grid-tied systems commonly operate without batteries using net metering or net billing. Batteries add resilience for outages but increase upfront cost and complexity. Evaluate backup needs, utility outage frequency, and payback for batteries—many homeowners add storage later once the PV array is in place.
How long before solar pays for itself on an existing home?
Payback varies by system cost, incentives, local electricity rates, and production. A common simple payback range is 7–14 years after incentives. Example: an 8 kW system that nets $17,760 after credits and saves $1,700/year yields roughly a 10–11 year payback. Include inverter and battery replacement costs when modeling lifetime returns.
Will solar panels damage my roof?
Properly installed racking with manufacturer-approved flashings should not damage a roof. Most reputable installers follow roofing best practices and offer workmanship warranties. Damage risk increases with inexperienced installers or missing flashing seals—inspect flashings after install and retain photos for warranty and insurance documentation.
Can I install solar myself and still get permits?
In some jurisdictions, homeowners can perform work and pull permits, but many places require licensed electricians for grid-tied electrical connections. Consult local permitting rules, and use the DIY building permits guide to understand documentation, inspection requirements, and when contractor licensing is mandatory.