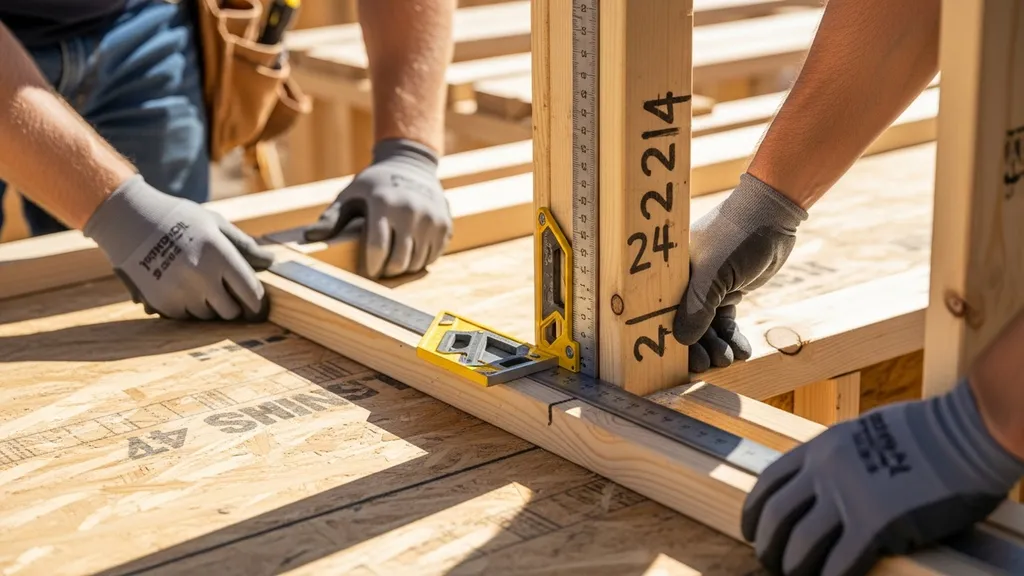
Practical guide to advanced framing techniques focusing on 24-inch OC, structural and thermal trade-offs, step-by-step layout, and DIY best practices.
Advanced Framing Techniques: 24-inch OC and Beyond
Advanced framing techniques can cut lumber use, speed layout, and improve insulation continuity — but they change structural details, sheathing spans, and airtightness needs. This guide on advanced framing techniques, with a focus on 24-inch OC framing, explains when wider stud spacing makes sense, which alternatives (staggered studs, two-stud corners, offset studs) perform better thermally, and how to lay out and build a 24" OC wall step by step for DIY eco homes. Read on for code and structural considerations, thermal trade-offs, and a practical workflow you can follow on a weekend framing run.
TL;DR:
- Use 24-inch OC when pairing with continuous exterior insulation or dense-packed cavities — saves roughly 10–20% of studs and reduces waste.
- Match framing pattern to sheathing spans and code: adjust sheathing thickness or use structural panels and engineered members when spans exceed limits.
- Prototype a short wall, verify plumb/square, and follow airtight detailing (flash openings and seal plate-to-sheathing) before committing to whole-house advanced framing.
Key Decisions: When to Choose Advanced Framing Techniques Including 24-inch OC
Design Drivers for DIY Eco Homes
Advanced framing techniques aim to reduce wood use and increase space for insulation. For DIY eco homes, the main drivers are material cost, thermal performance, and build speed. Choosing advanced framing techniques, like 24-inch OC framing, depends on climate (colder climates need more attention to thermal bridging), the insulation strategy (cavity-only vs continuous exterior insulation), and available skill level on site.
Industry guidance shows advanced framing can cut framing lumber by up to about 20–30% in simple wall layouts when combined with right-sized sheathing and proper detail work; see the APA overview for a broad summary of benefits and trade-offs: Advanced framing - apa – the engineered wood association. A simple decision rule for DIYers: prefer wider stud spacing when you plan to install continuous exterior insulation (CI) or increase cavity insulation depth, and be conservative where shear capacity or many openings are required.
Quick Checklist: Site, Climate, and Skill Level
- Climate: Cold climates — prioritize continuous exterior insulation and consider staggered or offset studs to reduce thermal bridging; mild climates — 24" OC often performs acceptably with standard cavity insulation.
- Insulation strategy: Choose 24" OC only if you will add CI or dense-pack the cavity to maintain R-value and minimize thermal bridging.
- Sheathing and spans: Verify sheathing span ratings and use thicker structural panels if spans increase. Refer to our guide to wall sheathing for material choices that matter with wider spacing.
- Skill and site complexity: For complex rooflines, many openings, or seismic zones, favor conventional framing or consult an engineer.
- Permits: Check local code and permit requirements before changing standard framing practice; see the permits checklist for permit basics.
Make the choice based on how the framing pattern meshes with insulation and sheathing. Advanced framing is a systems decision, not just a stud-spacing change.
What is 24-inch OC Framing? Pros, Cons, and Common Use Cases
Definition and How OC Spacing Works in Practice
"24-inch OC framing" means studs are placed 24 inches on center (OC) along the wall plate. Compare that to the common 16-inch OC pattern: 24" OC uses fewer studs per linear foot, which reduces material and labor. Stud spacing is measured from the centerline of one stud to the centerline of the next; layout starts from a fixed reference like an end plate or corner.
Benefits for Material Use and Labor
- Fewer studs reduces lumber consumption by roughly 10–20% depending on wall layout and number of openings.
- Faster layout once runners and templates are set; fewer studs to cut and install reduces time.
- Fewer thermal bridges if cavity remains filled with insulation of equal depth and CI is used outside sheathing.
Energy Star and DOE materials provide practical advanced framing details and expected savings in framing material: see the Energy Star advanced wall framing PDF for proven approaches and sample yields: ADVANCED wall framing | energy star.
Common Downsides and Performance Pitfalls
- Larger unsupported sheathing spans may require thicker sheathing or more robust panel ratings to meet shear and deflection limits.
- Fewer blocking points for hanging cabinets, interior finishes, and mechanical runs.
- Increased thermal bridging risk if cavity insulation is not upgraded or CI is omitted.
- Potential for reduced stiffness in tall walls or long unsupported spans; structural members and header details must be sized appropriately.
Typical use cases: small to medium-sized dwellings where CI is planned (eco-homes), tiny houses and sheds (with reference to our shed framing guide), and remodels where structural changes are minimal. For full-size homes with many large openings, hybrid approaches are commonly preferable.
Beyond 24-inch OC: Other Advanced Framing Patterns and When to Use Them
Two-stud Corners, Ladder Blocking, and Single-stud Partitions
Two-stud corners and ladder blocking reduce unnecessary studs at corners and intersecting walls while still providing nailing surfaces for drywall and finishes. Single-stud partitions at non-load-bearing intersections reduce material and give room for insulation. These techniques are low-complexity, high-payoff for DIYers and are directly covered in industry handouts such as the Insulation Institute's advanced framing approaches.
Staggered Stud and Offset-stud Walls for Thermal Performance
Staggered-stud and offset-stud walls separate the interior and exterior stud lines so the studs do not create a continuous thermal bridge. Staggered studs place two rows of studs on a wider plate, with sheathing attached to one row. Offset studs use an interior and exterior row connected by clips or a deep plate. These patterns dramatically reduce thermal bridging compared with single-line studs at 24" OC, but they add complexity and demand precise layout and blocking.
For a high-performance, airtight build, consider hybridizing: use staggered studs for exterior walls where insulation is critical and 24" OC for internal partitions.
Integrated Systems: Sips, Advanced Lumber Framing Hybrid Approaches
Structural insulated panels (SIPs) remove many framing trade-offs by combining structure and insulation into panels. SIPs are an alternative to advanced lumber framing for builders seeking high thermal performance with fewer on-site framing steps — see our SIPs guide for a direct comparison. Another hybrid is using 24" OC studs with a layer of CI and selective engineered members (LVLs) at openings and long spans.
The Insulation Institute describes seven practical advanced framing approaches, useful when choosing between staggered studs, two-stud corners, and CI strategies: 7 advanced framing approaches - insulation institute.
Compare options by build complexity, thermal gain, and labor. Staggered or offset studs reduce thermal bridging best but cost more time and may require engineered details.
Structural and Code Considerations for Advanced Framing Techniques
Load Paths, Headers, and Shear Wall Strategy
Advanced framing changes where load is carried through the wall. Ensure every load (roof, floor, wind) has a continuous load path to foundation. Headers over openings must be sized per span and load; in many cases doubled or LVL headers are still required even with 24" OC. Shear resistance is another concern: fewer studs can reduce shear wall frequency. Use sheathing rated for shear, add hold-downs or straps, or design shear walls at regular intervals.
The Department of Energy's advanced framing guidance explains maintaining structural integrity while increasing insulation: Advanced house framing - department of energy. For slab connections and plate anchorage, consult our slab on grade basics.
Span Tables, Sheathing Spans, and Engineered Alternatives
Check the IRC and manufacturer span tables for sheathing (plywood or OSB) and floor/roof members. Wider stud spacing can force a change from 7/16" OSB to 5/8" or structural plywood to meet deflection and lateral-load limits. APA and NAHB documents provide tables and examples: see the NAHB guide for framing patterns and nailing schedules: Advanced framing - national association of home builders.
When longer spans or heavy roof loads exist, use engineered members (LVL, glulam, or I-joists) and add blocking or rim ties. In seismic zones, special detailing and hold-downs are often mandatory — consult seismic design resources such as our seismic design guidance.
Always check with local building officials and obtain approval for non-standard framing patterns; the permits checklist explains typical permit steps.
Thermal Performance and Airtightness: How Framing Affects Energy and Moisture
Thermal Bridging: How Stud Spacing Changes Heat Flow
Thermal bridging occurs where wood or metal studs conduct heat through the wall. Wider stud spacing alone does not eliminate bridging; it reduces the number of bridges per linear foot but each stud still allows heat flow. The effective wall R-value improves most when 24" OC is combined with continuous exterior insulation or dense-packed cavity insulation. Research and handouts from building science programs demonstrate that CI can reduce whole-wall thermal bridging by 20–40% depending on thickness and materials — see the PHRC advanced framing handouts for data and modeling examples: Advanced framing handouts (phrc).
Aligning Framing with Insulation Strategies
- Cavity-only strategy: If you rely only on cavity insulation, consider staggered studs instead of 24" OC to reduce thermal bridging.
- CI + 24" OC: Use 24" OC with a continuous exterior rigid layer (polyiso, mineral wool, or exterior foam) sized to meet climate R-value goals.
- Dense-pack cellulose or mineral wool: Works well in deeper cavities; pay attention to ventilation baffles in raked eaves and wall top plates.
Match vapor control and air barrier location to climate. In cold climates, place the primary air barrier at the exterior sheathing or outside the insulation. For Passive House-level airtightness, follow specialized detailing: see our complete guide to Passive House airtightness.
Air Barrier Location and Common Leakage Paths
Airtightness is as important as insulation. Common leakage paths include top plates, rim joists, window and door rough openings, and electrical penetrations. Our checklist of leak locations is a practical reference: common air leakage points builders miss. Best practice: define one continuous air barrier (sheathing sealed to plates, taped seams, and sealed openings) and ensure the air barrier aligns with the insulation plane.
Small details matter: weatherstrip doors and flash windows correctly. For door sealing tips, see door weatherstripping tips. Continuity of insulation from foundation to roof — for example combining wall CI with exterior roof insulation — reduces condensation risk and simplifies airtightness.
Step-by-step: Laying Out and Building a 24-inch OC Wall (practical DIY Workflow)
Tools, Materials, and Marking Layout
Essential tools:
- Chalk line, speed square, framing square, tape measure, and laser level
- Circular saw, nail gun (or framing hammer), and impact driver
- Framing nails/screws per code and manufacturer
- Blocking material, sheathing panels, and sealant/tape for air barrier
Materials checklist:
- Studs (2x4 or 2x6 depending on cavity depth)
- Double top plate and bottom plate
- Sheathing (OSB or plywood with appropriate span rating)
- Fasteners and connector hardware
Start layout from a consistent corner. Snap a chalk line on the plates and mark 24" OC centers. Count studs rather than relying only on measurement: mark 0", 24", 48" etc., and transfer layout to the floor plate and top plate to keep studs aligned. For openings, plan blocking and jack studs so their centerlines fall on standard layout lines when possible.
For smaller projects, the step-by-step basics in our shed framing guide and the real-world sequence in the framing build update are helpful comparisons.
Cutting and Installing Studs, Plates, and Openings
- Prepare plates: mark every 24" center on both top and bottom plates.
- Cut studs to full-height minus double top plate and bottom plate thickness; use a framing square to mark and cut consistently.
- Install the bottom plate anchored to foundation or floor per code. Snap the top line and transfer marks up to the top plate.
- Set studs on the bottom plate at marks, toe-nail or use nail gun per nailing schedule. Keep studs plumb and align as you go.
- For window and door openings, size headers per span/load and install jack studs at the designated layout lines. When a header spans more than standard tables allow, use LVL or engineered solutions.
Refer to the NAHB advanced framing guide for nailing schedules and header examples: Advanced framing - national association of home builders.
Sheathing, Bracing, and Sequencing Tips
- Use sheathing rated for spans at 24" OC; 7/16" OSB may be marginal in some conditions — review span tables or choose 5/8" or structural plywood where needed. See our discussion on panel choice in the "Material savings" section and the OSB vs plywood comparison.
- Install sheathing horizontally with panel edges supported by studs. Fasten per manufacturer spacing; longer spans often require closer fastener spacing.
- Sequence: frame one wall, shear it with sheathing, then stand it and brace temporarily. This preserves alignment and helps maintain plumb as you assemble adjacent walls.
- Add blocking at interior finishes and for cabinetry. If you anticipate heavy loads on walls, pre-install backing.
Include the YouTube tutorial below to visualize layout and common corrections. This video shows chalk-line layout, stud placement at 24" OC, sheathing attachment, and typical fixes.
This video compares the options to help you decide:
Common mistakes in this phase: miscounting offsets (start counts at the wrong corner), failing to square the plates before raising the wall, and neglecting to account for sheathing panel orientation. Fixes: re-measure diagonals for square, brace temporarily, and correct stud spacing before sheathing.
Material Savings, Cost Trade-offs, and Environmental Impact (comparison Table)
Typical Material and Labor Trade-offs
- Stud savings: 24" OC typically reduces stud count by roughly 10–20% compared with 16" OC depending on wall layout.
- Sheathing: Wider spacing may require thicker or higher-grade sheathing, which offsets some lumber savings.
- Labor: Less nailing and fewer studs speed framing, but layout precision and blocking for finishes take time.
- Hidden costs: Engineered headers, additional fasteners, or CI materials can reduce or eliminate up-front savings if not planned.
See our posts on comparative costs for sheathing choices: plywood vs OSB cost and OSB vs plywood for selecting panels that support wider stud spacing.
Comparison Table: 16" OC vs 24" OC vs Staggered/offset Stud Walls
| Feature | 16" OC | 24" OC | Staggered/Offset Stud |
|---|---|---|---|
| Studs per 8ft wall (approx.) | 6 | 4-5 | 8-10 (two rows) |
| Typical lumber savings | baseline | 10–20% | -10–0% (more lumber) |
| Sheathing span demand | standard | higher — may need thicker panels | similar to 16" on exterior sheathing |
| Thermal bridging | moderate | lower per linear foot | lowest |
| Build complexity | low | low–moderate | higher |
| Best use case | conventional builds | CI or thicker cavity | high-performance walls |
Waste Reduction and Recycling Tips
- Panel layout: plan sheathing layout to minimize offcuts; orient panels to match stud spacing where possible.
- Buy dimensioned lumber in lengths that match wall runs to avoid short offcuts.
- Reuse scrap as blocking or temporary bracing.
- For longer-term sustainability, consider reclaimed lumber for non-structural blocking and trim.
Pair advanced framing with waste reduction strategies in our guide: 10 ways to reduce construction waste. Also review the list of hidden downstream costs to ensure lumber savings don't get offset by extra materials: 10 hidden costs in DIY eco home building.
Common Mistakes, Troubleshooting, and Quality Checks for DIY Self-builders
Layout Errors and How to Catch Them Early
Frequent layout errors include misnumbering plate marks and failing to square corners. Catch these by:
- Measuring diagonal distances for squareness before sheathing.
- Using a laser level to check stud plumb as walls are raised.
- Dry-fitting a short wall section as a prototype to confirm counts and sheathing fit.
Sheathing Failures and Fastening Mistakes
Sheathing failure often results from incorrect panel grade or fastener spacing at wider stud spacing. Fixes:
- Check sheathing span ratings and upgrade thickness if required.
- Follow manufacturer-approved nailing patterns; when in doubt, add an extra row of fasteners along unsheathed edges.
- Patch loosened nails with screws rated for structural sheathing.
When to Call an Engineer or Permit Reviewer
Call a structural engineer if:
- You plan long unsupported spans, tall walls over standard height, or unusual roof loads.
- You need load-bearing changes to existing structure in a remodel.
- Your site is in a high seismic or wind zone and you're deviating from prescriptive code.
If a permit reviewer flags shear wall distribution or header sizing, review plans and submit engineered details. For seismic-specific guidance, consult our seismic design guidance.
The Bottom Line: Choosing the Right Advanced Framing Path for Your Project
Advanced framing techniques like 24-inch OC framing can save material and improve thermal performance when paired with the right insulation and sheathing. For DIY eco builders: check code and sheathing spans first, pair wider spacing with continuous exterior insulation or dense-packed cavities, and prototype a short wall before committing to full-house framing.
Frequently Asked Questions
Is 24" oc structurally acceptable for load-bearing walls?
Yes, 24-inch OC can be structurally acceptable for load-bearing walls provided the sheathing, fastener schedule, and load path meet local code and manufacturer span tables. Many jurisdictions allow 24" OC for standard wall heights if the sheathing panel rating supports the span and headers are sized correctly. Always verify with your local building department or a structural engineer for unusual loads or long spans; the Department of Energy provides practical framing guidance that aligns with code-compliant practice: https://www.energy.gov/energysaver/advanced-house-framing.
Does 24" oc reduce energy use compared with 16" oc?
24-inch OC reduces the number of studs and therefore the number of thermal bridges per linear foot, but energy savings depend heavily on insulation strategy. Paired with continuous exterior insulation or deeper cavity insulation, 24" OC can improve whole-wall R-value and lower heat loss. Without CI or upgraded cavity fill, energy gains are modest. The PHRC handouts include modeling that shows how framing patterns interact with insulation choices: https://www.phrc.psu.edu/assets/docs/Webinars/PHRC-Webinar_Advanced-Framing-Techniques-for-High-Performance-Homes_HANDOUTS.pdf.
Can standard drywall and common sheathing be used with 24" oc?
Yes, standard 1/2" drywall and common sheathing can be used, but sheathing span ratings and fastener spacing should be checked. Exterior sheathing at 24" OC may need thicker panels (for example, using 5/8" or structural plywood instead of 7/16" OSB) depending on wind and seismic loads. For guidance on panel choice and trade-offs between OSB and plywood, see our comparison posts: /blog/OSB-vs-plywood-which-choose-build and /blog/cost-strength-moisture-resistance-plywood-vs-OSB-showdown.
What framing details change for taller or multistory walls?
Taller or multistory walls increase axial loads and buckling risk; they often require closer stud spacing, stronger sheathing, or engineered members. Double top plates remain common, and additional blocking, hold-downs, or straps may be necessary for lateral loads. When planning multistory advanced framing, consult the IRC span tables and consider an engineer to size headers and shear elements correctly. The DOE advanced framing guidance helps show where prescriptive limits apply: https://www.energy.gov/energysaver/advanced-house-framing.
When do I need engineered headers or LVLs?
Use engineered headers or LVLs when spans and loads exceed prescriptive table limits, when bearing conditions are nonstandard, or when you want reduced header depth for window placement. If you’re framing large openings, carrying floor or roof loads over wide spans, or building in a high-wind or seismic area, engineered members provide predictable performance and often save time. If unsure, consult a structural engineer or your permit reviewer.