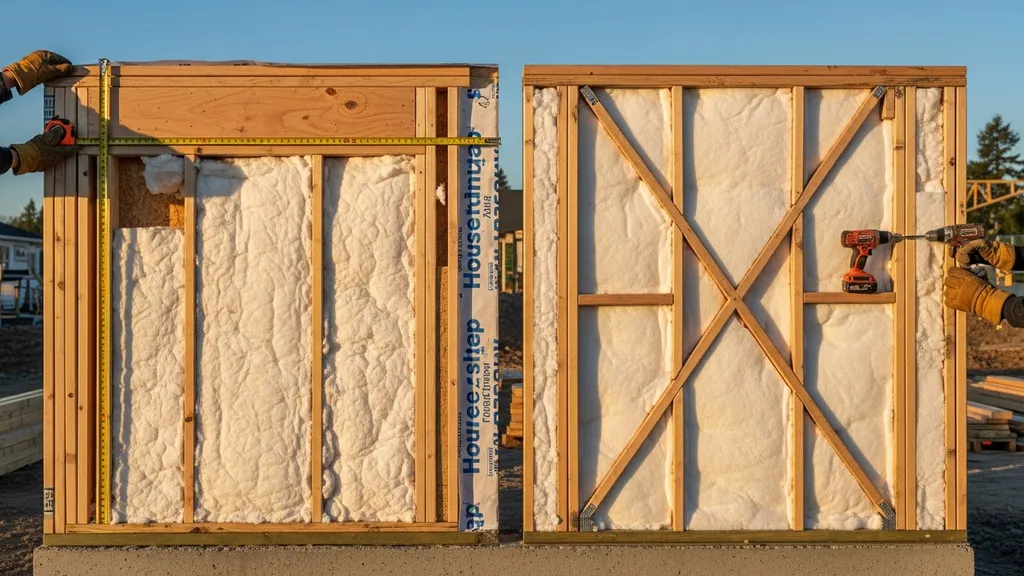
Clear, practical comparison of double stud walls and Larsen truss assemblies for DIY eco builders — performance, cost, moisture risk, and best-use scenarios.
Double Stud Wall vs Larsen Truss: Comparison
A DIY builder planning a cold‑climate, high‑performance envelope often must choose between a double stud wall and a Larsen truss. This article compares double stud wall vs larsen truss assemblies head‑to‑head so you can evaluate thermal performance, thermal bridging, moisture behavior, cost, and buildability for a self‑build or retrofit project. You’ll get clear descriptions of each assembly, practical trade‑offs, scenario recommendations, and links to detailed how‑tos and research.
TL;DR:
- Double stud walls deliver high cavity R-values with low thermal bridging but require 8–16 in. wall depth and careful air‑sealing; best when interior space and simple detailing matter.
- Larsen trusses give similar effective R with less interior thickness by enabling continuous exterior insulation; they demand precise WRB flashing and cavity wind‑wash prevention.
- For Passive House or deep retrofit goals, choose Larsen or framed wall + continuous exterior insulation where wall thickness or window jamb depth are constrained; choose double stud for low‑tech builds with easy framing access.
Double Stud Wall vs Larsen Truss: Quick Overview and Why This Comparison Matters
Purpose of the Comparison
This comparison contrasts two common high‑performance framed wall strategies for low‑energy homes: the double stud wall, which stacks two stud walls separated by a small air gap and thick insulation, and the Larsen truss, which builds an inner structural wall and attaches exterior trusses to create an outer insulation cavity that supports continuous exterior fill. The primary decision drivers are thermal bridging, effective assembly R, hygrothermal behavior (how the wall handles moisture), cost, and on‑site skill needed.
Research and field guides, including work from PHRC at Penn State, examine double wall approaches for increasing R‑values and lowering air permeability; these resources help quantify trade‑offs for real projects (PHRC double stud wall handout).
Who Should Read This (DIY, Self-builders, Tiny-home Builders)
This guide targets budget‑conscious DIY and self‑builders, small contractors doing energy upgrades, tiny‑house builders, and homesteaders weighing wall thickness against build complexity. If you plan a cold‑climate envelope or a Passive House‑style target, these are the two most practical framed options to consider.
Quick TL;DR Verdict
Double stud walls are straightforward to build using readily available framing techniques and dense‑packed insulation but use more lumber and create deep jambs. Larsen trusses achieve the same or better whole‑wall performance with less interior loss of floor area by allowing continuous exterior insulation or deep mineral wool — at the cost of more precise exterior detailing and a higher need for careful WRB/flashing work.
Comparison Table: Double Stud Wall vs Larsen Truss
| Feature | Double stud wall | Larsen truss |
|---|---|---|
| Typical assembly depth | 10–16 in. (deep interior cavity) | 8–12 in. (inner wall + exterior truss depth) |
| Typical insulation types | Dense‑packed cellulose, rockwool, fiberglass batts | Exterior mineral wool, rigid board, deep mineral wool in truss |
| Effective R per inch | Moderate (depends on dense‑pack vs batt) | Higher when combined with continuous exterior insulation |
| Thermal bridging level | Low (staggered framing reduces bridging) | Low when CI installed; studs carry loads but trusses reduce direct paths |
| Airtightness difficulty | Moderate — interior air barrier needed | Higher — WRB and air barrier continuity critical |
| Hygrothermal risk | Moderate — interior vapor control needed | Moderate–high if cavity wind‑wash or poor flashing present |
| Estimated material cost | Low–Medium (more lumber) | Medium–High (specialty trusses, exterior insulation) |
| Labor skill required | Medium (framing, dense‑pack) | Medium–High (exterior detailing, WRB, flashing) |
| Typical uses | New builds, deep retrofits where thickness ok | New builds, retrofits where interior space limited, Passive House |
For background on how a Larsen truss attaches to a sheathed inner wall, see the Sensible House discussion of double/truss walls (Larsen truss framing detail).
Double Stud Wall — Overview, Strengths, Weaknesses, and Best-for Use Cases
What a Double Stud Wall is (basic Build-up)
A double stud wall uses an inner load‑bearing stud wall and an outer non‑loadbearing stud wall separated by a small air gap or left with no sheathing between them. The cavities are packed with insulation (commonly dense‑packed cellulose or rockwool). Interior finish attaches to the inner studs; exterior sheathing and cladding attach to outer studs. This creates a thick, thermally deep assembly that reduces thermal bridging because the two stud frames are offset.
Strengths — Thermal Mass, Low Thermal Bridging, Simple Insulation Options
- Dense‑packed cellulose or rockwool in wide cavities gives high nominal R and better hygrothermal buffering than fiberglass.
- Offset studs reduce continuous wood‑to‑wood thermal bridges across the full wall.
- Build sequence is familiar to framers: layout inner wall, then outer wall, then fill cavities.
- Air barrier strategies often rely on interior gypsum or sheathing plus taped seams; no exotic materials are required.
The BRIKbase technical note provides a clear explanation of double wall assemblies and ties to truss concepts (Double wall framing technique pdf).
Weaknesses — Depth, Air‑sealing Challenges, Framing Lumber and Logistics
- Wall thickness impacts foundation design, window jamb depth, and interior floor area. You may need extended sills or jamb extensions for windows.
- Air‑sealing must address the inner cavity and the wall‑to‑foundation and ceiling interfaces. Relying on standard drywall as the only air barrier increases blower‑door work.
- More framing lumber increases embodied carbon and material cost in some markets.
- Deep cavities complicate electrical and plumbing runs unless planned during framing.
For insulation selection guidance inside double cavities, see our comparison of rockwool and fiberglass for moisture and performance implications: rockwool vs fiberglass. For builders avoiding spray foam, see alternatives and air‑barrier options in safer spray foam alternatives.
Best for — Specific DIY / Project Types
- Rural new builds with ample wall thickness allowance and simple detailing priorities.
- Owners who prefer cellulose or mineral wool for lower embodied carbon compared with closed‑cell spray foam.
- Retrofit projects where interior depth is available and contractors are comfortable with dense‑pack work.
Larsen Truss — Overview, Strengths, Weaknesses, and Best-for Use Cases
What a Larsen Truss is (exterior Truss + Cladding + Interior Wall)
A Larsen truss uses an inner structural wall and attaches exterior trusses or furring that create a continuous cavity on the outside of the sheathing. That outer cavity accepts either deep mineral wool, rigid insulation boards, or a mix of both. The result is a framed wall assembly that supports continuous exterior insulation (CI) without resorting to a full structural insulated panel.
Strengths — Continuous Exterior Insulation, Thermal Bridging Reduction, Thin Overall Wall for Same Effective R
- Continuous exterior insulation across the sheathing reduces thermal bridging at studs much more effectively than cavity‑only insulation.
- For the same whole‑wall effective R, a Larsen truss wall often uses less interior depth than a double stud wall.
- The exterior cavity allows easier installation of exterior mineral wool or rigid boards that perform well in cold climates.
The Building America Solution Center details air and insulation strategies for double/truss walls and is useful for step sequencing and air‑barrier placement (Double‑Wall architectural feature guide).
Weaknesses — Connection Details, Moisture Control, Exterior Sheathing and Flashing Complexity
- Exterior detailing is critical. Wind‑driven rain, poorly flashed penetrations, or a cavity open to splash can lead to wind‑wash or moisture retention.
- WRB continuity, flashing at windows and sills, and drainage/venting strategies must be well executed; poor detailing raises hygrothermal risk.
- Some DIY teams find the exterior work (taping, flashing, and installing CI boards) more demanding than inner framed tasks.
Before watching the step‑by‑step video below, note that the clip demonstrates sequencing, WRB and flashing details, and techniques to avoid wind‑wash in the external cavity. Viewers will learn how to install exterior trusses, sheathing ties, and continuous insulation with proper flashing.
For a visual demonstration, check out this video on enbix wall library - larsen truss retrofit assembly:
For cold‑climate installation tips and detailed wet‑climate considerations, see our cold‑climate larsen guide.
Best for — Specific DIY / Project Types
- New builds where interior floor area is at a premium or where deep jambs would be problematic.
- Projects targeting Passive House performance where continuous exterior insulation delivers predictable whole‑wall U‑values.
- Retrofits where adding exterior insulation is feasible (for example, re‑cladding a house) and contractors can manage exterior WRB and flashing work.
Side-by-side Technical Comparison: Thermal Bridging, Hygrothermal Behavior, and Airtightness
Thermal Bridging — How Each Assembly Performs and Why It Matters
Thermal bridging lowers effective R-value by creating conductive paths through framing. A double stud wall reduces bridging by offsetting studs; the inner studs are not aligned with outer studs, so the path for heat is interrupted. Larsen truss assemblies minimize bridging through the addition of continuous exterior insulation or by using trusses that physically separate the inner structure from the outer thermal layer.
For calculation methods, consult standards and tools used by designers (Passive House planning tools and ASHRAE methods) and the PHRC guidance linked earlier. In practice, adding 1–2 in. of continuous exterior insulation can reduce whole‑wall heat loss noticeably more than adding cavity insulation alone.
Hygrothermal Risks — Condensation, Drying Potential, and WRB Strategy
Drying potential and condensation management differ between systems. Double stud walls with hygroscopic insulation (cellulose, rockwool) can buffer moisture and dry slowly to both interior and exterior if vapor control is managed correctly. Larsen truss assemblies with exterior mineral wool or rigid boards shift drying to the exterior and depend heavily on WRB, flashing, and cavity drainage.
A sensible approach is to:
- Put the air barrier on the interior or sheathing, depending on insulation type.
- Use vapor control layers consistent with local climate (for cold climates, limit vapor‑impermeable layers on the warm side).
- Ensure the WRB is continuous and window flashings are stepped.
For hygrothermal modeling and recommendations, energy agencies and design resources provide methods for assessing condensation risk.
Airtightness and How That Affects Real-world Performance
Airtightness matters for both assemblies. Double stud walls often use taped sheathing or sealed interior gypsum as the primary air barrier. Larsen assemblies require continuity between inner wall air barrier and the exterior WRB where penetrations and wall ties occur. Airtightness changes the required insulation amounts in real projects; a leaky wall will underperform its calculated R regardless of cavity thickness.
For insulation interactions and airtightness tradeoffs, see comparisons of spray foam vs cellulose for airtightness and carbon impact: spray foam vs cellulose.
Insulation Material Interactions for Each System
- Double stud: Dense‑packed cellulose and rockwool are common; they offer good moisture buffering. Fiberglass batts are lower cost but more prone to settling or gaps unless installed carefully.
- Larsen truss: Exterior mineral wool or rigid board (polyiso, XPS) are common. For cold climates, consult guidance for rigid board performance and dew point control (using polyiso in cold climates).
Also consult the U.S. Department of Energy’s homeowner guidance for insulation choices and R‑value basics: DOE guide to home insulation.
Cost, Materials, and Buildability Comparison for DIY Builders
Material Use and Typical Complexity
- Double stud walls use more lumber and more insulation volume; materials are commonly available at local suppliers and costs skew toward lumber and dense‑pack installation.
- Larsen trusses use fewer interior studs but add truss materials or engineered components and continuous exterior insulation materials, which can increase material cost per square foot.
Construction literature notes that double walls are cheaper in materials but may cost more in foundation and window detailing because of depth impacts.
Labor, Tools, and Skills Required
- Double stud: Framing skills, dense‑pack blower for cellulose (if chosen), and basic air‑sealing tools. Moderate skill level.
- Larsen truss: Framing plus exterior insulation installation, taped joints, WRB detailing, and potentially custom truss fabrication. Higher skill for tight flashing and drainage details.
For overall framing estimating and sequences, see the complete framing guide.
Foundation and Window/door Impacts (depth, Jambs)
Deep walls change foundation and slab edge insulation decisions. When wall depth moves beyond standard sill heights, you’ll need extended sill pans, stepped foundations, or jamb extensions. See our guide to insulating slab footings for how wall depth affects foundation choices: insulate slab footings.
Permits, Structural Implications, and Code Touchpoints
Both assemblies are code‑acceptable when framed and detailed to meet structural and fire separation requirements. Larsen trusses that rely on long exterior furring may require engineered connections or U‑values demonstrated for compliance. Where standard prescriptive paths don’t apply, alternative compliance like Appendix U compliance may help.
Hybrid Approaches and Alternatives to the Double Stud vs Larsen Truss Choice
- Staggered stud walls: A single deeper wall with studs offset on a wider plate reduces bridging while using fewer materials than a full double wall.
- Standard framed wall + continuous exterior insulation: Simpler than building a full truss system; exterior CI (mineral wool or rigid) is installed over sheathing to reduce bridging.
- Thin double‑stud hybrids: Reduce thickness by narrowing cavity depths but retain offset framing benefits; lower R per linear inch but easier to fit into foundation constraints.
- Exterior rigid + interior dense‑pack: Combines exterior rigid board (polyiso or mineral wool) with dense‑packed cellulose inside a standard framed wall.
If considering polyiso for exterior use, review the tradeoffs in cold climates in our polyiso guide: polyiso pros and cons.
Decision rules:
- If interior space is limited, prioritize continuous exterior insulation or Larsen truss.
- If exterior detailing capacity is limited, favor a double stud or staggered stud approach.
- If embodied carbon is a priority, favor mineral wool or cellulose over closed‑cell spray foam where feasible.
Which Should You Choose? Scenario-based Recommendations for Diyers
Cold-climate Passive-house Oriented New Build
Choose a Larsen truss or framed wall with continuous exterior insulation to achieve predictable whole‑wall U‑values and reduce thermal bridging without excessive wall depth. Pair with high‑performance windows (see triple‑pane windows) and a controlled ventilation system.
Budget Retrofit on an Existing Framed House
If exterior re‑cladding is possible, add continuous exterior insulation; otherwise, consider a double stud approach only if interior space can be sacrificed. For many retrofits, exterior insulation over new sheathing is the most cost‑effective route.
Tiny House or Narrow-wall Footprint Builds
Larsen truss or rigid CI systems are better where interior floor area matters. Thin exterior insulation plus careful window detailing keeps compact footprints efficient.
Off-grid or Remote Builds with Limited Labor
Double stud walls can be simpler if skilled exterior contractors are not available. Dense‑pack cellulose is often a good match for on‑site labor and fewer specialty materials.
Builders Prioritizing Lowest Embodied Carbon
Double stud walls filled with dense‑packed cellulose or rockwool generally have lower embodied carbon than walls relying on large volumes of closed‑cell spray foam. Consider local lumber sourcing and reclaimed materials when possible. Passive design choices like window placement affect overall material needs — see our passive design guide: glare‑free passive design.
For foundation choices tied to wall depth, review slab considerations: slab on grade guide.
Step-by-step Practical Considerations for Planning and Building Either Assembly
Design and Drawings: Wall Sections and Window Jambs
Produce detailed wall sections showing stud layout, sheathing, WRB, insulation zones, air barrier location, and window jamb depths. Dimension jamb extensions and note sill‑pan and head‑flash detail. A clear CAD or hand‑drawn section prevents costly on‑site changes.
Air and Vapor Control Strategy for Each Assembly
- Double stud: Plan the primary air barrier on the inner sheathing or interior gypsum; tape and seal all penetrations. Use vapor control compatible with insulation choice.
- Larsen: Ensure the inner air barrier transitions to window and roof interfaces; maintain WRB continuity on the exterior and prioritize drainage behind cladding.
See ventilation for passive houses for integrating MVHR with airtight envelopes.
Insulation Selection, Installation Tips, and Common Mistakes
- Dense‑pack cellulose: Target 3.5–4.0 lb/ft3 density, avoid low voids; hire a blower operator with experience. Common mistakes: under‑density and voids near top plates.
- Rockwool: Cuts well for tight fits and resists moisture. Mistakes: gaps at plates and around penetrations.
- Exterior rigid: Stagger joints, tape seams, avoid compressing edges; ensure mechanical fasteners penetrate structural framing.
Sequencing on Site and Quality-control Checks
- Build inner wall, run services, install inner air barrier.
- Sheath and tape inner wall; flash windows to inner WRB.
- Attach Larsen trusses or outer studs; install continuous insulation.
- Clad and flash head/sill details; finish interior.
Quality checks: blower door testing, infrared imaging for void detection, and visual inspection of flashing. For framing accuracy, see advanced wall framing. For moisture‑prone sites, reference damp crawl space fixes.
The Bottom Line
Double stud walls offer a forgiving, low‑tech path to thick, low‑bridging assemblies; Larsen trusses deliver similar whole‑wall performance with less interior thickness by enabling continuous exterior insulation. Choose based on site constraints, available skills for exterior detailing, and which compromises (wall depth vs. exterior detailing) you prefer in your build.
Frequently Asked Questions
Can a DIYer build a Larsen truss wall safely?
Yes, a DIYer can build a Larsen truss wall safely if they follow detailed plans, use proper sheathing and WRB techniques, and either watch step‑by‑step tutorials or consult experienced installers for flashing details. The external cavity and continuous insulation require precise flashing at windows, doors, and roof intersections; mistakes in those areas create the highest risk of water intrusion. Use the cold‑climate larsen guide for climate‑specific tips and consider hiring a contractor for exterior WRB work if you lack confidence.
Which assembly dries better if water intrusion happens?
Drying capacity depends on the assembly and materials. Double stud walls filled with breathable insulation (cellulose or rockwool) can dry to the interior and exterior if the air/vapor control strategy allows it. Larsen truss walls that use exterior mineral wool and a proper WRB tend to dry to the exterior but depend heavily on cavity drainage and the integrity of the WRB. In practice, assemblies with clear drainage planes and breathable materials offer better resilience to occasional water entry.
How do wall thickness and window jamb depth affect cost?
Deeper walls raise costs in two ways: more material for the wall itself and more complex window jambs and foundation interfaces. Deep jambs often require custom sill pans, longer lintel or header assemblies, and extended foundation insulation. Larsen truss or CI strategies can reduce interior depth loss, but they may increase exterior material and labor costs. Review foundation and window details early in design to budget accurately; see our framing and footing guides for interaction effects.
Is one assembly better for embodied carbon or material reuse?
Generally, double stud walls filled with cellulose or rockwool can have lower embodied carbon than assemblies relying on large amounts of closed‑cell spray foam or high volumes of rigid foam. Using local lumber, reclaimed wood, and low‑carbon insulation reduces embodied impact further. For reuse, simpler framed walls are easier to deconstruct and salvage than heavily taped or foam‑filled assemblies.
Can you combine dense-packed cellulose with exterior rigid insulation?
Yes. Combining dense‑packed cellulose in cavity spaces with exterior rigid insulation or mineral wool creates a hybrid that balances interior buffering and exterior thermal continuity. Ensure air barrier and vapor control strategies work together: the outer rigid layer shifts the dew point outward, so follow cold‑climate guidance for selecting rigid type and thickness. See our polyiso guidance for when rigid boards are appropriate in cold climates.
{/ External sources used in article: PHRC double stud PDF: https://www.phrc.psu.edu/assets/docs/Webinars/PHRC-Webinar_Double-Stud-Wall-Framing_HANDOUTS.pdf SensibleHouse Larsen detail: http://www.sensiblehouse.org/con_double_wall.htm BRIKbase double wall PDF: https://www.brikbase.org/sites/default/files/BEST4_10.1%20Kosny.pdf BASC double wall feature: https://basc.pnnl.gov/resource-guides/double-wall-architectural-feature DOE insulation guide: https://www.energy.gov/energysaver/insulation /}