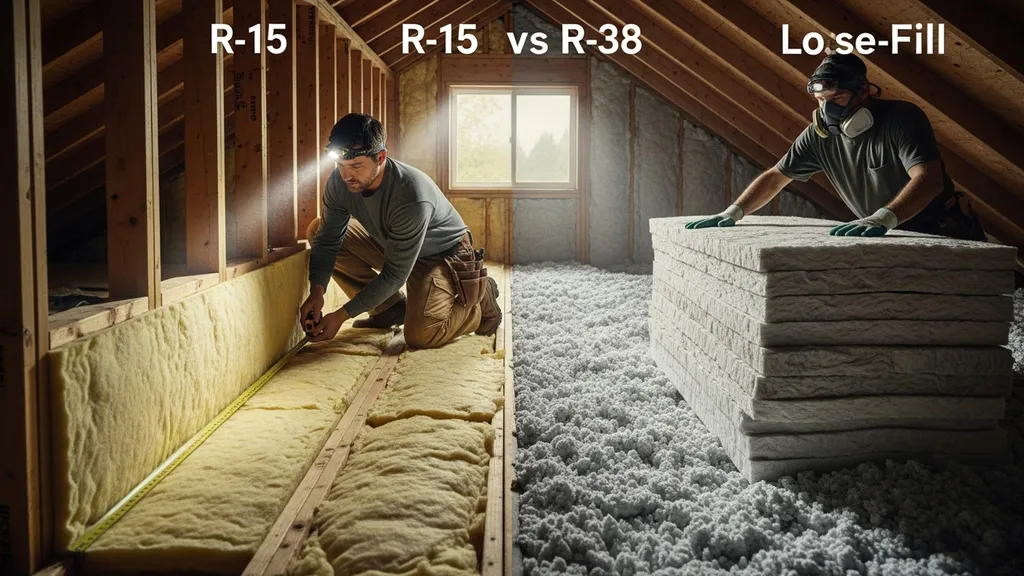
Compare R-15 and R-38 insulation to pick the right R-value for walls, floors, and attics — practical, budget-friendly guidance for DIY builders.
R-15 vs R-38 Insulation: Which Do You Need?
Choosing between R-15 and R-38 insulation starts with two questions: which assemblies are you insulating (walls, floors, attic) and what climate will the building live in? This article compares R-15 and R-38 so DIY builders can pick the right R-value for common projects, understand material and framing limits, and follow practical installation steps.
TL;DR:
- R-15 is the typical performance of a standard 2x4 wall cavity and is usually sufficient for interior partitions, moderate climates, and budget retrofits — prioritize air sealing and consider exterior continuous insulation.
- R-38 is the common target for attic floors in cooler climates (or for cabins/off-grid homes) and is best delivered with deep batts, blown-in cellulose, or layered approaches to reduce heat loss.
- If you must choose: use R-15 for shallow cavities and staged upgrades; choose R-38 for attic and cold-climate heating loads — run the insulation savings calculator to check payback for your climate.
R-15 vs R-38 Insulation: Quick TL;DR and Who This Comparison Helps
Quick Answer (one-paragraph Recommendation)
The short answer in the r15 vs r38 insulation debate: pick R-15 when cavity depth or budget limits you (common in 2x4 walls) and pair it with tight air-sealing or exterior foam to improve overall assembly performance. Choose R-38 for attic floors, cold-climate homes, or when lowering annual heating loads matters most — R-38 in the attic gives larger returns than upping wall R a little. For background on recommended R-values by zone, see the insulation institute's guidance on fiberglass and attic recommendations.
Who Should Read This (diyers, Self-builders, Retrofits)
- Homeowners retrofitting a 2x4-framed house and weighing cost vs performance.
- New-build DIYers choosing between 2x4 and 2x6 wall systems or adding continuous exterior insulation.
- Tiny-home and off-grid planners sizing insulation for small-enclosed spaces and optimizing heater size.
- First-time self-builders deciding whether to prioritize attic depth or wall upgrades during staged builds.
R-15 vs R-38 Insulation: Comparison Table (at-a-glance)
| R-value | Typical material | Typical thickness (in) | Common uses | Relative cost | DIY friendliness | Air-sealing requirement | Moisture risk |
|---|---|---|---|---|---|---|---|
| R-15 | Fiberglass batt, mineral wool batt, cellulose + thin board | 3.5" (2x4 cavity) | Exterior walls (2x4), interior partitions, small retrofit pockets | Lower | Easy–Moderate | High (air sealing needed) | Moderate |
| R-38 | Thick batts, blown-in cellulose/fiberglass, layered batts | 10–13" (attic floor) | Attic floor, cathedral ceilings (vented/unvented layered) | Medium–Higher | Moderate–Difficult | High (attic air barriers) | Higher if ventilation/moisture ignored |
| Rigid foam equiv. | Polyiso, XPS, EPS | 2–4" (board) | Continuous exterior insulation, rim-joists, small retrofits | Higher per inch | Moderate (cutting boards) | High (seal joints) | Low–Moderate (vapor control varies) |
| Spray foam | Closed-cell or open-cell spray | Varies (closed-cell ~2" for R-12) | Rim-joists, hard-to-reach cavities, air barrier + R | Higher | Difficult (pro recommended often) | Lower (foam is air barrier) | Can add moisture control benefits or trap moisture if misused |
Key Takeaways From the Table:
- R-values are for assemblies; continuous exterior insulation (rigid foam) changes effective wall R without deeper cavities.
- For official R-value guidance by assembly and climate, consult Energy Star's recommended home insulation R-values: Insulation r values.
- How to read this table: thicker materials give more R; compare per-inch R (material performance) and the practical thickness your framing allows.
R-15 vs R-38 Insulation: What R-15 Means — Materials, Strengths, and Limits
Overview: Where R-15 Commonly Appears
R-15 is the practical result when using batts in a 2x4 stud wall (nominal cavity depth ~3.5"). Typical materials that deliver around R-15 include fiberglass or mineral wool batts sized for 2x4 cavities, or combinations of thinner rigid foam plus a batt. In retrofit situations with shallow cavities, R-15 is often the highest in-cavity R achievable without changing framing.
Strengths: Cost, Wall-cavity Fit, Retrofit Friendliness
- Fits existing 2x4 walls without reframing, keeping labor and material costs down.
- Fiberglass and mineral wool batts are widely available and simple to install for an experienced DIYer.
- Mineral wool offers better moisture tolerance and fire resistance than some fiberglass options.
- R-15 paired with careful air sealing and a modest layer of exterior continuous insulation can approach the performance of thicker wall assemblies.
Weaknesses: Limited in Cold Climates, Less Attic Performance
- In heating-dominant climates, R-15 walls alone typically underperform compared with walls built with 2x6 cavities or with continuous exterior insulation; heat loss through framing and thermal bridging reduces effective assembly R.
- R-15 in an attic floor is too low; attics usually need R-30 to R-60 depending on climate.
- Without air sealing, insulation performance drops significantly — gaps, compressed batts, and misfitted insulation are common performance killers.
Best For: Specific Use Cases
- Moderate climates: Year-round comfort with limited heating or cooling loads.
- Retrofits: Existing 2x4 walls where removing siding or sheathing is cost-prohibitive.
- Interior partitions and accessory buildings: Spaces that do not require deep thermal resistance.
For a deeper look at how R-15 compares against other wall R-values and options for shallow cavities, see our guides on r-value wall comparisons and wall cavity options.
R-15 vs R-38 Insulation: What R-38 Means — Materials, Strengths, and Limits
Overview: Where R-38 Commonly Appears
R-38 is commonly used for attic floors in cooler zones and is achieved with deep batts, blown-in cellulose or fiberglass, or layered approaches (for example, installing two layers of batts oriented to cover framing gaps). Typical attic depths to reach R-38 range from about 10" to 13" depending on the material and its R-per-inch.
Strengths: Attic Performance, Cold-climate Benefit, Fewer Thermal Bridges
- Adding R-38 at the attic floor substantially reduces heat transfer through the ceiling, which is where many homes lose the most heat.
- Blown-in cellulose and fiberglass conform to irregular joist layouts, improving coverage compared with compressed batts.
- When combined with good air sealing, R-38 reduces annual heating demand and can allow smaller HVAC sizing in cold climates.
Weaknesses: Thicker Assembly, Higher Material/installation Trade-offs
- Depth is the main constraint: cathedral ceilings or shallow attics may not accommodate full R-38 without creative solutions or closed/unvented roof assemblies.
- Installation complexity grows for roofline insulation, eaves, and around penetrations; in such cases, a professional installer may give better results.
- Diminishing returns exist — the incremental energy saved per R increments shrinks after a certain point based on climate and house envelope.
Best For: Specific Use Cases
- Cold-climate attics: Prioritize R-38 or higher at the attic plane before upgrading wall R in many retrofit cases.
- Off-grid cabins: High attic R reduces heating fuel needs and supports passive thermal stability.
- New builds with deep cavities: If framing allows, choose materials and ventilation details that make R-38 achievable without compromising moisture control.
For a technical comparison focused on the high end of attic R-values, see our post on r-30 vs r-38 differences.
R-15 vs R-38 Insulation: Installation and Framing Considerations That Change Your Choice
Cavity Depth and Framing Options
Framing depth sets your in-cavity R ceiling. A 2x4 wall yields roughly 3.5" of cavity; a 2x6 yields 5.5". That extra 2" allows bumping from R-15 to around R-19 or R-21 with the same batt material. If you want higher effective wall R without wider studs, add continuous exterior insulation (rigid foam) outside the sheathing.
Advanced Framing and its Effect on Achievable R
Advanced framing techniques — wider stud spacing (24" o.c.), single top plates, and optimized stud layouts — reduce thermal bridging and can increase effective wall R for the same cavity insulation. Learn practical methods in our advanced framing techniques guide.
Air-sealing, Ventilation, and Moisture Control
Air barriers and sealing are as important as R. Attic air leaks at ceiling penetrations, recessed lights, and chases dump conditioned air into the uninsulated attic. For attic R-38 installs, ensure ceiling air barriers are continuous and that attic ventilation or unvented assemblies are designed per code. For rigid-foam exterior strategies, seal board joints to maintain continuous control layers; review polyiso board comparison for differences among foam boards.
Interplay with HVAC Sizing & Duct Placement
When you increase envelope R (especially moving attic from R-15-level performance to R-38), heating and cooling loads shrink. That affects HVAC sizing and duct runs. If ducts run through unconditioned spaces, insulating ducts and moving them into conditioned space will often repay faster than small jumps in wall R. See our mini split installation tips for guidance on right-sizing in tighter envelopes and the impact of improved insulation on system selection.
R-15 vs R-38 Insulation: Cost, Materials, and Environmental Trade-offs
Relative Material and Labor Trade-offs (no Dollar Figures)
- Fiberglass batts: Lower material cost per bag and easy DIY install for simple cavities; performance falls if compressed.
- Cellulose (blown): Moderate material cost, excellent fill for attics and irregular cavities, useful recycled content.
- Mineral wool: Slightly higher cost per inch, better moisture resilience and acoustic performance.
- Rigid foam: Higher cost per inch but effective when installed continuously to cut thermal bridging.
- Spray foam: Highest cost and complexity; offers air-sealing plus R in one step, but usually needs a pro for large jobs.
Embodied Carbon and Recycled-content Considerations
Cellulose, often made from recycled paper, typically has lower embodied carbon than petroleum-based foams. Mineral wool varies by manufacturer but can include recycled slag. Foam boards and closed-cell spray foams have higher embodied impacts and sometimes use blowing agents with global warming potential; compare life-cycle details when choosing materials. For a direct material comparison, see our posts on cellulose vs fiberglass and spray foam vs cellulose.
Material Durability, Pests, and Moisture Risks
- Fiberglass resists rot but can sag if not supported correctly.
- Cellulose is dense and resists airflow but requires a moisture-safe assembly.
- Mineral wool resists pests and mold better than cellulose in moist conditions.
- Rigid foam at the exterior reduces thermal bridging and protects wood sheathing from temperature swings, but joints must be sealed to avoid water infiltration.
How to Prioritize Cost vs Carbon vs Performance
Decide your priorities up-front. If embodied carbon is the main concern, select high-recycled-content cellulose or mineral wool and aim for higher installed R in the attic first. If airtightness and long-term performance are primary, consider targeted spray foam at rim-joists and continuous foam on exterior walls and pair with blown-in attic insulation. For natural alternatives, review cork insulation tips.
R-15 vs R-38 Insulation: Which Should You Choose? Scenario-based Recommendations
Below are practical, scenario-based picks that reflect common DIY and self-build situations. Use the insulation savings calculator for climate-specific payback and the cold-climate insulation guide for off-grid builds.
Cold-climate (heating-dominant) Scenarios
- Existing 2x4 walls: Prioritize attic R-38, seal air leaks, then add continuous exterior foam on the walls when budget allows. Reason: attic heat loss dominates and is easier to fix to R-38.
- New build: Use 2x6 walls plus exterior continuous insulation to reach a higher overall wall R while keeping thermal bridging low.
Mixed Climates
- Attic: R-38 remains a strong choice for annual comfort and lower HVAC runtime.
- Walls: R-15 in 2x4 can be acceptable if paired with good air sealing and selective exterior foam or storm windows.
Hot-humid Climates
- Focus on air sealing and vapor control. R-38 in attics helps reduce cooling loads, but attention to ventilation, radiant barriers, and humidity control matter more than bumping wall R by a few points.
Budget-first Retrofits and Staged Upgrades
- Stage 1: Seal attic air leaks and add blown-in insulation to reach R-38 in the attic.
- Stage 2: Upgrade rim-joists with spray foam or rigid foam, then assess wall exterior foam or siding retrofit later.
New Builds and Net-zero Targets
- Combine deep cavity insulation (2x6 or advanced framing) with continuous exterior insulation and high-performance windows. R-38 at the attic plus R-20+ walls (effective) forms a solid base for near net-zero targets.
- For off-grid or tiny homes, prioritize attic and floor insulation to reduce heating spikes.
For a visual demonstration, check out this video on insulation installation - r-value in walls, attic, and:
When to hire a pro: large spray-foam installs, complicated rooflines, and any insulation work affecting structural sheathing or building codes.
R-15 vs R-38 Insulation: DIY Step-by-step for Common Projects
Upgrading an Attic to R-38 — Checklist and Safety Notes
- Measure existing insulation depth and type.
- Seal air leaks at top plates, can lights, chimneys, and attic access.
- Ensure proper ventilation: baffles at eaves and continuous ridge/bath vents where required.
- Add blown-in cellulose or fiberglass or lay uncompressed batt layers to reach R-38.
- Inspect for moisture sources (roof leaks, plumbing vents) before closing up.
Safety notes: Use a rated respirator, eye protection, gloves, and knee pads. Work with a helper for large blown-in equipment rental tasks.
Working Within 2x4 Walls (maximizing R-15) — Practical Tips
- Install full-depth unfaced batts cut to fit; avoid compressing batts around wiring and boxes.
- Add airtightness: gasket electrical boxes, seal top plates, and chase cavities to prevent convective loops.
- Consider a thin continuous exterior foam (1"–2") to improve effective wall R without changing studs.
Adding Exterior Continuous Insulation on a Tight Budget
- Use 1"–2" EPS or polyiso boards and stagger seams. Tape joints and use furring strips for cladding attachment.
- Prioritize critical elevations (north or windward sides) first if budget is constrained.
- Flash transitions and window openings carefully to avoid water intrusion.
Tools, PPE, and Quality-check List
- Tools: tape measure, utility knife, insulation supports, blower machine (rental) for loose-fill.
- PPE: NIOSH-rated respirator (P100 for cellulose dust), safety glasses, gloves, coveralls.
- Quality check: Visual coverage (no gaps), correct depth measurement, sealed top plate areas, and ventilation paths intact.
For attic materials and detailed product choices, see our best attic insulation guide. For small structures, the shed insulation calculator and insulate a shed floor tutorial are useful.
The Bottom Line
R-15 suits shallow cavities and budget retrofits when paired with effective air sealing or a layer of continuous insulation; R-38 is the practical target for attic floors and cold-climate heating reduction. Use the insulation savings calculator and local code guidance to prioritize attic R-38 or wall upgrades based on your climate and budget.
Frequently Asked Questions
How do I know if my attic already has R-38?
Measure the thickness and identify the material. Loose-fill cellulose or fiberglass typically requires around 10–13 inches to reach R-38 depending on material density; batt insulation may need similar thickness in layered form. Compare your measured depth to manufacturer R-per-inch figures, and check attic labels or prior work orders if available. For recommended R-values by climate and assembly, consult the [Energy Star recommended insulation R-values](https://www.energystar.gov/saveathome/seal_insulate/identify-problems-you-want-fix/diy-checks-inspections/insulation-r-values).
Can I stack R-15 to get R-38?
Stacking layers is common in attics — for example, an R-19 layer across joists plus another R-19 perpendicular can approach R-38 if installed uncompressed. In walls, stacking batts in a 2x4 cavity is impractical; walls need continuous R strategies or deeper framing to increase R. When layering, ensure layers are unfaced where required and do not block ventilation paths. The Insulation Institute provides practical recommendations for batts and loose-fill layering: [Uploads](https://insulationinstitute.org/wp-content/uploads/2016/01/BI473.pdf).
Is R-15 bad for cold climates?
R-15 in walls is not ideal for cold climates if used alone; heat loss through studs and low overall R can increase heating loads. That said, R-15 with excellent air sealing and added exterior continuous insulation can be acceptable for staged retrofits. Prioritize attic upgrades to R-38 in cold regions first, then improve wall assemblies as budget permits. See the [Department of Energy](https://www.energy.gov/energysaver/insulation)'s insulation overview for climate-based guidance: [Insulation](https://www.energy.gov/energysaver/insulation).
Will spray foam to reach R-38 cause moisture issues?
Spray foam provides both R and an air barrier; closed-cell foam can act as a vapor retarder. If applied incorrectly, foam can trap moisture in assemblies that require drying to the exterior. Design choices must match climate and wall assembly — for example, in cold climates, avoid creating a double vapor barrier without a drying path. For a balanced view on performance and trade-offs between spray foam and blown-in options, see our comparison on spray foam vs cellulose.
How much energy will I save by moving from R-15 to R-38?
Energy savings depend heavily on climate, existing envelope performance, and HVAC efficiency. There is no single percentage that applies everywhere. Use the insulation savings calculator to estimate energy reduction and payback for your specific location. For general planning, the U.S. Department of Energy explains that insulation needs and expected savings vary by climate zone and system: [Insulation](https://www.energy.gov/energysaver/insulation).