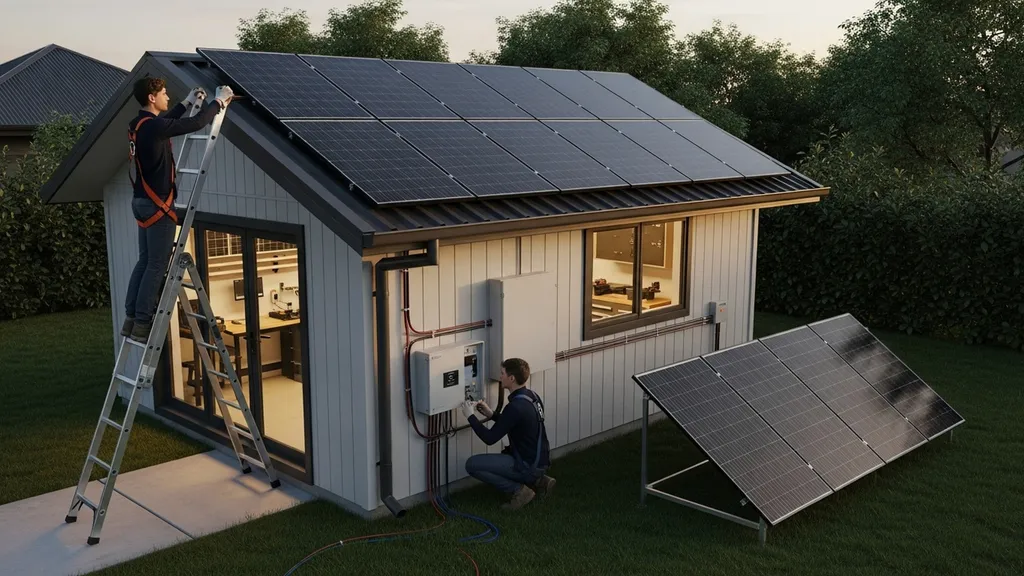
Step-by-step sizing guide for a 2kW solar system for workshop use — loads, panel count, batteries, inverter choice, costs and DIY tips.
2KW Solar System for Workshop: Complete Sizing Guide
A 2kw solar system for workshop use is a compact, budget-friendly array that can power lights, chargers, small hand tools and run intermittent motor loads for a few hours each day. This guide shows how to estimate your workshop’s kWh needs, convert that into panel count and battery capacity, pick an inverter that handles motor surge, and plan a practical install — with example builds and cost ranges. Read on to learn whether 2 kW will meet your needs, how season and shading change production, and what components you’ll actually buy.
TL;DR:
- A 2 kW array typically produces about 3–10 kWh per day depending on location; expect 5–7 kWh/day in many mid-latitude sites.
- For workshops, size the inverter for peak motor start-up (recommend 2.5–3 kW inverter) and add 6–12 kWh usable battery if you need one for overnight or outage backup.
- Start by measuring loads with a plug-in meter, model site-specific yield with a solar calculator, and reduce loads (LEDs, VFDs, scheduling) before upsizing panels or batteries.
Quick Sizing Checklist for a 2KW Solar System for Workshop
One-page Checklist
- Estimate daily energy: Measure tools with a watt meter or list typical runtime to get daily kWh.
- Check peak demand: Record highest simultaneous loads (table saw + compressor start) to size inverter.
- Panel count: 2 kW ≈ 8 × 250 W panels or 6 × 335 W panels (module wattage varies).
- Inverter: Choose continuous rating ≥ peak running load and surge capacity for motors — plan 2.5–3 kW for headroom.
- Battery: Decide on usable kWh (1 day autonomy = 6–12 kWh typical). Convert to Ah at chosen voltage.
- Wiring & safety: Use proper fusing, grounding, combiner, and rapid shutdown as required by code.
- Model production: Run a site-specific estimate via the solar sizing tool or a PVWatts-style calculator.
- Permits: Check local interconnection and inspection rules before install.
Industry benchmarks and cost studies help set expectations; the Department of Energy's solar PV cost benchmarks provide national-level context for equipment and BOS cost ranges.
When 2 Kw is a Good Fit (and When It’s Not)
- A 2 kW array is a good fit for a hobby workshop, lighting, battery charging, and occasional larger-tool use during sun hours. Expect partial daytime independence.
- It’s not ideal if your shop runs multiple motorized tools simultaneously for long periods (more than 4–6 hours/day); in that case consider 3–6 kW or a dedicated generator for surge-heavy work.
- If you expect daily energy needs above ~12 kWh, scaling beyond 2 kW is generally more practical than very large battery banks for routine loads.
How to Estimate Workshop Energy Use (load Analysis)
Common Workshop Loads and Typical Wattages
- LED task lighting: 10–100 W per fixture depending on size.
- Bench grinder: 600–1,200 W running.
- Table saw (1.5–3 HP): 1,100–2,250 W running; start-up surge 2–5×.
- Air compressor (small): 500–1,500 W running; large compressors much higher and cycle-based.
- Cordless tool chargers: 20–150 W while charging.
- Router or benchtop electronics: 50–300 W.
- Laptop / bench tools: 20–100 W.
These are nominal running watts. Motors create surge currents at start that matter for inverter selection.
Building a Simple Daily Load Profile
- List each device, its running wattage and estimated hours per day.
- Multiply watts × hours and divide by 1,000 to get kWh.
- Sum items for daily kWh.
Example: hobbyist lighting (0.6 kWh) + cordless charger (0.2 kWh) + sander 30 min (0.4 kWh) = 1.2 kWh/day typical. Use a plug-in watt meter for more accurate readings.
Example Scenarios (hobby vs Small Business)
- Light hobbyist shop: 2–4 kWh/day. Mostly lighting, occasional tool use, battery chargers. A 2 kW array can supply most daytime needs; small 2–4 kWh battery adds useful backup.
- Light production shop: 8–20 kWh/day. Regular table saw, router, compressor use. A 2 kW array offsets daytime grid draw but won’t fully power extended tool runtime without large batteries or load management.
Survey data shows average residential systems are larger than 2 kW, but for dedicated workshop sizing the key is matching load profile, not matching home averages — see industry adoption trends in the SolarReviews 2025 industry survey for context on system sizes and household usage.
For cross-reference on a smaller baseline, see our 1kW workshop guide and consider how doubling array size affects daytime runtime.
What a 2 Kw PV Array Actually Produces: Expected Output and Factors
Annual and Seasonal Energy Estimates
A 2 kW array’s daily output varies widely with location and season. Typical ranges:
| Climate band | Estimated daily kWh (typical) | Notes |
|---|---|---|
| Sunny (southern, low latitude) | 8–10 kWh/day | Strong year-round sun, longer summer days |
| Moderate (mid-latitude) | 5–7 kWh/day | Seasonal swing: summer higher, winter lower |
| Cloudy/northern | 3–4 kWh/day | Overcast reduces peak output and daily totals |
These ranges align with model outputs in techno-economic studies; for region-specific results consult a solar resource tool such as NREL PVWatts or similar models and review supply-chain and cost context in analyses like the NLR solar-storage review at NLR's solar and storage analysis.
Site Factors: Orientation, Tilt and Shading
- Orientation: South-facing (in the Northern Hemisphere) gives best annual yield; east/west reduces peak and total output.
- Tilt: Use latitude ±10° as a starting point for fixed-tilt; steeper tilt favors winter production.
- Shading: Even small shade on part of the array can reduce output disproportionately, particularly with string inverters. Microinverters or optimizers mitigate shading losses.
Temperature and Local Climate Effects
Higher temperatures reduce panel voltage and power output; panels have a temperature coefficient (e.g., −0.3%/°C). For hot climates expect modest derating compared with STC ratings — see our article on hot climate panel performance for detailed examples.
Component Sizing: Panels, Inverter, Charge Controller and Battery Options
Panel Count and Wattage Choices
Common 2 kW configurations:
| Option | Panel count | Total nominal kW |
|---|---|---|
| 250 W modules | 8 × 250 W | 2.00 kW |
| 335 W modules | 6 × 335 W | 2.01 kW |
| 400 W modules | 5 × 400 W | 2.00 kW |
Higher-watt panels reduce racking and wiring runs but may cost more per watt. Choose panels that fit your roof or ground rack and match string voltage to the inverter’s input range.
Inverter Sizing and Types (string vs Microinverter vs Hybrid)
- String inverter: Cost-effective for unshaded arrays. For many workshops a 2.5–3 kW inverter gives continuous headroom and manages motor surges better.
- Microinverters: Good for partially shaded roofs or odd orientations; allow panel-level monitoring and less mismatch loss.
- Hybrid inverter: Combines PV inverter and battery charger and handles backup/ATS functions — useful when batteries are part of the plan.
For motor loads, pick an inverter with sufficient surge capability (2–5× continuous rating for a few seconds). For workshops that frequently start motors, a larger inverter prevents nuisance trips.
See industry-scale data on system sizing and costs from SEIA at SEIA's solar and storage research data.
Battery Capacity: When and How Much to Add
Decide battery sizing from desired usable kWh:
- Example calculation: Daily load 8 kWh.
- Lead-acid (50% DoD) → Required battery capacity = 8 kWh / 0.5 = 16 kWh nominal.
- At 24 V: 16,000 Wh / 24 V ≈ 667 Ah.
- Lithium (80% DoD) → Required capacity = 8 kWh / 0.8 = 10 kWh nominal.
- At 48 V: 10,000 Wh / 48 V ≈ 208 Ah.
For light workshop backup, 6–10 kWh usable often covers lighting, chargers, and short tool runs. For full-day independence consider 12+ kWh usable. Choose voltage (12/24/48 V) to match inverter/charger; 48 V systems are more efficient for larger banks and lower current.
For battery integration method pros/cons, see our AC vs DC coupling guide.
Off-grid, Grid-tied and Hybrid Setups for a Workshop — Tradeoffs and Permits
Pros and Cons of Each System Type
- Grid-tied (no batteries): Lowest cost per kW, simpler permitting. Works for daytime offset but offers no outage backup.
- Grid-tied with backup subpanel/hybrid inverter: Adds battery backup for critical circuits; higher cost but keeps tools running during outages.
- Off-grid: Full independence — requires larger array and battery bank. More complex and often more expensive per kWh.
For workshops that need consistent runtime for power tools, a hybrid system often balances cost and reliability.
Permitting, Inspections and Interconnection Basics
Most jurisdictions require electrical permits, inspections, and a utility interconnection agreement for grid-tied systems. Talk to your AHJ or utility early. For design guidance and safety standards consult national standards and local code references; NASA-like power subsystem analyses are useful for understanding reliability principles in complex systems (NASA power systems overview).
See our hybrid wiring guide for detailed wiring and transfer switch options, and read the utility's interconnection requirements before purchasing equipment.
Backup Strategies and Automatic Transfer
Automatic transfer switches (ATS) or inverter built-in transfer features can switch essential circuits to battery backup during outages. Plan separate circuits for critical loads (lights, chargers, a dedicated outlet) to maximize limited battery runtime rather than attempting to back up the whole workshop panel.
For larger off-grid comparisons, see our off-grid 3 kW example to understand scaling implications.
Wiring, Mounting and Installation Basics (DIY-friendly Guidance)
Simplified Wiring Diagram and Key Safety Points
Typical flow: PV array → DC combiner/fuse → inverter/charger (or charge controller) → AC distribution panel → loads. If batteries are present, they connect to the inverter/charger with correctly sized DC cabling and fusing.
Key safety points:
- Use appropriately sized conductors and overcurrent protection at the array and battery.
- Install grounding and rapid shutdown per code.
- Label equipment and circuits clearly for inspectors and emergency responders.
- Avoid long DC runs; place batteries and inverter close to minimize losses.
For a practical, step-level wiring walkthrough see the panel-to-inverter guide and our step-by-step wiring article. After commissioning, consult solar troubleshooting for common faults and diagnostics.
Mounting and Roof/ground Rack Considerations
- Roof mount: Check roof condition, load-bearing capacity, and membrane warranties. Use manufacturer-approved flashing and lag placements.
- Ground rack: Easier access and cooling; requires a secure foundation and theft/weather protection.
- Tilt and spacing: Allow enough airflow behind panels to limit heat and maintain output.
Avoid shading from vents or nearby trees; even partial shading can reduce yield if panels share strings.
Common Pitfalls to Avoid
- Undersizing inverter for motor surges — will trip under load.
- Skipping permits — may block interconnection and insurance claims.
- Long runs of undersized DC wiring — leads to voltage drop and heat.
- Not planning for expansion — leave conduit and space in enclosures for future batteries.
Before following DIY wiring steps, determine which parts you can safely do (racking, mounting, conduit) and which require a licensed electrician (final AC connections, meter/tie-in).
For a visual demonstration, check out this video on dub-eng: how to install solar panels on garden:
The video above shows a practical walk-through of mounting panels, combiner wiring and initial commissioning — useful for visual learners before attempting an install.
Cost Estimate, Incentives and Simple ROI for a 2 Kw Workshop System
Equipment Cost Breakdown (panels, Inverter, Batteries, Mounting)
Sample cost ranges (equipment only, 2025-2026 market proxies):
| Item | Low | Mid | High |
|---|---|---|---|
| PV panels (2 kW) | $400 | $800 | $1,200 |
| Inverter (2.5–3 kW) | $500 | $900 | $1,500 |
| Batteries (6–12 kWh usable) | $800 | $3,000 | $6,000 |
| Racking & BOS | $300 | $700 | $1,200 |
| Balance (wiring, permits) | $200 | $800 | $1,500 |
Total installed DIY-friendly (grid-tied, no batteries): $1,400–$4,000. With batteries: plan $2,500–$10,000 depending on chemistry and capacity. For national cost context see the Department of Energy's PV cost benchmarks.
Typical Installation or DIY Savings Estimate
Hiring an installer adds labor and warranty costs; DIY can save 20–40% on labor but requires competency and time. Payback depends on local electricity rates and whether net-metering is available. For a simple ROI: if a 2 kW system produces 6 kWh/day (≈2,190 kWh/year) and you pay $0.15/kWh, annual value ≈ $328 — payback on a $3,000 system would be roughly 9 years ignoring incentives.
Incentives, Tax Credits and Local Rebates
The federal solar investment tax credit (ITC) historically offsets a portion of installed cost for qualifying systems; local rebates and utility incentives vary. Check national and state resources such as the Department of Energy and local incentive databases for current programs. The Department of Energy's benchmarks are a useful starting point for national trends.
Reduce Your Workshop Loads Before You Size the System (efficiency Hacks)
Low-energy Lighting and Tool Scheduling
- Replace legacy lighting with LED task fixtures to cut lighting load by 70–80%.
- Shift heavy runs (compressor top-ups, battery equalization) to midday to use direct solar.
See our smart lighting guide for fixture and control recommendations.
Compressor and Motor Management
- Use a larger receiver tank so the pump runs less frequently.
- Add soft-starts or variable-frequency drives (VFDs) to reduce start-up surge and lower required inverter surge rating.
- Consolidate air use and seal leaks.
Battery-friendly Tool Choices and Power Management
- Use battery-powered hand tools and charge during the day.
- Install load-shedding logic in hybrid inverters to prioritize critical circuits when batteries are low.
Efficiency measures lower upfront costs by reducing required battery size and inverter capacity — that can shorten payback.
Sample Parts List and Two Example System Builds (comparison Table)
Hobbyist 2 Kw Off-grid-ready Build
- Panels: 8 × 250 W (roof mount)
- Inverter/charger: 3 kW hybrid inverter (supports 48 V battery)
- Battery: 10 kWh usable lithium (≈12.5 kWh nominal at 80% DoD)
- Charge controller: MPPT integrated or separate sized to array (~60–80 A at 48 V)
- Mounting: simple pitched roof racking
- Estimated cost: $4,000–$7,000
Light-production 2 Kw Grid-tied + Battery Backup Build
- Panels: 6 × 335 W (roof or ground)
- Inverter: 3 kW hybrid inverter with ATS/critical-load panel
- Battery: 6 kWh usable lithium for backup
- Mounting: ground rack or reinforced roof mount
- Estimated cost: $3,500–$8,000
| Build | Panels (assumption) | Inverter type | Battery usable | Expected daily kWh | Estimated cost |
|---|---|---|---|---|---|
| Hobbyist off-grid-ready | 8×250 W | 3 kW hybrid | 10 kWh | 5–8 kWh | $4k–$7k |
| Light-production grid-tied + backup | 6×335 W | 3 kW hybrid | 6 kWh | 5–7 kWh | $3.5k–$8k |
Shopping checklist:
- PV modules and racking, inverter/charger, batteries, combiner/MPPTs, breakers/fuses, conduit, AC subpanel or ATS, monitoring device.
- For buying guidance, see panel selection and our hybrid setup example.
Commissioning Tips
- Test under sun, verify open-circuit and operating voltages, check inverter logs, and observe battery charging behavior for a few days before relying on backup. Use the manufacturer’s commissioning process for warranty and safety.
The Bottom Line
A 2 kW solar system for workshop use is a practical, budget-conscious option for hobbyists and small shops that want daytime independence and lower operating costs. Start by measuring your loads, model site production with the solar sizing tool, reduce loads where possible, then size panels, inverter and batteries to match actual energy and peak-demand needs.
Frequently Asked Questions
Can a 2 kW system run a table saw and air compressor?
The short answer: sometimes. A 2 kW array can support short runs of a table saw or small compressor, especially during peak sun, but start-up surge and run-time matter. Table saws and motor-driven compressors have high inrush currents that can be 2–5 times running watts; choose an inverter with adequate surge capacity (for example, a 3 kW inverter) and use a battery or generator for longer continuous runs.
Measure your specific tools with a watt meter and calculate both running kW and surge requirements before deciding.
How many panels do I need for a 2 kW array?
Panel count depends on module wattage. Typical configurations include 8×250 W, 6×335 W, or 5×400 W panels to achieve roughly 2 kW. Choose panels that match roof space and the inverter’s MPPT input range. See the component sizing section for configuration examples and considerations on string voltage.
Do I need batteries with a 2 kW workshop system?
Batteries are optional. For pure daytime offset and lower cost, a grid-tied 2 kW system without batteries is fine. Add batteries if you need outage backup, nighttime use, or to smooth motor starts. For short backup needs, 6–10 kWh usable is a common starting point; for full-day independence you will need more capacity and likely a larger array.
What inverter size should I choose for motor loads?
Pick an inverter with continuous rating at or above your peak running load and with surge capacity to handle motor start-up. For many workshops a 2.5–3 kW inverter offers useful headroom for a 2 kW array; add soft-starts or VFDs for motors to reduce surge requirements. Confirm inverter specs for surge duration (seconds) and continuous power.
How does shading affect my 2 kW system output?
Shading reduces output disproportionately when panels are in a single string because shaded cells lower string current. Microinverters or module-level power electronics (MLPE) reduce this effect by allowing each panel to operate independently. For partial-shade roofs consider microinverters or optimizers to preserve production.