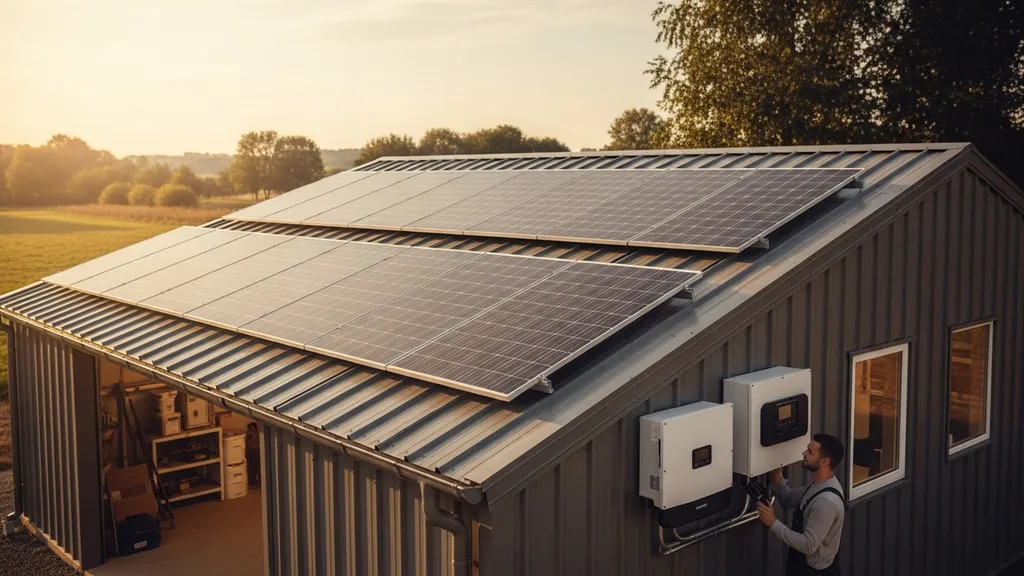
Step-by-step guide to sizing a 3kW solar system for a workshop: production, panel and inverter specs, batteries, wiring, costs, and sample builds.
3KW Solar System for Workshop: Complete Sizing Guide
A 3kw solar system for workshop use is a practical, affordable starting point for powering daytime tools, lights, and small compressors without a large roof or budget. This guide explains how much a 3 kW array typically produces, how to match that output to common shop loads, what panels and inverters to choose, when batteries are needed, wiring and permitting essentials, and three sample builds you can copy. Read on to learn step-by-step calculations, equipment options, and real-world trade-offs so you can size a system that fits your workshop and wallet.
TL;DR:
- A 3 kW array typically yields about 9–15 kWh/day depending on location (3 kW × peak sun hours), enough for daytime tool use and lighting in many small workshops.
- For tools with high startup currents (table saws, compressors), choose an inverter with adequate surge rating and plan batteries or staged starts; a hybrid inverter eases backup and storage.
- Typical builds: grid-tied daytime (no battery) ~8 panels + string inverter; grid-tied with backup adds 1–5 kWh battery; off-grid weekend workshop needs 10–20 kWh battery and a hybrid/charge controller.
How Much Energy Will a 3KW Solar System Produce for a Workshop?
The basic PV math is straightforward: System size (kW) × Peak Sun Hours (PSH) = expected daily energy (kWh) before losses. For a 3 kW array:
- 3 kW × 3 PSH ≈ 9 kWh/day (low-sun location)
- 3 kW × 4 PSH ≈ 12 kWh/day (average)
- 3 kW × 5 PSH ≈ 15 kWh/day (high-sun location)
These are raw figures. Real-world yield is lower after derating. Typical derate factors include inverter efficiency (95–98%), module temperature losses, soiling, wiring losses, and shading. A practical combined derate is often 10–20%. For example, 12 kWh/day raw minus 15% derate → ~10.2 kWh/day usable.
Seasonal and geographic variation matters. Use PVWatts/NREL or local insolation maps to model site-specific output. The U.S. Department of Energy's Homeowner's guide to solar offers guidance on ideal roof slope and orientation and links to modeling tools; check those before final sizing.
Real-world derates to account for:
- Inverter efficiency: 95–98%
- Temperature coefficient (hot climates reduce output): 2–3% per 10°C above standard test conditions — see our discussion of panel efficiency in heat
- Soiling and soiling intervals: 1–5% depending on environment
- Shading: single-shaded cell strings can reduce entire string output unless using optimizers or microinverters
Key takeaway: expect roughly 9–15 kWh/day in typical conditions. Model with PVWatts and then reduce by 10–20% to estimate delivered energy for workshop planning.
Step-by-step Sizing: Match Your Workshop Loads to a 3kw System
Start with a load inventory. List every tool, its watt draw, and how long you run it per day. Typical ranges:
- LED shop lights: 10–50 W per fixture
- Bench grinder: 500–1,500 W
- Circular/table saw: 1,500–3,000+ W (motor startup current much higher)
- Air compressor (1–3 HP): 1,000–3,000 W running; 3–6× startup surge
- Drill press: 250–1,000 W
- Dust collector: 800–2,000 W
- Electric heaters or space heaters: 1,500–3,000 W (high energy)
Remember: watts (W) measure instantaneous power; kilowatt-hours (kWh) measure energy over time. Convert tool runtime into daily kWh: (Tool watts ÷ 1,000) × hours used = kWh/day.
Worked example — small weekend workshop:
- 4 LED shop lights × 20 W × 8 hours = 0.64 kWh/day
- Table saw 2,000 W × 1 hour = 2.0 kWh/day (startup surge 4,000–6,000 W)
- Bench grinder 800 W × 0.5 hour = 0.4 kWh/day
- Dust collector 1,200 W × 0.75 hour = 0.9 kWh/day
- Misc outlets/tools 500 W × 1 hour = 0.5 kWh/day
Total = ~4.44 kWh/day
A 3 kW array in a 4 PSH location yields about 12 kWh/day pre-derate → more than enough to run the above loads during sun hours with room to spare. But continuous operation of a 2 kW table saw plus a 1.2 kW dust collector simultaneously could exceed inverter continuous rating; plan load coordination.
Practical tips:
- Measure actual draws with a Kill A Watt or clamp meter; modeled wattages differ from real tools.
- For motors, check locked-rotor and startup current specs. A 2–3 HP motor can pull several times its running amps for a fraction of a second.
- Consider soft-start devices or VFDs for motors to reduce startup surge and avoid oversized inverter costs.
- For hybrid systems where batteries are planned, consult our guide on matching panel and battery voltage and wiring examples in the hybrid wiring guide.
Watch this step-by-step guide on sizing a solar system for your house! examples and calculations:
This video walkthrough shows measuring loads, calculating daily kWh, and mapping that to a 3 kW array — useful for following the worked example step-by-step.
Solar Panels and Inverter Specs for a 3kw Workshop System
Choosing panels and an inverter requires balancing roof space, budget, and shading. Common panel wattages:
- 300 W panels: 10 panels → 3.0 kW
- 350 W panels: 9 panels → 3.15 kW
- 400 W panels: 8 panels → 3.2 kW
Comparison/specs table:
| Panel option | Typical watt | Panels required for ~3 kW | Approx. area (sq ft) |
|---|---|---|---|
| Standard 300 W | 300 W | 10 panels | 180–220 sq ft |
| Mid 350 W | 350 W | 9 panels | 160–200 sq ft |
| High 400 W | 400 W | 8 panels | 140–180 sq ft |
Array arrangement: design strings to match inverter MPPT input voltage range and minimize mismatch. For shaded roofs, microinverters or power optimizers reduce production loss at the module level.
Inverter sizing and type:
- Grid-tie string inverter: good for unshaded roofs; size near PV array (3 kW nominal). Many vendors allow 1.1–1.2× DC oversizing to boost morning/afternoon harvest.
- Microinverters: one per panel; excellent for shading but higher cost.
- Hybrid inverter (battery-ready): supports storage and backup; select an inverter with built-in charger or compatible external charger.
- Continuous vs surge: Pick an inverter with sufficient continuous AC rating and a surge rating for motor starts. Example: a 3 kW inverter with 6 kW surge short-term helps start saws and compressors.
MPPT considerations: Ensure VOC of panel strings at coldest expected temperatures stays below inverter input limits. For battery-coupled systems, match PV string voltage to charge controller/VMP window. See best practices in DC-to-AC wiring tips and troubleshooting steps in inverter issues and fixes.
Roof vs ground mount:
- Roof mounts save ground space but verify load capacity and flashing details.
- Ground mounts allow ideal tilt/azimuth and easier maintenance but require more space and secure foundations.
- For roof work, our guide on choosing panels for your roof is useful for matching panel size, racking, and wind/snow load constraints.
Brand and model notes: industry names like Enphase (microinverters), Fronius, SolarEdge (string+optimizer), SMA, and Growatt are common choices. Also consider warranties, monitoring features, and local support. For broader market cost and system descriptions, see a 3 kW overview such as this jackery.com guide on 3kW systems.
Battery and Storage Options: Do You Need Batteries for a Workshop?
Short answer: not always. Batteries make sense when you need backup power at night, plan off-grid use, or want to smooth peaks and capture surplus solar.
When Batteries Make Sense:
- You need nighttime lighting or tools when the grid is down.
- You run large motors that exceed inverter continuous rating during key hours.
- You want to run off-grid during weekends or remote jobs.
Sizing battery capacity:
- Start with required daily kWh. Example: nightly workshop use 8 kWh.
- Divide by usable depth-of-discharge (DoD). For lead-acid usable DoD ~50%; for LiFePO4 usable DoD ~80–90%.
- Account for round-trip efficiency: multiply required kWh by 1 / round-trip efficiency (e.g., 0.9 for LiFePO4, 0.8 for lead-acid).
Example: 8 kWh needed at night, LiFePO4 with 80% usable and 90% round-trip: battery size ≈ 8 ÷ 0.8 ÷ 0.9 ≈ 11.1 kWh nominal.
Battery Chemistry Comparison:
- Lead-acid (flooded/AGM): lower upfront cost, lower cycle life, heavy, limited usable DoD; requires ventilation for flooded types.
- AGM/Sealed lead-acid: less maintenance but still limited cycles and DoD.
- LiFePO4: higher upfront cost, long cycle life (2,000–5,000+ cycles), high usable DoD (80–90%), lighter, better performance in partial charge states.
System coupling:
- AC-coupled: AC output from inverter feeds battery inverter/charger; easier retrofit to existing grid-tie systems.
- DC-coupled: PV charges battery via MPPT charge controller before inverter; higher efficiency in some designs and lower component count. For details, see our AC and DC coupling guide.
Safety and maintenance:
- Follow manufacturer battery safety guidance, including proper ventilation for flooded lead-acid.
- Consider battery management systems (BMS) for LiFePO4.
- For troubleshooting and maintenance, see DIY battery troubleshooting.
Industry context: storage adoption is growing; sector data and trends are available from SEIA's industry resources for broader market context SEIA solar and storage data.
Wiring, Safety, Permits, and Mounting Considerations for Workshop Installs
Electrical code and safety matter. The National Electrical Code (NEC) requires rapid shutdown, appropriate disconnects, labeling, and grounding for PV systems. Local jurisdictions add permitting and inspection steps — check with your local building department early.
Basic wiring tips:
- Size conductors by maximum array current and allowable voltage drop. For small systems, 10 AWG to 6 AWG is common depending on current and run length.
- Use properly rated PV connectors (MC4) and PV-specific cable for outdoor runs.
- Each PV string typically requires a fuse sized to the string's short-circuit current × 1.25.
- Place AC disconnects and rapid shutdown per NEC and local code.
Grounding and safety checklist:
- Ground array frames and metal racks per manufacturer specs and NEC grounding electrode requirements.
- Install rapid shutdown devices on roof arrays where required.
- Label all PV circuits, inside and outside, for emergency responders.
Mounting and structural:
- Roof attachment details must use flashed roof mounts or tile hooks; avoid compromising roof warranty without consulting roofing contractor.
- Racking must be rated for local wind and snow loads. Use manufacturer kill-shear calculations and consider uplift fasteners and through-flashing where required.
- PVGIS installation guidance provides typical panel counts and area needs for a 3 kW system to estimate roof space and layout.
Permits and inspections:
- Budget time and fees for building and electrical permitting — some jurisdictions require both.
- Prepare one-line diagrams and equipment cut sheets for permit submittal.
- Work that involves service-panel modifications or meter changes often requires a licensed electrician to sign off.
For DIYers: do structural prep, racking layout, and panel mounting, but hire a licensed electrician for final AC connections and inspections when local code requires or when you lack the necessary permit license.
Cost, Incentives, and Budget Tips for a 3kw Workshop Solar System
Typical component cost breakdown (approximate ranges in USD, highly region-dependent):
- Panels (8–10 panels): $800–$2,000
- Inverter (3 kW string or hybrid): $700–$2,500
- Racking and mounts: $300–$1,000
- Wiring, conduit, disconnects, breakers: $200–$800
- Batteries (optional): lead-acid 5–10 kWh $500–$1,200; LiFePO4 10 kWh $6,000–$10,000
- Permits and inspections: $100–$500
- Labor (if hired): $1,000–$4,000 depending on complexity
For larger context on installed cost per watt and component splits, see the broader solar cost breakdown.
Incentives and rebates:
- Check federal incentives and guidance via Energy.gov and local incentive databases such as DSIRE for U.S. state-level programs. The Department of Energy's homeowner guide helps point to these resources.
- In some regions small systems may qualify for feed-in tariffs, net metering, or tax credits that change payback calculations.
DIY vs Professional Install:
- Save on labor by doing structural prep, panel layout, and mounting yourself.
- Hire a licensed electrician for service-panel work, interconnection paperwork, and final commissioning unless local code allows homeowner-performed electrical work.
- Buy matched panels in one batch to avoid mismatch issues. Consider group buys for panels or inverters to reduce cost.
- Avoid used inverters unless you can verify warranty and remaining life.
Simple payback example:
- Annual production estimate: 3 kW × 4 PSH × 365 × (1 - 0.15 derate) ≈ 3 × 4 × 365 × 0.85 ≈ 3,726 kWh/year? Wait — that math is off; correct example: 3 kW × 4 PSH = 12 kWh/day → 4,380 kWh/year raw. After 15% derate → ~3,723 kWh/year. Multiply by local utility rate (e.g., $0.15/kWh) → $558/year savings. If installed net cost after incentives is $4,000, simple payback ~7–8 years. Adjust for location, incentives, and system use.
For decision-making between grid-tied and off-grid, see grid-tied vs off-grid differences.
Optimization Strategies to Get the Most From a 3kw Workshop Array
Because a 3 kW system has limited instantaneous capacity, use smart scheduling and efficiency upgrades to increase effective capacity.
Load shifting:
- Run grinders, saws, and compressors during peak sun hours (10:00–15:00) where possible.
- Schedule long runtime tasks for midday and quick tasks outside peak if surplus exists.
Efficiency upgrades:
- Replace incandescent or older fluorescent shop lights with LED fixtures — small workshops can save 50–80% on lighting.
- Choose efficient compressors and right-size tanks to reduce duty cycles and number of starts.
- Use variable-frequency drives (VFDs) or soft-start kits for motors to cut startup surge and allow smaller inverter selection.
Energy management:
- Add an energy monitor and simple automation to prioritize loads. Our energy monitor calibration guide shows how to measure load profiles and tune schedules.
- Implement timers or a relay-based load manager to prevent multiple heavy loads starting at once.
Hybrid approaches:
- Use a small generator or a grid-tied backup to handle occasional large loads. A generator combined with a transfer switch or an energy manager can supply brief surges without oversizing the solar inverter.
- Consider adding a small AC-coupled battery (1–5 kWh) to smooth peaks and provide short backup; this can let you start motors without immediately drawing from the grid.
For lighting-specific strategies, see our smart lighting efficiency tips.
Sample System Builds and a 3KW Workshop Sizing Checklist
Build A: Daytime Grid-tied Workshop (no Battery)
- Panels: 8 × 375 W (3,000 W nominal)
- Inverter: 3 kW string inverter (no battery)
- Mounting: roof flush-mount
- Expected daily production: 9–15 kWh (depending on PSH)
- Use case: daytime tool use, net meter credits for excess
Build B: Grid-tied with Small Backup Battery (1–5 Kwh)
- Panels: 9 × 335 W (≈3.015 kW)
- Inverter: hybrid inverter with backup output or grid-tie + backup inverter
- Battery: 2–4 kWh LiFePO4 for lights, electronics, and short motor starts
- Use case: daytime production with limited night-use backup and outage resilience
Build C: Off-grid Weekend Workshop (10–20 Kwh Battery)
- Panels: 10 × 400 W (4 kW array to ensure charge on cloudy days) or 3 kW with conservative usage
- Inverter: 3–5 kW inverter/charger sized for loads and surge
- Battery: 10–20 kWh LiFePO4 for 1–2 days autonomy
- Use case: off-grid operation on weekends, extended runs without grid support
Comparison table:
| Build | Cost range | Autonomy | Complexity |
|---|---|---|---|
| A: Grid-tied no battery | $3,000–$7,000 | None (daytime only) | Low |
| B: Grid-tied + backup | $6,000–$12,000 | Limited (1–5 kWh) | Medium |
| C: Off-grid weekend | $15,000–$30,000 | 1–3 days | High |
Checklist for installation and commissioning:
- Site insolation and shading analysis (use PVWatts)
- Roof condition and structural check
- Load inventory and measured wattage
- Panel count, inverter type, and mounting plan
- Battery sizing and coupling choice (AC vs DC)
- Wiring diagrams, conductor sizing, and protection devices
- Permits, utility interconnection paperwork, and inspection schedule
- Commissioning tests: open-circuit VOC checks, string Isc checks, inverter startup, monitoring setup
- Troubleshooting references: how to troubleshoot solar power systems
For off-grid parallels, see tiny-house off-grid options and refrigeration strategies in off-grid refrigeration options.
The Bottom Line
A 3 kW array typically delivers about 9–15 kWh/day depending on location and derates; it suits daytime tooling and lighting for many small workshops but will need batteries or careful load management to support night use or high-startup motors. Model site production with PVWatts/NREL, measure actual tool loads, and use the checklist above before buying components.
Frequently Asked Questions
How long will a 3 kW system run a table saw?
Runtime depends on the table saw's wattage and duty cycle. A 2,000 W saw running continuously uses 2 kW, so a 3 kW array producing 12 kWh/day could power it for about 6 hours across the day if the sun provides that energy. However, startup currents for motors are much higher; a saw that draws 6 kW at startup will need an inverter with sufficient surge capacity or a soft-start/VFD. For accurate planning, measure the saw's running and startup draw with a clamp meter or Kill A Watt and coordinate starts to avoid simultaneous heavy loads.
How many panels do I need for a 3 kW array?
Panel count depends on module wattage. Rough examples: eight 375–400 W panels (8 × 375 W ≈ 3,000 W) or ten 300 W panels. Choose panel size based on roof area and tilt. Use the module watt rating and available roof space to pick the right mix, and verify string voltage and inverter MPPT ranges when finalizing layout.
Do I need batteries for a workshop solar system?
Not always. If your goal is daytime tool use and you stay grid-connected, batteries aren't required. Add batteries for backup during outages, for night use, or to smooth peaks and reduce grid draw. Battery sizing should be based on nightly kWh needs, usable depth-of-discharge, and round-trip efficiency. Small 1–5 kWh batteries work for basic backup; off-grid setups typically need 10–20 kWh or more depending on autonomy requirements.
How do I size an inverter for motors and compressors?
Check both continuous and peak/surge ratings on the inverter. Motors have high inrush current—often 3–6× running amps. Either choose an inverter with a high surge rating (for short starts) or use soft-starts/VFDs that limit startup current. For systems with batteries, a hybrid inverter with strong inverter surge capability is preferable. Always verify manufacturer startup limits and test with measured motor loads.
What permits and codes apply to a small workshop solar install?
Most areas require building and electrical permits for PV systems. NEC requirements include rapid shutdown, proper disconnects, labeling, grounding, and conductor sizing. Local authorities may have additional rules on racking, roof penetrations, and inspections. Start with your local building department, prepare one-line diagrams and equipment spec sheets, and plan for inspection and utility interconnection paperwork.