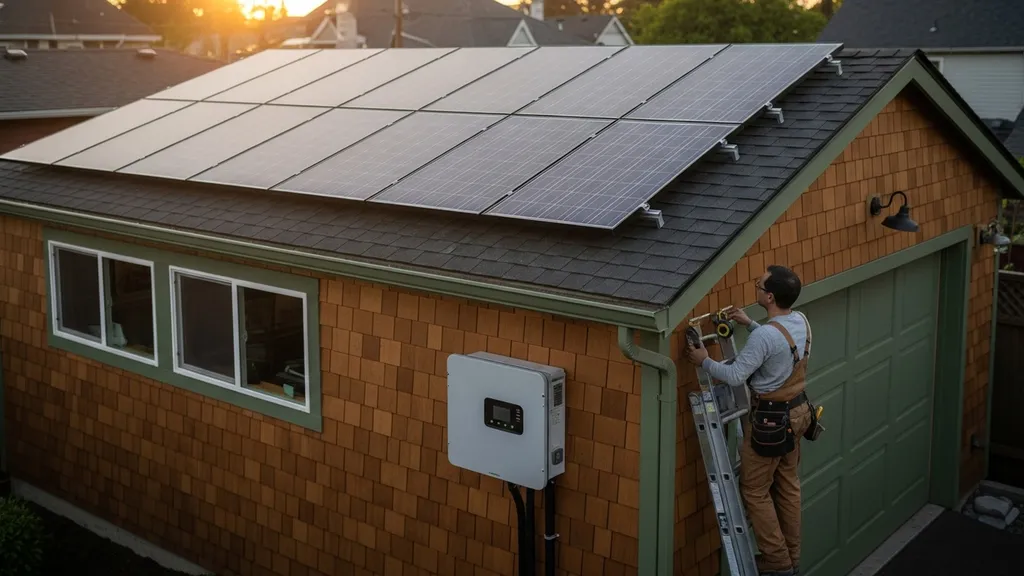
Step-by-step guide to sizing, components, costs and DIY tips for a 5kW solar system sized for a workshop.
5KW Solar System for Workshop: Complete Sizing Guide
A 5kw solar system for workshop installs about 5,000 watts of PV capacity and can reliably supply typical small-to-medium workshop loads — power tools, LED lights, battery chargers, and intermittent compressors. This guide shows how to translate tool wattages and hours into daily kWh needs, pick panels and inverters, decide whether to add batteries, estimate costs and payback, and handle DIY installation and permits. Read on to learn exact sizing steps, a worked example for a 500 ft² workshop, component ranges, and a one-page checklist you can take to the site.
TL;DR:
- A 5 kW array typically produces ~15–25 kWh/day depending on 3–5 peak sun hours; size panels by dividing desired daily kWh by site peak-sun-hours.
- For backup or off-grid use, plan 6–12 kWh usable battery storage for basic workshop continuity, sized to inverter output; consider a hybrid inverter for staged battery expansion.
- Start with a load inventory (watts × hours), include a 15–25% derate for system losses, and confirm local production with PVWatts or similar before finalizing panel count.
How a 5KW Solar System Fits a Workshop — What to Expect
A "5 kW" rating is the system's peak DC capacity under standard test conditions. In practice, daily energy output depends on local solar resource (peak sun hours), panel tilt, shading and seasonal variation. In a good sunny location with 5 peak sun hours, a 5 kW array may deliver roughly 22–25 kWh/day; in a cloudier location with 3 peak sun hours, output drops toward 15 kWh/day. The U.S. Department of Energy tracks system cost and performance benchmarks useful when comparing expected yields and budgets — see the Department of Energy's solar PV cost benchmarks for context.
Common workshop loads and typical peak draws:
- Table saw: 1,500–2,500 W peak.
- Compact router or planer: 800–1,500 W.
- Air compressor (motor start surge): 1,000–3,000 W cycling down to 300–800 W while running.
- LED shop lighting: 100–400 W total for a small workshop.
- Battery chargers, bench tools, laptop: 50–300 W.
Compare scale: a 3 kW shed system powers basic lighting and small tools intermittently; a 1 kW tiny-house setup supports minimal lighting and charging. For scale comparisons, see the 3kW shed guide and the 1kW tiny-house example. Use a solar calculator (PVWatts or equivalent) to refine expected daily kWh for your exact location and roof orientation.
Seasonal variation can more than double or halve monthly yields. South-facing, unshaded roofs at a tilt near latitude give best year-round averages. Shading from trees or nearby buildings reduces output significantly; microinverters or optimizers help mitigate partial shading losses.
Step-by-step Sizing: Calculate Your Workshop's Energy Needs
How to Inventory Appliances and Tools (a Simple Spreadsheet Method)
Create a spreadsheet with columns: Appliance, Rated Watts, Typical Hours/Day, Daily kWh (Watts × Hours ÷ 1,000). For motors, use running watts, not startup surge, to estimate energy use; list surge watts separately to size inverter and breakers. Example headers:
- Appliance | Rated Watts | Hours/Day | Daily kWh
Record realistic hours — a table saw used 0.5 hours/day has a very different impact than one used 4 hours.
Convert Watts and Hours to Daily Kwh
Example worked calculation for a 500 ft² workshop:
- Table saw: 2,000 W × 0.5 hr = 1,000 Wh = 1.0 kWh
- Air compressor (running): 600 W × 2 hrs = 1,200 Wh = 1.2 kWh
- LED lighting: 200 W × 6 hrs = 1,200 Wh = 1.2 kWh
- Battery charger & tools: 300 W × 1.5 hrs = 450 Wh = 0.45 kWh
Daily total = 4.85 kWh
To size panels, account for system losses. Use a derate factor 0.75–0.85 to cover inverter inefficiency, wiring, soiling and temperature. Choose 0.80 as a middle value: required DC energy = 4.85 kWh ÷ 0.80 ≈ 6.06 kWh needed from the panels per day.
Divide by site peak sun hours: if the site averages 4 PSH, required DC array = 6.06 kWh ÷ 4 h ≈ 1.52 kW. Round up to allow margin and future loads; a 2–3 kW array might suffice for this conservative usage. For a workshop with more frequent tool use or larger loads, you may land at 5 kW to cover peak simultaneous draws and provide headroom.
If the aim is a 5 kW installed capacity, calculate panel count: at ~330 W per panel, 5,000 W ÷ 330 W ≈ 15 panels. Roof space for 15 panels typically requires roughly 200–300 ft² depending on orientation and spacing.
Account for System Losses and Safety Margin
Include:
- Derate: 0.75–0.85.
- Battery round-trip (if present): 0.85–0.95 per charge/discharge cycle.
- Inverter continuous rating and surge capacity — motors need higher short-term power.
- Plan 15–25% safety margin for future tool additions or longer run-times.
Example: Sizing a System for a 500 Ft² Workshop
Using the worked numbers above, a conservative system to run tools and lighting reliably for several hours per day would be:
- PV array: 3–5 kW depending on desired autonomy.
- Inverter: 5 kW inverter if many tools run simultaneously; otherwise a hybrid inverter sized to peak loads.
- Storage (optional): 6–12 kWh usable battery for limited backup and evening use.
For code and performance recommendations, consult local energy code pages such as the California Energy Commission's guidance on solar and battery-ready standards: solar PV and battery storage code details.
Before buying panels, check modeled annual production (PVWatts) and compare to your calculated daily kWh. For off-grid layout examples and inverter choices, see the tiny-house electrical options.
Components for a 5KW Workshop System (panels, Inverter, Batteries, Mounting)
Panel Selection: Wattage, Efficiency, and Tilt
Typical modules for a 5 kW system range 300–450 W. Most DIY-friendly panels are 320–400 W today. Higher wattage panels reduce string length and roof area but can cost more per watt. Check panel certifications and long-term warranty — common standards include IEC 61215 (durability), IEC 61730 (safety) and inverter/installation compatibility. For more on certifications and ratings, read our panel certification notes. Panel layout: 15 × 330 W panels ≈ 4,950 W. Roof space: estimate 15–25 ft² per panel depending on form factor and spacing.
Inverter Choices: String, Microinverters, and Hybrid Inverters
Options:
- String inverter (5 kW): Lower cost, simple. Good for unshaded, uniform arrays.
- Microinverters: One per panel. Better partial-shade performance, simpler expansion, higher cost.
- Hybrid inverter: Integrates battery charging and grid/backup switching; ideal for staged battery addition.
Choose an inverter with enough continuous AC output for simultaneous tool use and a surge capability to handle motor starts (many inverters provide brief higher output). For storage-coupled systems, hybrid inverters simplify wiring and battery management.
Battery Options and Sizing (if Adding Storage)
Battery chemistry tradeoffs:
- Lead-acid: Lower upfront cost but limited usable depth of discharge (DoD) and cycle life.
- Lithium-ion (LiFePO4 common for stationary): Higher upfront cost, longer life, higher usable DoD (80–95%), faster discharge.
Battery sizing for basic workshop backup:
- To run lighting (200 W), compressor intermittently (600 W average), and charge tools (~500 W) for 4 hours, usable energy ≈ (200+600+500) × 4 ÷ 1,000 ≈ 5.2 kWh. Add a safety margin and battery DoD — a 7–8 kWh battery bank (usable) is reasonable. For whole-day off-grid or heavy tool use, 12–20 kWh usable may be needed.
See the hybrid cost and battery breakdown in our hybrid system costs and compare to smaller off-grid examples like the 3kW off-grid case.
Mounting, Racking and Wiring Basics
Roof mounts must be flashed and attached to rafters; ground mounts require permits and foundation pads. Plan conduit runs, combiner boxes for parallel strings, and appropriate wire sizing based on current. Use PV-rated wiring and connectors. For DC-coupled battery systems, include a charge controller (MPPT) sized to array output. Check inverter and battery compatibility before purchase.
Comparison/specs table (typical ranges):
| Component | Typical options | Notes |
|---|---|---|
| Panels | 300–450 W/module, 15–17 modules for ~5 kW | Account for tilt and shading; check IEC/UL certifications |
| Inverter | 5 kW string, microinverter per panel, or 5 kW hybrid | Choose surge rating to handle motor starts |
| Batteries | 6–20 kWh usable (lead-acid or lithium) | Lithium has higher usable kWh per nominal capacity |
| Racking | Roof flush, tilt frames, or ground mount | Factor wind/snow loads and roof penetrations |
For industry data on capacity growth and system pairing, see the Solar Energy Industries Association's research on solar and storage trends: SEIA solar and storage industry research data.
Grid-tied vs Off-grid vs Hybrid for Workshops
When Grid-tied is the Simplest and Cheapest
A grid-tied system without batteries is often the lowest upfront cost and simplest to install. It offsets energy purchases, can export surplus to the utility, and avoids battery maintenance and replacement costs. For workshops with consistent grid access and only occasional outages, grid-tied is recommended.
When Batteries or a Hybrid Approach Make Sense
Choose hybrid or off-grid when:
- Frequent outages disrupt work and uptime is critical.
- The site lacks reliable grid access.
- The owner wants to run heavy tools during evening hours without high grid charges.
Hybrid systems allow daytime PV to charge batteries and provide a seamless backup during outages. Off-grid requires larger arrays and batteries sized to worst-case cloudy days.
Research modeling 5 kW penetration and climatic impacts helps understand performance in hybrid and off-grid scenarios; see simulation studies such as this performance prediction article: performance prediction modelling 5 kW solar penetration.
Sizing Batteries and Inverter for Backup Loads
Pick backup loads first — e.g., lighting, compressor for short cycles, a few outlets. Sum continuous watts and required hours. Size inverter continuous rating at or above peak combined load; include surge headroom for motor starts. Example: to run 2,000 W of selected tools and 400 W lighting for 3 hours, battery usable capacity ≈ (2,400 W × 3 h) ÷ 1,000 ≈ 7.2 kWh usable. If using lithium with 90% DoD, nominal battery capacity ≈ 8 kWh; lead-acid would require much larger nominal capacity.
For comparisons and decision criteria between grid-tied and off-grid approaches, see the grid vs off-grid primer. If considering fully off-grid construction, consult the off-grid build roadmap.
Practical Installation Tips for DIY Workshop Systems
Roof vs Ground Mount — Pros and Cons
Roof mounts save space and use existing structure; avoid roofs with poor orientation, heavy shading or limited access. Ground mounts allow optimal tilt and easier maintenance but need secure footings and fencing. Calculate wind and snow loads; check racking manufacturer's specs.
Wiring, Conduit, Combiner Boxes and Safety Basics
- Use PV-rated cable, proper conduit and labeled disconnects.
- Install an accessible AC disconnect and, when required, a PV combiner box for multiple strings.
- Follow NEC requirements (Article 690 and 705 for interconnection and rapid shutdown in many jurisdictions). For high-voltage AC work or service upgrades, hire a licensed electrician.
A hands-on DIY lighting example is helpful for low-voltage projects; see our solar lighting setup for small-scale work area lighting and motion sensors.
Permits, Inspections and Interconnection Steps
Permitting processes vary. Typical steps:
- Submit electrical and structural plans to authority having jurisdiction.
- Obtain building and electrical permits.
- Schedule inspections for structural roof penetrations, electrical AC/DC connections, and final interconnection.
For a sample permit checklist, see the permit checklist. Before signing an interconnection agreement, confirm utility rules for net-metering, export limits and anti-islanding requirements.
If you encounter system faults or need to calibrate an energy monitor after install, consult our troubleshooting guide and energy monitor tips. When in doubt about structural modifications or mains connections, hire a pro.
For regional installation pointers and installation timelines, some installers and guides such as Sunsave provide practical checklists: 5 kW system costs & output guide.
Costs, Payback, and Budgeting for a 5KW Workshop System
Typical Cost Breakdown (panels, Inverter, Racking, Balance of System, Labor)
Installed cost varies by region, incentives, and hardware choice. Typical components:
- Panels: 30–50% of equipment cost.
- Inverter(s): 10–20%.
- Racking and BOS (wiring, conduit, combiner boxes): 10–15%.
- Batteries (if added): 25–45% of total for hybrid setups.
- Labor and permitting: region dependent.
Ballpark system installed price ranges vary significantly; industry benchmarks and DOE cost studies offer context for national averages and trends — see the Department of Energy's solar PV cost benchmarks for detailed benchmarks.
Pretapower provides a practical 5 kW off-grid guide with cost and battery sizing examples useful for workshops planning storage: 5kW off-grid guide.
Estimating Payback: Sample Spreadsheet Approach
Create a simple spreadsheet:
- Column A: Annual kWh produced (use modeled or measured outputs).
- Column B: Local electricity rate ($/kWh).
- Column C: Annual savings = A × B + exported credit if net-metered.
- Column D: Installed cost net of incentives.
- Payback years = D ÷ C.
Include maintenance and battery replacement in long-term ROI. For broader cost examples and house-size comparisons, see our solar cost guide.
Ways to Reduce Initial Cost Without Sacrificing Safety
- Stage battery purchases: install PV first, add storage later when prices or needs change.
- Use a hybrid inverter to permit later battery integration.
- Shop for used or lightly aged panels only with proper testing and warranty transfer caution.
- Prioritize energy efficiency (LED lights, efficient compressors) to lower required array size.
- Explore local incentives and tax credits to reduce upfront cost.
If considering complementing solar with small wind for off-grid redundancy, review comparisons in our solar vs wind comparison. For net-zero planning beyond a workshop, see net-zero planning.
Quick Sizing Checklist and Key Points
One-page Checklist to Take to the Site
- Measure tool wattages: Write nameplate running watts and surge watts.
- Estimate hours/day: Track typical daily run-time for each tool.
- Calculate daily kWh: Convert watts × hours ÷ 1,000 per tool and sum.
- Check roof area and orientation: Confirm available unshaded south-facing area (or equivalent).
- Estimate peak sun hours: Use PVWatts or local solar map.
- Choose inverter type: String, microinverter, or hybrid based on shading and battery plans.
- Decide grid/hybrid/off-grid: Based on outage tolerance and budget.
- Verify permits: Check local interconnection and building permit requirements.
Top 7 Takeaway Tips
- Include a safety margin: Add 15–25% extra capacity for future loads.
- Plan for battery expansion: Use hybrid inverter if storage might come later.
- Avoid shading: Even a small shaded area can cut output significantly.
- Size inverter for surges: Motor starts can require 2–3× running watts briefly.
- Check certifications: Confirm IEC/UL standards for panels and inverters.
- Record actual use: Monitor tool hours for accurate sizing and adjustments.
- Work with pros for AC tie-in: Use a licensed electrician for grid interconnection.
The Bottom Line
A 5kw solar system for workshop is a practical, mid-sized solution for hobby to light professional workshop use: it typically produces 15–25 kWh/day depending on sun hours, covers multiple tools and lighting, and can be paired with batteries for backup. Start by doing a detailed load inventory, apply a 15–25% derate, and confirm site-specific production with PVWatts or similar. Decide early whether you want a grid-tied, hybrid, or off-grid design — that choice drives inverter and battery selection and major costs.
Video: Intro to Pro-level Solar Installation Tutorial of 48V System 5.5kw
For a visual walkthrough of these concepts, check out this helpful video:
Frequently Asked Questions
Can I run a table saw on a 5 kW system?
Yes, in most cases. A typical contractor table saw draws 1.5–2.5 kW while cutting. A 5 kW array with a 5 kW inverter can supply that load, but simultaneous use of other heavy tools may require a larger inverter or a battery buffer to handle start surges. Size the inverter to handle combined peak loads and check motor start requirements before installation.
Do I need batteries for a workshop solar system?
No, batteries are optional. Grid-tied systems without batteries cost less and offset utility bills. Batteries make sense if you need blackout resilience, want to run tools after dark, or plan to go off-grid. For basic backup during short outages, plan 6–12 kWh usable capacity depending on selected loads.
How many panels fit on a small workshop roof?
Panel count depends on panel wattage and roof area. A 5 kW array using 330 W panels needs about 15 panels. Estimate 15–25 ft² per panel including spacing, so plan for roughly 225–375 ft² of clear roof area. Orientation and shading can reduce usable area; ground mounts are an alternative if roof space is limited.
What is the expected annual output from a 5 kW system?
Annual output varies with location. Expect roughly 1,800–3,000 kWh/year: lower in cloudy regions (~1,800 kWh for 3 PSH average) and higher in sunny zones (~3,000+ kWh for 5+ PSH). Use tools like PVWatts to model site-specific annual kWh based on tilt, orientation and shading.
Do I need a permit to install a workshop solar system?
Yes, most jurisdictions require building and electrical permits plus utility interconnection approval for grid-tied systems. Permit requirements include structural and electrical plans and inspections. Check local authority rules and follow a permit checklist such as the one in our permit checklist. Work with a licensed electrician for final hookups when required.