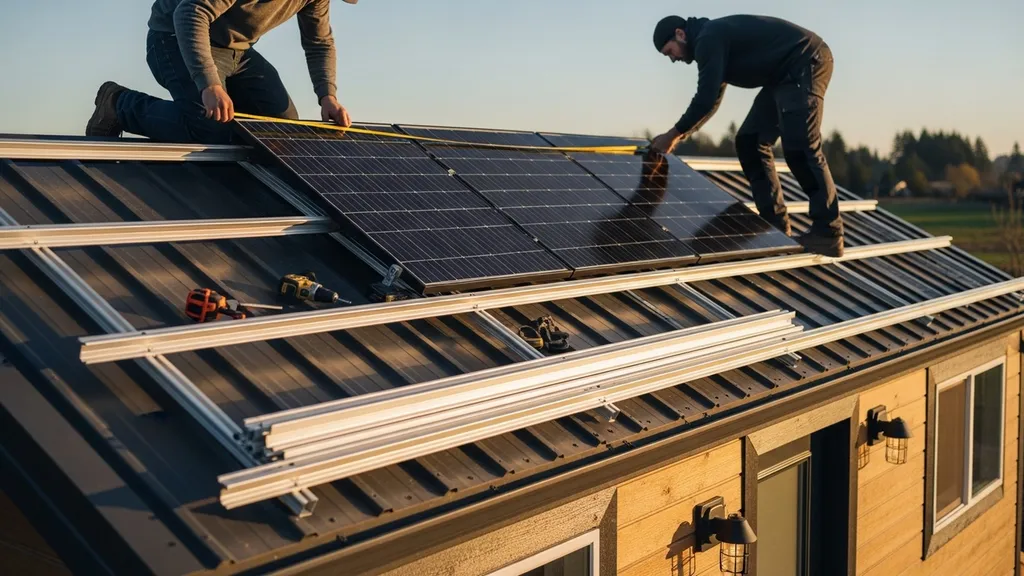
Step-by-step guide to sizing a 3kW solar system for a tiny house — panels, inverter, battery, costs, and installation considerations.
3KW Solar System for Tiny House: Complete Sizing Guide
A 3kw solar system for tiny house owners is a practical way to cover everyday loads like lighting, refrigeration, pumps, and device charging while keeping panels, weight, and cost manageable. This guide shows expected daily AC production, how to size panels and an inverter to match a tiny-house roof, battery storage rules, and three example builds you can adapt. Read on to learn whether 3 kW is enough for your tiny house, how location and season change output, and the concrete calculations to size panels and batteries.
TL;DR:
- A 3kW array typically produces about 9–15 kWh/day depending on 3–5 peak sun hours; expect ~12 kWh/day in many sunny regions.
- For common tiny-house uses, pair 3kW (≈8–12 m² of panels) with 5–12 kWh usable battery capacity for one day backup; choose LiFePO4 when budget allows.
- Decide grid-tied vs off-grid by mobility, permit limits, and budget; run a PVWatts estimate and log appliance use before finalizing components.
Key Takeaways for a 3KW Solar System for Tiny House Owners
Quick Sizing Rules of Thumb
- A 3 kW PV array multiplied by peak sun hours gives approximate daily AC output: 3 kW × 3–5 PSH → about 9–15 kWh/day raw DC before losses. Use NREL's PVWatts for a location-specific estimate. For planning, subtract ~10–20% for inverter and wiring losses to estimate usable AC.
- Panel area: modern 300–400 W panels need roughly 8–12 m² (86–130 ft²) total for 3 kW, depending on panel wattage and efficiency.
- Battery rules: store 1–3 days of typical usage depending on desired autonomy. For one-day backup on a 12 kWh daily load, plan for ~15 kWh nominal battery to allow depth-of-discharge and round-trip losses.
When 3kw is a Good Fit (and When It Isn’t)
- Good fit: Minimal to moderate tiny-house setups (lights, efficient fridge, small induction cooktop used sparingly, pump, laptop) where daily use is 4–12 kWh.
- Not a fit: Heavy electric heating, full-size electric water heating, or continuous window AC use — those loads often require 6 kW+ arrays or significant battery capacity.
- For contrast, see how smaller systems scale in our 1kW shed example to understand why 3 kW often gives better daytime coverage and battery charging margin.
- Useful guidance from the U.S. government on rooftop suitability and basic solar planning is available in the Department of Energy's homeowner guide to solar.
How a 3KW Solar System Meets Tiny House Energy Needs
Estimate Daily Energy Use for Common Tiny-house Setups
Create a simple load list: itemize appliances, estimate hours per day, and multiply by rated watts. Example profiles:
- Minimal profile: LED lighting (4 LED fixtures × 10 W × 4 h = 160 Wh), compressor fridge (~600 Wh/day), phone/laptop charging (600 Wh), water pump (300 Wh) → ~2–3 kWh/day.
- Typical profile: Adds microwave/induction cooking for short periods, ventilation, dehumidifier → 6–10 kWh/day.
- High-use profile: Electric space heater or continuous AC, frequent cooking, dryer use → 12–20+ kWh/day.
Studies of off-grid tiny houses show a wide range — e.g., a university tiny-house project used a 2.2 kW array and 6.4 kWh battery to cover moderate loads, demonstrating that system sizing depends heavily on lifestyle and HVAC choice (see the Berkeley study ENERGY and water performance of an off-grid tiny ...).
Translating Sun-hours to Expected Kwh/day
- Calculation: Array (kW) × Peak Sun Hours (PSH) × System Efficiency ≈ daily AC kWh.
- Example: 3 kW × 4 PSH × 0.85 (loss/derating) ≈ 10.2 kWh/day.
- Low-sun region example: 3 kW × 3 PSH × 0.80 ≈ 7.2 kWh/day — may not cover high-use profiles.
- High-sun region example: 3 kW × 5 PSH × 0.90 ≈ 13.5 kWh/day.
Run a location-specific estimate with NREL PVWatts or similar tools before finalizing. For a practical comparison to similar small installations, our 3kW shed sizing guide shows how daily loads match array output in constrained roof areas.
Seasonal and Location Variations
- Winter production can be 30–70% lower than summer in high-latitude or snowy climates; plan for heating needs separately (insulation, heat-recovery ventilators).
- For cold-climate tiny houses, reducing heating load by improving insulation can cut required solar and battery size; see our guide on insulation for cold climates.
- Track real usage with an energy monitor for 1–2 weeks before sizing batteries to avoid oversizing or under-sizing.
Sizing Panels, Inverters, and Roof Constraints for a 3KW Tiny-house Array
Panel Count, Wattage Choices, and Roof Space
Choose panel wattage by balancing roof area and weight. Common panel choices:
- 300 W: ~10 panels for ~3 kW
- 330 W: ~9 panels
- 375–400 W: ~8 panels
| Panel wattage | Panels for ~3 kW | Typical area per panel | Approx. weight per panel |
|---|---|---|---|
| 300 W | 10 | 1.6 m² | 18–20 kg |
| 330 W | 9 | 1.7 m² | 18–22 kg |
| 375 W | 8 | 1.9 m² | 20–24 kg |
- Roof area: eight 400 W panels need roughly 15–18 ft² × 8 ≈ 120–150 ft². Smaller, higher-efficiency panels reduce area but cost more.
- For roof-on-trailer installs, allow extra for rail spacing and ventilation. If area is tight, consult our guide on how to choose panels for your roof and compare efficiencies in our compare panel efficiency article.
Inverter Options: String vs Micro vs Hybrid
- String inverter: Single inverter (3–4 kW) handling all panels. Pros: lower cost; cons: whole system output reduced by shading on one string.
- Microinverters: One per panel. Pros: panel-level MPPT, better with shading and differing tilts; cons: higher cost and roof complexity.
- Hybrid inverter (battery-ready): Combines inverter+charger functionality for seamless grid/hybrid operation; ideal for grid-tied with battery backup.
- Typical string inverter sizes for a 3kW array: 3.0–4.0 kW depending on future expandability and local code (some oversize arrays slightly on DC side).
For common small-inverter issues and fixes, see our troubleshooting reference: inverter troubleshooting tips. Manufacturers to consider include SMA, Fronius, SolarEdge, Enphase (microinverters), and Victron — evaluate warranties and monitoring features.
Mounting, Tilt, and Shading Considerations
- Tilt trade-offs: Flat rooftop mounting maximizes portability but sacrifices winter production in higher latitudes. A modest tilt (20–30°) improves year-round yield.
- Shading: Even small shade on a tiny roof can disproportionately reduce output. Do a simple sun-path check with a smartphone compass and observe at peak times. For complex shading, use a shading app or Solar Pathfinder.
- Structural load: Trailer roofs may need reinforcement for panel and rail loads. Consult a structural engineer when unsure.
- For step-by-step mounting choices, see the practical tips in padtinyhouses's tiny-house solar primer (example guidance): How to power your tiny house with solar power.
Battery and Storage Options Matched to a 3KW Tiny-house System
How to Size Battery Capacity (kwh) for Your Goals
- Basic formula: Required usable kWh = desired days of autonomy × average daily kWh.
- Account for usable capacity: Battery nominal kWh / usable DoD × round-trip efficiency = usable delivered kWh.
- Worked example: Want one-day backup on a 12 kWh/day load. Assume LiFePO4 with 90% DoD and 90% round-trip efficiency.
- Needed usable = 12 kWh. Nominal battery = 12 / (0.9 × 0.9) ≈ 14.8 kWh nominal → round to 15 kWh battery.
- For lead-acid (50% DoD, ~80% efficiency) the same usable 12 kWh requires ~30 kWh nominal — much larger and heavier.
Battery Chemistry: Lead-acid, AGM, Lifepo4 — Pros and Cons
- Lead-acid (flooded or AGM): Low upfront cost, heavy, limited cycles, shallow DoD. Good for very low-budget short-life projects.
- LiFePO4: Higher upfront cost, far better cycle life (2000–5000 cycles), deeper DoD (80–100%), lighter — the preferred choice for long-term off-grid tiny houses.
- Other lithium chemistries (NMC): Higher energy density but shorter cycle life and thermal considerations; less common for tiny-house stationary banks.
Jackery and other consumer battery makers offer plug-and-play options for short-term, portable use; for house-scale systems, select purpose-built batteries sized to your inverter and expected cycles. See a consumer primer for small-system batteries at Jackery: solar panels for tiny house guide.
Dc-coupled vs Ac-coupled Storage Basics
- DC-coupled: PV charges battery directly via MPPT charge controller; efficient for battery-first systems and off-grid setups.
- AC-coupled: PV feeds inverter/charger after conversion to AC; easier to retrofit grid-tied systems with batteries.
- Which to choose: For new off-grid designs, DC coupling usually yields higher efficiency; for upgrading a grid-tied system, AC coupling simplifies installation. See our detailed guide on coupling differences in the AC vs DC coupling guide.
Off-grid, Grid-tied, or Hybrid: Choosing the Right Setup for a Tiny House with a 3KW System
Pros and Cons for Tiny-house Owners
- Grid-tied (no battery): Lowest cost, simpler permitting, sell excess under net metering where available. Downside: No power during grid outages.
- Grid-tied with battery backup (hybrid): Provides day-to-day savings and short outages coverage; hybrid inverters simplify operation but increase cost.
- Full off-grid: Complete independence. Requires larger battery bank, generator or charging backup, and careful load management. Best for remote sites without reliable grid access.
For cost implications of hybrid systems and when hybrid makes sense, consult our hybrid system costs.
Net Metering, Islanding, and Local Permitting Issues
- Net metering rules vary by state and utility. Confirm interconnection policies before buying equipment.
- Islanding: Grid-tied inverters must disconnect during grid outages for safety. Hybrid systems can provide intentional islanding if correctly configured.
- Always follow local interconnection and inspection requirements; permanent tiny houses tied to mains may need different permits than transportable units.
Explore broader off-grid considerations in our solar off-grid topic hub or the full build guide: building an off-grid home start to finish guide.
Including a Generator or Backup Charging
- Generators provide reliable charging during extended low-sun periods. Size a generator to handle inverter charging rate plus critical loads (e.g., 3–5 kW).
- Consider propane or diesel generators for space-limited tiny houses; petrol generators are lighter but noisier.
- Automatic transfer switches and generator-compatible inverters simplify operation.
Component Comparison Table and Three Example 3KW Tiny-house System Builds
| Component type | Sample spec | Expected cost range (USD) | Footprint | Ideal use-case |
|---|---|---|---|---|
| Panels | 8×375 W mono PERC (3 kW) | $900–$2,400 | 120–160 ft² | Limited roof area, higher upfront cost acceptable |
| String inverter | 3.5 kW MPPT string inverter | $600–$1,500 | 1–2 ft² wall mount | Budget grid-tied or with simple battery |
| Microinverters | 8×microinverters (enphase) | $1,200–$3,000 | On-roof per panel | Shaded or mixed-tilt roofs |
| Battery (LiFePO4) | 15 kWh nominal (80–90% usable) | $6,000–$10,000 | Closet/under-bed | Multi-day backup, long life |
| Battery (AGM) | 20 kWh nominal | $1,500–$3,000 | Larger, heavy | Low budget, short lifespan |
| Charge controller | 60 A MPPT (DC-coupled) | $300–$800 | Small panel | Off-grid or DC-coupled systems |
| Hybrid inverter | 3.5 kW hybrid | $1,500–$4,000 | 2–3 ft² | Grid-tied with battery intent |
Example a — Minimal Grid-tied (no Battery)
- Panels: 10 × 300 W = 3.0 kW
- Inverter: 3.5 kW string inverter
- Expected daily production: 9–12 kWh (region dependent)
- Use-case: Seasonal cabin or tiny house with grid available; covers daytime loads and reduces bills.
- Approx cost (installed): $5,000–$8,000 (equipment + install), region dependent — see our broader solar power costs by size.
Example B — Grid-tied with Small Battery Backup
- Panels: 9 × 330 W = 2.97 kW
- Inverter: 3.5 kW hybrid inverter
- Battery: 5 kWh LiFePO4 (usable ≈4.5 kWh)
- Expected daily production: 9–13 kWh; battery covers short outages or evening needs
- Use-case: Tiny home with occasional off-grid nights or campsite stays. Good compromise on cost vs autonomy.
- Safety note: Follow the solar installation safety checklist during installation and commissioning.
Example C — Full Off-grid 3kw with Multi-day Storage
- Panels: 8 × 375 W = 3.0 kW (tilted for year-round yield)
- Charge controller: 60 A MPPT (DC-coupled)
- Battery: 30 kWh LiFePO4 nominal (usable ≈25 kWh)
- Generator: 5 kW for emergency charging
- Expected daily production: 9–15 kWh; 2–3 days autonomy depending on load
- Use-case: Remote tiny house where grid hookup is impractical. Requires space and budget for battery, plus generator for extended low-sun periods.
Installation Checklist and Tiny-house-specific Site Considerations
- Measure roof area: Confirm panel layout fits with rails, wiring, and vent clearances.
- Check structural capacity: Trailer roofs often require reinforcement; consult a structural engineer if loading is uncertain.
- Choose mounting hardware: Ballasted mounts, low-profile rails, or custom clamps for curved roofs.
- Plan conduit runs: Minimize DC wire runs; place inverter near battery and main service for efficiency.
- Grounding and lightning: Follow NEC grounding rules and local codes; consider surge protection.
- AC/DC wiring: Use correct wire size, MC4 connectors, and surge protection. See our practical wiring advice in DC-to-AC wiring best practices.
- Permits and inspections: Check local interconnection and building permits; example permit types are summarized in our permits in Massachusetts guide — verify equivalent local rules.
- Ventilation and mounting for inverter/battery: Provide space for ventilation and service access; batteries need temperature control depending on chemistry.
- Commissioning: Verify array open-circuit voltages, string currents, inverter firmware, and battery management settings.
Watch this step-by-step guide on installing a home solar energy storage system, complete installation, litime:
Before work, read the ultimate guide to solar installation safety for PPE, ladder safety, and electrical precautions. For wiring specifics and inspector expectations, follow the standards and local permitting steps.
Estimating Costs, Incentives, and Simple ROI for a 3KW Tiny-house Solar System
Equipment and Soft-cost Breakdown (examples)
- Panels (3 kW): $900–$2,400 depending on panel model and efficiency.
- Inverter/hybrid: $600–$4,000 depending on type and features.
- Battery bank: $1,500–$10,000 depending on chemistry and capacity.
- Mounting/rails/Balance of System: $300–$1,000.
- Installation labor/permits/inspection: $500–$3,000 (varies widely).
- Typical installed cost (grid-tied, no battery): $5,000–$10,000. With batteries, installed cost often rises to $10,000–$20,000 depending on capacity.
These are illustrative numbers; for broader cost context by system size, review our detailed breakdown: solar power costs by size.
Incentives, Rebates, and the Federal Tax Credit (check Current Rules)
- Many jurisdictions offer net metering, rebates, or state tax credits. The federal solar tax credit (ITC) has historically applied to residential systems — check the current IRS and Department of Energy pages for updated rules.
- Incentives can shorten payback significantly; calculate with local electricity rates and expected production from PVWatts.
Simple Payback Scenarios for Tiny-house Use Cases
- Example payback: If your tiny house reduces grid draw by 8 kWh/day and your utility rate is $0.20/kWh, annual savings ≈ 8 × 365 × $0.20 ≈ $584/year. A $7,000 installed system (no battery) → simple payback ≈ 12 years before incentives.
- Batteries increase capital cost; think of batteries more as resilience than pure ROI unless you can arbitrage time-of-use rates or avoid expensive generator fuel.
Maintenance: Budget for periodic cleaning, inverter replacement after ~10–15 years (depending on model), and possible battery replacements (LiFePO4 lasts far longer than lead-acid).
The Bottom Line
A 3kW solar system is often a sensible, cost-effective choice for tiny houses with modest to moderate daily demand. It balances limited roof area, weight, and cost while delivering roughly 9–15 kWh/day in many regions. Next steps: log your actual energy use, run a PVWatts estimate for your site, and pick one of the sample builds above as a starting point.
- Measure your real daily kWh for 1–2 weeks with an energy monitor.
- Run a PVWatts location estimate to get expected daily production.
- Choose a build (grid-tied, hybrid, off-grid) that matches mobility and backup needs.
Frequently Asked Questions
How many panels do I need for 3kW and will they fit?
Panel count depends on individual panel wattage: roughly 10 × 300 W, 9 × 330 W, or 8 × 375–400 W panels yield about 3 kW. Check the panel dimensions and total area — a 3 kW array usually needs about 120–160 ft² (11–15 m²) depending on panel size.
If roof area is limited, choose higher-efficiency panels or consider ground- or pole-mounts if site space allows. For tips on matching panels to tight roofs, see our guide on how to choose panels for your roof.
Can a 3kW system run heating or air conditioning?
A 3 kW array can support small electric heating or window AC for short periods but is usually insufficient for full-time electric space heating or continuous AC use. Electric heaters and air conditioners draw large currents; for example, a 5,000 BTU window AC may draw 400–600 W, while whole-house electric heating often needs several kilowatts.
For heating-heavy climates, reduce heating loads through insulation and consider propane or wood heat alternatives, or scale the PV and battery system up to match peak heating demand.
How big of a battery do I need for overnight/off-grid use?
Battery size depends on your average daily kWh and desired days of autonomy. Use the formula: desired usable kWh = days of autonomy × daily kWh. Adjust for depth-of-discharge and round-trip efficiency. For one-day backup on 12 kWh/day with LiFePO4 (90% DoD, ~90% efficiency), plan ~15 kWh nominal battery.
If budget is tight, consider a smaller battery for essential loads only (lights, fridge, comms) and supplement with a generator for long outages.
Do tiny-house trailers need special mounting?
Yes. Trailer roofs are typically thinner and less stiff than fixed framed roofs and often require reinforcement and specialized mounting hardware to distribute load. Ballasted systems are rarely appropriate on trailer roofs; use rail-mounted clamps and avoid point loads that could distort the trailer frame.
When in doubt, consult a structural engineer and follow trailer manufacturer guidelines. For wiring and safety during installation, see our [installation safety guide](/blog/ultimate-guide-to-solar-installation-safety) and DC-to-AC wiring best practices.
What permits are commonly required?
Permitting varies by locality but often includes electrical permits, building or structural permits for rooftop changes, and utility interconnection applications for grid-tied systems. Permanent tiny houses tied to mains may face different requirements than transportable units.
Check local authority rules and utility interconnection policies before purchasing equipment. Use example permit lists such as those in our permits in Massachusetts guide to understand common permit types and inspection steps.