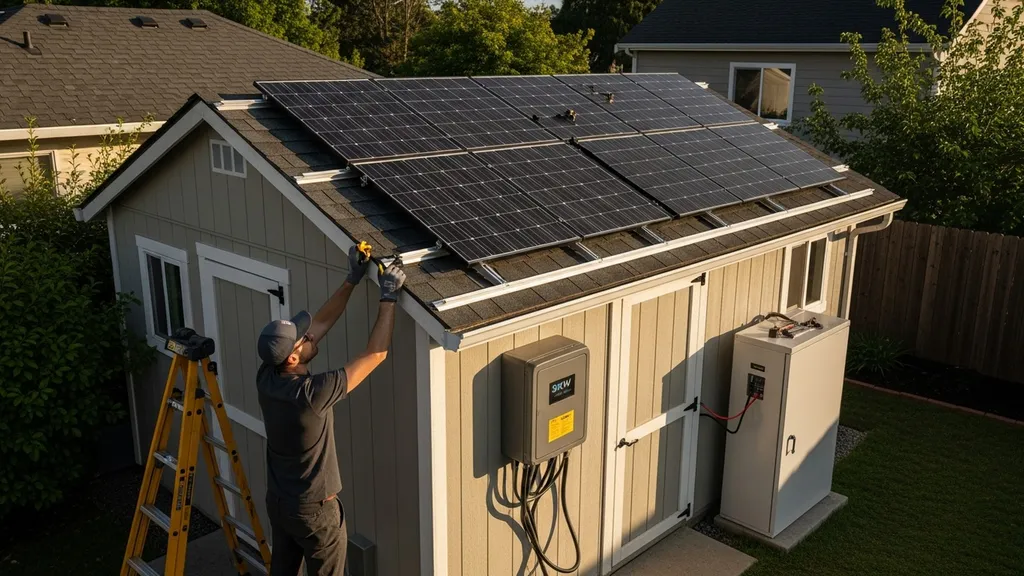
Step-by-step guide to sizing a 3kW solar system for a shed — panels, batteries, inverters, roof space, costs, and DIY tips.
3KW Solar System for Shed: Complete Sizing Guide
A 3kw solar system for shed is a common, cost-effective choice for powering lights, tools, a mini fridge, and modest workshop loads without a full-house install. This guide shows exactly what a 3 kW array will produce in real conditions, how to size panels and batteries, what inverters and wiring you need, and the typical DIY costs — with examples and clear math so you can plan a reliable shed system.
TL;DR:
- A 3 kW array typically produces about 9–15 kWh/day depending on location (3–5 peak sun hours) and system derate (0.75–0.85).
- Pair 3 kW panels with 3–6 kWh usable battery storage for overnight use; use LiFePO4 batteries sized by usable kWh = days × daily load ÷ DoD.
- Common DIY cost range: $2,000–$7,000 (panels, inverter, mounts) plus $800–$3,500 for batteries; check local incentives to lower net cost.
What a 3KW Solar System for a Shed Actually Delivers
A 3 kW rating is the panels' nameplate maximum under standard test conditions, not the everyday output. Real-world energy (kWh) = array kW × peak sun hours × system derate. Use PVWatts or NREL data for precise site estimates; research from the Department of Energy explains how system size relates to expected production and site factors. For quick - Low scenario: 3 kW × 3 peak sun hours × 0.75 derate ≈ 6.75 kWh/day
- Average scenario: 3 kW × 4 peak sun hours × 0.80 derate ≈ 9.6 kWh/day
- High scenario: 3 kW × 5 peak sun hours × 0.85 derate ≈ 12.75 kWh/day
Typical range for many temperate climates is about 9–15 kWh/day annually, but this varies. Cool-temperate sites with long clear mornings may hit the higher side in summer; cloudy or heavily shaded regions fall toward the lower side. Panel temperature affects output: panels lose efficiency as cell temperature rises (see research on panel efficiency in hot climates), so a rooftop array on a small dark shed in summer can produce 5–10% less energy than the same array in cooler conditions.
Shading is a major production killer — a single shaded panel string can reduce whole-array output. Tilt and orientation matter: in the northern hemisphere, a south-facing tilt near the local latitude gives the best year-round yield, but a shallower tilt can favor summer peak production if you mainly run tools. Use local solar tools like PVWatts or a shading app to refine daily kWh estimates for your exact site.
Step 1 — Estimate Your Shed's Energy Needs
Start with a simple load worksheet. Identify every device you plan to run, its wattage, and how many hours per day it runs. Sum watt-hours to get daily Wh, then convert to kWh (1,000 Wh = 1 kWh). Account separately for peak/surge requirements for motors and compressors.
Typical shed loads:
- LED work light: 10 W × 4 h = 40 Wh/day
- Mini fridge (energy-efficient): 80 W average × 24 h = 1,920 Wh/day (1.92 kWh/day)
- Bench drill or circular saw: 1,200 W × 0.25 h = 300 Wh/day (intermittent)
- Laptop and charger: 60 W × 4 h = 240 Wh/day
Sample copyable load table:
- Device: LED light — Wattage: 10 W — Hours/day: 4 — Daily Wh: 40
- Device: Mini fridge — Wattage: 80 W (avg) — Hours/day: 24 — Daily Wh: 1,920
- Device: Circular saw — Wattage: 1,200 W — Hours/day: 0.25 — Daily Wh: 300
- Device: Router/phone charger — Wattage: 10 W — Hours/day: 12 — Daily Wh: 120
Total daily load example: ~2.38 kWh/day (fridge + lights + small tools). That fits easily within a 3 kW array in most sunny areas. For larger tools or electric heaters, instantaneous power matters: motors and heaters have higher surge and continuous draws. For motors, check locked-rotor or starting current; many inverters handle 2–3× surge briefly, but confirm in inverter specs.
For broader off-grid layout and appliance load comparisons, see this guide to tiny house electrical options. Industry reports such as SEIA's research provide context on solar adoption and typical system sizes, which is useful when comparing small shed systems to residential installs.
Step 2 — Panels, Roof Space, and Layout for a 3kw Shed System
How many panels? It depends on module wattage. Typical module choices:
| Module wattage | Panels needed for ~3,000 W | Approx. panel dimensions (m) | Estimated roof area (m²) |
|---|---|---|---|
| 300 W | 10 | 1.65 × 1.00 | 16.5 m² (177 ft²) |
| 330 W | 9 | 1.70 × 1.02 | 15.3 m² (165 ft²) |
| 360 W | 8–9 | 1.70 × 1.02 | 13.6–15.3 m² |
| 400 W | 8 | 1.96 × 1.00 | 15.6 m² (168 ft²) |
These area numbers include rail spacing and clearance. Eight to ten panels is typical; higher-watt modules reduce the panel count but may require more careful roof fitting. For help choosing modules that match a small roof, see choosing panels for a roof. If roof area or orientation is limited, consider a small ground-mount or pole mount.
Orientation and tilt rules-of-thumb:
- Ideal orientation: true south (northern hemisphere); ±20° is acceptable with modest loss.
- Tilt: roughly the local latitude for year-round balance; reduce by 10–20° for summer-focused use.
- Small sheds often have low-pitch roofs — use low-profile rail mounts or consider ballast mounts for metal roofs.
Shading assessment and space planning: run a simple shading test across a typical day with a smartphone sun-path app or a Solar Pathfinder. Place panels to avoid early morning or late afternoon tree shade. If shade is unavoidable, use microinverters or power optimizers to limit string-level losses.
A practical installation video showing panel layout, rail mounting, and small-shed spacing can help visualize these choices — watch the embedded clip above. Industry guides and buyer guides (for example, module sizing and shed-specific installs) discuss module selection and trade-offs; this Jackery guide offers additional context on 3 kW system layouts and expected performance.
Step 3 — Batteries and Storage Options for a 3kw PV Array
Decide how many nights off-grid or backup you want. Use this formula:
- Required usable kWh = days of autonomy × daily load
- Battery capacity (kWh) = usable kWh ÷ depth of discharge (DoD)
Example: For 1 day autonomy for a 3 kWh/day load with LiFePO4 (80% DoD):
- Usable = 1 × 3 = 3 kWh
- Bank size = 3 ÷ 0.8 = 3.75 kWh nominal
Common battery chemistries:
- Lead-acid (flooded or AGM): lower upfront cost, less usable DoD (50%), heavier, needs ventilation if flooded, shorter cycle life.
- LiFePO4 (lithium iron phosphate): higher upfront cost, 80–90% DoD usable, longer cycle life, lighter, requires less maintenance.
DoD, cycle life, and usable kWh math matter when comparing cost per usable kWh: LiFePO4 typically has lower lifecycle cost despite higher initial price because of higher DoD and more cycles. For country-specific guidance on system sizing and incentives for storage, see the Australian government's sizing guidance at Size your solar system.
Match battery voltage to inverter/charge controller. Common battery bank voltages for small systems are 12 V, 24 V, or 48 V; 48 V is common for 3 kW systems because it reduces current and eases wiring. For technical matching of panel arrays to battery voltage and proper charge controller selection, consult the guide on panel-to-battery voltage matching.
Practical considerations for shed installs:
- Weight: batteries add significant weight. Secure racks and check shed floor strength.
- Ventilation: sealed LiFePO4 requires less venting than flooded lead-acid, but heat control matters — see our shed ventilation tips.
- Maintenance and troubleshooting: check battery troubleshooting for common post-install issues.
Step 4 — Inverter, Charge Controller, and Wiring Essentials for a Shed 3kw System
Choose inverter topology based on whether you want grid-tied, off-grid, or hybrid. A 3 kW array often pairs with a 3 kW continuous inverter; select higher continuous ratings if you expect extended tool runs or heaters. Key inverter types:
- Grid-tie string inverter: sends excess to grid, no batteries unless hybrid.
- Off-grid inverter/charger: manages battery charging and AC loads without grid.
- Hybrid inverter: combines PV, battery charging, and optional grid export.
For battery-based systems use MPPT charge controllers sized by the array's maximum power and voltage. MPPT controllers convert higher panel voltage into optimal battery charging current and provide better performance than PWM controllers in most small systems.
Wiring basics and safety checklist:
- Fuse or breaker at the battery positive nearest the battery (DC disconnect).
- Proper DC cable sizing to limit voltage drop: keep runs short or raise nominal system voltage (48 V) to reduce current.
- Grounding: bond array frames to an earth ground per local code.
- Overcurrent protection on array strings sized to the charge controller and inverter inputs.
- Conduit and weatherproof enclosures: use outdoor-rated conduit and seals at roof penetrations.
Follow local codes and permit rules; see the grid vs off-grid guide to choose the correct system type for your situation. For practical wiring practices and safety points, read the DC-to-AC wiring tips, the hybrid wiring guide, and the AC/DC coupling overview. If inverter faults occur, consult quick fixes in inverter issue fixes.
Choose pure sine inverters for sensitive electronics. Brands commonly used in small systems include Victron Energy, SMA, Growatt, and household-grade battery-integrated systems from Jackery for portable alternatives. Ensure your inverter handles surge current for motor starts; specs will list continuous and peak watts.
Installation Checklist, Mounting Tips, and Common Pitfalls
Pre-install checklist:
- Confirm permits and local authority requirements.
- Check roof structural capacity and framing — consult building a shed basics if modifying structure.
- Verify array layout with shading test and measurements.
- Plan conduit, cable entry, and battery enclosure location with ventilation per shed ventilation tips.
Mounting tips:
- Use manufacturer-specified flashing kits for roof penetrations and ensure watertight seals.
- Choose tilt and rail spacing to avoid panel-to-panel rubbing and allow snow shedding if relevant.
- For small roofs, consider side-by-side module arrays or a short ground-mount near the shed — see shed foundation options for mounting base choices.
- Secure panels and battery enclosure against theft with locks and bolted mounts.
Common DIY mistakes and fixes:
- Undersized wiring causing voltage drop: calculate current and choose cable size for <3% DC loss or increase system voltage.
- Poor shading assessment: use module-level power electronics if partial shading is unavoidable.
- Inadequate battery ventilation or temperature control: move batteries to a climate-stable cabinet or use LiFePO4.
- Incorrect fuse placement: always fuse close to the battery positive.
Quick key points list:
- Check roof strength before mounting panels.
- Fuse the battery bank at the battery positive within 7 cm.
- Use MPPT controllers for best harvest with battery systems.
- Keep DC runs short or use 48 V banks to reduce current.
- Seal all roof penetrations with approved flashing kits.
If problems appear after install, our guide on troubleshooting solar systems walks through diagnostics and fixes. For theft and weather protection, consider physical enclosures and anchor points.
Costs, Incentives, and When to Choose a Different System Size (comparison Table)
Rough DIY Cost Breakdown (low / Typical / High Estimates):
- Panels (3 kW): $600 / $900 / $1,600
- Inverter (3 kW hybrid or off-grid): $400 / $900 / $1,800
- Mounting hardware & rails: $100 / $300 / $700
- Wiring, breakers, connectors: $100 / $300 / $600
- Batteries (LiFePO4 4 kWh usable): $800 / $1,800 / $3,500
- Misc permits, inspections: $0 / $100 / $400
Total approximate DIY range: $2,000 (minimal panels + basic inverter, no battery) to $8,600 (high-end panels + large LiFePO4 bank). Incentives and rebates vary widely; consult local utility rebate pages and federal programs — the Department of Energy's homeowner guide offers high-level program info and considerations.
When to choose a different size:
- 2 kW: Good for lighting, phone/laptop charging, and occasional small tools; produces roughly 6–10 kWh/day in sunny regions.
- 3 kW: Balanced for continuous fridge use, lights, and moderate tool use (9–15 kWh/day typical).
- 5 kW: Better if you plan heavy power tools regularly, electric heating loads, or want increased battery charging in winter.
Comparison table: 2 kW vs 3 kW vs 5 kW
| System size | Typical daily kWh | Typical DIY cost range | Best use case |
|---|---|---|---|
| 2 kW | 6–10 kWh/day | $1,400–$4,000 | Lights, charging, small fridge, occasional tools |
| 3 kW | 9–15 kWh/day | $2,000–$7,000 | Mini fridge + tools + lights, light workshop |
| 5 kW | 15–25 kWh/day | $3,500–$12,000 | Full workshop, multiple large tools, partial home backup |
Estimate ROI by comparing system output to avoided grid electricity or the value of backup power. For detailed cost modeling by house/system size see our solar cost breakdown. Check DSIRE (U.S.) or local utility pages for incentives that can improve payback.
The Bottom Line
A 3 kW solar system for shed suits users who need fridge power, lighting, and intermittent tool use — expect roughly 9–15 kWh/day depending on sun hours and shading. Key trade-offs are roof space and battery cost if you want overnight backup. First steps: estimate your daily loads, confirm roof area and shading, and choose a battery/inverter strategy that matches your surge and autonomy needs.
Video: How to Install a Home Solar Energy Storage System, Complete
For a visual walkthrough of these concepts, check out this helpful video:
Frequently Asked Questions
How many panels do I need for a 3kW system?
Panel count depends on module wattage. Typical options: ten 300 W panels, nine 330 W panels, eight 360–400 W panels. Consider panel dimensions and available roof area when choosing module size; higher-watt panels reduce count but need careful layout. See the panel layout section above for area estimates and mounting notes.
Will a 3kW system run a mini fridge and lights?
Yes. A 3 kW array commonly produces 9–15 kWh/day, enough to run an efficient mini fridge (~1.5–2.0 kWh/day) plus LED lighting and small tools. If you want overnight backup, add batteries sized using usable kWh = days × daily load ÷ DoD; one day of backup for a 2 kWh/day load needs about 2.5 kWh nominal LiFePO4 (80% DoD).
Do I need batteries with a 3kW shed system?
Not necessarily. If your shed is grid-connected, a grid-tie inverter can send excess to the grid and you can run loads during the day without batteries. Batteries are required for off-grid use or for overnight backup. Battery sizing depends on desired autonomy and expected loads; LiFePO4 is recommended for long life and higher usable DoD.
How much roof space does a 3kW system require?
Expect roughly 13–17 m² (140–185 ft²) depending on panel wattage and spacing. For example, eight 360 W panels need about 13.6–15.3 m² whereas ten 300 W panels need about 16.5 m². Account for rail spacing and clearance when measuring available roof area.
Can I install a 3kW solar system on a shed myself?
Yes, many DIYers install small shed systems, but follow local electrical codes and permitting. Common DIY pitfalls include undersized wiring, poor grounding, and inadequate flashing for roof penetrations. If you’re unsure about electrical work, hire a licensed electrician for the final interconnect and inspection. Use the checklists and wiring guides linked above for step-by-step support.