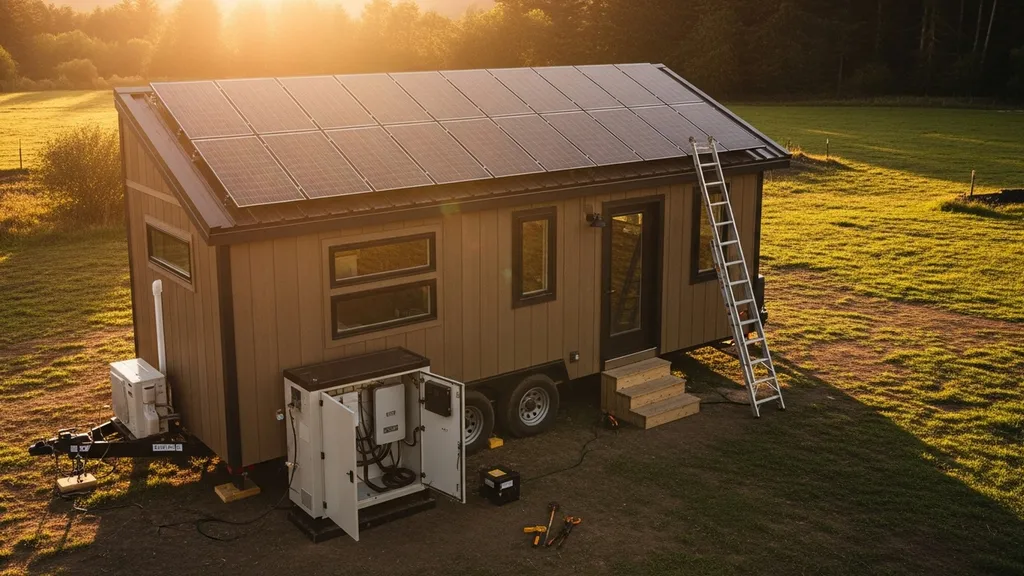
Step-by-step guide to sizing a 10kW solar system for a tiny house — panels, inverter, batteries, costs, and installation tips for off-grid or grid-tied setups.
10KW Solar System for Tiny House: Complete Sizing Guide
A 10kw solar system for tiny house owners offers significant generation capacity — but what does that rating actually mean in practice? This guide explains how a 10 kW array translates into daily kWh, how to audit a tiny house load to decide if 10 kW is appropriate, and how to size panels, inverter, and batteries for grid-tied, hybrid, or off-grid setups. Expect concrete calculations, equipment examples, area and weight checks, cost ranges, and an installation checklist you can use for a DIY build.
TL;DR:
- A 10 kW DC array typically produces roughly 28–44 kWh/day after system losses, depending on 3.5–5.5 peak sun hours and 10–25% derate.
- For most tiny houses, run a load audit first: minimal setups use ~8–12 kWh/day; full-electric heating/cooking can need 30–45 kWh/day — add 20–30% headroom when planning.
- Match panels (about 25×400 W modules), a 10 kW-class inverter, and a battery bank sized for your days of autonomy (LiFePO4 at ~80% usable) while checking roof area, weight, permits, and budget.
Understanding What a 10KW Solar System Means for a Tiny House
What "10kw" Rating Actually Measures (DC vs AC)
Solar system ratings are usually in DC nameplate capacity for the PV array (module wattage summed) and in AC capacity for the inverter. A "10 kW system" typically refers to about 10 kW of modules (DC). After the inverter and system losses, the AC available at the house will be lower. Industry practice uses a derate factor to account for inverter efficiency, wiring, soiling, temperature, and other losses — commonly 10–25%. Tools like NREL’s PVWatts model estimate production from array DC size and location.
Typical Real-world Output From a 10kw Array
Use peak sun hours (PSH) to estimate daily energy:
- 10 kW DC × 3.5 PSH × 0.8 system efficiency ≈ 28 kWh/day
- 10 kW DC × 4.5 PSH × 0.8 ≈ 36 kWh/day (example in intro)
- 10 kW DC × 5.5 PSH × 0.8 ≈ 44 kWh/day
Derate ranges: plan 10–25% losses (0.75–0.9 multiplier). Expect seasonal swings: winter production may drop 30–60% depending on latitude and tilt. PV module temperature coefficients and shading reduce output further. Research shows tiny home installations can have very different yields based on siting; for context, see this summary of tiny-home trends and energy outcomes at Mesocore's tiny-home report: 29 tiny home trends and energy impacts.
Factors That Change Delivered Energy (location, Tilt, Shading)
- Location / PSH: Southern and desert locations hit 5+ PSH; cloudy northern areas may be below 4 PSH. Use PVWatts for a localized estimate.
- Tilt & orientation: Optimal tilt close to latitude maximizes annual yield; roof pitch and roof facing east/west change midday production.
- Shading: Single-tree shade on a tiny roof can reduce a string’s output significantly unless you use microinverters or power optimizers.
- Module efficiency & temperature: Higher-efficiency panels produce more per square foot but cost more. Heat reduces voltage — ventilation under panels helps (see cooling tips in our solar panel cooling tips reference).
- Inverter clipping: A DC array sized larger than inverter AC capacity can "clip" production on bright days; this is a deliberate design trade for cost or roof-area reasons.
For examples of how power vs energy matters with motor loads on small arrays, see the 7kW workshop sizing guide.
Estimating a Tiny House's Energy Needs to See If 10KW is Right
How to Build an Appliance-level Load List
- List every device and rating: fridge (W), lights (W), pump (W), heater (W), AC/mini-split (W), cooktop (W), charger loads.
- Estimate hours per day for each item.
- Convert to kWh: (Watts × hours) ÷ 1,000.
- Add standby loads and inverter/charger inefficiencies (10–20%).
- Add 20–30% headroom for future loads and cloudy days.
Example definition list:
- Fridge: 12 V compressor fridge, 60–100 W running, 1.5–3 kWh/day typical.
- Mini-split heat pump: 600–1,500 W running, varies with climate and runtime.
- Water heater: Heat pump water heater 1–3 kWh/day; electric resistance much higher.
The Department of Energy's homeowner guidance is useful for assessing rooftop suitability and typical equipment sizing: Homeowner's guide to solar.
Worked Example: Daily Kwh for a 200–400 Ft² Tiny House
Low-usage tiny house (efficient appliances, propane cooking, no electric heating):
- LED lighting: 0.5 kWh/day
- 12 V fridge: 2 kWh/day
- Ventilation/ERV: 1.5 kWh/day
- Small electronics/chargers: 1.5 kWh/day
- Hot water (tankless propane or small electric heat pump): 2 kWh/day
Total ≈ 8–12 kWh/day
Higher-usage tiny house (all-electric with heat pump, induction cooktop):
- Mini-split heating/cooling: 8–16 kWh/day (varies by climate)
- Induction cooking: 2–6 kWh/day
- Fridge/freezer: 2–4 kWh/day
- Hot water (electric): 5–8 kWh/day
- Miscellaneous: 3–4 kWh/day
Total ≈ 30–45 kWh/day
Compare those numbers to the production estimates above to see whether a 10 kW array is oversized, about right, or underpowered. For perspective on smaller systems and scaling, see the 3kW tiny house guide and the 1kW tiny house sizing case studies.
Adjusting for Seasonal Heating/cooling and Hot Water
Heating is the largest variable. Heat pump mini-splits are far more efficient than resistance heat; in many climates they can cut seasonal load by 50–70% compared with electric resistance. Ventilation strategy also matters — see our ventilation for small homes guide because ERVs/HRVs change heating/cooling energy use. Plan for the coldest month when sizing battery autonomy if you expect extended low-sun periods.
Sizing Panels, Inverters, and Batteries for a 10KW Tiny House System
Choosing PV Array Size, Layout, and Panel Count
To reach ~10 kW DC:
- 25 × 400 W panels = 10,000 W
- 30 × 330 W panels ≈ 9,900 W
Area estimate: typical 400 W panel needs about 15–20 ft² installed (including spacing). So 25 panels require ~375–500 ft² of roof or ground area. Real-world layout depends on roof geometry, obstructions, and tilt.
Plan string sizes with module Voc and operating temperatures in mind. Microinverters or optimizers help with shading and mixed orientations at the cost of higher unit price per watt.
Refer to battery/inverter wiring and hybrid connection notes in how to connect solar panels to a hybrid inverter.
Selecting Inverter Type and Correct Inverter Sizing
Two common inverter approaches:
- Grid-tied string inverter (with or without battery-ready hybrid): Efficient and cost-effective for large arrays. If you plan net metering, match inverter AC rating to local interconnection caps. For true 10 kW AC export capacity, choose an inverter rated near 10 kW continuous with adequate surge ability for startup motors.
- Off-grid / true sine hybrid inverter: Manages batteries, generator inputs, and AC loads. Off-grid systems often require higher surge capacity for motors and compressors.
Inverter surge ratings matter: refrigerators and pumps often require 2–6× running current at startup. Ensure continuous rating covers expected base loads and surge covers motor starts.
Sizing Battery Storage: Usable Kwh, Depth-of-discharge, and Chemistry
Decide autonomy (days of usable energy). Example: if production ~36 kWh/day and you want 2 days of autonomy:
- 36 kWh/day × 2 = 72 kWh usable
If using LiFePO4 with 80% usable DoD:
- Nominal capacity = 72 kWh ÷ 0.8 = 90 kWh nominal
Battery types comparison table:
| Component Type | Example Spec | Why it matters |
|---|---|---|
| Panel (330 W) | 330 W, 1.7 m² | Lower upfront cost, more panels needed |
| Panel (400 W) | 400 W, 2.0 m² | Fewer panels, useful for limited roof area |
| Panel (450 W) | 450 W, 2.2 m² | High power density, higher cost |
| Inverter (String hybrid) | 10 kW continuous, 20 kW surge | Cost-effective for grid-tied with battery-ready features |
| Inverter (True off-grid) | 8–12 kW continuous, 30 kW surge | Manages islanding, genset input, and heavy startup loads |
| Lead-acid flooded | 50–60% usable, 500–1,200 cycles | Low upfront cost, heavy, high maintenance |
| AGM/Gel | 60–70% usable, 400–800 cycles | Maintenance-free, moderate cost |
| LiFePO4 | 80–95% usable, 3,000–10,000 cycles | High cycle life, lightweight, higher upfront cost |
Charge controllers: use MPPT controllers sized for the array and system voltage. System voltage commonly 48 V for larger tiny-house battery banks to reduce current and wire size.
Balance-of-system items: combiner boxes, fuses, rapid shutdown, grounding equipment, conduit, AC disconnects.
For research context on small off-grid arrays combined with batteries and ventilation systems, see the Berkeley study on an off-grid tiny house energy system: Energy and water performance of an off-grid tiny house.
Design Constraints When Installing a 10KW System on a Tiny House
Roof and Trailer Space — Realistic Panel Area Calculations
Estimate 15–20 ft² per 400 W panel; 25 panels need roughly 375–500 ft². Many tiny houses have less roof area than that, or roof sections oriented in different directions. Options:
- Use ground-mount or small pole mounts if property allows.
- Combine roof and ground racks.
- Use higher-wattage modules to reduce the count and area.
See how smaller cabin projects solved layout constraints in the 2kW cabin sizing.
Weight, Structural Load, and Mounting Options
Panels weigh roughly 40–50 lbs each mounted; racking and rails add more. For 25 panels the distributed weight may be 1,500–2,000+ lbs. Trailer frames and roof sheathing must support these loads including wind and snow. For trailer-mounted tiny homes, check axle ratings and weight distribution. Options:
- Penetrating mounts into rafters require flashing and proper water seals.
- Ballasted mounts avoid roof penetrations but add significant weight.
- Ground mounts shift weight to the ground and free roof area.
Consult structural tables or a structural engineer for concentrated loads and uplift design. Permitting officials often require stamped calculations for unusual systems.
Permits, Code, and Interconnection Limits for Tiny House Systems
Local building code, electrical code (NEC), and utility interconnection rules govern sizing and safety. Some jurisdictions limit inverter export capacity or require specific disconnects. For permit workflows and common steps, use the building permits guide. The Australian government guide on sizing offers useful parallels for available roof area and inverter sizing: Size your solar system.
Off-grid, Grid-tied, and Hybrid 10KW Setups for Tiny Houses
Choose topology by site and lifestyle:
- Grid-tied: Minimizes battery needs; uses net metering or export credits. Best where grid access exists and reliability is acceptable.
- Off-grid: Requires larger battery bank and often generator backup for extended low-sun periods.
- Hybrid: Combines grid connection with battery storage, or uses AC/DC-coupling to charge batteries while exporting/importing.
When to Choose Off-grid vs Grid-tied:
- Go off-grid if grid connection is unavailable or very expensive and if you want full independence.
- Choose grid-tied if cost or simplicity are priorities and grid reliability is fine.
Hybrid system topologies and coupling:
- AC coupling: Grid-tied inverter plus a battery-based inverter/charger on the AC side. Easier retrofit of batteries into existing grid-tied arrays.
- DC coupling: PV charges batteries directly through MPPTs and a battery inverter supplies AC — typically more efficient for new installs. For a deep dive see the AC/DC coupling guide.
Common backup strategies:
- Use a generator with an automatic transfer switch (ATS) for extended outages.
- Configure the inverter to auto-start the generator when SOC drops under a set threshold.
For a visual demonstration, check out this video on complete hybrid solar inverter wiring installation:
For broader project context, including full off-grid homes and how solar fits into a complete build, see building an off-grid home start-to-finish guide.
Cost and Payback: Budgeting a 10KW Solar System for a Tiny House
Typical Component Cost Ranges and Sample Budget Breakdown
Cost varies by region and equipment choice. Rough example ranges (2025–2026 market ballpark):
- Panels (10 kW): $4,000–$8,000
- Inverter (10 kW hybrid or off-grid): $2,000–$6,000
- Batteries (LiFePO4, 50–90 kWh nominal): $10,000–$40,000
- Mounting, wiring, combiner boxes: $1,500–$4,000
- Permits and inspections: $200–$1,000
- Labour (contractor): $3,000–$8,000 (DIY lowers this)
Sample budget table:
| Item | Low estimate | High estimate |
|---|---|---|
| Panels (10 kW) | $4,000 | $8,000 |
| Inverter & controllers | $2,000 | $6,000 |
| Battery bank (LiFePO4, 72 kWh usable) | $12,000 | $40,000 |
| BOS, conduit, mounts | $1,500 | $4,000 |
| Permits & labour | $3,200 | $9,000 |
| Total | $22,700 | $67,000 |
These numbers vary widely. For a detailed breakdown on hybrid systems and where battery costs impact totals, consult the hybrid systems cost breakdown.
Incentives, Net Metering, and How They Affect Payback
The federal residential clean energy tax credit (ITC) has historically offered a percentage credit of qualifying system costs; check current federal rules and local incentives. Utilities may offer net metering or compensation for exported energy, drastically improving payback if allowed. Local rules and incentive portals vary — verify through state or utility portals.
Jackery’s buyer guide provides perspective on small-system costs and tradeoffs relevant to tiny-house buyers: Solar panels for tiny house guide.
Cost-saving Strategies for Budget-conscious DIY Builders
- Increase efficiency first: LED lighting, smart controls, efficient mini-splits, and heat pump water heaters reduce required array/battery sizes — see smart lighting tips in smart lighting efficiency.
- Phase the project: install panels first and add batteries later.
- Use refurbished inverters or gently used batteries with caution — test and warranty status matter.
- Reduce panel count by combining roof and ground arrays, or by prioritizing higher-wattage modules.
- DIY installation of racking and conduit while hiring a licensed electrician for final AC interconnection saves money but preserves safety.
Installation Checklist and Maintenance for a 10KW Tiny House Solar System
Pre-install Checklist: Site Survey, Permits, Wiring Plans
- Site survey: Map shading, measure roof area, confirm orientation, and mark obstructions.
- Load audit: Finalize daily kWh and peak loads to confirm inverter and battery sizing.
- Permit set: Electrical single-line diagram, racking details, inverter specifications.
- Parts list: Panels, inverters, MPPT/charge controllers, battery modules, disconnects, combiner, conduits, fuses, lugs.
- Structural check: Confirm rafter and trailer/frame capacity; get engineer sign-off if needed.
Key Wiring and Safety Best Practices During Installation
- Use correct conductor sizing for maximum current and voltage drop limits.
- Install overcurrent protection at combiner and battery outputs.
- Label AC and DC disconnects clearly and keep them accessible for emergency shutoff.
- Follow NEC rapid shutdown rules for roof-mounted PV, and use listed equipment.
- For detailed conductor sizing and AC interconnection procedures, consult our wiring best practices guide.
Routine Maintenance Tasks and Troubleshooting Tips
- Inspect and clean panels annually or after heavy soiling; more often in dusty locations.
- Check torque on racking bolts and electrical connections each season.
- Update inverter firmware when manufacturers publish safety or performance fixes.
- Monitor battery state-of-health; calibrate SOC alarms and watch for cell imbalance.
- If batteries underperform, see our battery troubleshooting tips.
Safety note: PV arrays produce dangerous DC voltage whenever sunlight is present. Work with a licensed electrician for grid interconnection and when handling high-voltage batteries.
The Bottom Line
A 10 kW solar system makes sense when your tiny house has higher daily kWh demand or you plan future growth; start by sizing to kWh needs, not only inverter kW. Include 20–30% headroom for cloudy days and growth, check roof area and structural capacity, and weigh costs between grid-tied, hybrid, or full off-grid topologies. Next steps: run a load audit, use PVWatts for location-specific production estimates, and confirm permit and interconnection requirements.
Frequently Asked Questions
How many panels does a 10kW system need?
About 25 panels sized at 400 W each produce 10 kW DC (25 × 400 W = 10,000 W). Using 330 W panels needs roughly 30 units. Actual panel count depends on module wattage and layout constraints. Factor in spacing for vents and microclimate considerations — and plan area of about 15–20 ft² per 400 W panel for installation spacing.
Will a 10kW system run electric heat in a tiny house?
Possibly, but it depends on heating loads and climate. A 10 kW array in a sunny location can produce 28–44 kWh/day after losses. Efficient heat pump systems may run comfortably on that energy in moderate climates, but cold climates with long heating seasons typically need more energy or additional batteries and backup. Size by expected seasonal kWh and include headroom for low-sun periods.
Can a tiny house roof hold a 10kW array?
Sometimes yes, sometimes no. A 10 kW array often needs 375–500 ft² and a distributed weight of 1,500–2,000+ lbs. For trailer-based tiny homes, check axle load ratings and roof framing; for permanent foundations, verify rafter capacity and snow/wind loads. If roof area or structural capacity is limited, consider ground-mount or pole mounts.
Is a 10kW system too big for off-grid tiny houses?
It can be larger than necessary for low-usage tiny houses, but useful if you want multi-day autonomy, electric heating, or future expansion. Off-grid systems require significant battery capacity to match 10 kW production, plus generator backup for extended cloudy periods. Run the numbers: daily kWh need × days of autonomy → usable battery size required.
Do you need batteries with a 10kW grid-tied system?
No, batteries are optional for grid-tied systems if the grid is available and net metering exists. Batteries add backup and reduce grid dependence but increase cost. For retrofit or partial backup, consider a hybrid inverter with an initially small battery bank and plan to expand later.