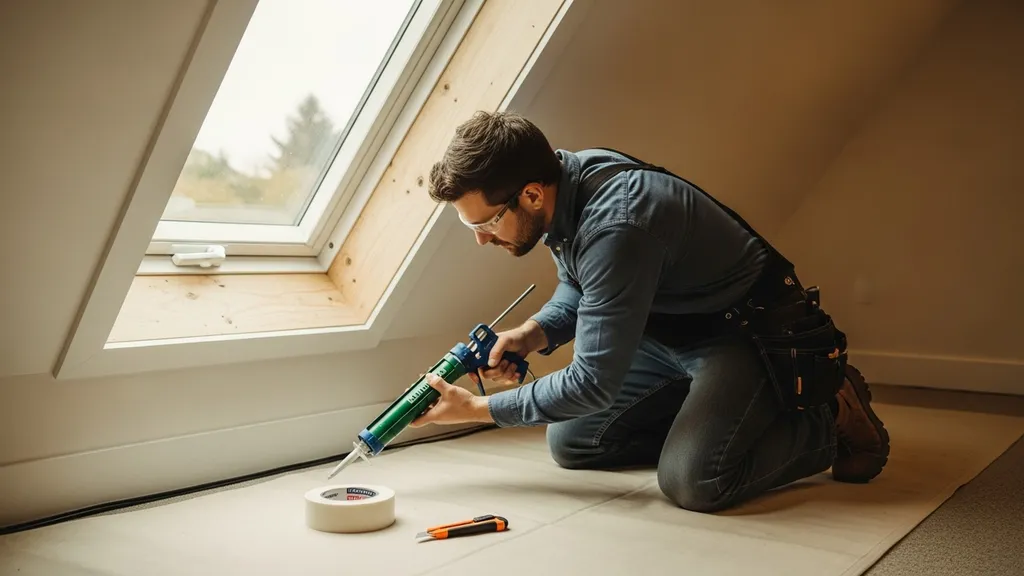
A practical guide to the tools and materials DIY builders need to air-seal a home efficiently and affordably.
Air Sealing Tools and Materials: What You Need
Air sealing tools and materials are the backbone of a tight, energy-efficient home. For budget-conscious DIY builders, choosing the right air sealing tools and sealants saves heat loss, reduces drafts, and can cut heating and cooling energy by roughly 10–30% when combined with insulation upgrades. This guide explains which tools to buy or rent, which tapes and caulks work where, how to measure airtightness, and how to prioritize purchases so a weekend project or full retrofit delivers measurable results.
TL;DR:
- Buy a reliable caulking gun, a selection of high-quality sealants, and airtight tapes first; expect to spend $50–$200 for a solid starter kit.
- Use diagnostic tools (smoke pencil, IR thermometer) and schedule a blower door test at key milestones; Passive House target is 0.6 ACH50, retrofit goals often under 3–5 ACH50.
- Prioritize sealing high-impact areas (rim joists, attic plane, window perimeters) with appropriate materials—backer rod + polyurethane for 1/4"–1" gaps; expanding foam only where recommended.
Why Air Sealing Matters for DIY Eco Homes
Airtightness affects comfort, energy bills, and moisture control. Research and best-practice guides show that properly sealing the building envelope can reduce space-conditioning loads by about 10–30% depending on climate and the starting condition of the home (see the Best practice guide for air sealing and insulation retrofits). A tighter envelope reduces uncontrolled infiltration, which lowers drafty spots and helps HVAC systems operate closer to their design efficiency.
Passive House standards set a clear target: 0.6 air changes per hour at 50 Pa (0.6 ACH50). Typical code-level airtightness varies by jurisdiction—many codes accept 2.0–3.0 ACH50 or use CFM50 limits—so Passive House is significantly tighter. For DIY retrofits, meaningful progress is often moving a leaky house from 8–12 ACH50 down to under 5 ACH50; further reductions require attention to continuity of the air barrier and better detailing.
Key building-science concepts:
- Air barrier continuity: The air barrier must be continuous across walls, floors, roofs, and around penetrations. Gaps at joints or transitions are common leak sources.
- Stack effect: Warm air rises in winter, pulling air in at lower levels and pushing out at upper levels; sealing rim joists and attic plane interrupts this pathway.
- Moisture transport: Air leaks carry moisture. Reducing infiltration lowers condensation risk in assemblies.
For a deep technical reference on airtightness strategy and Passive House targets, see the complete passive airtightness guide. For retrofit sequencing and practical tips on larger projects, consult the passive retrofit tips.
Essential Air Sealing Tools Every Diyer Should Own
This is the immediate shopping list for a practical starter kit. A short demo video showing tool handling and technique helps—viewers will learn caulking technique, tape application, and basic smoke testing with handheld gear.
This DIY video shows you the hands-on process:
Must-have tools (with use cases and typical cost ranges):
- Caulking gun (smooth rod), $10–$40: Use for most tube sealants—better control and less hand fatigue than ratchet guns. Consider a dripless model.
- Premium caulk finishing tool, $5–$15: Quick, clean tooling for beads around windows and trim.
- Utility knife, $10–$30: Cut tapes, trim membranes, and open tubes.
- Disposable nitrile gloves and rags, $10–$20: Protect hands from adhesives and solvents.
- Masking/painter’s tape, $5–$12: Mask off trim and protect surfaces during sealant tooling.
- Long-reach brush or vacuum nozzle, $15–$30: Clean joints prior to sealing.
- Cordless heat gun, $25–$120: Warm adhesives in cold weather for better adhesion (use carefully).
- Multi-tool or oscillating tool, $50–$150: Trim old sealant, cut back cladding for access.
- Respirator with organic vapor cartridges, $30–$90: Required when spraying polyurethane or solvent-based sealants.
- Spray bottle and shop vacuum, $10–$80: Prep and cleanup.
Diagnostic basics (essential inexpensive testers):
- Smoke pencil / theatrical fog pen, $20–$60: Fast way to find drafts at penetrations and joints.
- Infrared thermometer, $30–$150: Spot-check surface temperatures for leaks and insulation voids.
- Moisture meter, $40–$120: Confirm when assemblies might be damp after sealing or roof leaks.
Blower door guidance:
- Renting a blower door for a weekend typically costs $75–$250 depending on location; buying one runs $1,500–$4,000 for entry-level kits (brands: Retrotec, Minneapolis BlowerDoor). Energy.gov’s Guide to air sealing explains when blower door testing is most useful—pre- and post-seal verification, and for large retrofits hire a certified tester.
Quick Checklist: What to Pack for a Weekend Sealing Job
- Essential kit: Caulking gun, two sealant types, backer rod, airtight tape, utility knife, gloves.
- Diagnostics: Smoke pencil, IR thermometer, headlamp.
- Prep: Shop vac, brush, masking tape, rags.
- For more context on tool selection for entire builds, see the essential tools list.
Decide what to rent vs buy: Buy hand tools and a quality caulking gun. Rent blower doors and large power tools unless you expect repeated use.
Air Sealing Materials: Tapes, Caulks, Sealants, and Membranes
Choosing the right material for each leak type makes the difference between a short-lived patch and a durable air barrier. Below is a practical comparison and guidance on where to use each product class.
Airtight Tapes vs Construction Tapes: When to Use Each
- Airtight tapes (acrylic-coated, butyl-backed, MS polymer): Designed for long-term adhesion to sheathing, membranes, and rigid foam. Use for sheathing seams, membrane terminations, and Zip sheathing details. For ZIP sheathing specifics, see the ZIP sheathing as air barrier.
- Construction tapes (PVC, duct tape): Good for temporary protection or light sealing but not for primary air-barrier seams. Avoid using general-purpose duct tape for critical airtight seams.
Sealants and Caulks — Chemistries and Performance
- Acrylic latex caulk: Low cost, paintable, for small gaps (under 1/4"). Low movement capability. Good interior use.
- Polyurethane sealant: Strong adhesion and movement tolerance; good for joints that expect expansion/contraction. Use on rim joists and exterior terminations. Typically more expensive.
- Silicone: Excellent flexibility and UV resistance; poor paintability. Avoid on some substrates where adhesion is weak.
- Butyl tape and butyl-backed flashing: Excellent initial stick and conformability; often used for window flanges and flashing terminations.
- MS polymer (hybrid): Combines adhesion and paintability; increasingly popular as an all-rounder.
Airtight Membranes and Housewraps — Types and Placement
- Self-adhesive membranes (peel-and-stick): Use at rough opening perimeters and flashings. Must check manufacturer compatibility with solvent-based sealants.
- Breathable housewraps: Provide weather resistance but are not always air barriers; seams must be taped with airtight-compatible tape to serve as the air barrier.
- Dedicated airtight membrane (e.g., vapor-permeable airtight sheets): Used where an interior or exterior air barrier is required.
Comparison/specs table (common materials):
| Material | Typical cost | Perm rating | Best use case |
|---|---|---|---|
| Acrylic latex caulk (tube) | $3–$8 | ~medium (varies) | Interior trims, small gaps under 1/4" |
| Polyurethane sealant (tube) | $6–$12 | low | Exterior terminations, rim joists |
| Silicone (tube) | $6–$15 | low | Wet areas, UV-exposed joints |
| Butyl tape (roll) | $10–$25 | very low | Window flanges, flashing |
| Acrylic-coated tape (roll) | $20–$50 | medium/low | Sheathing seams, membrane joins |
| MS polymer tape (roll) | $25–$60 | low | General airtight sealing, durable |
| Self-adhesive membrane (roll) | $30–$120 | varies | Rough openings, penetrations |
Performance notes:
- Adhesion temperature range matters—many tapes lose stick below 40°F unless specially rated.
- UV exposure limits: most tapes degrade with long sun exposure; use UV-rated products or cover them.
- Primer requirements: Some membranes need primer before sealants—check manufacturer data sheets and follow ASTM adhesion test recommendations.
For contractor-focused descriptions of common leak areas and material durability, see the Energy Star Air Sealing guide for contractors. For membrane installation steps, consult install airtight membranes. If using exterior foam as part of your strategy, review the exterior foam insulation options for seam-sealing recommendations.
Measuring Airtightness: Blower Doors, Smoke Tests, Infrared, and What Numbers Mean
Knowing the numbers helps prioritize work and verify success. Testing quantifies leaks and guides follow-up work.
Blower Door Basics: Rent vs Hire, What to Expect
A blower door pulls a controlled pressure (usually 50 Pascals) to measure infiltration in CFM50 (cubic feet per minute at 50 Pa) and convert to ACH50. Renting is cost-effective for one-off checks: expect $75–$250 per rental. Buying is sensible for contractors or frequent testers—entry models start around $1,500. If precision and third-party certification are needed for incentives or Passive House certification, hire a certified tester.
The blower door process:
- Install frame and fan in an exterior door.
- Close all interior doors, open exterior vents per protocol.
- First test gives baseline CFM50/ACH50.
- Seal targeted areas and retest to quantify improvement.
Energy auditors and building scientists recommend testing at milestones: baseline, after major air-sealing stages, and final verification.
Simple Diagnostics: Smoke Pencils, Incense Tests, and IR Cameras
- Smoke pencil/theatrical fog: Quick, safe way to see airflow direction at penetrations and gaps. Use outdoors or in ventilated spaces.
- Incense stick: Cheap alternative for small leaks—watch smoke movement. Beware of fire risk and allergies.
- Thermal imaging: IR cameras (e.g., FLIR brand or smartphone attachments) reveal temperature differences indicating air leaks or insulation voids. Effective when indoor-outdoor temperature difference exceeds ~10–15°F.
A practical approach: use a smoke pencil to find leaks, mark them, seal, and then use a blower door to measure overall progress. For guidance on diagnostic testing in heritage buildings and retrofit situations, see the Vancouver heritage best practice guide.
Interpreting Results: ACH50, CFM50, and Real-world Meaning
- CFM50: Total leakiness at 50 Pa. Useful absolute number for tracing improvements.
- ACH50: Air changes per hour at 50 Pa; divides CFM50 by building volume. Passive House uses 0.6 ACH50 as its limit.
- Real-world airtightness: ACH50 numbers do not directly equal natural infiltration rates, but they correlate. Lower ACH50 means fewer drafts and more predictable ventilation needs.
Practical targets:
- Small retrofit or outbuilding: aim under 5 ACH50 for clear improvement.
- Whole-house deep retrofit: aim under 3 ACH50 and use mechanical ventilation.
- Passive House: 0.6 ACH50 for certification.
For homeowners unsure whether to test, the short answer is: if you plan to do significant sealing or insulation work, schedule a blower door test to document baseline and verify results.
How to Choose Budget-friendly Tools and Materials
Spend where it matters. Small investments in the right places deliver the largest airtightness gains.
Prioritizing Purchases: Highest-impact Tools First
Ranked ROI for DIYers:
- Good caulking gun and quality sealants: Immediate impact on window perimeters and trim.
- Airtight tapes for sheathing seams: High value for whole-envelope air barrier continuity.
- Smoke pencil and IR thermometer: Low cost, immediate diagnostics.
- Rent blower door for verification: Validate work; rent for key tests.
- Respirator and PPE: Safety first when using solvent-based products or spray foam.
Cost-saving Material Substitutions and When Not to Skimp
- Savings: Use rope caulk or backer rod + acrylic latex for irregular small gaps; effective and cheap.
- When not to skimp: Do not substitute cheap masking tape for long-term airtight tape on sheathing seams. Low-grade tapes peel within a few seasons, causing rework.
- Alternatives: For temporary sealing, painter's tape or duct tape can block drafts during short-term work, but plan to replace with proper materials.
Budget scenarios:
- Small job (under $100): Caulking gun, 2 tubes of acrylic latex, backer rod, smoke pencil.
- Mid-sized retrofit ($300–$1,200): Add airtight tape, MS polymer sealant, IR thermometer, rent blower door for test.
- Whole-house professional-grade ($1,500+): High-performance tapes, several sealant types, blower door purchase or pro services, specialized membranes.
Industry coverage on detection technologies and cost trade-offs is available from Building Performance Association commentary: an up-and-coming technology to detect air leakage.
When to Rent or Hire a Specialist
- Rent a blower door for mid-sized projects; hire a certified tester when documentation is required for rebates or certification.
- Hire pros for complex air barriers, multi-layer assemblies, or if the project affects structural components or fire-rated assemblies.
For broader sustainability trade-offs and material lifecycle thinking, consult the sustainable materials guide.
Step-by-step: Using Air Sealing Tools on Common Leak Points
This section provides concrete, size-based guidance and recommended materials for typical leak locations. Use numbered steps for tasks where order matters.
Windows and Doors: Gaps, Sills, and Shims
Typical gaps and recommended fixes:
- Gaps under 1/4": Use a bead of acrylic latex or silicone (bath or exterior grade depending on location). Tool the bead smooth.
- Gaps 1/4"–1": Insert backer rod, then seal with polyurethane or MS polymer. Backer rod supports the sealant and creates correct joint geometry.
- Gaps over 1": Use low-expansion spray foam for deep voids, then trim and backer rod + sealant for a finished joint.
Steps:
- Clean mating surfaces with brush and vacuum.
- Install backer rod sized ~25% larger than gap diameter.
- Apply sealant with caulking gun, keeping gun at ~45° and moving steadily.
- Tool the bead within the skin time recommended by manufacturer.
- Check with smoke pencil.
For window upgrade guidance, read the window upgrade considerations.
Attic and Roof Junctions: Skylights, Vents, and Hatches
- Seal attic perimeter (top plate) and all ceiling penetrations before insulating. Major leaks are commonly at plumbing vents, chimneys, and recessed cans.
- For skylights: follow manufacturer flashing instructions, seal the gap between skylight curb and roof deck with butyl or MS polymer tape, and apply sealant on interior trim edges as needed.
- Use gasketed hatches or weatherstrip along attic access doors.
See attic insulation basics before insulating the attic; sealing first prevents trapped moisture.
Basement Rim Joists and Service Penetrations
- Rim joists are high-impact. For gaps under 1/4", caulk. For 1/4"–1", use backer rod + polyurethane. For larger cavities, apply low-expansion spray foam to fill voids and follow with a mechanical nailer of rigid foam if doing continuous insulation.
- Seal around electrical, plumbing, and HVAC penetrations with foam, then tool with sealant or tape for a neat finish.
Duct Boots, Electrical Boxes, and Plumbing Penetrations
- Seal duct boots to subfloor or drywall with mastic or UL-181 foil tape (on metal ducts) and then airtight gaskets around the boot.
- Use putty pads or foam gaskets for electrical boxes on exterior walls; interior boxes can be sealed with fire-rated caulk if required by code.
- Penetrations through framing members: use non-expanding spray foam for irregular gaps, and large penetrations should be boxed and sealed with membranes.
For technical guidance on using backer rod, non-expanding foam, and diagnostic tools, see Oak Ridge National Laboratory's Seal air leaks and save energy.
Safety note: Spray foam and solvent-based adhesives require respirators and ventilation during installation. Allow full cure and ventilate per product instructions before reoccupying enclosed spaces.
Safety, Prep, and Quality Checks
Sealing a home involves chemicals and potential dust; safety and documentation matter as much as the materials chosen.
Health and Ventilation While Sealing
- Use a half-mask respirator with organic vapor cartridges for polyurethane and solvent-based products; N95 is not sufficient for organic vapors.
- Wear nitrile gloves and eye protection.
- Ensure cross-ventilation during and after application; run fans and, if possible, exhaust to outdoors for several hours following application.
- For guidance on ventilation planning after tightening a house, see the ventilation for eco homes.
Compatibility, Adhesion Testing, and Primer Use
- Do an adhesion test: apply a small tape patch or bead of sealant to the substrate, wait cure time, then test pull. If adhesion is poor, use manufacturer-recommended primer.
- Check temperature and humidity installation limits on product data sheets—many adhesives require above 40°F and below 80% RH.
- Store sealants in moderate temperatures; freeze-thaw cycles can ruin some chemistries.
Documenting Work and Retesting
- Photograph each detail before and after sealing. Record product name, batch number, and date.
- Retest with a blower door or smoke pencil after major sections are complete. Document CFM50/ACH50 improvements.
- Keep leftover material labeled for future touch-ups and disposal per local regulations.
The Bottom Line
A compact toolkit—caulking gun, select sealants, airtight tapes, smoke pencil, and an IR thermometer—plus strategic blower door testing will yield the biggest comfort and energy gains for DIY eco homes. Prioritize sealing the attic plane, rim joists, and window perimeters, document work, and test after major milestones to measure results.
Frequently Asked Questions
What are the absolute must-have air sealing tools for a beginner?
Start with a smooth-action caulking gun, utility knife, backer rod, a tube each of acrylic latex and polyurethane sealant, airtight tape, and a smoke pencil for diagnostics. Add nitrile gloves and a respirator if you will use spray foam or solvent-based sealants. These items let a beginner tackle windows, small gaps, and rim joist sealing with professional results.
How do I know if I need a blower door test?
If you plan significant air sealing, insulation upgrades, or need proof for incentives or certification, a blower door test is recommended. Use it to measure baseline leakage and to quantify improvements after major work. For a one-off small job, a smoke pencil and IR checks may suffice; rent a blower door if moving from a rough retrofit toward under 5 ACH50 goals.
Can I use standard construction tape as an airtight tape?
No. Standard construction tape and duct tape are not designed for long-term airtightness and typically fail under UV or temperature cycling. Use tapes specified for airtight seams, such as acrylic-coated or MS polymer tapes, especially on sheathing seams and membrane terminations. For more on compatible sheathing and tapes, see the [wall sheathing choices](/blog/wall-sheathing-choosing-right-material-strength-airtightness) and ZIP sheathing as air barrier guidance.
What’s the difference between caulk and sealant for air sealing?
Caulk (often acrylic latex) is generally for small interior gaps and is paintable but has limited movement capacity. Sealants like polyurethane or MS polymer have higher adhesion and movement tolerance for exterior joints, rim joists, and transitions between dissimilar materials. Choose based on expected joint movement, substrate compatibility, and exposure to UV or moisture.
How long should I wait before retesting after sealing?
Follow product cure times: most caulks cure to handle light stress in 24–48 hours; polyurethane may need 48–72 hours. For spray foam, allow manufacturer-recommended cure time and ventilation—often 24 hours for initial cure. Retest with a blower door only after sealants have fully cured to avoid underestimating results. Document cure times and test dates for accurate comparison.