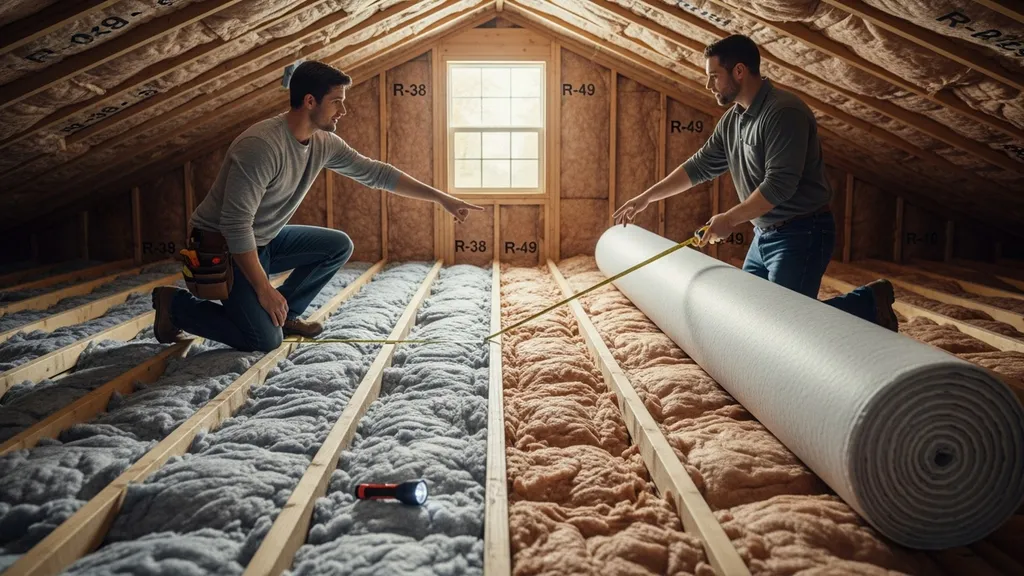
Compare R-38 and R-49 insulation: performance, thickness, costs, common materials, and practical guidance to choose the right R-value for your DIY eco home.
R-38 vs R-49 Insulation: Which Do You Need?
Choosing between R-38 and R-49 insulation comes down to how much thermal resistance your attic or roof cavity needs, how deep your framing is, and whether long-term energy savings justify higher upfront cost. This article compares R-38 vs R-49 insulation head-to-head so a budget-conscious DIY homebuilder can weigh thickness, materials, installation trade-offs, and when each R-value makes practical sense. You’ll learn typical thicknesses by material, rough cost ranges, retrofit tips, and scenario-based recommendations so you can pick the right target R-value for your climate and build goals.
! Homeowner comparing R-38 and R-49 insulation depths in a residential attic — [r38 vs r49 insulation](/images/r-38-vs-r-49-insulation-hero.jpg)
TL;DR:
- R-38 saves energy in most mild-to-moderate climates and fits standard 2x10 attic depths (about 11–14 in fiberglass); choose R-38 for budget retrofits and limited attic depth.
- R-49 cuts heating load noticeably in cold climates and is recommended where heating dominates or for long-term ownership (typically 14–18 in fiberglass or layered systems); expect higher material cost and thicker assemblies.
- Start with air sealing and ventilation fixes, then add insulation; use the insulation savings calculator to estimate payback for your home.
Quick Overview — R-38 vs R-49 Insulation: Which Do You Need?
TL;DR aside, the practical question many homeowners face is: will the extra thickness and cost of R-49 produce measurable savings in my climate and house type? For attics, building codes and programs often recommend R-38 in milder zones and R-49 (or higher) in colder zones. For example, national guidance groups list attic targets that range from roughly R-30 up to R-49 or R-60 depending on climate and whether continuous insulation is used. The Insulation Institute provides useful baseline recommendations for fiberglass and loose-fill products when starting from zero insulation: see their selection guide for product-specific advice (PDF).(insulationinstitute.org)
| R-value | Typical thickness (fiberglass batt) | Typical thickness (blown-in cellulose/loose fill) | Typical spray-foam equivalent (closed-cell / open-cell) | Estimated material cost range / ft² (installed, rough) | Common uses | Payback considerations |
|---|---|---|---|---|---|---|
| R-38 | ~11–14 in | ~10–12 in settled depth | Closed-cell ~5–6 in + layer; open-cell ~14–16 in | $0.50–$1.50 (DIY blown/batts), $1.50–$3.50 (pro installed) | Attic floor in zones 3–5, retrofit on 2x10 joists | Lower upfront cost, faster payback in mild climates |
| R-49 | ~14–18 in | ~13–16 in settled depth | Closed-cell ~8–9 in or hybrid with rigid foam | $0.80–$2.50 (DIY/pro variable), $2.50–$5.50 (spray foam) | Cold-climate attics, passive-house targets, long-term ownership | Higher cost, longer payback but reduces heating loads in cold zones |
Notes: Thickness ranges vary with product R-per-inch. Costs and payback vary by region, fuel prices, and whether labor is DIY or pro. Always check local code (IECC or local amendments) for minimum attic R-values.
R-38 — What It Is, Performance and When to Choose It
Definition and Typical Assemblies
R-38 denotes insulation that provides 38 units of thermal resistance per inch of area (R-value is a measure of thermal resistance). In typical practice, R-38 for attic floors is commonly achieved with fiberglass batts about 11–14 inches thick installed between 2x10 joists, or with blown cellulose / fiberglass loose-fill at similar settled depths. In new builds, R-38 can also be achieved with a combination of cavity insulation plus continuous exterior insulation (for example, R-13 cavity + R-5 continuous board yields comparable performance in some climates).
Strengths (cost, Thickness, Retrofit-friendly)
- Cost-effective: Material costs are lower than deeper targets; many DIYers can install batts or rent a blower for cellulose.
- Retrofit-friendly: Fits within standard 2x10 attic floor depths without extensive framing changes.
- Quick payback in moderate climates: If your house currently has little insulation, moving to R-38 usually yields strong immediate savings.
- Compatible with common ventilation strategies: Keeps attic depth reasonable, making soffit and ridge ventilation simpler.
Weaknesses (limits in Very Cold Climates, Lower Thermal Margin)
- Not optimal for cold climates: In heating-dominated zones (IECC zones 6–8), R-38 may not be sufficient to minimize heat loss or condensation risk in roof assemblies.
- Less thermal margin: If you expect rising energy costs, long-term ownership, or plan major airtightness improvements, R-38 offers smaller incremental gains than R-49.
- Can be compromised by bypasses: Compressed batts or air leaks around chimneys, plumbing stacks, and recessed lights erode effective R-value.
Best For: Use Cases
- Mild-to-moderate climates (IECC zones 1–5) where heating season is short or balanced with cooling.
- Budget attic retrofits where ceiling cavity depth restricts thicker fill.
- Homes with limited attic access or where moving ducts and HVAC is impractical.
For R-value fundamentals, consult our R-value basics guide. Also see the Department of Energy's insulation overview for recommended R-ranges and strategies for different climate zones ([[[Department of Energy's guide to insulation).]]](https://www.energy.gov/energysaver/insulation)
R-49 — What It Is, Performance and When to Choose It
Definition and Typical Assemblies
R-49 provides roughly 29% more thermal resistance than R-38 for the same area. Achieving R-49 usually requires deeper insulation—fiberglass batts around 14–18 inches thick, denser blown cellulose at 13–16 inches settled, or layered/hybrid systems that combine cavity fill with rigid foam above the ceiling or on the roof sheathing. For spray foam, closed-cell at ~8–9 inches or an open-cell layer plus a thin sheet of exterior foam can hit the target.
Strengths (better Thermal Comfort, Lower Energy Use in Cold Climates)
- Superior performance in cold climates: Extends heating-season comfort and reduces heat loss through the attic deck.
- Smaller daily temperature swings: More thermal mass in the envelope means interior temperature holds longer overnight.
- Better fit for high-performance goals: R-49 aligns with passive-house-inspired retrofit targets and near-net-zero projects where airtightness and high R-values combine.
Weaknesses (thickness, Higher Cost, Installation Complexity)
- Requires deeper cavities or raised-heel trusses: Standard rafters may not have enough depth; solution often means furring or redesigning trusses.
- Higher material and labor cost: Especially for spray foam or layered systems; professional installation is common.
- Moisture and ventilation considerations: Thicker insulation in vaulted or cathedral ceilings can trap moisture unless vapor control and ventilation are designed correctly.
Best For: Use Cases
- Cold climates (IECC zones 6–8) with long heating seasons.
- New builds targeting long-term ownership and low operating costs.
- Retrofits where the homeowner plans to pair insulation upgrades with air-sealing and mechanical ventilation improvements (see Energy Star's recommended R-values for context).
If you have limited cavity depth but want R-49 performance, consider layered strategies with rigid foam or Larsen truss walls to increase effective R without extreme framing changes; see our larsen truss wall option guide for one approach.
How Common Insulation Materials Deliver R-38 and R-49
Fiberglass Batts (typical Thicknesses and Limits)
- R-38: Fiberglass batts sized for 2x10 joists measure roughly 11–14 inches thick depending on product R-per-inch (typically R-3.2–R-3.8/in).
- R-49: Requires thicker batts, often oversized or layered, at about 14–18 inches. Manufacturers make high-density batts but they’re bulkier and harder to install without compression.
- Moisture: Fiberglass resists moisture damage but loses performance when compressed or wet. No vapor control; air sealing must be handled separately.
Blown Cellulose and Loose-fill (depth and Settling Considerations)
- R-38: Achieved with about 10–12 inches of cellulose at initial fill; settling over years can reduce effective R by 5–10% if not properly dense-packed.
- R-49: Typically 13–16 inches settled; installation should account for long-term settlement—dense-pack or binder-treated products reduce settling.
- Moisture: Cellulose is hygroscopic; it holds water and must be paired with proper vapor and ventilation strategies.
Spray Foam (open-cell vs Closed-cell to Reach R-values)
- Open-cell spray foam has R ≈ 3.5–3.7/in; to reach R-49 you’d need ~13–14 inches—rare for practical use and expensive.
- Closed-cell spray foam has R ≈ 6–7/in; 7–8 inches can reach R-49 but at high cost and with higher embodied carbon. A hybrid—thin closed-cell layer for air/moisture control plus batt or cellulose atop—can achieve R-49 with less foam.
- Vapor control: Closed-cell acts as an air and vapor barrier; open-cell does not.
Rigid Foam and Layered Systems (thin Layers to Avoid Bulk)
- Continuous exterior rigid foam (polyiso, XPS, or EPS) can supplement cavity insulation. For example, R-13 cavity + R-10 polyiso yields combined performance similar to deeper cavity-only values.
- Advantages: Avoids extreme interior bulk, reduces thermal bridging, and simplifies meeting R-49 in shallow cavities.
- Watch for installation details: foam board joints must be taped or sealed to maintain continuity.
Hybrid Approaches (air-sealing + Moderate R-value)
- Air sealing often delivers more immediate savings than adding incremental R. A common high-value approach is to air-seal ceilings and add R-38, then add exterior continuous insulation later.
- For thin-cavity situations (mobile homes, tiny houses) see our mobile home insulation options.
Watch this step-by-step guide on beefing up attic insulation:
See our deeper comparison of material pros and cons for more on carbon and performance trade-offs: spray foam vs cellulose comparison and the related detailed material pros and cons.
Cost, Thickness, and Installation Trade-offs in R-38 vs R-49
Material Cost Ranges and Labor (DIY vs Pro)
- Ballpark installed costs vary widely. For attic blown fiberglass or cellulose, expect $0.50–$1.50/ft² (DIY) and $1.50–$3.50/ft² (professional), depending on depth and region.
- Spray foam runs substantially higher—often $2.50–$5.50/ft² or more for closed-cell to reach high R-values.
- Rigid foam layering increases material cost but can simplify labor and avoid truss changes.
Use the insulation savings calculator to estimate payback for your home.
Thickness Impact on Framing and Roof Assemblies
- R-49 may exceed standard joist/rafter depth. Raised-heel trusses or furring to create depth are common solutions. See our framing and rafter depth guide.
- In cathedral ceilings, adding R-49 often requires changing rafter depth or creating vent chases and baffles so ventilation isn't blocked.
Installation Complexity and Common Pitfalls
- Common mistakes: compressing batts, covering vents, ignoring bypasses, and failing to account for settling in blown systems.
- Retrofit challenges: relocating recessed lights, HVAC ducts, attic-mounted equipment, and ensuring clearances for recessed fixtures are all part of the job.
- For guidance on where air leaks typically occur, consult our common leakage points. And before adding insulation, follow the air-sealing checklist.
Moisture, Ventilation, and Attic Airflow Considerations
- More insulation alters attic temperature and vapor dynamics. You may need to reassess ventilation strategy—continuous soffit and ridge vents remain common, but thicker insulation can increase the importance of controlled intake/exhaust and a proper vapor-control approach.
- Our ventilation strategies guide explains how ventilation and insulation depth interact.
Which Should You Choose? Scenario-based Recommendations
Mild Climates and Budget Builds — When R-38 is Appropriate
- Choose R-38 when heating is occasional, cooling is the bigger issue, or when attic depth is limited. Homeowners in IECC zones 1–4 often see good ROI from R-38 upgrades. If your budget is tight, prioritize air sealing and duct sealing, then add R-38.
Cold Climates, Long-term Ownership, and High-performance Goals — When R-49 is Justified
- R-49 makes sense if your home is in zones 6–8, you primarily heat with fossil fuels, and you expect to stay in the house 10+ years. The incremental energy savings compound, and R-49 reduces peak heating load—helpful for smaller heating systems.
Space-constrained Builds, Tiny Homes and Mobile Homes — Alternatives to Deep R-values
- In low-cavity situations, use high-R-per-inch materials and continuous foam strategies. See our mobile home insulation options for thin-cavity tactics, or consider Larsen truss walls to create extra cavity depth without large exterior changes: larsen truss wall option.
Upgrade-first Checklist for Diyers (air Sealing, Ventilation, Then Add Insulation)
- Air-seal obvious leaks: attic hatch, plumbing chases, recessed cans, and electrical penetrations. Follow the air-sealing checklist.
- Address attic ventilation: ensure soffit intake and ridge or gable exhaust are clear per our ventilation strategies.
- Choose material: pick blown cellulose/fiberglass for cost-effectiveness or a hybrid with rigid foam for space-limited situations.
- Install to depth with attention to settling and compression; hire pros for spray foam.
Decision heuristic: If heating dominates and you plan to own the house a decade or longer, favor R-49. If cooling dominates, attic depth is limited, or you’re on a tight budget, R-38 is often the pragmatic choice.
The Bottom Line
R-38 is the cost-effective, retrofit-friendly choice for many mild-to-moderate climates and shallow attic depths. R-49 pays off in cold climates, long-term ownership scenarios, and high-performance builds but requires deeper cavities or layered systems and higher upfront cost. Start with air sealing and ventilation fixes, then use the insulation savings calculator to model payback.
Frequently Asked Questions
How much energy will I save by moving from R-38 to R-49?
Ballpark savings vary by climate, current insulation level, and energy prices. Moving from R-38 to R-49 typically reduces attic heat loss by roughly 10–20% for the same area, though percentage gains are smaller than the absolute R-value jump because returns diminish at higher R-values. For a specific house, use the insulation savings calculator to get a tailored estimate that includes local fuel costs and climate.
Can I combine materials to reach R-49 without huge thickness?
Yes. A common approach is to combine cavity insulation with continuous rigid foam (for example, R-13 cavity + R-10 polyiso). Another method is a thin closed-cell spray-foam air barrier plus blown insulation above it. These hybrid systems reduce bulk and thermal bridging while achieving high effective R-values.
Is R-49 worth it for a mild climate?
Probably not in most mild climates unless you have other goals like sound control, passive-house targeting, or expect to own the home long term and value comfort over upfront cost. In mild zones, air sealing plus R-38 often delivers the best cost-to-performance ratio.
Do I need a vapor barrier if I upsize to R-49?
Vapor control depends on wall/roof assembly and climate. Closed-cell spray foam provides both air and vapor control, but if using fibrous insulation or cellulose, you must manage vapor and airflow with proper ventilation and selective vapor retarders. Consult local code and best-practice guides for your climate; see the Department of Energy and Energy Star links above for general guidance (Department of Energy's guide to insulation, Energy Star recommended R-values). energystar.gov
Can I DIY reach R-49, or should I hire a pro?
DIY is possible for blown fiberglass or cellulose if you rent a blower and understand settling and density needs. Reaching R-49 with spray foam usually requires a professional. For complex builds—raised-heel trusses, roofline insulation, or assemblies that affect ventilation—professional help reduces risk and code issues.