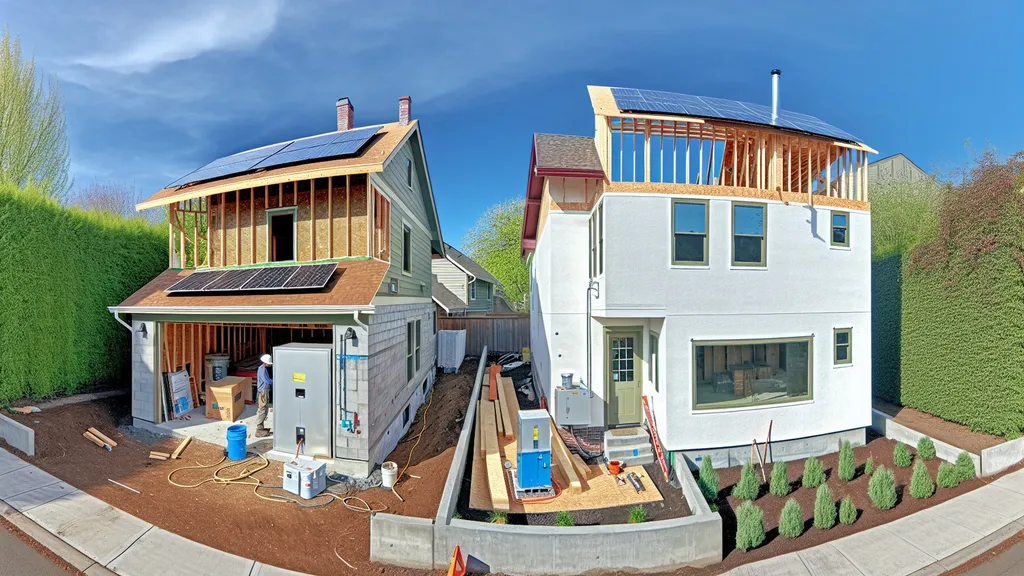
Clear, practical guide that explains net zero vs net zero ready — costs, design choices, and which approach suits DIY builders.
Net Zero vs Net Zero Ready: Understanding the Difference
Choosing whether to build a net zero home now or to make a net zero ready house is one of the first big decisions a DIY self-builder faces. This guide explains exactly what "net zero" and "net zero ready" mean, how they differ in design and cost, and practical steps for DIY builders who want to prioritize the envelope, phase in solar later, or commit to on-site renewables from day one. You'll learn where money buys the biggest lifetime savings, what verification paths exist, and simple on-site choices that keep future upgrades affordable.
TL;DR:
- Build net zero ready first if you have limited upfront budget: focus on airtight envelope and high R-values, then add PV and batteries later to reach net zero.
- Choose full net zero when you want immediate operational savings and resilience—this often requires larger upfront costs for PV and storage sized to annual use.
- Certification and verification (DOE Zero Energy Ready Home, PHIUS/Passive House) change design trade-offs; consult the Federal new buildings handbook for technical guidance and start with a net zero ready glossary if you need quick definitions.
Net Zero vs Net Zero Ready: Quick TL;DR and Comparison Table
TL;DR Summary for DIY Builders
A homeowner deciding whether to add PV now or prioritize the envelope should weigh first-cost vs lifetime energy costs and resilience. A net zero ready approach minimizes initial spending on solar by building a high-performance shell now. Full net zero reduces annual utility bills and can offer backup power but raises upfront system costs. Use the short table below to scan the main trade-offs; after that, read the full sections for sizing methodology and stepwise upgrade paths.
| Topic | Net Zero | Net Zero Ready | Key differences | Typical first-cost impact | Typical operational differences |
|---|---|---|---|---|---|
| On-site renewables required? | Yes — sized to offset annual use | No — designed to accept renewables later | Net zero includes PV/storage; ready means the envelope and electrical capacity are prepared | Higher (PV + inverter + battery) | Lower grid bills, potential export revenue vs. low bills once PV installed |
| Verification / certification | DOE Zero Energy Ready Home, PHIUS/Passive House + zero-energy claims | Meets high-performance envelope & systems; labeled "ready" by some programs | Net zero verifies on-site generation; ready verifies readiness and envelope | +10–40% vs baseline depending on climate and PV inclusion (varies) | Net zero reduces annual energy use to near-zero; ready reduces loads and simplifies later PV sizing |
| Typical sizing approach | PV sized to annual kWh demand; battery sized for resilience | Envelope reduces demand; PV sized later to match reduced demand | Ready lowers the kW needed for net zero | Immediate PV expense vs deferred capital | Immediate reduced bills with net zero; delayed with ready |
For technical baseline and recommended verification approaches for public projects, see the Federal new buildings handbook for net zero projects.
Also keep a short project checklist for on-site decisions in your folder: see our self-build checklist for project management items that matter during framing, electrical rough-in, and roof sheathing.
Net Zero: Definition, How It Works (net Zero vs Net Zero Ready)
Overview: What "net Zero" Means in Practical Terms
A net zero home balances its annual operational energy use with on-site renewable generation. In practice that means the home's yearly kWh consumption is offset by the kWh produced by rooftop or ground-mounted PV, often combined with batteries or time-of-use exports. Net zero focuses on operational energy (heating, cooling, hot water, appliances, lighting). Certification and measurement can be formal—using meter data over a full year—or informal, using modeled energy use and PV output.
Design Strategies Commonly Used
Common strategies are:
- High-performance envelope: continuous insulation, thermal breaks, and minimized thermal bridging.
- Airtight construction plus mechanical ventilation with heat recovery (MVHR or HRV).
- Efficient heating and hot water: air-source or ground-source heat pumps and heat-pump water heaters.
- Efficient appliances and LED lighting to reduce baseline loads—see our guide to efficient appliances.
- Proper PV sizing and inverter selection, with optional battery storage for resilience.
- Orientation, shading, and passive solar that reduce mechanical loads.
Guidance on envelope load control and system choices appears in the NIST report Strategies to achieve net-zero energy homes, which explains heat transfer and moisture-control trade-offs.
Strengths
- Predictable, low annual energy bills once systems are sized correctly.
- Greater resilience when paired with batteries—able to supply critical loads during outages.
- Clear environmental benefits and strong marketing value at resale if certified.
Weaknesses
- Higher upfront costs for PV arrays, inverters, and batteries sized to match annual consumption.
- Peak demand issues if not paired with load-shifting controls; larger PV systems may require structural or permitting adjustments.
- Accuracy of net zero claims depends on how energy is measured (site vs source energy, export accounting).
Best for [use Cases]
- Owners who want immediate energy independence, lower bills from day one, or near-off-grid capability.
- Projects where incentives, tax credits, or favorable net-metering reduce the effective cost of PV and batteries.
- Builds in sunny climates where PV yields are maximized.
For detailed ventilation layout considerations that affect both net zero and net zero ready homes, consult our ventilation design guide.
Net Zero Ready: Definition, How It Works (net Zero vs Net Zero Ready)
Overview: What "net Zero Ready" Means in Practical Terms
A net zero ready house combines a high-performance shell and efficient systems sized so that when on-site renewables are added later, the home can achieve net zero with a modest PV system. The primary idea is future-proofing: invest in airtightness, insulation, and efficient mechanicals now; postpone the high cost of PV and batteries until the budget or incentives permit installation.
How It Differs From Full Net Zero (intent vs Installed Systems)
Net zero ready focuses on reducing the denominator—annual energy use—by making the building as efficient as possible. Net zero adds the numerator—on-site generation—immediately. A ready build will typically include:
- Electrical panel space and conduit for future PV and batteries.
- Roof structure and orientation optimized for PV placement.
- Mechanical systems compatible with future integration (e.g., heat pumps sized for low loads).
- Documentation: as-built energy models and labelled junctions to simplify later installation.
Design guidance for insulation choices and hygrothermal analysis is detailed in the State University Construction Fund's Energy efficiency design guide, which recommends early thermal and moisture modeling to inform insulation type and thickness.
Strengths
- Lower initial capital outlay compared with full net zero.
- Bigger lifetime savings per dollar because the envelope improvements reduce required PV capacity.
- Easier to phase in upgrades; retrofit costs are minimized if the home is prepared for PV and battery installation.
Weaknesses
- Operational emissions only fall to net zero once renewables are installed.
- Buyers may undervalue "ready" compared to certified net zero; resale premiums are clearer for verified net zero.
- Requires discipline: owners must follow through with PV installation eventually to realize the full environmental and energy cost benefits.
Best for [use Cases]
- Budget-conscious self-builders who want the lowest long-term cost-per-kWh reduction.
- Landowners who plan to add off-grid capability later.
- Projects in jurisdictions with rising incentives or improving PV economics over time.
Practical Steps to Become Net Zero Later (upgrade Path)
- Pre-wire for PV and battery with conduit runs sized for 4/0 cables and space at the service panel for an extra breaker or subpanel.
- Reserve roof area and document rafter spacing and sheathing for future mounting.
- Install an allowance in the electrical plan for a dedicated inverter and battery location (garage or dedicated closet).
- Keep an energy model and airtightness test results; these reduce uncertainty when sizing PV later.
A short explainer video helps visualize the difference between the two approaches and common upgrade steps for owners. Watch this to see examples of a finished net zero house and a net zero ready home with retrofit provisions:
This video explains the fundamentals:
For hands-on window sealing techniques while building a ready envelope, see our window sealing tips.
Net Zero vs Net Zero Ready: Performance, Cost, and Certification Comparison
Energy Performance Metrics to Compare (EUI, Kwh/yr, Peak Loads)
Compare homes using:
- Site energy use (kWh/yr): actual metered electricity consumed on site.
- Energy Use Intensity (EUI): kWh/ft²/yr or kWh/m²/yr, useful for size-normalized comparisons.
- Peak electrical demand (kW): affects inverter and service sizing.
- Source energy: includes generation and transmission losses; useful for environmental accounting.
A net zero home aims for net site energy near zero across a full year. Net zero ready reduces site energy significantly but will show net positive generation only after PV is added.
Upfront Cost vs Lifecycle Cost Trade-offs
Upfront cost is primarily driven by PV and battery capacity in net zero builds and by envelope quality for net zero ready. Typical guidance: invest first in the building fabric (insulation, airtightness, windows) up to the point of diminishing returns, then size PV to cover the reduced load. Industry analyses and municipal code guidance (see the Municipal guide to net-zero energy ready building codes) show that code-driven "ready" standards reduce future PV needs and lower lifecycle costs.
Avoid giving a single universal price because material and labor rates vary widely with climate and region. Instead, plan ranges and use an energy model to determine the knee point where adding more insulation costs more than the PV it saves.
Sizing PV and Storage for Each Approach
Sizing methodology:
- Estimate annual kWh demand from modeled or measured loads.
- For net zero: size PV (kW) so annual production ≈ annual demand, adjusting for local solar resource and system losses.
- For net zero ready: reduce demand first, then size PV to match the reduced demand when funds are available.
For example methodology and small-system math, see our solar sizing guide. For budget panel options DIYers often prefer low-cost modules—see our list of budget solar panels when planning initial PV purchases.
Storage sizing depends on desired resilience. A daytime-only backup needs less battery capacity than full 24-hour autonomy. See our breakdown of hybrid systems costs for inverter topology and coupling trade-offs.
Certification and Verification Pathways Compared
- DOE Zero Energy Ready Home: verifies high-performance envelope and that renewables are used or planned; a common pathway for net zero projects with DOE-aligned checklists.
- PHIUS/Passive House: focuses on envelope, airtightness, and ventilation; a Passive House can be net zero with added renewables.
- ENERGY STAR for Homes: verifies efficient systems and can be a step toward net zero ready.
Certification affects design: Passive House targets airtightness and thermal comfort that reduce loads dramatically, while DOE Zero Energy Ready emphasizes documentation proving readiness for renewables. For context on high-performance envelope costs, refer to our analysis of passive house costs.
Net Zero Ready: Practical Design and Build Checklist
This checklist targets DIY builders aiming to make a durable net zero ready shell with sensible allowances for later PV and battery work.
- Envelope and insulation priorities: Use continuous insulation on exterior sheathing to break thermal bridges. Target wall and roof R-values appropriate for your climate. See our guide to exterior roof insulation for details.
- Windows, orientation, and passive solar: Place most glazing on the south side in northern latitudes. Use high-SHGC glazing on south-facing glass and low-SHGC glazing on west exposures. Include shading devices or light shelves; see our light shelves guide for daylighting strategies.
- Air sealing and moisture control: Plan an explicit air barrier plane and sequence window and penetration seals during rough framing. Target airtightness test results that reflect Passive House or PHIUS guidance as a goal; see our air-sealing guide for step-by-step techniques.
- Mechanical systems and ventilation: Install an MVHR or HRV sized for the building's occupancy and leakage rate. Choose heat pumps with an eye to future coupling with PV; the heat pump buying guide lays out inverter and capacity choices.
- Electrical and solar-ready provisions: Install a service panel with spare capacity and a 240V/AC feed routed to a labeled inverter/battery closet. Run 2.5–4 inch conduits from the roof to the inverter location and from the inverter location to the main panel. Label conduit ends and provide a clear equipment footprint to reduce retrofit labor.
For airtightness targets and ventilation sizing, reference Passive House/PHIUS guidance. Keep all installation records and energy models; those will reduce uncertainty when you size PV and storage later.
Net Zero vs Net Zero Ready: Upgrading a Ready Home to Full Net Zero
Assessment Checklist Before Adding Renewables
- Confirm actual annual loads via bills or a monitored baseline for 12 months if possible.
- Review as-built documentation: envelope R-values, airtightness test, ventilation system efficiency and duct runs.
- Check roof condition and orientation, structural capacity for modules, and any shading issues.
- Verify electrical service capacity and inspect pre-installed conduit and inverter footprint.
For measured performance frameworks and testbeds that illustrate retrofit outcomes, consult the NIST program on Measuring the performance of net-zero energy homes.
Cost-effective Upgrade Sequence (PV, Storage, Controls)
- Address any remaining low-cost efficiency gaps first (LEDs, smart thermostats, reduce standby loads).
- Install PV sized to cover current measured annual loads with a margin (10–20%) for future increases or system losses.
- Add battery storage if resilience is a priority—start with a smaller system for critical loads and expand modularly.
- Implement energy management and smart controls to shift loads into PV production windows.
Staged investments often reduce capital strain and allow you to take advantage of improving battery economics. Read about trade-offs in inverter coupling and lifecycle impacts in our hybrid sustainability piece.
Estimating Expected Payback and Performance
Use measured kWh/yr and local solar resource data to estimate annual generation and simple payback. Incentives and net-metering rules change payback calculations significantly, so obtain current local policy information. For off-grid considerations or full islanding, see our off-grid home guide.
Net Zero vs Net Zero Ready: Which Should You Choose?
Scenario 1: Budget Self-builder Who Wants Lowest Upfront Cost
Choose net zero ready. Prioritize the envelope, airtightness, and efficient systems now and add PV later when funds or incentives are available. This minimizes the PV kW required and often produces better lifecycle returns on your insulation and ventilation investments.
Scenario 2: Landowner Planning Eventual Off-grid Conversion
Start net zero ready but design for off-grid from the outset: oversize the electrical service, add conduit, and specify roof framing for panels. If you need immediate resilience or off-grid capability, build full net zero with a battery bank sized for autonomy.
Scenario 3: Buyer-focused Builds Where Resale Matters
If resale value and marketing are top priorities, full net zero with certification can command higher buyer interest. A certified net zero home offers clearer claims than "ready" status alone; however, a well-documented net zero ready home with a plan and allowances for PV can also sell well in markets attuned to energy efficiency.
Scenario 4: Passive-house Focused Projects with Tight Performance Goals
If you are pursuing Passive House/PHIUS certification, focus first on the envelope and mechanical ventilation—these lower loads dramatically. Decide whether to include PV now based on budget and whether local policy or incentives favor early installation. Passive House + PV is effectively net zero in many cases.
Decision Checklist to Pick the Right Path
- Budget: Do you have capital now for PV and batteries?
- Timeline: Do you need immediate bill reductions or resilience?
- Grid access and net-metering: Are exports compensated favorably?
- Resale goals: Will certification or immediate net zero be a local selling point?
- Climate: Are solar yields favorable or is heat reduction more important?
Answer these five on-site and budget questions to choose an initial path and plan upgrades.
The Bottom Line
For most budget-conscious DIY builders, the best route is to build net zero ready: invest in a tight, well-insulated envelope and efficient systems now, and add PV and storage later to reach net zero. If immediate bill savings or resilience are priorities and funds allow, pursue full net zero with appropriately sized PV and battery systems.
Frequently Asked Questions
Can a net zero ready house be labeled ‘net zero’?
No. A net zero ready house is not the same as a net zero home until on-site renewable generation offsets annual energy use. Certification programs require measurement or verified generation to claim net zero. That said, a well-documented ready home simplifies achieving certified net zero later because it already meets the envelope and systems requirements.
How much extra does it cost to make a home net zero ready?
Costs vary by climate and design choices. Adding continuous exterior insulation, higher-performance windows, and an MVHR can raise upfront costs, but typically these investments are smaller than the cost of full PV+storage. Use an energy model and consult the Energy efficiency design guide to quantify insulation and hygrothermal needs for your location.
Is net zero better than passive house?
They’re different goals. Passive House focuses on extreme envelope performance, airtightness, and comfort, which reduces energy demand. Net zero aims for a balance between demand and on-site generation. The approaches can be combined—many Passive House projects become net zero when PV is added. Which is "better" depends on your priorities: thermal comfort and low demand (Passive House) or immediate zeroed annual bills (net zero).
Can I add solar later and still get the same performance?
Yes, if you design the home as net zero ready. Proper pre-wiring, roof planning, and an efficient envelope reduce the PV size needed to reach net zero. Before installing PV, perform an energy audit and use measured or modeled annual kWh to size the array for actual needs; guidance on stepwise upgrades is discussed above and in the NIST performance measurement resources at NIST's NZERTF program.
What certification should I pursue as a DIY builder?
Choose based on goals and budget. PHIUS/Passive House is ideal if you prioritize envelope performance; DOE Zero Energy Ready Home verifies readiness for renewables and is useful if you plan to add PV. ENERGY STAR can be an entry-level verification. Certification adds documentation and often higher construction scrutiny but can improve resale and ensure design targets are met.