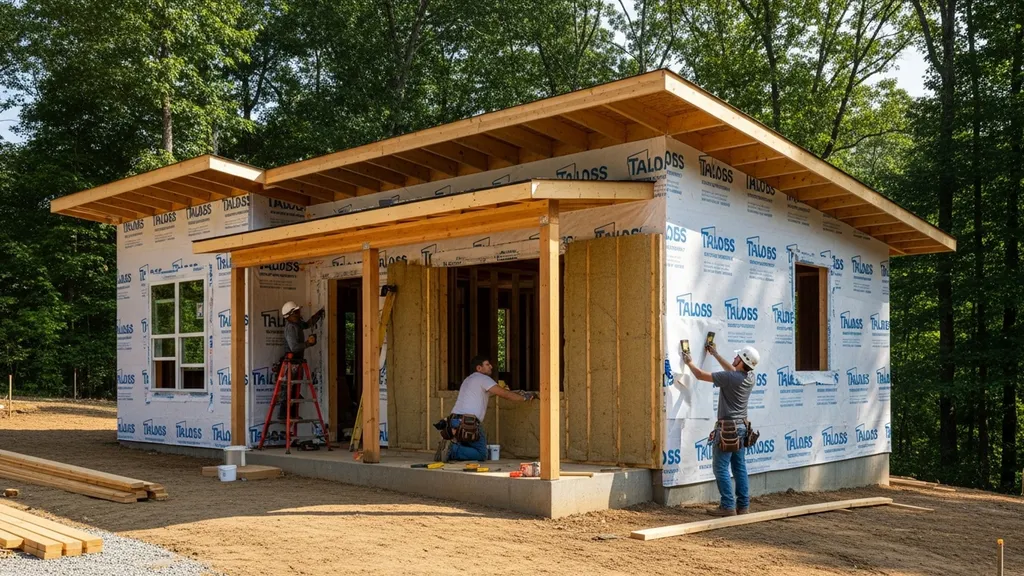
Practical, budget-focused design guidance for building in climate zone 3 (mixed-humid): envelope, moisture control, ventilation, renewables, and DIY tips.
Building in Climate Zone 3: Mixed Humid Design
Building in climate zone 3 means planning for warm, humid summers and mild to cool winters. For a DIY self-builder designing a small, efficient home, understanding climate-driven risks — condensation in wall assemblies, summer dehumidification loads, and periodic heavy rainfall — directly shapes choices for the envelope, ventilation, and site work. This guide on climate zone 3 will show practical numbers, sensible assemblies, and budget-first strategies so a small build performs well year-round while avoiding moisture problems that lead to mold and rot.
TL;DR:
- Prioritize bulk water control first, continuous exterior insulation second, and mechanical dehumidification third; expect 30–60% lower HVAC sizing with a tight, well-insulated envelope.
- Choose an ERV for most mixed-humid homes, target wall assemblies with R-20+ continuous plus cavity fill, and aim for 5% slope for the first 10 feet around foundations.
- Use a sealed or conditioned crawl space with a 6-mil vapor barrier, install properly flashed windows, and monitor indoor RH to keep year-round relative humidity between 40–55%.
Understanding Climate Zone 3: What "mixed Humid" Means and Why It Matters
Climate zone 3 (mixed-humid) covers large parts of the U.S. Southeast and lower Mid-Atlantic — areas like central North Carolina, parts of Georgia, and sections of Texas and Arkansas. Official climate zoning maps used by code and builders come from the IECC and DOE; for county-level designation see the Guide to determining climate zone by county from pacific northwest national laboratory. That guidance aligns with IECC definitions used for insulation and envelope requirements.
Typical climate characteristics:
- Heating degree days (HDD65): Moderate (roughly 2,000–4,000 HDD65 depending on location).
- Cooling degree days (CDD65): Noticeable cooling demand (roughly 1,500–3,500 CDD65).
- Summer relative humidity: Often 60–80% daytime in peak months; overnight RH can remain high.
- Wet season: Most rainfall concentrates in late spring through early fall, with occasional tropical storm influence in coastal areas.
ASHRAE guidance — especially the moisture control procedures in ASHRAE 160 — is a key reference for assembly design in mixed-humid regions. Risk factors for DIY builders: assemblies that trap moisture (vapor impermeable layers on both sides), insufficient bulk water control, and under-specified ventilation. Those lead to condensation problems in cavities and on sheathing during shoulder seasons when temperatures and indoor moisture are both moderate.
Design trade-offs to remember:
- Insulation and airtightness reduce heating and cooling loads but increase reliance on controlled ventilation and dehumidification.
- More glazing on the south gains winter passive heat but increases cooling and solar control needs in summer.
- Vapor-permeable claddings and correctly placed vapor retarders usually perform better here than fully impermeable, sandwich-type assemblies.
Site Planning and Orientation for Climate Zone 3
Good performance starts with siting. Passive solar orientation and drainage control lower long‑term maintenance and mechanical costs.
Solar Orientation and Passive Gains
Orient long facades and most glazing within 20° of true south to capture winter sun. In climate zone 3, summer sun control is nearly as important as winter gain. Design overhangs sized to block high summer sun while admitting low winter sun — a simple rule of thumb: overhang depth roughly 0.4–0.6 times window head height at mid-latitudes; use detailed sunpath calculations for precise sizing.
Place larger fixed glazing on the south and limit east/west glazing to reduce morning/evening heat gains. Use light shelves or exterior shading for south-facing windows; see our light shelf design guidance for practical dimensions and daylighting tips.
Landscape, Shading, and Drainage Best Practices
- Prevailing winds: Orient operable windows to capture cooling breezes in summer if local insect/humidity issues permit natural ventilation.
- Deciduous trees: Plant 20–30 feet from the house to shade summer sun while allowing winter sun.
- Runoff slope: Grade surfaces to slope away from foundations at a minimum of 5% (6 inches fall over the first 10 feet) to avoid water pooling near the slab or crawlspace.
- Drainage features: Use swales, gravel-filled French drains, or downspout dispersal to move concentrated runoff away from the structure.
For regional siting details and county-level climate planning, review the DOE's county climate guide: Volume 7.3, Guide to Determining Climate Regions by County.
Building Envelope Strategies: Insulation, Walls, Roofs, and Foundations
A durable envelope in mixed-humid climates balances thermal performance with moisture control and drying potential.
Wall Assembly Options and Recommended R-values
Aim for continuous exterior insulation plus cavity fill. The IECC has baseline R-value requirements for zone 3; practical targets for net-zero‑oriented DIY builds are:
- Walls: R-20 continuous plus R-13–R-15 cavity fill, or equivalent (for example, 2x6 cavity with spray or dense-pack plus 1–2" exterior foam).
- Roof/ceiling: R-38–R-60 depending on attic use and budget.
- Slab edge: Insulate slab edges to at least R-10–R-15 where feasible.
Compare common assemblies in this table:
| Assembly | Typical Installed R | Pros | Cons |
|---|---|---|---|
| 2x6 cavity + 1" polyiso CI | R-26–R-28 | Cost-effective, familiar | CI thickness limited, thermal bridging if gaps |
| 2x6 + continuous 2" mineral wool | R-30–R-32 | Fire-resistant, vapor-permeable | Cost higher than polyiso |
| SIPs (4.5" or 6") | R-24–R-40 | Airtight, fast install | Higher material cost, panel seams require care |
| ICF foundation + framed walls | High thermal mass | Excellent foundation thermal performance | Requires experienced crew |
| Hempcrete / cob | Variable | Sustainable, breathable | Lower R per inch, labor intensive |
For more R-value comparisons, see our insulation R-value comparison article and consider spray foam alternatives if avoiding closed-cell foams.
Roof and Attic Insulation Strategies
If using an unvented conditioned attic, insulate the roof deck with continuous insulation meeting R-30+ depending on roof slope and local code. For vented attics, insulate the ceiling plane and ensure soffit-to-ridge ventilation with balanced airflow. Use airtight ceiling box assemblies and seal all penetrations to improve performance.
Foundations, Crawl Spaces, and Slab Edge Details
Sealed, conditioned crawl spaces perform well in mixed-humid climates by keeping the building pressure-balanced and reducing entry of humid soil air. Key details:
- Impermeable ground vapor barrier: 6-mil or thicker poly overlapped and sealed at seams; tape to foundation wall.
- Perimeter insulation: R-10–R-15 at slab edge or insulated stem walls.
- Mechanical ventilation or conditioned makeup air if the crawlspace houses HVAC equipment.
For DIY crawlspace fixes and vapor barrier work, see our crawl space repairs and the step-by-step vapor barrier steps.
Air Barrier and Vapor Control Approaches
Follow ASHRAE 160 moisture control logic: allow at least one side of assemblies to dry to the exterior; avoid sandwiching impermeable layers. Use smart vapor retarders (e.g., Class III variable-perm products) on the interior of walls to reduce inward vapor drive in summer while allowing drying in winter. Key DIY air-sealing tips:
- Seal top plates, sill plates, and rim joists with gaskets or spray-applied sealant.
- Use backer rod and compatible sealant at service penetrations.
- Tape seams on continuous exterior insulation and housewrap with manufacturer-approved tapes to maintain continuity.
Windows, Doors, and Glazing Strategies for Mixed-humid Climates
Windows and doors are both thermal breaks and potential moisture intrusion points; pick carefully and install meticulously.
Choosing U-factor and SHGC for the Zone
For climate zone 3, aim for:
- U-factor: 0.30–0.35 or lower for most glazing.
- SHGC (south): 0.4–0.5 for passive gains, but consider lower SHGC (0.25–0.35) for east/west glazing to limit solar heat gain.
Passive House guidance often uses even lower U-factors, but on tight budgets balance cost vs performance. Low-e coatings help reduce solar heat while allowing visible light. Use operable shading or exterior screens where SHGC trade-offs require control.
Placement, Shading, and Light Control
Limit large east/west glazing runs. Size overhangs and exterior shading so south glazing gains in winter but is shaded in summer; for more detailed dimensioning consult our light shelf design resource. Exterior operable screens, awnings, and deciduous trees add flexible shading without compromising daylight.
Installation, Flashing, and Airtight Detailing
Proper flashing and airtight installation are non-negotiable. Follow Passive House sealing best practices and use a sill pan under all sills, continuous exterior flashing tape under the drainage plane, and proper head flashing. For a step-by-step install, see our window sealing guide. The ICC/IECC code chapter listing climate zones can guide local U-factor requirements: see the IECC code chapter details at ICC digital codes chapter 3 ce general requirements.
Ventilation, HVAC, and Dehumidification — Applying Passive House Principles
Tight envelopes require controlled ventilation. That reduces uncontrolled air changes while maintaining indoor air quality and managing moisture.
HRV vs ERV: Which to Choose and Why
- ERV (enthalpy recovery ventilator): Transfers sensible heat and some moisture, often the preferred choice in mixed-humid climates because it reduces the dehumidification load in summer while recovering some latent energy.
- HRV (heat recovery ventilator): Transfers sensible heat only, better where heating dominates and latent loads are low.
Choose units with high sensible recovery efficiency (>70% sensible recovery) and low fan power (SRE/ERP metrics). Integrate filtration: see our HEPA ventilation options for guidance on adding filtration to mechanical ventilation systems.
Sizing HVAC for Low-load Homes
Tight, well-insulated homes commonly see 30–60% lower heating and cooling loads than typical code-built homes. Right-sizing process:
- Calculate baseline load using Manual J or simplified heat-loss estimates.
- Reduce that load estimate by predicted envelope and airtightness improvements (e.g., 40% reduction is common for R-20 CI plus tight air barrier).
- Size equipment to match reduced loads; prefer modulating compressors or multiple smaller units over a single oversized unit.
For example, a small 1,200 ft² home that would traditionally require a 12,000–15,000 BTU cooling system may only need a 7,000–10,000 BTU capacity after envelope upgrades — often met by a ductless mini-split. Ductless mini-splits also offer efficient part-load performance in mixed climate conditions.
Dehumidification Options and Controls
Because humidity drives comfort and mold risk, include active dehumidification in design:
- Whole-house dehumidifiers integrated into the central system or ducted from an ERV.
- Standalone dehumidifiers sized by pints/day (for a tight house, a 30–50 pint/day unit is common for a small home).
- Heat-pump water heaters with dehumidification modes can provide ancillary moisture control.
Use humidistats with setback schedules and monitor RH with a data logger. For common air-leakage targets and to identify problem spots before final finishes, follow our air leakage checklist.
Water Management and Moisture Control
Visual, step-by-step work on crawlspace encapsulation and grading helps DIYers avoid costly mistakes.
Managing Bulk Water: Roof, Gutters, and Grading
- Roof edge details: Use continuous gutters and at least two downspouts per roof plane when possible. Extend downspouts to discharge at least 6–10 feet from the foundation or into a drain that leads downhill.
- Gutter sizing: 5–6 inch gutters work for most small roofs; oversize on large roof areas feeding a single downspout.
- Grading: Maintain a 5% slope away from the foundation for the first 10 feet; use gravel swales or French drains where grade is limited.
Crawlspace and Slab Moisture Strategies
- Vented vs sealed crawlspace: In mixed-humid climates, a sealed, conditioned crawlspace generally reduces humidity-driven problems. Install a continuous vapor barrier (minimum 6-mil), tape seams, and seal to the foundation wall. Provide mechanical conditioned air or a dedicated supply to keep the space near house conditions.
- Drainage: If subgrade water is present, install a perimeter drain tied to a sump or daylight outlet before encapsulation. For slab-on-grade, insulate slab edges and grade away to limit capillary rise.
Detailed DIY repairs and product options are in our crawlspace guide: best DIY crawl-space repairs to stop moisture and mold.
Interior Moisture Sources and Control
- Sources: Cooking, bathing, laundry, houseplants, and indoor drying are typical contributors. Use exhaust fans vented to outdoors for kitchens and bathrooms and consider a heat-pump or desiccant dehumidifier for persistent humidity.
- Targets: Aim for 40–55% indoor RH year-round; lower RH during heating reduces condensation risk on windows.
- Monitoring: Use low-cost data loggers ($20–$80) to record temperature and RH trends and adjust ventilation/dehumidification accordingly.
For plumbing strategies that reduce indoor moisture, consult our water-efficient plumbing resource. Also see county-level IECC insulation maps and guidance summarized at Remodel Calculators: IECC Climate Zone 3 Insulation R-Value Requirements (2021).
Off-grid and Renewable Considerations for Climate Zone 3 Homes
Mixed-humid climates present predictable solar yield patterns (strong summer sun) and higher humidity-related corrosion risks; plan systems with that in mind.
Solar PV Siting and Efficiency in Mixed-humid Situations
Solar panels perform well in climate zone 3 but suffer slight efficiency loss as module temperature rises. Shade avoidance and tilt optimization matter:
- Orient panels to true south where possible; avoid partial shading from trees or nearby buildings.
- Use corrosion-resistant mounting hardware (stainless steel or coated steel) to resist humid conditions.
For tips optimizing PV in warm climates, see our solar panel efficiency tips article.
Hot Water and Solar Thermal Options
Heat-pump water heaters work well in mixed-humid climates and offer dehumidification side benefits when installed in conditioned spaces. Solar thermal systems are viable for larger hot water demands but require careful freeze protection and maintenance.
Battery and Hybrid System Sizing Basics
Common small-home PV system sizes in DIY guides include 5 kW and 7 kW examples. Review our 5 kW sizing guide and 7 kW sizing guide for baseline load estimates and array sizing scenarios. For many self-builders, a grid-tied system with battery backup balances cost and resilience; compare trade-offs in our grid vs off-grid overview.
Consider simple maintenance plans: periodic panel cleaning in sticky-humid environments, visual inspections for corrosion, and using vented enclosures for inverters in sheltered locations.
Quick Reference: Key Design Takeaways and Budget DIY Tips for Climate Zone 3 Builders
Compact Checklist: 12 Quick Design Rules
- Prioritize bulk water control: gutters, downspouts, and 5% slope for the first 10 feet.
- Use continuous exterior insulation on walls where possible.
- Aim for wall assemblies with R-20+ continuous plus cavity fill.
- Select an ERV for most mixed-humid homes to transfer latent energy.
- Seal crawlspaces and install a 6-mil vapor barrier taped at seams.
- Size HVAC after calculating reduced loads from insulation and airtightness.
- Flash and sill-pan every window; use the window sealing guide.
- Install mechanical dehumidification sized to home square footage.
- Monitor indoor RH with affordable data loggers and adjust ventilation.
- Use exterior shading (overhangs, screens, trees) for summer solar control.
- Choose corrosion-resistant materials for solar PV and outdoor hardware.
- Budget for blower-door testing and one round of targeted air-sealing before finishes.
Affordable Material and Upgrade Priorities
Where to spend:
- Invest in a continuous air barrier and airtightness measures (sealing rim joists, top plates).
- Upgrade to higher-performance windows if budget allows; proper installation matters more than modest U-factor gains.
- Allocate funds for a quality ERV and dehumidifier rather than the largest HVAC unit.
Where to save:
- Interior finishes can be phased; delay high-end finishes until envelope and systems are proven.
- Use reclaimed or low-cost siding options that are breathable and well-installed.
- Consider DIY installation for exterior insulation if you have carpentry skills; hire pros for flashing, window install, and mechanical systems if inexperienced.
For help choosing cost-effective products, see our budget-friendly material choices.
The Bottom Line
Build to control water first, then create a continuous thermal and air barrier with drying potential to the exterior, and finally provide controlled ventilation with dehumidification. For DIY builders in climate zone 3, focus spending on continuous exterior insulation, airtightness, and moisture management — those steps reduce HVAC size, extend durability, and cut operating costs. Next steps: finalize site grading and drainage plans, lock in wall and foundation details, and schedule a blower-door test before finishing.
Frequently Asked Questions
What is climate zone 3 and how do I confirm my county's designation?
Climate zone 3 (mixed-humid) covers areas with warm, humid summers and mild to cool winters. To confirm a county-level designation, consult the Department of Energy and Building America guides; the Pacific Northwest National Laboratory's county guide is a practical reference: Guide determining climate zone county building america and iecc 2021 updates. Local code offices also map IECC climate zones for permit applications.
Should I use an ERV or HRV in a mixed-humid house?
An ERV is usually the better choice in mixed-humid climates because it transfers some latent heat and reduces interior moisture load in summer. HRVs transfer only sensible heat and work well when heating dominates. Choose units with high sensible recovery efficiency and low fan power, and pair them with dehumidification if indoor RH often exceeds 60%.
Is a sealed crawlspace better than a vented one here?
For climate zone 3, a sealed or conditioned crawlspace typically reduces moisture problems by preventing humid ground air from entering and by keeping the space near conditioned temperatures. Key steps include installing a continuous vapor barrier (minimum 6-mil), sealing vents and penetrations, and providing conditioned air or a dedicated supply. If groundwater is present, address drainage first with perimeter drains or a sump before encapsulation.
How much continuous insulation should I aim for on walls?
Practical targets for DIY mixed-humid builds are at least R-20 continuous insulation combined with cavity insulation (e.g., R-13 or R-15). That could be achieved with 1–2 inches of polyiso or mineral wool plus full cavity fill in 2x6 walls. Continuous insulation reduces thermal bridging and improves moisture performance when installed with a breathable drainage plane and proper flashing.
What indoor relative humidity should I aim for year-round?
Aim to keep indoor relative humidity between about 40% and 55% year-round. Lower RH during cold months reduces condensation risk on windows and assemblies; in summer, keeping RH below 55% improves comfort and controls mold. Use a data logger or smart thermostat that records RH and adjust ventilation and dehumidification settings based on measured trends.