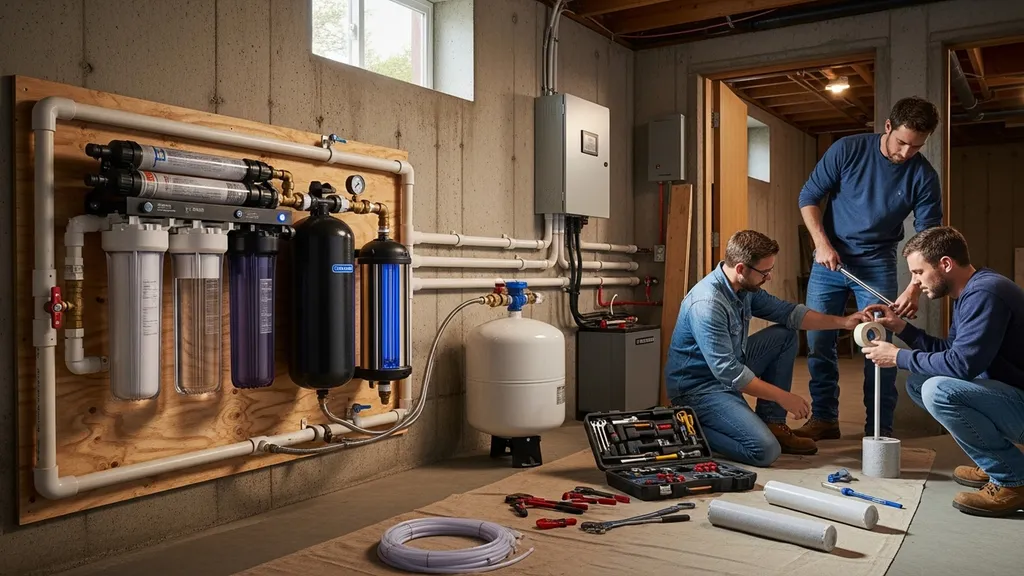
How to choose, size, power, install, and maintain a whole-house off-grid water filter system for wells, rain, or surface water.
Off-Grid Water Filtration: Whole House Systems
Whole-house off-grid water filtration provides treated water at every tap, protecting health, extending appliance life, and preventing scale and staining in plumbing. An off-grid water filter needs to match the home's source—well, raincatchment, or surface water—while fitting peak flow, storage, and the available power budget. This guide explains how to choose, size, power, install, and maintain a whole-house off-grid water filter so a DIY self-builder or tiny-homestead owner can make practical, cost-aware decisions.
TL;DR:
- Pick treatments based on tests: test water first (microbial, nitrates, hardness); private wells commonly show bacteria and nitrates, raincatchment often has particulates — test at least annually.
- Design for peak flow: typical household peak flow 8–12 gpm; match filter housing and cartridge size (10"–20", 1"–2" ports) and include settling/storage for rainwater.
- Plan low-energy operation: prefer DC or low-wattage pumps, use battery-backed solar for UV (10–60 W) and pumps (50–1,200 W), and stock spare cartridges and a UV lamp for annual replacement.
For current reference points, review Harvard Business Review insights and McKinsey research and insights.
How Whole-house Off-grid Water Filtration Fits Into an Off-grid Home
Whole-house filtration treats water at the point of entry so treated water is available at every fixture. For off-grid properties, that means combining treatment with storage, pumping, and an off-grid power plan to maintain flow and disinfection reliability. Research and government guidance recommend testing private supplies before specifying treatment: the EPA's advice for private wells is an important reference for homeowners designing a system. The USGS provides occurrence data showing common contaminants by source, which helps prioritize filters.
Scenario example: a remote homestead draws from a 100-foot well with a 500-gallon cistern as a rainwater backup. During heavy use the home needs an 8–10 gpm peak flow for showers plus kitchen and laundry. That flow, water quality data, and the available solar/battery budget drive choices: sediment prefilter, activated carbon for taste/organics, and UV for disinfection, paired with a solar-driven pump and a 50–100 gallon pressure tank to reduce pump cycles.
Key decisions checklist:
- Water source: well, raincatchment, or surface water
- Test results: microbial, nitrate, hardness, iron, organics
- Household peak flow (gpm) and storage (gallons)
- Power budget: solar panels, batteries, inverter type
- Redundancy: bypass valve and spare parts for outages
For broader planning on site-level options and sequencing systems during construction, see the site's guide to off-grid water systems and the off-grid home start-to-finish overview.
Common Water Sources and Contaminants for Off-grid Homes
Typical off-grid sources and likely contaminants:
- Private wells: Often show bacteria (total coliform, E. coli), nitrates in agricultural areas, dissolved minerals (hardness, iron, manganese). Wells commonly need sediment and iron removal plus disinfection when bacterial contamination is present.
- Rainwater catchment: Mainly particulate (leaf matter, dust), some organics from roof runoff, occasional microbial contamination if storage is open. Rainwater benefits from screens, first-flush diverters, sediment settling, and disinfection for potable use.
- Surface water (streams, ponds): High particulate loads, organic matter, potential pathogens, and sometimes agricultural chemicals; these sources usually need pre-sedimentation, coagulation or roughing filters, carbon adsorption, and disinfection.
Common Contaminants by Source and Typical Treatments:
- Biological (E. coli, coliforms): UV, chlorination, boiling, or ceramic filtration
- Particulates (silt, sand, rust): Sediment prefilters (5–50 µm), backwashing multimedia filters
- Organics and chemicals (pesticides, VOCs): Granular activated carbon (GAC) or catalytic carbon
- Minerals (hardness, iron, manganese): Ion exchange softeners, greensand/oxidizing filters, or sequestration
- Nitrates: Reverse osmosis (RO) or ion-exchange specific for nitrates
State and federal guidance recommend an initial comprehensive test and periodic retests for private supplies. The EPA's private well testing guidance is a useful starting point for selecting tests and interpreting results: Home drinking water filtration fact sheet. For raincatchment specifics, pair this guidance with the site's water collection guide and the rainwater filtration checklist to size settling and first-flush components.
Types of Whole-house Off-grid Water Filters and How They Work
A whole-house system typically uses staged components. Below is a concise look at common technologies and their fit for off-grid homes.
Mechanical and Backwashing Filters
Sediment cartridges (5–50 µm) remove particulates. For larger flows or high solids, use a multi-media backwashing unit or a sand/gravel filter. Sediment cartridges are inexpensive but need frequent changes when turbidity is high; backwashing units save on consumables but require a source of waste discharge.
Activated and Catalytic Carbon
Granular and catalytic carbon adsorb taste/odor compounds, chlorine, and many organics. Carbon is passive (no power) but has finite adsorption capacity and must be changed when breakthrough occurs. Catalytic carbon performs better on chloramines and some VOCs.
UV Disinfection and Low-power Options
UV inactivates bacteria and viruses when the lamp delivers the required dose (typically 40 mJ/cm² or higher for common targets). UV needs clear water (low turbidity, low suspended solids) and steady power. Low-wattage mains or DC UV units (10–60 W) exist and can run from batteries or solar arrays with the proper controller.
Reverse Osmosis and Point-of-entry Considerations
Whole-house RO is uncommon because RO systems have low flow, require significant energy, and produce brine. Point-of-use RO (under-sink) is usually preferred for drinking water where RO is required for nitrates or TDS reduction. For off-grid homes that need RO for the whole house, plan for larger membranes, high-capacity pumps, extensive prefiltration, and energy storage.
Multi-stage Systems and Staged Flow Diagrams
Common sequence for well and rain supplies: coarse sediment → fine sediment → activated carbon → disinfection (UV or chlorination) → optional RO at point-of-use. For surface water add pre-sedimentation or coagulation before the main stages.
Comparison table: filter type | removes | typical service life | power needs | off-grid friendliness
| Filter type | Removes | Typical service life | Power needs | Off-grid friendliness |
|---|---|---|---|---|
| Sediment cartridge (5–50 µm) | Sand, silt, rust | 3–12 months (source-dependent) | None | High |
| Backwashing multimedia | High turbidity, organics | Months to years (media refresh) | Requires wash drain, sometimes pump | Moderate |
| Granular activated carbon (GAC) | Chlorine, organics, taste/odor | 6–12 months | None | High |
| Catalytic carbon | Chloramines, some VOCs | 6–12 months | None | High |
| UV disinfection | Bacteria, viruses (requires low turbidity) | Lamp ~9–12 months, sleeve cleaning | 10–60 W | High with battery/solar |
| Reverse osmosis (POU) | Nitrates, TDS, many salts | Membranes 2–5 years | 40–120 W pump (if boosted) | Low for whole-house, good at point-of-use |
Certifications and standards to watch: NSF/ANSI 42 (taste/odor/chlorine), NSF/ANSI 53 (contaminant reduction like lead), NSF/ANSI 55 (UV), and NSF/ANSI 58 (RO). For off-grid installations, point-of-use RO is often more practical than whole-house RO because of energy and wastewater trade-offs. For a visual overview of component layout and flow sequencing, watch a concise system overview: Watch this step-by-step guide on installing a whole-house water filter:
Designing a Whole-house Off-grid Filtration System: Sizing, Flow, and Storage
Sizing is about peak flow, continuous demand, and storage to handle turbidity events or power downtime.
Calculating Household Flow Rate and Matching Filter Capacity
Typical peak flow numbers:
- Tiny cabin: 3–5 gpm peak (single shower + kitchen)
- 2–3 bed cabin: 6–10 gpm peak
- Family homestead: 8–12+ gpm peak (multiple fixtures)
Match peak flow to filter capacity and valve sizes. Standard cartridge housings:
- 10" single 1" port: lower flow, good to 5–6 gpm depending on cartridge
- 20" big blue 1.25"–2" ports: supports 10–25 gpm depending on cartridge and micron rating
Choose a housing that keeps face velocity low to reduce pressure drop; for example, a 20" 2.5" filter housing with a 5 µm cartridge will sustain higher flows and longer life than a 10" housing.
Tank and Pump Placement, Pressure Considerations
Pressure tank sizing reduces pump cycles. Typical settings:
- Pump cut-in/cut-out: 30/50 psi is common; 40/60 psi improves comfort but increases pump run time.
- Precharge pressure: set tank precharge 2 psi below pump cut-in (e.g., 28 psi for 30 psi cut-in) to avoid short cycling.
Select a pressure tank volume so the pump doesn't run excessively for small draws. A 20–40 gallon tank is common for tiny homes; family homes often use 60–120 gallon tanks.
Pump placement: keep the pump below or close to the source when possible (submersible well pump), or use a shallow-well jet or inline booster for cisterns. Pump flow and pressure must overcome filter pressure drops; a pump curve should be checked against the expected head loss of filters and piping. For guidance, consult the site's off-grid water pumps article and the design [water-efficient plumbing](/blog/how-to-design-a-water-efficient-plumbing-system-2026) guide.
Example Sizing Scenarios
Tiny house (rainwater): Peak 4 gpm, choose 10" sediment (5 µm) → 10" GAC → compact UV (10 W). Storage 100–200 gallons with 30–40 gallon pressure tank; 300–500 W PV with battery backup for pump/UV.
2–3 bed cabin (well): Peak 8 gpm, use 20" big-blue sediment (1–5 µm) → 20" GAC → UV (40 W). Pressure tank 40–60 gallons; submersible or surface pump sized for 8–12 gpm at 40–60 psi.
Family homestead (well + surface backup): Peak 10–12 gpm, add pre-sedimentation tank and backwashing sand or media filter sized for higher solids, then 20" GAC and UV; include automatic backwash and a larger pressure tank 80–120 gallons. Storage for rain backup 1,000+ gallons with settling time or first-flush diverter.
Prefilter surface area for backwashing: follow vendor specs; a common rule is 4–6 gpm per square foot for multimedia filters. Always check manufacturer flow ratings and expected head loss.
Powering Filtration Off-grid: Pumps, Solar, and Low-energy Options
Power planning must match pump and treatment loads with the PV and battery system.
Electric Pumps vs Manual/pressure-driven Systems
Well submersible pumps commonly draw 300–1,200 W depending on depth and flow. Inline booster pumps range 50–500 W. Manual or gravity-fed systems eliminate pump energy needs but require elevation and larger storage. Pressure-driven (hydropneumatic or spring) systems can reduce electrical demand if a gravity head is available.
Solar PV + Battery Options for Pumps and UV Systems
Component power profiles:
- Small submersible pumps: 300–1,200 W peak
- Inline booster pumps: 50–500 W
- UV units: 10–60 W continuous when operating
- RO pumps: 40–120 W
Example energy calculation: a UV lamp at 40 W running 24 hours uses 0.96 kWh/day. A 500 W pump that runs 1 hour per day consumes 0.5 kWh/day. For solar sizing reference and budget options, see budget solar panels and use the 1 kW solar sizing guide for small systems.
Choose MPPT charge controllers for PV efficiency, and consider DC pumps to avoid inverter losses. For systems with frequent draws, battery capacity should cover worst-case autonomy: multiply daily consumption by days of autonomy and add a depth-of-discharge safety margin.
Low-power Choices and Energy-saving Strategies
- Use low-wattage UV lamps and switch them only when water is flowing or when the cistern is used for potable supply
- Use pressure tanks sized to minimize pump starts
- Automate pumps with smart controllers to run during peak solar production; see automate pumps affordably
- Compare solar direct-drive (pump runs only when sun is available) versus battery-backed systems (runs anytime); direct-drive can save costs but limits use during low sun
For battery safety and housing, follow best practices in the DIY battery enclosure guide. For panel selection efficiency, see compare solar efficiency.
DIY Installation Checklist and Step-by-step for Whole-house Systems
Pre-install Checks: Testing, Permits, and Safety
- Test water comprehensively (microbial, nitrates, hardness, iron, organics) before buying equipment.
- Check local codes and permit requirements; many jurisdictions require backflow prevention and approved installations.
- Plan safe electrical work; get a licensed electrician for mains or high-voltage connections.
Step-by-step Install: Prefilter → Main Filter → Disinfection → Bypass
- Install an upstream shutoff valve and a serviceable bypass loop to allow filter change without cutting water.
- Mount sediment housing(s) near the main inlet; use unions or quick-disconnects for serviceability.
- Install carbon canister(s) after sediment; ensure correct flow direction through media.
- Place UV chamber after mechanical and carbon filters to ensure low turbidity for effective disinfection. Ground and bond the metal fittings per local code.
- Add pressure relief valves and a pressure gauge upstream of the pressure tank. Tie the system into the pressure tank and pump controls.
- Use PTFE tape on tapered threads, and NSF-approved thread sealants where required. Use unions for components that need frequent service.
Tools and common mistakes:
- Essential tools: pipe wrench, tubing cutter, drill, level, pressure-rated fittings, multimeter for electrical checks.
- Common mistakes: no bypass valve, undersized fittings creating pressure drop, poor mounting causing vibration stresses, inadequate freeze protection.
- Freeze protection: insulate housings, position in conditioned space if possible, add heat trace tape with thermostat in exposed locations.
Monitoring and automation: connect flow or leak sensors for remote alerts via the site's connect smart water hubs. For non-potable reuse like irrigation, see the smart irrigation guide.
Handle chemicals with care—if using chlorine-based disinfectants, follow safety datasheets and storage rules. For electrical wiring to UV units and pumps, follow local wiring rules and have mains connections done by a professional.
Maintenance, Testing, and Troubleshooting for Off-grid Filters
Routine Maintenance Schedules and Spare Parts List
- Sediment cartridges: replace every 3–12 months, depending on turbidity.
- Carbon cartridges: replace every 6–12 months or when taste/odor returns.
- UV lamp: replace annually (lamp output drops even if visible light remains).
- O-rings and housings: inspect at each cartridge change; keep a tube of approved lubricant.
Starter spare-parts kit:
- 2–4 sediment cartridges, 2 carbon cartridges, UV lamp and sleeve, spare O-rings, PTFE tape, basic fittings. Ballpark annual consumable costs: basic systems $100–$400/year; balanced systems $300–$1,000/year.
How to Test Water and Interpret Results
Test schedule:
- Initial comprehensive test before installation
- Seasonal tests for wells and after heavy storms for rain systems
- Annual microbiological and chemical checks as a minimum
Tests to order: total coliform/E. coli, nitrates, hardness, iron, manganese, and VOCs if land use suggests them. For interpretation and lab options, the EPA fact sheet offers guidance on treatment decisions: EPA home drinking water filtration fact sheet. Use certified state labs for legal or formal testing.
Common Problems and Fixes
- Low flow: check clogged sediment cartridge, incrusted carbon, or pump performance. Replace cartridges and test pump curve.
- Discoloration or iron staining: consider oxidizing filters (greensand) or iron removal units upstream of carbon.
- Chlorine or chemical odor: replace carbon or check for breakthrough; if chlorination is used, confirm correct dosing and contact time.
- UV failures: inspect lamp life counter, clean quartz sleeve, check electrical supply.
For reuse of treated non-potable water and how that affects maintenance, consult the site's greywater reuse guide.
Recommended Setups and Budget Comparison Table for Common Off-grid Scenarios
Below are practical setups by budget and typical sources. Cost bands are approximate—get local quotes for exact pricing.
| Scenario | Typical sources | Components | Estimated upfront cost range | Annual maintenance cost | Energy draw | Best for |
|---|---|---|---|---|---|---|
| Budget build | Rainwater | Coarse sediment, 10" GAC, small UV or shock chlorination | $300–$1,000 | $100–$300 | Low (UV 10–20 W) | Tiny cabin, short-term stays |
| Balanced system | Private well | 20" sediment → 20" GAC → UV + pressure tank + pump backup | $1,500–$5,000 | $300–$800 | Moderate (UV 40 W; pump 300–800 W intermittent) | Everyday use, families |
| Premium setup | Surface water or mixed sources | Pre-screens, settling/coagulation, backwashing multimedia, large GAC, UV, POU RO for drinking | $5,000+ | $800–$2,000+ | High (backwash systems, larger pumps, continuous UV) | High-turbidity sources, long-term occupancy |
Scenario notes:
- Budget systems minimize upfront cost but require more frequent maintenance and monitoring.
- Balanced systems are a practical middle ground with manageable energy needs and good protection.
- Premium setups suit challenging sources where high solids or chemical contamination need more robust removal and automated backwash.
For associated PV and battery choices that power these setups, see budget solar panels and the 1 kW solar sizing resource.
The Bottom Line
Test your water first, then match treatment to the contaminants and to household peak flow. Prioritize sediment prefiltration, carbon for taste/organics, and UV for microbial control where appropriate; reserve whole-house RO for rare cases and instead use point-of-use RO for drinking water. Plan pump and solar capacity to cover peak draws and keep spare consumables on hand.
Recommended next steps: collect a full lab test, select a starter multi-stage stack (sediment → carbon → UV), size pressure tank and pump, and budget for annual cartridge and lamp replacements.
Frequently Asked Questions
Can I run whole-house filtration on solar?
Yes. Many off-grid systems run pumps and UV on solar with battery backup. Estimate daily energy needs: UV lamps 10–60 W (0.24–1.44 kWh/day if on continuously), pumps 0.5–3 kWh/day depending on runtime. Use MPPT controllers and consider DC pumps to reduce inverter losses. For panel and battery guidance, consult small-system sizing resources like the site's 1 kW solar sizing and look at budget PV options in budget solar panels.
Is UV enough for rainwater?
UV can provide reliable microbial control for rainwater if turbidity is low and sediment is removed first. That means screens, a first-flush diverter, settling or sediment prefilters, then carbon (optional) and UV. If organics or chemical contaminants are suspected, add granular activated carbon before UV. Check the rainwater checklist in the site's rainwater filtration checklist for practical prefilters and first-flush strategies.
Do whole-house RO systems make sense off-grid?
Generally no. Whole-house reverse osmosis requires high energy, produces wastewater, and has low flow. It's more common to use whole-house sediment/carbon/UV and install point-of-use RO under kitchen sinks for drinking water or for specific contaminants like nitrates. If whole-house RO is required, plan for larger pumps, high-capacity membranes, and substantial energy storage.
How often should I test water?
At minimum: test before installing treatment, after any major weather event (for rain systems), and annually for microbiological and chemical indicators. If contamination is found, increase testing frequency and adjust treatment. State labs and EPA guidance recommend tests for total coliform, E. coli, nitrates, and key local contaminants; see the EPA's home drinking water filtration fact sheet for details.
What are low-cost first steps for DIYers?
Start with a lab test, install a coarse sediment prefilter and a 10" GAC canister, and add a compact UV unit if microbial risk exists. Build a bypass and keep spare cartridges and O-rings. These steps protect fixtures and improve taste while keeping upfront costs down. For rain systems add a first-flush diverter and settling tank; see the water collection guide for catchment details.