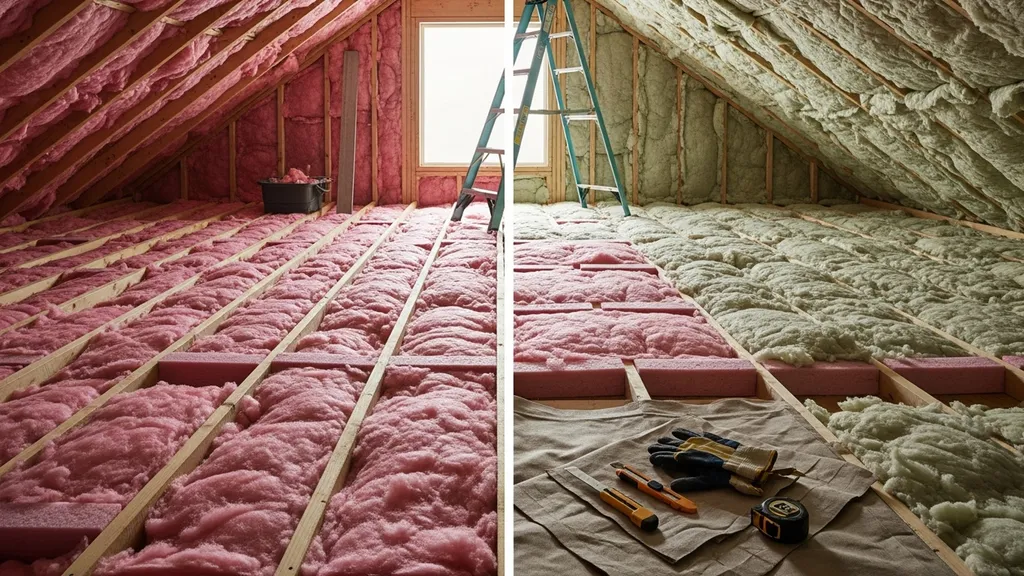
Compare R-19 and R-38 insulation for attics and walls — pros, cons, costs, and which R-value fits common DIY scenarios.
R-19 vs R-38 Insulation: Which Do You Need?
Choosing between R-19 vs R-38 insulation often comes down to space, climate, and how long you plan to stay in the home. This guide compares the two R-values for attics and walls, explains what those numbers mean in real houses, and gives clear DIY upgrade paths and decision rules for budget-conscious self-builders. Readers will learn when R-19 is an acceptable compromise, when R-38 makes a measurable difference, and how to avoid common installation mistakes that erase the benefit of added R-value. The term "r19 vs r38 insulation" appears through the guide to keep the comparison focused and searchable.
TL;DR:
- If your attic has R-19 and you live in cold climate zones, upgrade to R-38 for better winter comfort and lower heat loss; expect diminishing returns above R-38.
- If you’re budget-limited or in a mild climate, prioritize air sealing and targeted insulation fixes over full R-38 top-up; check cavity depth before buying thicker batts.
- For shallow cavities, use blown-in cellulose or a layered approach (R-19 + unfaced top layer); follow an air-seal checklist and protect soffit vents.
| Metric | R-19 typical batt | R-38 typical batt | Practical effect |
|---|---|---|---|
| Typical thickness | ~6 in (standard 2x6 cavity) | ~10–12 in (or two layers) | R-38 needs more depth; confirm joist height or use blown-in |
| Common materials | Fiberglass batts, mineral wool, compressed cellulose | Thicker batts, layered batts, blown-in cellulose | Same materials; different form or layering to gain depth |
| Insulating performance per inch | ~R-3 to R-4 per inch (material dependent) | Same per inch; total R differs by thickness | Per-inch performance similar; total resistance increases with depth |
| Common uses | 2x6 walls, some attic floors | Attic floors above living spaces, uninsulated ceilings | R-38 is usual attic target in heating climates |
| Typical cost range per ft² installed | Varies by material/access; check local quotes | Higher material and labor due to depth/handling | Costs vary—get local bids, factor access and air-sealing work |
| Retrofit complexity | Low to medium: fits standard cavities | Medium to high: may need layering, blocking vents, or blowing | Deeper installs need ventilation care and possible framing work |
The Department of Energy's guide to attic and wall insulation provides climate-based recommendations to pair with the points below.
Quick Comparison: R-19 vs R-38 (TL;DR)
Headline Summary
R-19 typically fits 2x6 cavities and is common in moderate climates or interiors with limited cavity depth. R-38 is the common attic recommendation in colder climates and for long-term owners who want reduced heating loads. That said, the benefit you get depends on assembly details: air leaks, thermal bridges, and ventilation often determine whether the extra R translates to lower bills and better comfort.
Comparison Table — Performance at a Glance
(See table above for a concise side-by-side.)
When Each R-value is the Sensible Default
- R-19 is sensible when cavity depth is limited (2x4/2x6), budget is tight, and the house has good air sealing and moderate winters.
- R-38 makes sense when you have room for thicker insulation in the attic, live in a heating-dominated climate, or plan to stay in the home long-term.
Before choosing, review the Department of Energy's insulation guidance and consider whole-assembly performance rather than just batt R-values.
How R-value Works — Interpreting R-19 vs R-38 in Real Homes
What R-value Measures and Limits of the Metric
R-value is a material-level measure of thermal resistance: higher R slows heat flow through an assembly. R-19 provides roughly half the resistance of R-38 when measured across the same area. But R-value applies to a standardized test condition; in real homes, factors such as air movement, thermal bridging through joists, and moisture change real-world performance.
How Climate and Heating Degree Days Change the Value of Extra R
In cold climates (high heating degree days), each added increment of R reduces annual heat loss more than in mild climates. Energy Star and the IECC use climate zones to set recommended R-values — you'll get more payback from upgrading in Zones 5–8 than in Zones 2–4. See Energy Star's recommended insulation R-values by location and assembly for a quick lookup.
How Diminishing Returns Apply Between R-19 and R-38
Resistance adds linearly but savings do not. Doubling from R-19 to R-38 roughly halves conductive heat flow through the insulated plane, but system losses (air leaks, thermal bridges) reduce the net benefit. In practice, sealing attic bypasses and adding a continuous thermal break often pays back faster than simply adding more batt depth. For comparisons between small R steps, consult the R-19 vs R-20 or R-20 vs R-30 discussions to see when small increments matter; the general rule is: fix air leakage and thermal bridges first.
R-19 Insulation: What It Is, Strengths, Weaknesses, Best Uses
Overview and Common Materials
R-19 is commonly supplied as 6-inch fiberglass or mineral wool batts sized for 2x6 wall cavities or attic joist bays. It can also be achieved with denser compressed cellulose layers in retrofit contexts where depth is limited. The Insulation Institute notes that two layers of R-19 batts equal R-38 when properly installed—using unfaced batts and cross-laying helps avoid seams and compression (insulation institute guidance PDF).
Strengths: Cost, Ease of Install, Fits Standard Cavities
- Fits 2x6 walls and many attic joist bays without framing work.
- Batts are widely available and simple for DIY installation.
- Lower material cost and less handling than deep-thickness options.
- Good choice where ventilation and vapor control are already correct.
Weaknesses and Installation Risks
- Compression reduces effective R; stuffing batts into shallower cavities lowers performance.
- Gaps at edges, around wiring, and at joist intersections can create heat pathways.
- Does not address air leakage; heat loss through bypasses can negate the value of added R.
- Mineral wool is more forgiving for partial compression and better for fire/sound, but costs more.
Best-for Use Cases
- Mild climate homes with moderate heating needs and limited budgets.
- Finished ceilings or shallow cavities where re-framing is not practical.
- Targeted retrofits where air sealing is excellent and the goal is a low-cost improvement.
For material pros/cons between fiberglass and rockwool, see the site's comparison of fiberglass vs rockwool. For natural builders, cork-based products appear as alternatives in some assemblies; see cork insulation methods for details.
R-38 Insulation: What It Is, Strengths, Weaknesses, Best Uses
Overview and Common Ways to Achieve R-38
R-38 is commonly achieved in attics by installing 10–12 inches of batt insulation, layering two R-19 batts (unfaced) crosswise, or using blown-in cellulose or dense-pack to reach depth. It is also possible to combine a thinner spray foam air barrier with batt insulation to get effective assembly R without excessive depth.
Strengths: Winter Comfort, Lower Heat Loss in Cold Climates
- Meaningful reduction in winter heat loss in heating-dominated climates.
- Improved thermal comfort and lower HVAC runtime.
- Blown-in cellulose provides good coverage around obstructions and can be dense-packed to limit air movement.
Weaknesses: Cost, Thickness/space Requirements
- Requires deeper joists or layering; may block soffit vents if not careful.
- Higher material and labor costs; attic access difficulty raises installed price.
- May necessitate adding blocking or baffles to maintain ventilation channels.
Research on annual energy impacts shows upgrades from R-19 to R-38 can reduce heat loss, but exact savings depend on assembly and climate (OSTI study on thermal performance).
Best-for Use Cases
- Cold, heating-dominated homes where winter energy use is the primary cost.
- Long-term homeowners who plan to occupy the house for many years.
- Unconditioned attics above living spaces where adding depth is straightforward.
If attic depth is limited or you want a continuous exterior approach, consider exterior insulation strategies; our exterior foam guide covers those options. Also check the practical sizing in the site's attic insulation how much article before buying bulk materials.
How to Upgrade From R-19 to R-38: Practical DIY Steps
Assess First: Measure, Inspect, and Air-seal
- Measure existing insulation depth and note material type and condition.
- Inspect for moisture stains, mold, or pest damage; address roof leaks first.
- Identify attic bypasses: top plates, recessed lights, duct boots. Use an air sealing checklist to prioritize sealing before adding bulk insulation.
Common Upgrade Methods (layered Batts, Blown-ins, Spray Foam Strategies)
- Layered batts: Lay unfaced R-19 batts crosswise over existing R-19 where joist depth allows. Avoid compressing the bottom layer.
- Blown-in cellulose: Cover existing R-19 with dense-pack or loose-fill cellulose to achieve R-38 without disturbing existing batts.
- Spray foam hybrid: Apply a thin closed-cell spray foam layer at the top of ceiling plane for air-sealing, then add batt or blown-in insulation for bulk. See the site's comparison of spray foam vs cellulose for trade-offs in cost and embodied carbon.
Step-by-step Retrofit Checklist for Diyers
- Measure depth and document insulation type and joist spacing.
- Fix active moisture and roof leaks; dry and repair damaged insulation.
- Air-seal major bypasses using gasket foam, caulk, or spray foam following the air sealing checklist.
- Protect ventilation channels at eaves with baffles; do not block soffit vents.
- Choose method: add an unfaced top layer, or hire a blower truck for cellulose.
- Install in stages: add partial coverage, then re-check for compression and vent blockage.
- Label depth and add an attic access note for future owners.
When to Call a Pro
- When ventilation, vapor control, or framing changes are required.
- If spray foam is considered across large areas (proper equipment and controls).
- When attic has knob-and-tube wiring, asbestos, or structural concerns.
For vapor control practice in wall or ceiling planes, consult the site's vapor barrier guide. Place the following video to visualize layering and installation technique: This video compares the options to help you decide:
Cost, Payback and Energy Impact: R-19 vs R-38
What Affects Installed Cost for Each Option
Installed cost varies with material (fiberglass vs cellulose vs mineral wool vs spray foam), attic access, need for air sealing/repairs, and local labor rates. Tight cavities increases labor as installers must avoid compressing batts. Blown-in cellulose requires blower truck rental or contractor access, whereas layered batts are more DIY-friendly but still require care.
How to Estimate Payback (simple Approach)
A practical template:
- Estimate annual heating reduction (%) from an R-19 → R-38 upgrade using climate lookup or a local energy calculator.
- Multiply by annual heating cost (fuel or electricity) to get annual savings.
- Divide retrofit installed cost (materials + labor + sealing) by annual savings to estimate simple payback years.
For formal modeling, consider a HERS assessment; our HERS rating guide explains how to quantify savings with a certified model.
Non-energy Benefits to Weigh
- Improved occupant comfort and fewer cold spots.
- Potentially smaller HVAC runtime and longer equipment life.
- Reduced risk of frozen pipes in attic-adjacent spaces when assemblies are correct.
- Increased resale appeal in some markets, especially where buyers expect higher attic R-values.
For background on price drivers and market trends, see material cost trends.
Common Mistakes When Choosing Between R-19 and R-38
Installation Mistakes That Erase the Benefit of Extra R
- Compressing batts into insufficient cavity depth (reduces effective R).
- Blocking soffit vents or compressing baffles, which creates moisture risk and reduces attic ventilation.
- Skipping air sealing; heat bypass through gaps undercuts added R.
Material Selection Errors and Compatibility Problems
- Using faced batts as the top layer can trap moisture if the assembly needs vapor permeability.
- Mixing incompatible vapor barriers across ceiling and roof assemblies—this can shift condensation into unintended layers.
- Choosing a product solely on R/inch without considering long-term moisture and aging.
Ventilation and Moisture Traps to Avoid
- Laying insulation across eave vents—always install baffles to keep airflow.
- Adding depth without checking attic ventilation rate; if the attic becomes colder and traps moisture, rot risk increases.
For common air leaks to inspect before insulating, review the site's air leakage points. Also consult EPA guidance on indoor air quality where moisture is a concern.
Which Should You Choose? Scenario-based Recommendations for R-19 vs R-38
Short-term, Budget-limited Homeowners
Recommendation: R-19 with targeted air sealing. If staying <5 years or renting, fix major air leaks, add cavity-specific insulation, and stop there. Use low-cost fixes like gasket foam around top plates and insulation baffles for soffits.
Long-term Owners in Cold Climates
Recommendation: R-38 (or higher) in attic floors. Combine a top layer of unfaced batts or blown-in cellulose with a thorough air-sealing pass. Expect longer payback but improved comfort and lower annual heating load.
Small Cabins, Tiny Homes, and Off-grid Scenarios
Recommendation: Prioritize whole-assembly R and airtightness over simply stacking batts. For off-grid cabins where weight and space matter, consider high-performance closed-cell spray foam or exterior continuous insulation. See the site's off-grid cabin insulation advice and cabin roof insulation tips for tight-build strategies.
When to Prioritize Air-sealing or a Different Material Instead
Recommendation: If the budget allows only one improvement, seal the top plate leaks and duct penetrations first. After that, choose insulation depth based on cavity height. In many cases, a hybrid approach—spray foam at critical seams plus cellulose or batt for bulk—gives the best balance of performance and cost (see spray foam vs cellulose).
The Bottom Line
For many homes, upgrading from R-19 to R-38 in the attic is worth it when living in a cold climate or planning long-term occupancy; however, sealing air leaks and fixing thermal bridges usually returns more value per dollar than piling on insulation. Use the "r19 vs r38 insulation" comparison above to decide: if you can add depth without creating ventilation or moisture problems, R-38 is the stronger long-term choice.
Frequently Asked Questions
Is R-38 worth it if I already have R-19?
It depends on climate, occupancy horizon, and existing air sealing. In colder climate zones, upgrading to R-38 typically reduces winter heat loss noticeably and improves comfort. But if major attic air leaks, thermal bridges, or moisture issues exist, those should be fixed first because they often erase the marginal benefit of added R.
Use a local energy-cost estimate or a HERS-style model to quantify payback for your location; the HERS rating guide explains how to get a formal estimate.
Can I just stack R-19 batts to get R-38?
Yes—two unfaced R-19 batts laid crosswise can achieve R-38 if joist depth allows, but only if you avoid compressing the batts and maintain ventilation channels at eaves. Use unfaced batts as the top layer to avoid creating a vapor-impermeable sandwich, and install baffles at soffits to protect airflow.
Will adding insulation cause moisture problems?
It can, mainly if ventilation, vapor control, or roof leaks are not addressed. Thicker insulation can change drying paths and attic temperatures. Inspect for leaks, maintain soffit-to-ridge ventilation, and follow vapor control guidance—see the site's vapor barrier guide for assembly-specific advice.
Which insulation material reaches R-38 most easily?
Blown-in cellulose and multilayer batt systems reach R-38 without major framing changes. Dense-pack cellulose fills voids and fits over existing batts; layered unfaced batts also work. Spray foam can achieve high R with less depth but is more expensive and has different moisture and carbon trade-offs—see spray foam vs cellulose for details.
How do codes and recommended R-values affect my choice?
Building codes and programs like Energy Star and the IECC set minimum and recommended R-values by climate zone. Use their tables to set a baseline; Energy Star's recommendations are a helpful starting point and are summarized in their insulation R-values guidance. Local codes may require different minimums, so check with your building department before finalizing a plan.