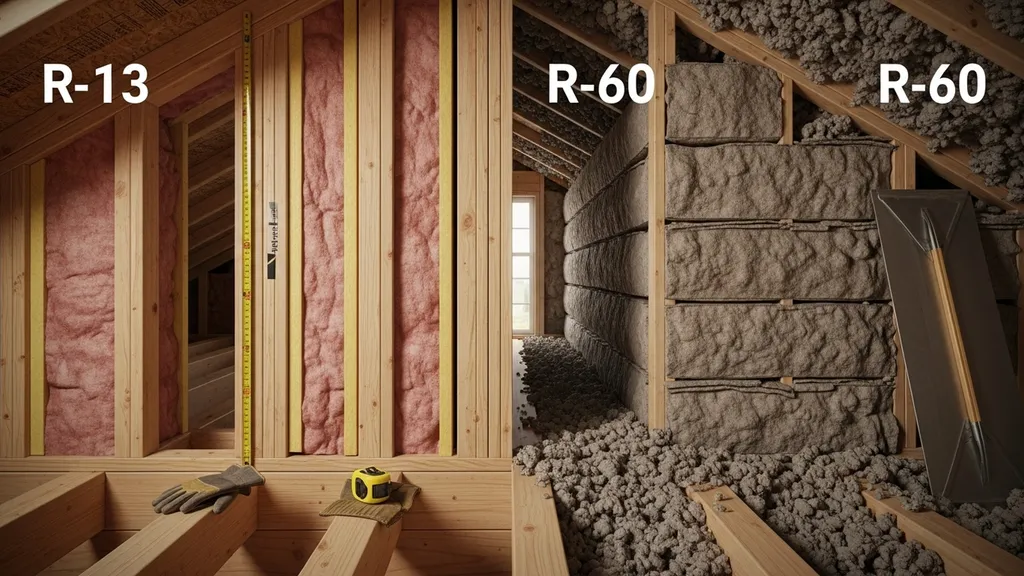
Compare R-13 and R-60 insulation for walls and attics — pros, cons, cost drivers, and scenario-based recommendations for DIY self-builders.
R-13 vs R-60 Insulation: Which Do You Need?
Choosing between R-13 and R-60 insulation starts with two simple questions: what assembly are you insulating (a 2x4 wall or an attic), and how cold or hot is your climate? This article compares "r13 vs r60 insulation" head-to-head, explains how each is built, and gives scenario-based picks so budget-conscious DIY builders can make the right call for walls, attics, and hybrid assemblies. Expect clear trade-offs on thickness, energy savings potential, installation difficulty, and where layered approaches beat a single high R-value.
TL;DR:
- R-13 is typically for 2x4 wall cavities (about 3.5 in thick), low cost, easy DIY install — good for mild climates or interior/non-load-bearing partitions.
- R-60 is an attic target (roughly 18–22 in of loose-fill, depending on material), high insulation performance for cold climates, higher labor/access costs and safety requirements.
- Middle ground or layered assemblies (cavity R + continuous foam) often give better cost-effectiveness and reduce thermal bridging; use an insulation savings calculator to compare payback by climate and fuel prices.
R-13 vs R-60 Insulation: Quick TL;DR and Comparison Table
Short Summary (one-paragraph TL;DR)
R-13 is the standard nominal R-value for 2x4 wall cavities and works well in mild climates or as a baseline in new stick-built homes. R-60 is an attic-level target recommended for many cold zones to minimize heat loss through the ceiling. The right choice depends on climate zone, airtightness, available depth, and budget; often the best approach pairs a modest cavity R (R-13–R21) with added continuous insulation or a deep attic layer to get the performance of a high R-value without excessive cost or structural complications. See the Department of Energy's overview on insulation for recommended targets and climate guidance: Insulation | Department of Energy.
Side-by-side Comparison Table (R-13 vs R-60)
| Feature | R-13 | R-60 |
|---|---|---|
| Typical location | Wall cavity in 2x4 framing, small sheds | Attic top-up (ceiling), deep loose-fill or layered batts |
| Nominal thickness | About 3.5 in (fiberglass batt) | About 18–22 in loose-fill (depends on material) |
| Thermal performance per linear foot | ~R-3.7 per inch (fiberglass batt) — modest | High overall attic resistance; larger total R reduces heat loss dramatically |
| DIY difficulty | Low — friction-fit batts, cavity blow-in | Medium–High — deep blowing, access, joist load, safety |
| Typical cost drivers | Material cost, framing constraints | Material volume, blown-in equipment or labor, attic access, ventilation fixes |
| Relative energy savings potential | Low-to-moderate; depends on airtightness | High in cold climates; marginal returns diminish beyond recommended levels |
| Payback considerations | Shorter payback in mild climates if paired with air-sealing; low upfront cost | Longer payback where heating loads are high; larger upfront cost but larger annual savings in cold zones; see DOE/ENERGY STAR guidance and Insulation Institute tables for cost-effective ranges: Recommended home insulation R-values - Energy Star, DOE R-value recommendations (Insulation Institute PDF). |
R-13 vs R-60 Insulation: R-13 Explained — What It is and When It Fits
Overview: Common Materials and Installation Methods
R-13 is most commonly achieved with fiberglass batts sized for 2x4 stud walls (nominal 3.5 inches thick). Loose-fill cellulose can also reach R-13 in shallow cavities or small retrofit pockets. Installation methods for a DIYer include friction-fit batts, faced batts with vapor retarder, or dense-pack cellulose for better air-control. Key terms: R-value (resistance to heat flow) and vapor retarder (material limiting moisture transfer) should be clear before beginning.
Strengths of R-13
- Low material cost and widely available.
- Straightforward DIY install — batts cut to fit, friction-fit between studs.
- Works well for interior partitions and mild climates where full-depth framing is 2x4.
- Secondary benefit: modest sound attenuation between rooms.
Weaknesses of R-13
- Limited thermal resistance — poor choice alone in cold climates for exterior walls.
- Compression or gaps reduce effective R-value; installation quality matters more than nominal rating.
- Thermal bridging through studs can cut overall wall performance; continuous insulation is needed to address that.
- Vapor-control strategy depends on climate — faced batts may not be appropriate in all zones.
For a deeper cavity comparison, see the R-13 vs R-23 breakdown and the R-13 vs R-21 guide for help deciding whether upgrading wall cavities above R-13 makes sense.
Best-for: Typical Projects Where R-13 is the Right Call
- Mild-climate cottages or accessory buildings with 2x4 framing.
- Interior non-load-bearing walls where sound attenuation is the priority.
- Budget-sensitive retrofits where adding cavity fill is cheaper than re-sheathing for continuous foam.
- Small sheds or outbuildings where thermal load is low — try the shed insulation calculator for sizing.
R-13 vs R-60 Insulation: R-60 Explained — What It is and When It Fits
Overview: How R-60 is Commonly Built (materials & Layering)
R-60 is most often achieved in attics with deep loose-fill cellulose or fiberglass. Typical target depths range from 18 to 22 inches for cellulose and somewhat more for fiberglass depending on the product density and R-per-inch. Another route is layered batt plus blown-in top-up or combining cavity insulation with continuous exterior insulation on roofs. Achieving R-60 in wall assemblies is rare without thick structural depth or advanced continuous systems.
The Department of Energy lists attic R-values by climate zone and shows R-60 as a common recommendation in colder zones; consult Insulation | Department of Energy and Energy star recommended r-values for climate-specific targets.
Strengths of R-60
- Large reduction in heat loss through ceilings in cold climates; reduces fuel use substantially for heating-dominated homes.
- When combined with good air sealing, yields major comfort and moisture control benefits.
- Loose-fill options allow topping up existing attics without gutting ceiling assemblies.
Weaknesses of R-60
- Requires large material volumes and often blown-in equipment; DIYers must rent a blower or hire help.
- Access, headroom, and joist load-bearing capacity can limit how much insulation can be added safely.
- Ventilation strategy must be revisited: adding depth may obstruct vents or require baffles to maintain airflow or change to a sealed/intentionally unvented assembly.
- Diminishing returns: beyond recommended zone-specific levels, each extra R gives less annual savings.
For detailed material choices and realistic attic targets, review attic materials and R-values and the material pros/cons in cellulose vs fiberglass comparison. Off-grid cold-climate builds often aim for R-60 in the attic; see our off-grid cabin insulation tips.
Best-for: Projects Where R-60 Delivers Clear Value
- Cold-climate primary residences where heating is the dominant energy use.
- Off-grid homes where reducing heating fuel or generator hours has high value.
- Retrofit attics with high roof-to-ceiling heights and safe access; topping up to R-60 often pays off in reduced heating bills and improved comfort.
- Homes where attic insulation is paired with comprehensive air sealing and ventilation fixes.
R-13 vs R-60 Insulation: Mid-range R-values and Alternatives (R-19–R-38) That Bridge the Gap
When a Mid-range R-value is the Smarter Budget Choice
A mid-range R-value often gives a better marginal return per dollar than jumping straight from R-13 to R-60. For example, upgrading wall cavities to R-19 (2x6 framing or dense-packed options) or bringing attic levels to R-30–R-38 can cut a big chunk of heat loss for much less cost and installation difficulty than extreme depths.
Comparing R-19, R-21, R-30/R-38 Performance vs R-13 and R-60
- R-19 in a 2x6 wall (about 5.5 in) reduces envelope loss relative to R-13 by removing a lot of the low-hanging heat transfer, especially if paired with an air barrier.
- R-30–R-38 in the attic reaches many IECC/ENERGY STAR targets for mixed climates and captures most of the energy savings available before diminishing returns accelerate.
- For many DIY projects, the sweet spot is R-19 to R-30 depending on climate and budget.
Compare options in related comparisons: R-15 vs R-23 comparison and R-19 vs R-38 contrast for performance and cost trade-offs.
Materials and Installation Notes for Mid-range Options
- R-19: Use 2x6 framing with fiberglass batts or dense-packed cellulose in cavities. Watch for compression when installing plumbing/electrical.
- R-30/R-38 attic: Often achieved with layered batts or a combination of batts plus blown-in. See R-30 vs R-38 attic choices.
- Mid-range upgrades are a good moment to add targeted air sealing, which often recoups more energy than small jumps in R-value.
A practical step: run the insulation savings calculator to estimate payback and annual savings for a mid-range upgrade in your climate. The calculator helps evaluate "insulation payback" under different fuel and electricity price scenarios.
R-13 vs R-60 Insulation: Combining Cavity Insulation and Continuous Layers — Smarter Than Choosing One R-value?
Concept: Cavity R-value + Continuous Insulation
Instead of relying on a single thick layer, combining cavity insulation (like R-13 in studs) with continuous exterior insulation (rigid foam or insulated sheathing) reduces thermal bridging through studs and raises the whole-wall R-value efficiently. That assembly often achieves equal or better performance than very thick cavity-only systems.
Practical DIY Layering Strategies
- Add 1–2 in of polyiso or XPS board outside sheathing to convert a standard R-13 wall into an assembly with much higher whole-wall performance. Tape seams and fasten correctly to maintain continuous insulation.
- Use mineral wool or cellulose in the cavity and add 1–2 in of rigid board for fire performance and vapor moderation.
- Interior insulated sheathing (e.g., insulated gypsum or wood-fiberboard) is another option for retrofit projects where exterior re-sheathing isn't feasible.
See trade-offs between air-sealing spray foam and layered strategies in spray foam vs cellulose impact. For eco-friendly continuous options, consider cork as a choice in the assembly: cork as an insulation option.
Strengths, Trade-offs, and Typical Assemblies
- Strengths: Reduces thermal bridging, improves moisture control when detailed correctly, uses less thickness to reach high whole-wall R-values.
- Trade-offs: Adds cost for rigid board materials and requires careful detailing of taped seams and fasteners. Fastener thermal bridging can be an issue if not accounted for.
- Typical DIY assembly: R-13 cavity + R-5 to R-10 polyiso => whole-wall performance similar to much thicker cavity-only walls; better acoustic performance and improved resilience.
Always check local building code and manufacturer installation instructions. When adding continuous foam, follow best practices for air-barrier sequencing and tape all horizontal seams to form a continuous layer.
R-13 vs R-60 Insulation: Which Should You Choose? Scenario-based Recommendations
Decision Checklist (climate, Budget, Access, Use Case)
- Climate: Determine heating vs cooling dominance and your IECC climate zone.
- Budget: Compare material plus labor vs long-term energy savings; use the insulation savings calculator.
- Access: Attic headroom, roof structure, and joist capacity limit how much can be added safely.
- Airtightness: If the house is leaky, prioritize air sealing before adding thickness.
- Use case: Tiny cabins, primary homes, off-grid systems, and rental units all have different payback horizons.
Scenarios — Quick Picks for Common DIY Builds
- Small mild-climate cottage: Choose mid-range walls (R-19 if possible) and R-30 attic — focuses on comfort and budget.
- Cold off-grid cabin: Prioritize attic R-60 and R-21+ walls; pair with airtightness and a right-sized heating system. See off-grid cabin insulation tips.
- Retrofitting an attic with limited budget: Seal air leaks, then top up to R-38–R-49; R-60 makes sense only if the remaining heating load justifies the added expense.
- New stick-built home on a tight budget: Use R-13 walls plus continuous exterior foam (R-5–R-10) to beat thermal bridging; then aim for R-38 in attic for many climates.
- Soundproofing interior walls: R-13 with acoustic sealant and resilient channels is often sufficient.
Before upgrading HVAC, consider pairing insulation work with a right-sized heat pump; our DIY mini-split install tips can help builders who choose heat pumps. For off-grid projects, balance insulation investment with measures like solar lighting for off-grid homes.
A Simple Decision Flow (3-step) to Guide Your Final Choice
- Diagnose: Measure current insulation levels and blower-door leakage if possible.
- Seal: Fix air leaks and ventilation problems — air sealing normally improves payback more than small R increases.
- Add insulation where it gives the most ROI: attic first for most homes; upgrade walls or add continuous insulation if attic is already adequate.
This video explains the fundamentals:
The Bottom Line
For most DIY self-builders, R-13 is a sensible, low-cost wall cavity value while R-60 is an attic-level goal for cold-climate houses. However, combining modest cavity R-values with continuous insulation or choosing mid-range attic values (R-30–R-38) usually gives better cost-effectiveness and comfort. Use climate-specific guidance and an insulation savings calculator to choose the best path in your project.
Frequently Asked Questions
Do I need R-60 in every attic?
No. Recommended attic R-values vary by climate zone. The Department of Energy and ENERGY STAR provide zone-by-zone tables showing cost-effective targets; many mild climates do well with R-30–R-38, while cold zones often list R-49–R-60 as cost-effective. Start by checking those tables and assessing your home's airtightness — sealing leaks typically gives more immediate savings than adding small amounts of insulation.
Can I mix R-13 in walls with R-60 in the attic?
Yes. It's very common to have 2x4 walls insulated with R-13 while the attic is insulated to a much higher R-value. Prioritize attic insulation in heating-dominated homes for the biggest energy reduction per dollar, then upgrade walls or add continuous insulation if budget allows.
Is it better to add more attic insulation or seal air leaks first?
Seal air leaks first. Air leaks can bypass insulation and significantly reduce its effective R-value. A blower-door test identifies major leakage paths. After sealing, add insulation to reach climate-appropriate levels. This sequence usually improves payback and eliminates condensation or ice-dam risks tied to warm air escaping into the attic.
How does payback time compare between R-13 and R-60 upgrades?
Payback depends on climate, fuel prices, and existing insulation. In cold climates, upgrading attic insulation toward R-60 often has a multi-year payback but yields substantial annual fuel savings. In mild climates, the same upgrade may take much longer to pay back. Use guidance from ENERGY STAR and the Insulation Institute for cost-effectiveness ranges and try the insulation savings calculator to model local costs and savings.
Will thicker insulation create moisture or ventilation problems?
Thicker insulation can affect ventilation paths and change humid-air movement. In attics, adding depth may block soffit vents unless baffles are installed; failing to maintain ventilation or perform proper air sealing can lead to condensation and mold. For walls, adding continuous exterior insulation usually improves drying potential, but vapor-control strategies must match local climate. Consult the DOE's insulation guidance and local code if unsure: Insulation | Department of Energy.