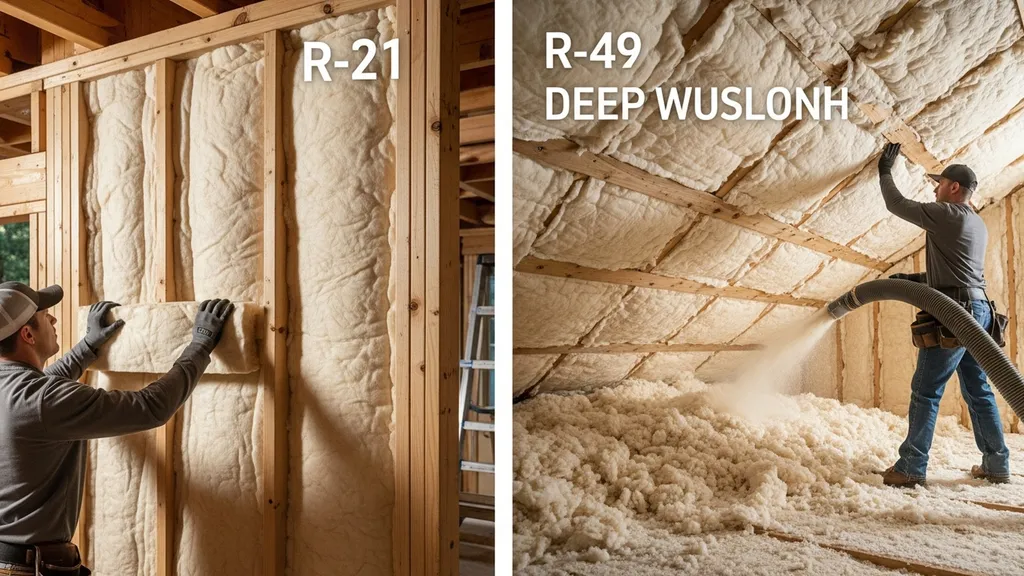
Compare R-21 and R-49 insulation, learn pros, cons, costs, and which R-value fits your climate, budget, and DIY project.
R-21 vs R-49 Insulation: Which Do You Need?
Choosing the right R-value affects comfort, energy bills, and how you build. This guide compares r21 vs r49 insulation so DIY homebuilders can match R-value to framing, climate, and budget. You’ll learn where R-21 makes sense (typically 2x6 wall cavities), why R-49 is a common attic target, the material options to reach each value, and scenario-based recommendations for new builds and retrofits.
TL;DR:
- R-21 is the practical choice for 2x6 framed walls and knee walls — good DIY options: fiberglass batts, mineral wool, or dense-packed cellulose.
- R-49 is a typical attic target for cold climates — achieved with deep loose-fill cellulose/fiberglass or layered rigid/spray foam; expect higher material, labor, and thickness requirements.
- For many projects a middle ground (R-30 plus continuous exterior insulation) gives the best cost-to-performance balance; prioritize air-sealing before chasing very high cavity R-values.
| R-value | Typical application | Typical thickness range (approx.) | Common materials | Relative cost | DIY-friendliness | Recommended climates |
|---|---|---|---|---|---|---|
| R-21 | 2x6 framed exterior walls, knee walls | ~5–7 inches cavity (varies by material and compression) | Fiberglass batts, mineral wool, dense-packed cellulose, closed-cell spray foam, rigid foam | Low–mid | High for batts/cellulose, Low for spray foam | Mild to mixed climates; acceptable in cold when paired with continuous insulation |
| R-49 | Attics, very deep walls, continuous exterior stacks | Deep attic fills or stacked rigid/spray systems (approx. double cavity depths) | Loose-fill cellulose/fiberglass, high-thickness spray foam, stacked rigid foam | Mid–high | Mid for loose-fill (with blower), Low for spray foam/rigid layering | Cold climates and high heating-load buildings |
Quick overview sources and compressed batt guidance from the Insulation Institute are helpful for assessing in-wall compression and R-value loss: Estimated R-values for compressed fiberglass batt insulation (PDF).
Quick Overview & TL;DR — R-21 vs R-49 Insulation: Which Do You Need?
One-paragraph Summary
R-21 and R-49 are different targets used for different parts of a home. R-21 is a mid-range R-value commonly installed in 2x6 wall cavities with batts or dense-packed insulation; it balances cost, framing, and DIY ease. R-49 is a high R-value target most often applied to attics or deep-wall assemblies and requires more material, thickness, or combined layers of cavity plus continuous insulation. This article compares materials, installation effort, moisture considerations, and which option fits common DIY scenarios.
TL;DR Comparison Table
(See the comparison table above for a quick scan of typical applications, materials, and DIY friendliness.)
R-21 Insulation: What It Is, When It Works, and Trade-offs
Overview: Typical Uses and Materials
R-21 is a mid-range thermal resistance value widely used in 2x6 framed walls and certain below-grade or kneewall applications. Common materials that achieve near-R-21 in a 2x6 cavity include unfaced fiberglass batts, mineral wool batts, and dense-packed cellulose. Closed-cell spray foam or high-performance rigid foam can reach equal or greater R within the same cavity depth but at higher cost.
Energy Star lists cost-effective insulation levels by location and assembly; R-21 in walls is a common recommendation where 2x6 framing is used and continuous insulation is limited: Recommended home insulation R–values (Energy Star).
R-21 is commonly used in:
- Exterior framed walls on 2x6 studs
- Basement knee walls and some rim-joist details
- Some roof assemblies where framing depth is adequate
Strengths
- Material options are affordable and widely available.
- Fiberglass and mineral wool batts are straightforward for homeowners to install.
- Works well when combined with good air sealing and moderate continuous insulation.
- Less thickness impact on window jambs and interior space than very deep assemblies.
Weaknesses
- Studs cause thermal bridging; cavity-only R-21 can underperform compared with wall systems that add continuous insulation.
- Compressed batts lose R-value—see compression charts from industry guidance when stuffing batts into deeper or uneven cavities.
- In cold climates, cavity-only R-21 may be marginal without exterior continuous insulation or improved framing.
For a primer on R-value fundamentals and how cavity limits affect performance, see our understanding R-value basics. To reduce thermal bridging, consider adding continuous insulation following our exterior insulation guide.
Best for (use Cases)
- New 2x6 framed homes on a tight DIY budget where adding thin continuous foam is feasible later.
- Renovations with limited cavity depth where full-depth retrofit is difficult.
- Builders prioritizing lower upfront cost and simpler installation without pursuing passive-house targets.
R-49 Insulation: What It Is, When It’s Appropriate, and Trade-offs
Overview: Typical Uses and Materials
R-49 is a high R-value target typically used for attics in colder zones or for walls where very deep cavities or layered insulation systems are possible. In attics, R-49 is commonly achieved by deep loose-fill cellulose or fiberglass installed with a blower. In walls or roofs, reaching R-49 often requires stacked solutions: large cavity spray foam, multiple layers of rigid foam, or double-stud/Larsen truss-style deep assemblies.
A useful review of high-R attic targets and how R-38 compares to R-49 is available in our deeper attic comparison: R-38 vs R-49 comparison. For material trade-offs when aiming for high R-values, see our analysis comparing spray foam and cellulose: spray foam vs cellulose analysis.
Strengths
- Delivers significant thermal resistance where space allows, reducing heating loads in cold climates.
- Loose-fill cellulose or fiberglass in attics is cost-effective per incremental R compared with spray foam.
- When combined with thorough air sealing, high attic R-values cut heat loss dramatically in heating-dominated homes.
Weaknesses
- Requires more material volume and results in thick assemblies; not always feasible in wall cavities without special framing.
- Higher upfront cost, and spray foam solutions add significant labor and contractor requirements.
- Deep attic fills must be managed around ventilation, chases, and electrical; poor installation can create cold spots or moisture risks.
Leyton’s buyer guide gives a practical sense of options and R-per-inch trade-offs across materials: Insulation buyer guide 2026.
Best for (use Cases)
- Cold-climate attics where adding deep loose-fill is inexpensive relative to heating savings.
- New builds aiming for very low heating loads where wall thickness is not constrained (double-stud walls, Larsen trusses).
- Tiny homes or cabins only when the extra thickness and cost are justified by dramatic energy reductions.
Middle Ground: R-30 and Other Mid-range Options Between R-21 and R-49
Why Mid-range Can Be the Best Trade-off
R-30 is often the practical compromise: higher thermal performance than R-21 without the thickness and cost of R-49. Mid-range solutions deliver most of the energy savings for a fraction of the material and labor cost of extreme R-values. In many climates, improving air tightness and adding continuous exterior insulation to a cavity at R-21 yields similar or better results than pushing cavity R from 21 to 49.
The U.S. Department of Energy’s technical overview of insulation types helps compare materials when designing layered systems: Types of insulation (Department of Energy).
Common Ways to Get R-30 (framing, Continuous Insulation, Hybrid Assemblies)
- Use a deeper stud (2x8) or reduce compression of cavity insulation to approach R-30 with denser batts.
- Combine R-21 cavity with 1–2 inches of continuous rigid foam outside the sheathing to reach effective wall R in the R-30 neighborhood.
- In attics, install a moderate loose-fill depth to R-30 when R-49 isn’t practical; focus on sealing attic penetrations and insulating ducts.
- Hybrid assemblies: cavity spray foam plus exterior rigid insulation reduces air leakage and thermal bridging while keeping reasonable thickness.
For a targeted comparison between R-21 and R-30 choices, see R-21 vs R-30 discussion.
Cost, Performance and Payback: How R-21 and R-49 Compare for DIY Budgets
Material and Labor Cost Drivers
Costs vary widely by region and material. Key drivers are:
- Material type: fiberglass batts are least expensive; cellulose mid-range; mineral wool slightly higher; spray foam and high-density rigid foam are most expensive.
- Labor and equipment: loose-fill cellulose/fiberglass requires a blower (rental or contractor); spray foam requires certified installers and often off-gassing precautions.
- Framing changes: deeper studs or double-stud walls increase lumber and detail work costs.
- Waste and disposal: retrofit work can generate debris and require extra labor.
Local examples and regional cost cues are available in our regional DIY cost reference.
Energy Savings vs Upfront Cost (qualitative Guidance)
A few points to guide decisions:
- Air sealing typically returns value faster than raising cavity R from 21 to 49. Seal gaps, add gaskets, and insulate rim-joists before adding massive R.
- R-49 in the attic yields more incremental annual heating savings in cold climates than in mild climates.
- Payback depends on local energy prices, occupancy patterns, and building form factor; passive-house level insulation is cost-effective primarily when combined with mechanical strategy and low air leakage. See our passive house ROI analysis for deeper modeling.
Thickness, Framing and Structural Impacts
- Increasing cavity R often requires deeper framing, which affects window jambs, trim, and interior finishes. It can also change door jamb depths and roof overhang detailing.
- Continuous exterior insulation reduces thermal bridging without requiring much deeper cavities, but it introduces siding attachment and window flashing details you must follow.
- Building codes such as the IECC reference ceiling and wall R requirements; Chapter 4 of the 2018 IECC discusses ceiling insulation thresholds including R-49 in some conditions: IECC 2018 Chapter 4 residential energy efficiency.
Installation, Airtightness, and Moisture: Practical Considerations for Installers and Diyers
Air Sealing vs R-value: What Matters Most
Air leakage often causes more heat loss than insulation gaps. A well-sealed R-21 wall can outperform a leaky R-49 assembly. Focus on:
- Sealing top plates, electrical penetrations, and plumbing chases
- Gasketed window and door rough openings
- Proper sealing of rim joists and mechanical penetrations
Moisture Control, Vapor Barriers, and Ventilation
Moisture strategy depends on climate and material:
- In cold climates, keep vapor control toward the warm side of the assembly; consider vapor-permeable continuous insulation to avoid trapping moisture.
- Attic ventilation must be managed when adding deep insulation—maintain clear baffles at soffits and ensure soffit-to-ridge airflow if the roof assembly requires ventilation.
- For crawl spaces and below-grade areas consult our fix damp crawl space tips.
Material-specific Installation Notes (batts, Cellulose, Spray Foam, Rigid)
- Fiberglass batts: avoid compression and gaps; cut carefully around obstructions; use friction-fit or batting with proper supports.
- Mineral wool: more forgiving with moisture and sound control; heavier but allows denser packing in odd cavities.
- Dense-packed cellulose: excellent air-sealing when installed correctly; needs a blower and attention to settling rates.
- Spray foam: excellent air-barrier and high R/inch but requires professional installation for closed-cell systems and fire-blocking compliance.
- Rigid foam: use continuous layers to reduce bridging; follow flashings and window detail guidance.
This DIY video shows you the hands-on process:
.Also see our guidance on natural and sustainable options in the natural fiber insulation guide and soundproofing overlaps for fill density and decoupling techniques in soundproofing overlap tips.
Which Should You Choose? Scenario-based Recommendations for R-21 vs R-49
If You're Building New on a Tight DIY Budget
Choose R-21 cavity insulation in 2x6 walls paired with targeted continuous insulation (1–2 inches) where budgets allow. This keeps framing simple, lets you DIY much of the work, and still reduces thermal bridging.
If You're in a Cold Climate and Want Long-term Savings
Prioritize R-49 in the attic and a deep-wall strategy for walls. For walls, consider double-stud walls, a Larsen truss, or continuous exterior insulation combined with an R-21 cavity. For modeling of long-term returns, consult our passive house ROI analysis.
If You're Retrofitting an Old Home with Limited Cavity Depth
Work with R-21 equivalents and improve air sealing and continuous exterior insulation where feasible. Dense-pack cellulose can raise effective in-wall R without major reconstruction. Consider insulating from the exterior if interior depth is constrained.
If You're Aiming for a Passive-house or Net-zero Target
Use deep-wall assemblies (double-stud or truss) or exterior continuous insulation stacked with cavity insulation to reach very high whole-wall R-values. R-21 cavity plus continuous insulation often outperforms compressed higher-cavity R. For deep-wall choices see our double-stud vs larsen truss comparison and advanced wall framing steps for construction details.
If You're Working on an Attic-only Project or Tiny Home
For attics, target R-49 in cold climates; loose-fill cellulose is a cost-effective route if you can rent a blower. Tiny homes and mobile homes often have space constraints; consult our best insulation for mobile homes for tailored options.
Budgeting and DIY Tips: Materials, Tools, and Common Pitfalls
Tools and Materials Checklist
- Blower for loose-fill cellulose or fiberglass (rental)
- Utility knife, staple gun, and insulation supports for batts
- Protective gear: NIOSH-rated respirator/mask, eye protection, gloves, coveralls
- Tape and compatible sealants for air-barrier work
- Rigid-foam adhesive and mechanical fasteners for continuous insulation
For an extended tools list for natural-building and DIY projects, see our natural building tools list.
Where to Save and Where to Spend
- Save: Choose fiberglass batts or dense-packed cellulose for large areas where labor time is manageable.
- Spend: Prioritize air sealing, rim-joist treatment, and continuous insulation details — these yield outsized returns.
- Invest: Hire a pro for spray foam or complex exterior insulation flashing details; mistakes are costly and sometimes irreversible.
Common DIY Mistakes and How to Avoid Them
- Compressed batts: Don't cram wider batts into narrower cavities — compressed insulation delivers less R.
- Gaps at top plates and around penetrations: Use foam or gaskets to seal these; they are common heat-loss paths.
- Blocking ventilation: When adding attic insulation, keep baffles clear and maintain ventilation where needed.
- Ignoring code and rebates: Local codes and incentive programs affect acceptable assemblies; check local requirements and available rebates in our choosing budget-friendly green materials article.
The Bottom Line
For framed walls, R-21 is the pragmatic, DIY-friendly choice; for attics in cold climates, R-49 is often worth the investment. Most projects benefit more from airtightness and targeted continuous insulation than from simply increasing cavity R to extremes.
Frequently Asked Questions
Is r-49 always better than r-21?
No. Higher R-value reduces heat flow, but real-world performance depends on airtightness, thermal bridging, and moisture control. A sealed R-21 wall with continuous exterior insulation can outperform a leaky R-49 assembly.
Can I retrofit r-49 into existing walls?
Retrofitting R-49 into existing framed walls is usually impractical without rebuilding because of thickness limits. Alternatives include dense-pack cellulose to raise effective in-wall R and adding continuous exterior insulation to boost whole-wall performance.
Will increasing r-value reduce my heating bills enough to justify cost?
It depends on climate, energy costs, and existing envelope quality. In cold climates, attic upgrades to R-49 often pay back faster than minor wall upgrades. Run a simple payback model or consult resources like our passive-house ROI analysis for project-specific estimates.
How does climate affect the choice between r-21 and r-49?
Colder climates justify higher R-values (attic R-49 and thicker walls). In milder climates, R-21 walls with good air sealing and some continuous insulation are often sufficient. Use Energy Star’s climate-based guidance when planning insulation levels.
Which insulation materials best reach high r-values safely?
Loose-fill cellulose and high-density fiberglass provide a cost-effective route to high attic R when installed properly. Closed-cell spray foam and layered rigid foams reach high R per inch but are more expensive and require careful detailing and, in some cases, professional installation.