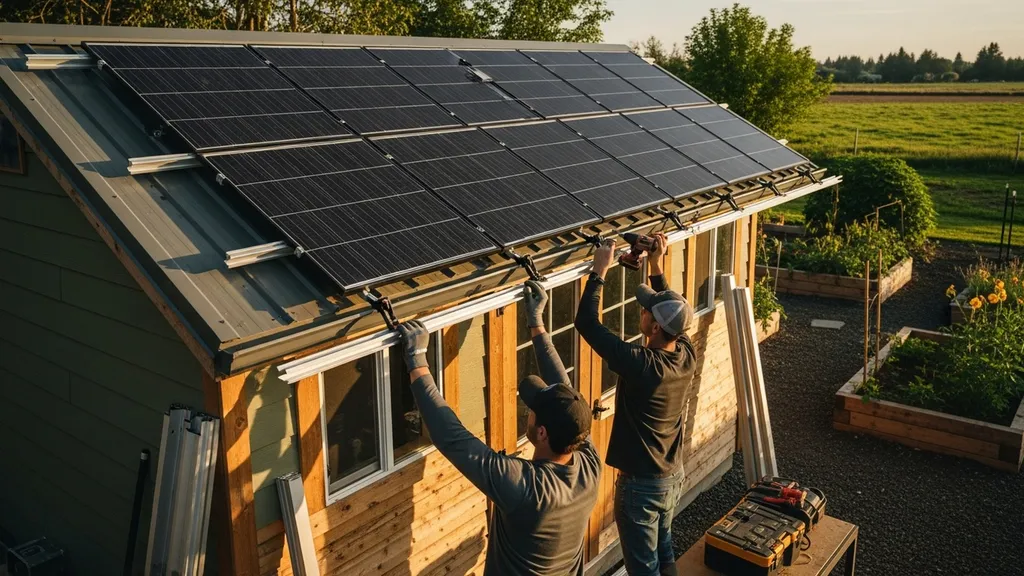
Step-by-step guide to sizing a 10kW solar system for a shed: loads, panel count, batteries, wiring, costs, and installation tips for DIYers.
10KW Solar System for Shed: Complete Sizing Guide
A 10kW solar system for shed gives a small building enough peak generation to run workshop tools, refrigeration, mini-split heating or cooling, and lights — often producing roughly 30–40 kWh per day depending on location. This guide walks through how to decide if 10 kW is the right size, estimate your load, translate kWh needs into panel count and roof area, size batteries and inverters, and plan wiring, permits, and costs. By the end you'll have a clear checklist to design a practical, budget-minded 10kW shed system.
TL;DR:
- Aim for ~35 kWh/day from a 10kW array in 3.5 peak sun hours (10 kW × 3.5 ≈ 35 kWh/day); adjust using local PVWatts or solar insolation data.
- For hardware, expect ~25–34 panels depending on wattage (300W–400W), a hybrid inverter sized near 8–12 kW AC, and battery capacity chosen to meet days of autonomy (e.g., 10–30 kWh usable).
- Start with a detailed load inventory, verify roof area/structure, pick grid-tied vs off-grid, and get local permit and utility interconnection rules before buying components.
Who Should Consider a 10KW Solar System for Shed?
A 10kW solar system for shed suits owners who plan to run moderate continuous loads and intermittent high-power tools. Typical use-cases include:
- Workshop with table saws, compressors, welders, and battery chargers where peak draws reach multiple kilowatts.
- Small off-grid cabin or guest suite with refrigeration, cooking, and a mini-split HVAC system.
- Cold storage or commercial refrigeration for small farms needing reliable daytime and partial-night backup.
- EV or battery charging station for small vehicles, combined with workshop loads.
For quick production expectations, use the simple rule: system kW × average peak sun hours = daily kWh. In many U.S. temperate areas average is 3.0–5.0 sun-hours/day. So 10 kW × 3.5 hours ≈ 35 kWh/day. Annual production per kW varies by site; many locations produce 1,000–1,800 kWh/year per kW, so a 10kW system often yields 10,000–18,000 kWh/year.
Research and government guidance recommend locating arrays on roofs with slopes between 15° and 40° and favor south-facing exposures where possible; see the Department of Energy's homeowner guide to solar for orientation and tilt basics. People who should not choose 10kW include owners with very small daytime loads (less than 5–10 kWh/day), extremely tight budgets where panel-only micro-systems suffice, or sites with severe shading or insufficient roof/ground space.
Plan to link your load-estimate to panel count and battery needs in the next sections, and compare smaller references like the 2 kW workshop guide if your loads are lighter.
Estimating Your Shed's Energy Use: a Step-by-step Method
Step 1 — Inventory appliances and tools
- List every device: model, rated watts, and typical hours used per day.
- Use manufacturer nameplate watts or measure with a clamp meter or plug power meter.
- Include always-on draws (Wi‑Fi, fridge controller), cycling loads (refrigerator), and intermittent high-power events (table saw, shop compressor).
Common examples:
- Refrigerator: 150–800 W while running; average ~1–2 kWh/day depending on efficiency and cycling.
- Mini-split heat pump: 500–2,000 W during conditioning; runtime varies with size and climate.
- Table saw / circular saw: 1,200–3,000 W peak for short durations.
- Air compressor (2–5 HP): 1,500–3,700 W motor start surge, running 700–1,500 W depending on load.
Step 2 — Calculate daily kWh
- For each device: Watts × hours/day = Wh/day; divide by 1,000 for kWh/day.
- Sum all devices to get baseline kWh/day.
- Add 10–30% for inefficiencies, inverter loss, and future growth. Example formula:
- Required daily kWh = (sum of device kWh/day) × 1.15 (15% margin).
Step 3 — Apply diversity factors and handle surges
- Many tools are intermittent; use a diversity factor (e.g., 0.6–0.8) for tool-heavy workshops if tools won’t run simultaneously.
- For surge loads (compressor or drill motors), size inverter and battery to handle start currents—select inverters with surge capability 2× continuous rating or use soft-start motor controllers.
Step 4 — Convert to system size
- Required system kW = Required daily kWh / (average sun hours × system derate).
- Use derate of 0.75–0.85 to account for inverter losses, temperature, soiling, and mismatch.
- For an example 35 kWh/day need in a 3.5 sun-hour site with 0.80 derate:
- Required kW = 35 / (3.5 × 0.8) ≈ 12.5 kW nominal PV (so a 10kW array may need load reduction or battery management if site sun-hours are low).
For regional insolation data use tools like NREL PVWatts or local solar resources — Australian guidance on sizing is also helpful: see Size your solar system | energy.gov.au for real-world examples and panel counts. Compare your findings to cabin or workshop examples such as the 7 kW workshop sizing and 7 kW cabin sizing to validate assumptions.
From Kwh to Panels: Calculating Panel Count and Array Layout
Estimating Daily Production Per Kw for Your Site
- Use the formula: Daily kWh per kW = average sun hours × derate (0.75–0.85).
- Example: In a 4.0 sun-hour location with 0.8 derate, 1 kW ≈ 3.2 kWh/day; a 10 kW array ≈ 32 kWh/day.
Panel Wattage Choices and How Many Panels You Need
- Panel wattage impacts quantity and roof area. Common module sizes: 300W, 350W, 400W, 450W.
- Panel count = system size (W) / module wattage.
- Example: 10,000 W / 400 W = 25 panels.
- Example: 10,000 W / 330 W ≈ 30 panels.
- Higher-watt panels reduce count and roof clutter but cost more per watt. See our budget-friendly panel options for trade-offs.
Panel area and roof space
- Average modern panel ~1.7–2.2 m² (18–24 ft²) depending on wattage and efficiency.
- Rough roof area = panel area × quantity + 10–20% spacing for rails, access, and microinverters.
- For 25 panels at 1.9 m² each, gross area ≈ 48 m² (517 ft²) plus spacing.
Array layout, tilt, and azimuth
- South-facing orientations maximize annual yield in the northern hemisphere; azimuth shifts and tilt lower output but may be necessary based on roof geometry.
- East-west layouts can flatten production profile and reduce string mismatch for long low roofs.
- Shading kills production from strings; use microinverters or power optimizers for partial shade.
- If roof area is limited, consider ground-mount or carport mounting to fit the 10kW array.
Structural and clearance rules
- Verify roof framing and attachment points can support panel dead and live loads; check local building code and permit requirements. For guidance on planning roof structure, consult our shed building plans and the local submittal guides for permits like the Woodside CA submittal requirements for PV over 10 kW.
Compare small examples such as the 3 kW shed guide to see how panel count and roof area scale from small systems to a 10kW installation.
Batteries, Inverters, and Balance-of-system Components (specs and Comparison Table)
Battery Sizing: Capacity vs Usable Kwh and Depth of Discharge
- Battery capacity (kWh): Total stored energy. Usable kWh = capacity × usable depth of discharge (DoD).
- Choose DoD based on chemistry: lithium (Li‑ion) commonly supports 80–95% usable DoD; flooded lead‑acid often limited to 50% usable to preserve life.
- Decide days of autonomy: 1–3 days is typical for shed systems. Example: 35 kWh/day × 1.5 days × 1/DoD = battery size required.
Inverter Sizing: Continuous vs Surge Ratings and Types
- For a 10kW PV array consider inverter AC nominal capacity in the 8–12 kW range depending on whether you want AC clipping or full output export. Hybrid inverters (battery‑ready) sized to match expected continuous loads are common.
- Surge capability matters for motor starts; choose inverters with at least 2× surge rating or use soft-start devices.
Charge Controllers, Combiner Boxes, Breakers and Cable Sizing
- For string inverters with integrated MPPTs you may not need separate charge controllers; off-grid and hybrid systems use MPPT charge controllers sized to panel string current.
- Use combiner boxes to group strings and install appropriate fuses/MCBs.
- Typical conductor guidance (examples only): up to 30 A circuits → 10 AWG copper; up to 50 A → 6 AWG; main battery/inverter conductors at 100 A+ → 3 AWG or 1/0 depending on run length. Always follow NEC and local code; have a licensed electrician verify final sizing.
Comparison/specs table
| Component | Typical options | Usable kWh / DoD | Cycle life (approx.) | Ballpark cost per kWh |
|---|---|---|---|---|
| Lithium‑ion (LFP) | Tesla, BYD, generic LFP modules | 80–95% DoD | 3,000–8,000 cycles | $300–$800 |
| Lead‑acid (flooded) | Deep‑cycle, AGM | 30–50% DoD | 300–1,200 cycles | $100–$200 |
| AGM/gel | Sealed lead variants | 30–50% DoD | 400–1,200 cycles | $150–$300 |
Note: Cost ranges are ballpark estimates and vary by vendor, currency, and region. For smaller off-grid comparisons see the 3 kW off-grid reference and the 7 kW off-grid example for scale.
Typical example combos for a 10kW PV array
- Grid‑tied (no battery): 10kW PV → string inverter ~10kW AC, minimal BOS.
- Hybrid DIY with battery: 10kW PV → hybrid inverter 8–12kW AC with 10–30 kWh usable battery (e.g., 12 kWh usable = 15 kWh nominal at 80% DoD).
- Off‑grid system: Larger inverter (continuous AC capacity sized to peak loads) and more battery capacity to cover multiple cloudy days.
For technical connection patterns and step‑by‑step hybrid wiring, see our guide on how to connect panels to a hybrid inverter and the hybrid systems cost study at hybrid systems cost breakdown. For a practical walk-through and parts-level detail refer to recent industry write-ups such as the analysis at AnkerSolix: Solar Panels for Sheds Guide 2026.
Grid-tied, Off-grid, or Hybrid for a Shed: Choosing the Right Architecture
Pros and Cons for Shed Installations
- Grid‑tied: Lowest overall component count and cost; allows exporting excess energy for net metering where available; no islanding — system shuts down during utility outages unless paired with storage. Good for users who want daytime power and economic offset.
- Off‑grid: Fully independent but requires much larger battery banks and often backup generation. Best for remote sheds without reliable grid access.
- Hybrid: Adds batteries to a grid‑connected system so you can run during outages, manage self-consumption, and control export. Most flexible for workshop owners who want backup reliability.
Required Components and Interconnection Basics
- Grid‑tied needs inverter, AC disconnect, and utility interconnection agreement. Hybrid adds battery bank, battery inverter/charger, and transfer control.
- Automatic transfer switches or inverter-based automatic changeover are used to move loads during outage events; anti‑islanding protection is mandatory.
- For detailed differences see our grid vs off-grid differences.
Permitting, Inspections, and Utility Rules to Check
- Check local permitting thresholds; some jurisdictions treat >10kW as commercial or require additional structural plans — see examples in municipal submittal guides like the Woodside CA requirements.
- Contact your utility to learn about export limits, net metering policies, and required interconnection forms. Some utilities limit export without advanced inverters or deploy time-of-use tariffs that change economics.
If you plan an off-grid option, compare mid-size examples such as the 7 kW off-grid example to see how battery sizing and generator backup scale with increased autonomy.
Installation Steps, Wiring Overview, and Safety
High-level Installation Sequence
- Site and structural assessment: check roof orientation, shading, and framing capacity.
- Mounting system installation: rails or ballast systems depending on roof type.
- Module installation: fasten panels, install grounding, and apply sealants at penetrations.
- Array wiring: route strings to combiner box with appropriate fusing.
- Inverter and battery install: place inverter in a dry ventilated location; battery bank on suitable rack.
- AC connection and commissioning: install AC disconnects, tie into shed electrical panel or subpanel, obtain inspection and interconnect permission.
Basic Wiring Layout and Key Safety Checkpoints
- Simplified wiring path: array → DC combiner/fuse → DC disconnect → inverter/charger → AC disconnect → shed main panel → utility grid (for grid-tied/hybrid).
- Grounding and equipotential bonding are mandatory. Use GECs (grounding electrode conductors) sized per code.
- Label all disconnects, and use lockout/tagout during work.
- Example conductor guidelines: small string currents often use 10–8 AWG conductors; battery/inverter main runs may need 3 AWG or larger. Always verify ampacity and voltage drop for run length.
What to watch for and when to call a pro
- Call a licensed electrician for final AC connection, meter integration, and permit-required inspections.
- If your project includes complex structural modifications, heavy battery racks, or grid interconnection paperwork, engage a contractor or solar professional.
For a visual demonstration, check out this video on dub-eng: how to install solar panels on garden:
For an in-depth hybrid wiring step-by-step and diagrams, see our hybrid wiring walkthrough.
Cost Breakdown, Payback, and Example Scenarios for a DIY Shed 10kw System
Line-item Cost Ranges (DIY vs Pro-installed)
- Solar panels (10 kW): $3,000–$8,000 (hardware only; brand and efficiency influence price).
- Inverter (10 kW hybrid or string inverter): $1,500–$6,000 depending on type and features.
- Battery bank (10–30 kWh usable): $3,000–$20,000 depending on chemistry and vendor.
- Racking, wiring, combiner, disconnects, grounding: $800–$3,000.
- Permits, inspection fees, interconnection: $200–$2,000 depending on locality.
- Pro installation labor: $5,000–$20,000 depending on complexity and local labor rates.
DIY scenario (grid‑tied, no battery)
- Hardware cost: panels $5,000 + inverter $2,500 + BOS $1,500 + permits $500 = ~$9,500.
- Estimated annual production: 35 kWh/day × 365 ≈ 12,775 kWh/year.
- At $0.15/kWh utility rate, annual savings ≈ $1,916 → simple payback ≈ 5 years (hardware only). Results vary with incentives and net metering.
Hybrid DIY scenario (battery backup)
- Hardware cost: panels $5,000 + hybrid inverter $4,000 + 15 kWh usable battery $9,000 + BOS and mounting $2,000 + permits $700 = ~$20,700.
- Annual grid offset depends on storage strategy; if full 12,775 kWh is captured and used, savings at $0.15/kWh ≈ $1,916/year, but battery replacement at 8–12 years affects lifecycle cost.
- Consider battery replacements (every 5–15 years) and inverter replacement (10–15 years) in lifecycle analysis.
Maintenance and replacement
- Panels: 25+ year life with gradual degradation (~0.5%–1%/year).
- Inverter: replace or refurbish at 10–15 years.
- Batteries: 5–15 years depending on chemistry and cycling.
- Plan for periodic cleaning, vegetation control to reduce shading, and monitoring subscriptions if using cloud-based inverter platforms.
Run payback calculations specific to your local insolation, net metering rules, and electricity rates to see real ROI. For deeper hybrid cost modeling see our hybrid systems cost breakdown.
Sizing Checklist, Troubleshooting Tips, and Upgrade Paths (key Points List)
- Confirm daily kWh target: Total of device kWh/day plus 10–30% margin.
- Verify roof area and structure: Measure usable area and check rafters for PV loads; consult shed building plans as needed.
- Calculate panel count and layout: Choose module wattage and estimate spacing.
- Pick inverter architecture: Grid‑tied, hybrid, or off‑grid based on outage needs and utility rules.
- Match battery capacity: Usable kWh = target autonomy days × daily kWh; adjust for DoD.
- Permits and utility: Submit interconnection and building permit applications early.
- Safety gear and electrical checks: Acquire DC/AC disconnects, breakers, grounding materials, and have a licensed electrician verify connections.
Common Problems and Quick Fixes
- Low production: check array tilt/azimuth, shading, dirty modules; clean panels and re-check orientation.
- Inverter fault codes: consult inverter manual for specific codes; common causes include AC over/under-voltage, ground faults, or DC overvoltage.
- Battery not reaching full SOC: verify charging profile, charge controller settings, and temperature compensation.
How to scale later
- Add more panels: check inverter MPPT headroom and string voltage limits; with string inverters you may need an additional inverter or switch to microinverters.
- Expand battery bank: ensure inverter charger supports larger capacity and battery chemistry match.
- Add a generator: integrate with transfer switch or generator input to hybrid inverter for extended autonomy.
- For small add-ons and step-by-step upgrades see our 1 kW off-grid primer for incremental growth strategies.
The Bottom Line
A 10kW solar system for shed is a practical choice when your daily loads approach 25–40 kWh, or when you need to run high-power tools alongside refrigeration and HVAC. Start by inventorying loads, then convert required daily kWh into PV capacity using local sun-hours and a system derate. Decide whether you need batteries: grid‑tied systems are cheaper and simpler, while hybrid or off‑grid setups provide outage resilience at higher upfront cost. Next steps: finalize your load sheet, verify roof area and structural capacity, consult your utility on interconnection, and choose components that match surge and continuous power needs.
Frequently Asked Questions
How many solar panels do I need for a 10kW system on my shed?
Panel count = 10,000 W ÷ panel wattage. For common sizes: 300W → ~33 panels, 350W → ~29 panels, 400W → ~25 panels. Factor in spacing and access when checking roof area; high-efficiency panels reduce count but cost more. See our notes on layout in "From kWh to panels" for area estimates and roof checks.
Can a 10kW system run a mini-split and fridge all day?
Yes, in most cases. A 10kW array typically produces 30–40 kWh/day under moderate sun. A single mini-split plus a modern refrigerator may average 5–15 kWh/day combined depending on climate and runtime, leaving headroom for tools. Run an appliance inventory and calculate kWh/day to confirm; include extra margin for inefficiencies and surge sizing for compressor starts.
Do I need batteries with a 10kW shed system?
Not necessarily. If you have grid access and don't need backup during outages, grid‑tied is cheaper. Batteries are required for off‑grid operation or if you want blackout resilience. For daytime-only loads batteries can be small; for overnight autonomy plan battery capacity equal to days of backup × daily kWh, adjusted for usable DoD.
Will a shed roof support a 10kW array?
Maybe. A 10kW array needs several hundred square feet and imposes dead and live loads on rafters. Have a structural assessment done: check rafter spacing, pitch, and connections. If the roof is too small or weak, consider ground-mount or carport mounting. Our shed building plans link helps with framing considerations.
What permits are typically required for shed solar?
Most jurisdictions require a building permit and electrical permit; systems above certain sizes may need structural plans and additional documentation. Utility interconnection paperwork is required for grid‑tied systems. Check local rules early — municipal guides like the Woodside submittal requirements provide an example of documentation needed for larger installs.