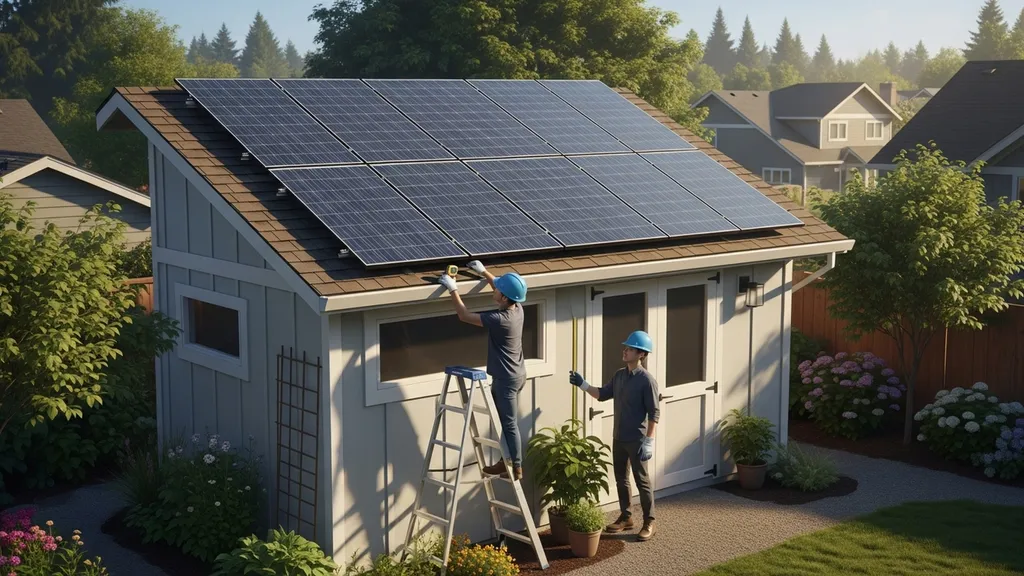
Step-by-step guide to sizing a 5kW solar system for a shed — production, components, battery sizing, costs, permits, and installation checklist.
5KW Solar System for Shed: Complete Sizing Guide
A 5kw solar system for shed can power power tools, lighting, small HVAC, and provide reliable backup — if it’s sized and sited correctly. This guide shows how much energy a 5 kW array actually produces, how to match that output to shed loads, what components and mounting options you’ll need, battery sizing math, permit essentials, and a ready-to-use DIY installation checklist. Read on to get precise kWh estimates, parts lists you can shop with, and a practical commissioning timeline.
TL;DR:
- A 5 kW array typically produces 12.5–30 kWh/day depending on sun hours; expect ~10–15% derate from panels/inverter losses.
- For daily needs, size batteries by daily kWh ÷ usable DoD (e.g., 15 kWh/day ÷ 0.8 ≈ 18.8 kWh battery for LFP).
- Best DIY setup: ~13 panels at 370–400 W, a 5 kW hybrid inverter (48 V), and 1–3 days of battery autonomy depending on budget.
How Much Energy Will a 5KW Solar System Produce on a Shed?
A 5 kW nameplate array’s raw daily output equals 5 kW × average sun hours. For simple planning use 2.5–6.0 sun hours per day to cover cloudy to very sunny sites. After real-world derating (inverter losses, soiling, temperature, wiring, shading) expect 10–15% less than the theoretical number.
Daily and Annual Output Estimates (kwh)
- Quick formula: Daily kWh ≈ Array kW × Sun hours × (1 − system derate).
- Examples using 12% derate:
- Seattle (~3.2 sun hours): 5 × 3.2 × 0.88 ≈ 14.1 kWh/day → ~5,150 kWh/year.
- Denver (~5.0 sun hours): 5 × 5.0 × 0.88 ≈ 22.0 kWh/day → ~8,030 kWh/year.
- Phoenix (~6.0 sun hours): 5 × 6.0 × 0.88 ≈ 26.4 kWh/day → ~9,636 kWh/year.
- Seasonal variation: expect 2–4× difference between deep winter and peak summer at higher latitudes; use monthly output from PVWatts or NREL maps for precision.
Industry tools: use NREL’s PVWatts or national solar maps to get site-specific sun-hours and monthly output. The California energy code page also has context for system performance and design expectations (solar standards and guidance).
Key Factors That Change Real-world Production
- Shading: A single shaded module can reduce string output significantly unless microinverters or optimizers are used.
- Tilt and orientation: South-facing at latitude tilt is near-optimal in the Northern Hemisphere; ±10° from optimal reduces output only a few percent.
- Temperature and soiling: Higher ambient/module temperature lowers panel efficiency; dust and leaves can reduce output 2–8% between cleanings.
- Inverter and wiring losses: Choose an inverter with good MPPT and low standby losses; plan for 10–15% system loss overall.
For a quick site check, sketch the shed, note cardinal orientation, and record window/trees/nearby roofs. If unsure, use PVWatts for a first-pass estimate and then refine with a shade analysis tool or a smartphone solar app.
Sizing the System: Matching a 5KW Array to Your Shed Loads
Proper sizing starts with a load inventory and ends with verifying that the daily kWh available covers consumption plus a safety margin.
Create a Load List and Convert Watts to Daily Kwh
- Method: For each appliance, multiply running watts × hours used per day = Wh/day; sum and convert to kWh (1,000 Wh = 1 kWh).
- Example items: Table saw (1,500 W for 1 hr = 1.5 kWh), LED shop lights (40 W × 8 hrs = 0.32 kWh), mini-split (1,200 W average during run cycles × 4 hrs = 4.8 kWh), fridge (120 W average × 24 hrs ÷ duty cycle ≈ 2.9 kWh/day).
- Use a clamp meter or a plug-in meter for accurate appliance reads, and calibrate with an energy monitor for whole-shed measurement (energy monitor calibration guide).
Three Example Load Profiles (workshop, Tiny-living, Cold-storage)
- Workshop (intermittent heavy tools):
- Tools (saw, compressor), lighting, small heater: ~8–20 kWh/day depending on hours of tool use. A 5 kW array in medium sun (4–5 sun-hours) covers typical weekend workshop use plus limited tool run time.
- Tiny-living in a shed (all-day loads):
- Fridge, lights, laptop, induction cooktop (short bursts), mini-split: ~10–18 kWh/day. A 5 kW array with 10–20 kWh battery can support daily living and limited autonomy.
- For comparison, see our tiny-house 1 kW example to scale consumption up from a low-energy baseline.
- Cold-storage or controlled-environment shed:
- Continuous refrigeration can be 3–8 kWh/day depending on insulation and ambient temps. A 5 kW array covers refrigeration easily in high-sun locations; battery buffers are useful for multi-day outages.
How to Allow for Growth and Seasonal Use
- Add a 20–30% margin to daily kWh for future devices and worst-month performance.
- Distinguish between inverter capacity (instantaneous kW) and daily energy (kWh). A 5 kW inverter lets you run most power tools simultaneously, but runtime depends on daily kWh available from the array and battery.
- If seasonal heavy use is expected (e.g., winter heating), design for the worst month or plan staged battery and panel additions.
For off-grid configurations and wiring choices, see our primer on off-grid electrical options. For broader benchmarks on PV costs and system sizing refer to the Department of Energy analysis on system benchmarks (solar PV cost benchmarks).
Components You'll Need for a 5KW Shed System (parts List and Specs)
This section lists module counts, inverter choices, and balance-of-system items with typical specs you can quote when sourcing parts.
Solar Panels: Sizing, Count, and Efficiency Trade-offs
- Typical modern panel wattages: 325–410 W. For a target 5 kW:
- 13 × 385 W = 5,005 W
- 12 × 420 W = 5,040 W
- Area rule of thumb: a 385 W panel is roughly 1.7 m² (18.3 ft²). Thirteen panels ≈ 22 m² ≈ 236 ft².
- Choose higher-efficiency panels if roof area is limited; lower-cost 325–350 W modules work if space is ample.
- See certification notes when buying modules (panel certification explained).
| Panel wattage | Panels for ~5 kW | Approx area (sq ft) | Notes |
|---|---|---|---|
| 325 W | 16 | 292 | Lower cost, more area |
| 370 W | 14 | 255 | Balanced option |
| 400 W | 13 | 237 | Higher efficiency, less roof space |
Inverters and Charge Controllers: String vs Micro vs Hybrid
- Options:
- Grid-tied string inverter: Good efficiency, lower cost, but needs grid for export/backup.
- Microinverters/AC modules: Better shade tolerance, per-panel MPPT, simpler monitoring, higher cost.
- Hybrid inverter (AC-coupled or DC-coupled): Integrates battery charging and grid-tie in one unit; ideal for DIY backup systems.
- Recommended sizing: a 5 kW continuous inverter rated for at least 5 kW output and 7.5–10 kW surge for motor loads.
- For battery systems, prefer 48 V battery systems and inverters rated to match (48 V inverter-chargers are common for >3 kW loads).
- Compare grid-tied vs hybrid systems in our grid-tied vs off-grid differences guide.
| Inverter type | Pros | Typical rating | Best use case |
|---|---|---|---|
| String inverter | Cost-effective, high efficiency | 5 kW | Simple grid-tied sheds |
| Microinverters | Shade resilience, per-panel MPPT | 250–400 W per panel | Shaded roofs, complex orientations |
| Hybrid inverter | Built-in battery support | 5 kW continuous | Backup + islanding capability |
Balance of System: Racking, Combiner Boxes, Breakers, Wiring
- Racking: choose penetration mounts for long-term stability on a pitched roof; ballast mounts for flat roofs where penetrations are undesired.
- Wiring: use PV-rated cable (PV wire) and size conductors per NEC and manufacturer specs. Example: for a 600 V DC string at 30 A, #10 AWG copper may be common; always verify ampacity with local code.
- Safety: include AC/DC disconnects, overcurrent protection, grounding equipment, lightning arrestors if site requires.
- Quote typical specs when sourcing: panel model, string size (e.g., 2 strings of 6–7 modules), inverter model (5,000 W, 48 V compatible), combiner box with fused inputs.
For certification expectations and warranty considerations see panel certification explained. For inverter selection and hybrid cost context, the Australian energy guide provides useful inverter sizing guidance (size your solar system).
Roof, Ground, or Pole Mounting: Best Options for a Shed
Siting and mounting influence production, maintenance access, and structural requirements.
Roof-mounted Systems: Structural and Tilt Considerations
- Check rafter spacing and roof load capacity; many small sheds need a framing reinforcement before through-flashing mounts are installed.
- Area calculation: 13 × 1.7 m² ≈ 22 m² (≈236 ft²). If panels are landscape-mounted, ensure sufficient edge clearance and avoid ridge interference.
- Tilt: fixed tilt equal to site latitude ±5° is a good compromise between annual production and winter/summer balance. For seasonal optimization, adjustable angle racks can add 5–10% winter output.
If the shed is marginal structurally, use our shed cost estimator for budget planning and see framing tips in how to build a shed and our real build update build update: power shed framing.
Ground and Pole Mounts: Advantages and When to Choose Them
- Ground mounts allow optimal tilt and easy access for cleaning and repairs; pole mounts reduce footprint and can include single-axis tracking.
- Pole mounts are useful where roof shading, orientation, or structural limits rule out roof mounting.
- Consider wind and frost loading in engineering for taller pole mounts.
Orientation, Tilt, and Shading Analysis (include Site Sketch Tips)
- Sketch the site: show shed footprint, nearby trees, powerline, and likely shade sources at solar noon and sunrise/sunset for solstice dates.
- Use a solar pathfinder or a smartphone app to map shading across the year and place panels where shading is minimal.
- Watch a practical walkthrough: the following video shows mounting choices, tilt considerations, and shading checks for small arrays — viewers will learn real-world racking and layout techniques before they start.
For product-specific mounting practices and small-array walkthroughs, see the Anker SOLIX guide on panels for sheds (solar panels for sheds guide). That article includes real-world examples of mounting options and tilt tips.
Battery and Charging Strategies for a 5KW Shed Setup
Battery selection and the charging strategy determine usable energy, lifetime costs, and reliability.
Sizing Batteries for Daily Use and Backup (kwh and Ah Math)
- Formula: Required battery capacity (kWh) = Daily load (kWh/day) × Days of autonomy ÷ usable DoD.
- Example: If daily load = 15 kWh and desired autonomy = 1.5 days with LFP at usable DoD = 0.8:
- 15 × 1.5 ÷ 0.8 = 28.125 kWh battery bank.
- Convert to amp-hours: Ah = (kWh × 1,000) ÷ system voltage. For a 48 V bank: Ah = (28.125 × 1,000) ÷ 48 ≈ 586 Ah.
- Account for round-trip efficiency: divide required battery by inverter+battery efficiency (e.g., 0.9) for conservative sizing.
Battery Chemistry Comparison: Flooded Lead-acid vs AGM vs LFP
| Chemistry | Usable DoD | Cycle life (years) | Round-trip eff. | Typical cost/kWh |
|---|---|---|---|---|
| Flooded lead-acid | 0.5 | 3–5 | 0.75–0.85 | Low upfront, higher lifecycle cost |
| AGM | 0.5–0.6 | 4–7 | 0.8 | Moderate cost, sealed |
| LFP (LiFePO4) | 0.8–0.9 | 10–15+ | 0.9–0.95 | Higher upfront, best lifecycle cost |
Industry guidance and cost breakdowns for hybrid systems are available in our hybrid cost analysis (hybrid system cost breakdown).
Charging Strategy, Inverter-charger Settings, and Lifecycle Tips
- Set charge stages correctly: bulk, absorb, float. Use manufacturer settings for LFP or lead-acid; LFP typically uses a narrow float window and benefits from active BMS.
- For a 5 kW setup, a 48 V inverter-charger sized for 5 kW continuous output with appropriate charge current (e.g., 50–100 A depending on battery) is common.
- Thermal management: avoid installing batteries in unventilated hot sheds; ambient temps above 40°C shorten battery life. Consider battery heaters for cold climates.
- Practical autonomy target: 1–3 days depending on critical loads and budget. For essential backup (fridge, lights, critical tools), 1 day may suffice; for uninterrupted off-grid use, 2–3 days is safer.
For off-grid case studies and battery sizing examples for smaller systems see the 3 kW off-grid example (3 kW off-grid home sizing).
Permits, Safety, and Code Considerations for a 5KW Shed Installation
Permits and code requirements vary, but certain documents and safety measures are almost always needed for grid-tied or battery-backed systems.
Typical Permit Steps and Inspection Points
- Typical paperwork: permit application, electrical single-line diagram, structural attachment details, and sometimes a racking engineer sign-off.
- Utility interconnection: for grid-tied systems, submit an interconnection application and comply with utility requirements for net metering or export limits.
- Book inspections: rough-in electrical and final inspection for sign-off before utility connection.
Electrical Code Basics and Safety Equipment
- NEC items to check: rapid shutdown for rooftop arrays, listed equipment, grounding/bonding per code, and proper overcurrent protection.
- Safety gear: AC/DC disconnects, clearly labeled battery enclosures, ventilation for lead-acid batteries, and signage for first responders.
- Local AHJ rules: check your authority having jurisdiction for additional requirements or local amendments.
When to Hire Licensed Trades (structural, Electrical)
- Hire a licensed electrician for any connection to the building wiring or grid interconnection in most jurisdictions.
- Structural engineer sign-off is advised when the shed roof is old, metal, or when mounting penetrations are extensive. If load calculations or unusual wind/ice loads apply, consult a structural pro.
State and federal guidance can clarify plan expectations; see the Department of Energy for national benchmarks (DOE solar PV cost benchmarks) and California energy code resources for solar-ready and BESS rules (CA solar code guidance).
Cost Estimate and ROI for a 5KW Shed System (budgeting and Cost-reduction Tips)
Budgeting early prevents sticker shock. Below are typical ranges and ways to lower upfront costs.
Typical Cost Breakdown (panels, Inverter, Batteries, BOS, Labor)
- Hardware-only 5 kW array (panels + inverter + BOS): $3,500–$7,000 (varies by panel and inverter choice).
- Batteries (LFP): $6,000–$15,000 for 10–30 kWh depending on brand and BMS.
- Installation labor and permits: $1,000–$4,000 (higher if structural work or trenching required).
- Example low/median/high build:
- Low: $6,000 (basic panels, owner-installed racking, no battery)
- Median: $12,000 (mid-tier panels, hybrid inverter, 10 kWh LFP)
- High: $25,000+ (premium panels, larger battery, professional install)
For broader per-kW context see our full solar system cost guide.
Ways to Reduce Costs: Used Panels, DIY Racking, and Staged Installs
- Buy slightly older model panels from reputable brands with remaining warranty — check for microcracks and PID risk.
- DIY racking on simple pitched roofs can save labor; use pre-engineered mounting kits and follow manufacturer instructions.
- Stage the install: start with the array and add batteries later when budget allows; hybrid inverters can accept batteries later in many cases.
- Use a community permit or group buy to lower per-system labor costs.
Incentives, Rebates, and Simple Payback Examples
- Incentives: check national and local incentives and tax credits. For U.S. homeowners, the federal ITC has been a major driver — verify current eligibility and rates.
- Payback example: If the system produces 20 kWh/day (~7,300 kWh/year) and your avoided cost is $0.18/kWh, annual savings ≈ $1,314. A $12,000 installed system payback ≈ 9 years before incentives.
- Use local utility rates and expected production from PVWatts to calculate realistic payback.
Be cautious when buying used equipment; warranties and warranty transfers are key. For hybrid system-specific costs see hybrid system cost breakdown.
Installation Checklist and Step-by-step Timeline for a DIY-friendly 5KW Shed System
A clear checklist keeps the job on schedule and within code.
Pre-install Checklist (site Survey, Permits, Parts List)
- Site survey: Shade map, orientation, roof/plinth loads, and access.
- Permits and paperwork: Submit plan, single-line diagram, and interconnection forms as needed.
- Parts list: Panels (quantity & model), inverter/charger, racking kit, DC/AC disconnects, combiner, wiring, breakers, battery bank (if used), conduit, grounding equipment.
- Safety gear: Harnesses (for roof work), gloves, helmets, rubber-soled boots, and fire extinguisher for battery areas.
Typical 2–4 Day Install Timeline for a Small Crew
- Day 0 (prep): Deliver materials, mark layout, reinforce roof framing if required.
- Day 1 (racking): Install rails, flashings, and mounts.
- Day 2 (modules & wiring): Mount panels, make DC wiring to combiner or microinverter AC connections.
- Day 3 (inverter & battery): Install inverter/charger, battery bank, DC isolators, and AC disconnects.
- Day 4 (commission & inspection): Final wiring, label circuits, commissioning tests, and schedule inspection.
Smaller DIY teams can extend timeline; safety and inspection windows often dictate final scheduling. After installation, record serial numbers and take photos for warranty and inspection.
Commissioning and Post-install Checks
- Verify open-circuit and operating voltages, string currents, and MPPT tracking.
- Test rapid shutdown and grounding continuity.
- Confirm inverter firmware and configure battery charging setpoints and charge current.
- Watch for common pitfalls: undersized conductors, poor grounding, overlooked rapid-shutdown requirements, and shading not evident in planning.
For troubleshooting guidance after commissioning refer to how to troubleshoot solar systems. Common pitfalls to note:
- Shading: Re-check for seasonal shade that wasn’t obvious initially.
- Undersized conductors: Can cause overheating or voltage drop.
- Missing rapid-shutdown: Required on many rooftop systems by code.
The Bottom Line
A 5 kW solar system for shed is a practical choice when you need reliable daytime power for tools, refrigeration, or tiny-living — expect roughly 12–30 kWh/day depending on site sun hours. Plan for ~13 mid-to-high-watt panels, a 5 kW hybrid inverter on a 48 V battery system if backup is needed, and battery capacity sized as daily kWh ÷ usable DoD. Start by creating a detailed load inventory and running a PVWatts or NREL estimate as your next step.
Frequently Asked Questions
Can a 5kW system run power tools?
Yes. A 5 kW inverter provides enough instantaneous power for most hand-held and stationary shop tools (table saws, compressors) as long as total simultaneous demand stays under the inverter's continuous rating. Runtime depends on available daily kWh from the array and batteries; heavy tool use for several hours may require battery support or staging tool runs to stay within energy limits.
How many panels does 5kW need?
Panel count depends on individual module wattage. Typical mid‑range modules (370–400 W) need about 13 panels for roughly 5 kW. Lower-wattage panels (325 W) require about 15–16 panels. Always check module area and roof space: 13 panels at ~1.7 m² each take ~22 m² (≈236 ft²).
Do I need batteries for a shed solar system?
Batteries are optional. For daytime-only use and grid-tied systems, you can often go without batteries. For backup, off-grid operation, or to run loads when grid power is off, batteries are necessary. Size batteries by dividing your daily kWh need by usable DoD (for example, 15 kWh/day ÷ 0.8 DoD ≈ 18.8 kWh bank for LFP).
What permits are required for a 5kW shed installation?
Permits commonly include a building or electrical permit, a single-line electrical diagram, and sometimes structural documentation for roof attachments. Grid-tied systems require utility interconnection paperwork. Requirements vary by jurisdiction; consult your local authority having jurisdiction (AHJ) and submit the documents listed on permit checklists.
Can I install a 5kW system on my own?
DIY installation is possible for mechanically competent owners, especially for roof or ground racking and panel mounting. However, most jurisdictions require a licensed electrician for final grid connection and any work that ties into building wiring. Structural engineering may be recommended for older roofs or unusual mounts. Follow local codes and permit conditions closely.