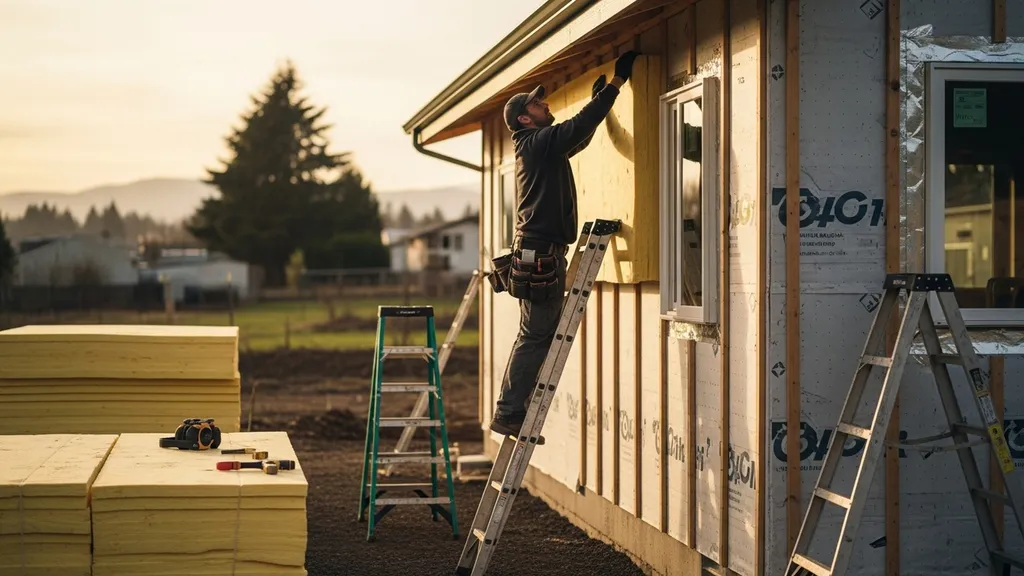
Practical, low-cost strategies for DIYers to reach net zero energy — design, insulation, renewables, water systems, and phased budgeting.
Achieving Net Zero on a Budget: Cost-Saving Strategies
Reaching an affordable net zero home is realistic for DIY builders who prioritize design decisions and a few high-return upgrades over expensive full-system replacements. Research and retrofit case studies show that passive measures like improving insulation, airtightness and orientation can cut energy needs by 40–70%, which shrinks the size and cost of renewables you’ll need. This guide shows practical, low-cost strategies—design, envelope work, HVAC choices, renewables and phased budgeting—so you can plan a staged, budget-friendly route to net zero.
TL;DR:
- Prioritize envelope first: passive measures typically reduce load by 40–70%, shrinking system costs.
- Start small with renewables: a 1 kW starter solar array can be expanded later; use incentives to cut upfront cost.
- Phase the build: envelope and airtightness upfront, HVAC and ventilation next, then battery-backed solar as final step.
Why Affordable Net Zero is Realistic for DIY Builders
Common Myths vs Reality
Many assume net zero requires high-end contractors and deep pockets. That’s not the only path. Industry guidance for phased zero strategies shows organizations can reach net zero over time through prioritized upgrades and efficient operations (Best practices for achieving zero over time for building portfolios). For homes, the math is similar: cut demand first, then right-size systems. Passive-house principles are a spectrum—improving insulation and airtightness moves you part way toward certification and yields large savings without meeting every Passive House standard.
Small-scale Wins That Matter (case Scenarios)
- Compact tiny home example: a 400 sq ft build that minimizes floor area reduces exposed envelope and often needs 50–70% less heating than a typical suburban footprint; see this tiny build example for a compact-plan case study.
- Retrofit scenario: sealing and adding continuous insulation to an existing small house can reduce heating loads by 30–50% and lower the solar array requirement by the same proportion.
Compare an all-at-once conversion versus incremental work: all-at-once is faster but demands higher capital. Incremental upgrades let you capitalize on incentives, spread cost, and learn before you buy large equipment.
Design Choices That Slash Energy Needs Early
Right Size and Compact Plans
Smaller, simpler floor plans reduce exterior surface area relative to volume and cut heat loss. A compact plan often lowers heating load 10–30% compared with a sprawling layout. Reduce unnecessary square footage first: every 10–20% reduction in conditioned area typically lowers heating and cooling loads and downstream equipment size. For wall depth and insulation planning, consult wall framing options like wall thickness choices to balance structural needs and cavity insulation.
Orientation, Daylighting and Window Strategy
Good orientation uses solar gain in winter and shading in summer. Prioritize south-facing glazing (in northern hemisphere) for passive heat and daylight, but limit west-facing glass to avoid afternoon overheating. Use light shelves and simple daylighting tricks to move daylight deeper into rooms and reduce electric lighting; see our daylighting with light shelves resource. A sensible glazing strategy can reduce lighting and heating loads by 5–20% depending on climate.
Form Factor: Cold-climate Lessons vs Mild-climate Tweaks
- Cold climates: prioritize continuous exterior insulation, compact form, and minimal thermal bridging. A continuous insulation layer outside sheathing keeps thermal bridges low and reduces frosting risk.
- Mild climates: focus more on shading, cross-ventilation, and thermal mass where appropriate. A modest increase in insulation paired with strategic shading can offer most gains at low cost.
Design choices reduce loads first; a smaller, well-oriented home requires a smaller heat pump and fewer panels—big dollars saved up front.
Insulation and Airtightness — Highest ROI Measures
Air Sealing Checklist: Where to Focus First
Airtightness often returns the fastest energy savings. Focus on these priority locations:
- Band joists and rim joists: Insulate and seal with spray foam or rigid insulation and sealant.
- Window and door junctions: Install continuous air barrier details and weatherstripping; see door weatherstripping tips.
- Penetrations and service entries: Seal plumbing, electrical, and vent penetrations with gaskets or approved sealants.
- Attic hatch and access doors: Insulate and gasket the access point.
A blower-door test (rental or pro) gives a baseline. Rental costs vary by region—expect roughly $75–$200/day for rental kits; a contractor test commonly runs $300–$500. Improving airtightness from high leakage to moderate levels (for example, ACH50 8 → 3) commonly reduces heating energy 15–30%, though results vary by climate and existing construction.
Insulation Options by Price and Performance
Continuous insulation plus airtight details give the best ROI. For small budgets, choose materials that balance R-value per inch, moisture handling, and DIY friendliness. The tiny-house insulation options guide covers small-scale trade-offs.
Comparison Table: Common Insulations for Budget Net Zero
| Material | Typical R/in | Relative installed cost | DIY friendliness | Moisture resilience |
|---|---|---|---|---|
| Fiberglass batts | 3.1–3.4 | Low | High | Low (needs dry cavity) |
| Blown cellulose | 3.2–3.8 | Low–Medium | Medium | Medium (best dense-packed) |
| Mineral wool | 3.1–3.3 | Medium | Medium | High (resists moisture) |
| Polyiso rigid foam | 5.0–6.5 | Medium–High | High | Medium (top performance) |
| XPS rigid foam | 5.0 | Medium–High | High | High (moisture resistant) |
| Dense-pack cellulose | 3.6 | Medium | Medium (blower needed) | Medium–High |
Use continuous exterior foam or rigid insulation where possible to control thermal bridging. Dense-pack cellulose in stud bays is a cost-effective retrofit option with good thermal and acoustic performance.
Heating, Cooling, and Ventilation on a Budget
Choosing the Right Heat Pump Type
Match the heat pump to the reduced load. For most tight, well-insulated small homes:
- Ductless mini-splits work well for zoned heating and cooling and are often the most cost-effective first upgrade.
- Small ducted systems suit homes already set up for ducts.
- Cold-climate models are needed where outdoor temps routinely fall below -10°C (14°F).
Consult ratings like COP, SEER, and HSPF to compare units; see the heat pump efficiency guide for specifics. Typical modern air-source heat pumps have COPs in the 2.5–4.5 range depending on operating conditions.
Simple Ventilation Strategies for Comfort and Health
A basic strategy: tight envelope + controlled ventilation. An ERV or small MVHR recovers heat and keeps fresh air with low energy penalty. If budget is limited, add timed exhaust fans and local supply vents to reduce stale air, then upgrade to an ERV when funds allow. Even a basic ERV can reduce winter heating ventilation losses by 60–80% compared with uncontrolled ventilation.
Sizing and Phasing HVAC to Match Reduced Loads
Right-size equipment after envelope improvements. Oversized units short-cycle and waste money. Example: a well-insulated 1,200 sq ft house might need a 6,000–12,000 Btu (0.5–1 ton) heat pump instead of a 2-ton system common with leaky houses. Example operating-cost comparison (illustrative; climate dependent): if electric resistance heating would use 6,000 kWh/year at $0.15/kWh = $900, switching to a heat pump with average seasonal COP 3 reduces consumption to ~2,000 kWh ($300), saving roughly $600/year. Use the ducted or ductless guidance to pick layout.
Renewables, Water, and Off-grid Systems That Save Money
A short video case study helps visualize system sizing and panel placement—viewers will see a low-cost, staged approach to solar and batteries that suits DIY builds.
This DIY video shows you the hands-on process:
Affordable Solar + Battery Basics and Sizing Tips
Start with a small array sized to cover daytime loads, then expand. Internal guides on panel options help balance cost and output—see our budget panels list and the 1kW tiny system guide for starter sizing. Use the solar cost calculator to model local generation and incentives. Typical system generation (location dependent):
- 1 kW: ~1,200–1,500 kWh/year
- 5 kW: ~6,000–7,500 kWh/year
- 7 kW: ~8,400–10,500 kWh/year
Comparison Table: Common Solar + Battery Configs (tiny to Small Homes)
| System size | Rough installed cost (after incentives vary) | Typical annual generation | Typical storage | Notes |
|---|---|---|---|---|
| 1 kW | $1,500–$4,000 | 1,200–1,500 kWh | 1–5 kWh | Starter for cabins, expand later |
| 5 kW | $8,000–$18,000 | 6,000–7,500 kWh | 5–15 kWh | Good for small homes, often grid-tied |
| 7 kW | $10,000–$25,000 | 8,400–10,500 kWh | 10–20 kWh | Near full-year coverage in efficient builds |
Costs vary widely by location, labor, and incentive programs. Hybrid grid-plus-storage systems often deliver the best near-term payback in areas with time-of-use rates; see our hybrid analysis in hybrid system costs.
Hybrid Systems and When They Pay Off
Hybrid systems (grid-tied with battery backup) save on outage resilience and can reduce peak charges. The break-even depends on electricity cost, incentives, and your tolerance for outages. Use the solar cost calculator to model payback.
Water Systems, Pumps, and Low-cost Sanitation Options
Simple, reliable water systems reduce operating cost for off-grid sites. Automate pumps inexpensively with low-voltage relays and pressure sensors; see automating pumps cheaply. For plumbing basics on small sites, review cabin plumbing basics. Composting toilets are a low-water, low-sewer option that can eliminate septic costs in some jurisdictions; check local codes before installing and plan for periodic maintenance. Payback examples: a modest solar array sized to cover hot water and basic electrics can eliminate most monthly utility bills for a tiny house when paired with aggressive envelope measures.
Smart Material Choices: Where to Save and Where to Invest
High-impact Places to Spend More
Invest first in items that are hard or costly to replace later:
- Windows and installation: Buy the best you can afford or buy good units used with proper installation. A poorly installed window negates high-performance glass.
- Continuous exterior insulation: Better long-term performance and reduces thermal bridging.
- Air barrier materials and quality membranes: Small extra cost up front, large lifetime savings.
Cheap, Durable Materials That Work for Net Zero
Save on finishes and non-structural features. Durable, low-cost cladding options (fiber cement, properly detailed metal) often outlast cheap composites and reduce lifecycle cost. For green, budget-friendly options see our budget green materials guide and alternate list at alternate materials list.
Reclaimed and Recycled Material Strategies
Sourcing reclaimed lumber, doors or even appliances can cut cost and reduce embodied carbon. Inspect used windows for frame damage and check glass integrity before installing. EnergyGeosciences research shows that material choices and reuse can make net-zero affordable when paired with reduced operational demand (Getting to net zero).
Quick Cost-saving Checklist (key Points List)
Top 10 Budget Moves (one-line Actions)
- Right-size: Reduce conditioned floor area by 10–20% before other changes.
- Insulate continuous: Add continuous exterior insulation to reduce thermal bridging.
- Air-seal early: Complete air sealing before interior finishes.
- Weatherstrip doors: Install weatherstripping on exterior doors as a low-cost comfort fix.
- Choose efficient heating: Use a properly sized heat pump instead of resistance heat.
- Start small with solar: Install a 1 kW starter array and expand as budget allows.
- Automate pumps: Use inexpensive relays and sensors to cut water waste and manual trips.
- Use reclaimed finishes: Save on non-structural materials while keeping performance.
- Apply for incentives: Seek federal, state and local rebates to lower installed costs.
- Test and measure: Rent a blower-door or hire one test to prioritize sealing work.
Phased-build Checklist for Spreading Costs
- Phase 1 — Envelope: Site work, compact plan, continuous insulation, windows and airtightness.
- Phase 2 — Mechanicals: Right-sized heat pump, basic ventilation, hot water strategy.
- Phase 3 — Renewables: Small solar array, battery if needed, expand after measuring loads.
- Phase 4 — Finishes: Low-cost durable finishes, reclaimed materials, landscaping.
Model budgets and phased scenarios with the passive house calculator to set realistic costs and timelines.
The Bottom Line
Affordability for net zero comes from reducing loads first, then buying smaller, more efficient systems and adding renewables in phases—this is the essence of achieving affordable net zero. Start with design and envelope upgrades, right-size HVAC and ventilation, then add solar and storage as funds and incentives allow.
Frequently Asked Questions
How much does it cost to reach net zero for a small home?
Costs vary by climate, starting condition and local incentives. For a small, well-insulated new build, incremental costs to reach net zero (compared with a standard code-built home) commonly range from a few thousand dollars for envelope upgrades to $10,000–$30,000 when adding a modest solar array and battery. For retrofits, expect a wide range: a targeted envelope-first approach often pays back faster than replacing systems alone.
Use sizing tools like the solar cost calculator and the passive house calculator to model your site-specific numbers and available incentives.
What is the best first step for a tight budget?
The best first step is to reduce energy demand: air-seal and add continuous insulation where possible. These measures produce immediate comfort benefits and shrink the size of heating and solar systems you’ll need. A blower-door test helps prioritize sealing work; simple weatherstripping on doors and sealing rim joists often deliver big returns for low cost.
How should I phase solar so it stays affordable?
Start with a small, daytime-focused array (for example, 1 kW) to cover lighting and basic loads, then expand as envelope and HVAC reductions lower total demand. Use grid-tied or hybrid setups so you can add batteries later. Model generation and payback with a solar cost calculator and consider budget panel options from our budget panels list.
Are composting toilets inspected and allowed?
Regulations vary widely by jurisdiction. In many places composting toilets are permitted with inspection if they meet local health and building codes; in others they may face restrictions. Check local code officials before installation and follow manufacturer guidance for maintenance and siting to ensure compliance.
When should I hire professionals instead of doing it myself?
DIY is appropriate for many envelope and finish tasks, but hire professionals for work that affects structural integrity, complex roof penetrations, electrical interconnection of solar systems, and final HVAC commissioning. For airtightness testing, a certified blower-door and a pro report can prevent costly mistakes. When in doubt, get a consult or hire a licensed installer for the work that carries safety, code or warranty implications.