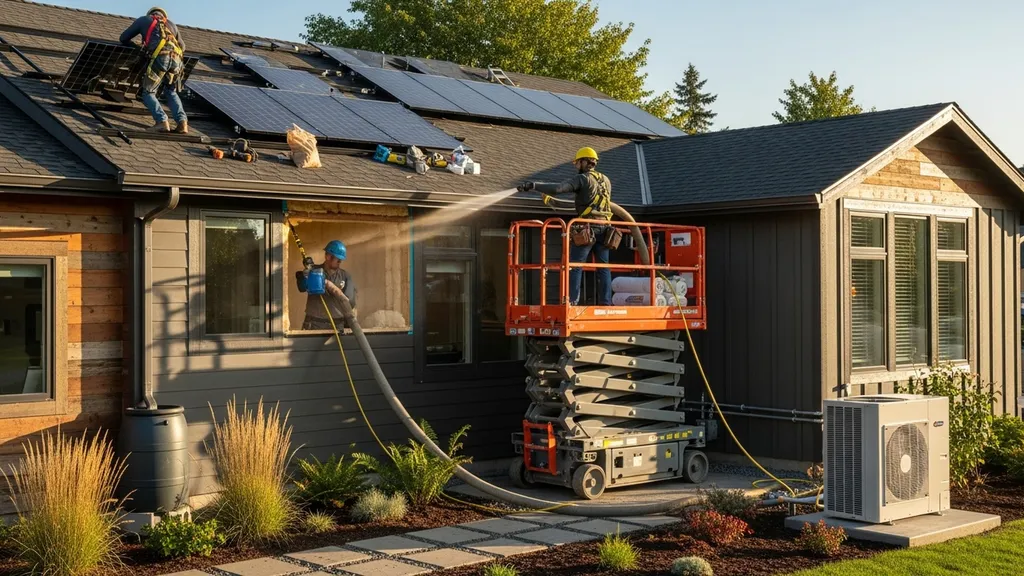
Discover the 10 essential net zero features for DIY eco homes — from high-performance envelopes to solar + batteries and smart controls.
10 Net Zero Home Features You Need
Net zero features are the design choices and systems that let a home produce as much energy as it consumes over a year. For budget-conscious DIY homebuilders, knowing which features deliver the biggest reductions in energy use — and which are best tackled during construction versus as retrofits — makes the difference between chasing performance and meeting it. This guide lays out the 10 essential net zero features, explains how they work together, and gives practical sizing, material, and DIY vs pro guidance so you can prioritize upgrades that actually move the meter.
TL;DR:
- Focus first on the envelope and heating: tightening and insulating can cut space heating demand by 40–60% in many climates (PHIUS and NREL data support large savings).
- Pair a right-sized heat pump with ventilation recovery (HRV/ERV) and smart controls to hit ~70–90% fossil-fuel replacement before adding batteries.
- Add PV sized to annual demand, then choose batteries for daily shifting or backup — start grid-tied with export/monitoring and scale storage later.
Quick Reference: 10 Net Zero Features at a Glance
One-line summary of each feature
- High-performance envelope: Continuous insulation, high R-values, and airtightness to reduce heat loss and cooling loads. Big impact on annual energy use.
- Proper windows and doors: Low U-value glazing and correctly flashed/air-sealed installs to prevent thermal bridging and drafts.
- Heat pumps for space heating and hot water: Air-source or ground-source heat pumps replace fossil burners with high coefficient of performance (COP).
- Mechanical ventilation with heat recovery (HRV/ERV): Provides fresh air while reclaiming heat or humidity from exhaust air.
- Solar PV and battery storage: On-site generation to offset electricity use, paired with batteries for shifting or backup.
- Passive solar design and thermal mass: Orientation, glazing ratios, and mass to reduce active heating/cooling.
- Continuous insulation strategies: Minimize thermal bridges with insulation layers that wrap the building envelope.
- Water-saving systems: Rainwater and graywater for non-potable loads reduce pumped water energy and demand.
- Energy-efficient appliances and induction cooking: Low-energy appliances and electric cooking reduce overall load and work tightly with heat pumps.
- Smart energy controls and EV readiness: Simple automation, monitoring, and a Level 2 charger to schedule charging during solar production.
Priority for New Builds vs Retrofits
- High-impact, cost-effective retrofit opportunities: air sealing, attic insulation, efficient appliances, and smart controls.
- Best done during new construction: continuous insulation strategies, window and door replacement, and optimal orientation/passive design.
- Heat pump installation and PV can be done in both scenarios; the order depends on envelope quality and budget.
Quick metrics to show impact
- Envelope and airtightness improvements often yield the largest single-step reductions in heating energy (30–60% depending on baseline).
- Switching from a gas boiler to a heat pump typically reduces delivered heating energy by more than half when sized and installed correctly (COP matters).
- Adding on-site PV sized to annual electricity use can make a home net zero energy if demand is low and timing losses are managed. See NIST net-zero research for data and context: NIST Net-Zero research page.
High-performance Building Envelope: Insulation, Air Sealing, Windows, and Doors
Key Envelope Targets: R-values, Continuous Insulation, and Airtightness
A high-performance envelope starts with two measurable aims: reduce conductive losses with appropriate R-values and eliminate uncontrolled airflow with airtight construction. For airtightness, builders use blower-door testing and aim for low ACH50 (air changes per hour at 50 Pa). Passive-house projects typically target very low ACH50 results to minimize ventilation heat loss; while designers may choose specific ACH50 targets by climate and project goals, the concept is simple: less uncontrolled air exchange means less energy required to maintain comfort.
Continuous insulation (CI) reduces thermal bridging. In practice, CI can be a rigid board, insulated sheathing, or exterior mineral wool. Choose a CI approach that fits your wall assembly and local climate; in cold climates, putting insulation outside the sheathing helps protect framing from cold and reduces condensation risk.
Common DIY Air-sealing Methods and Materials
- Weatherstripping and door sweeps: Start with simple perimeter seals at accessible doors and old windows.
- Caulk and spray foam: Use latex/acrylic caulk for small gaps and low-expansion spray foam for rim joists and penetrations.
- Rigid air barrier panels and tapes: For more durable results, install taped-oriented strand board (OSB) seams or self-adhered air-barrier membranes in accessible cavities.
- Attic sealing: Seal top plates, chase penetrations, and insulate/air-seal attic hatches.
For a step-by-step tool list, see our guide to air-sealing tools and the air-sealing DIY guide for retrofit techniques.
Window and Door Selection Basics (u-value, SHGC, and Installation)
- U-value: Lower is better for insulating performance. Choose windows rated for your climate.
- SHGC (solar heat gain coefficient): Higher SHGC helps in heating-dominant climates; lower SHGC helps in cooling climates.
- Installation: Proper flashing and airtight sealing are as important as the window unit. For sealing strategies aimed at high-performance goals, see our guide on sealing windows.
Materials note and carbon considerations
- Spray foam vs cellulose: Spray foam offers excellent airtightness and high R-value per inch, but has higher embodied emissions. Cellulose is lower-carbon and performs well in cavities when installed densely. See the detailed comparison in spray foam vs cellulose to weigh trade-offs by performance, cost, and embodied carbon.
Refer to national guidance on net-zero approaches for additional framing and enclosure best practices: Introduction to the net zero carbon guide.
Efficient Heating and Hot Water: Heat Pumps and Distribution
Why Air-source and Ground-source Heat Pumps Matter for Net Zero
Heat pumps move heat rather than creating it from combustion; that makes them far more efficient than fossil-fuel systems. A heat pump with a COP of 3 delivers three units of heat for every unit of electricity used. That efficiency, combined with low-carbon electricity or on-site PV, is the main pathway to net zero heating.
Air-source heat pumps (ASHPs) are cost-effective for many DIY-friendly homes. Ground-source (geothermal) heat pumps have higher upfront complexity and higher COPs in some climates, but they require drilling or trenches and usually involve professional design and installation.
Sizing Basics and COP vs HSPF Explained
- COP: A ratio describing heat delivered per unit of electricity consumed; it's instantaneous and varies with outdoor temperature.
- HSPF / SEER: Seasonal metrics that estimate performance over a heating or cooling season.
Sizing guidance (practical heuristic, not a substitute for a Manual J): size the heat pump to meet roughly 80–100% of the building’s design heating load if the envelope is high-performance. Oversizing creates short-cycling issues; undersizing leaves excessive supplemental heating. Consult local installers and use Manual J or software tools, and link with PV sizing so the system runs largely on renewable generation. For integrating heat pumps with grid or hybrid setups see our hybrid energy systems cost breakdown.
Hot Water Options: Heat Pump Water Heaters and Integrated Systems
Heat pump water heaters (HPWHs) are efficient for domestic hot water (DHW). Options include standalone HPWHs, combi-units integrated with space heat, and heat-recovery from ventilation systems in some advanced designs. When pairing DHW with PV, consider timing and controls to use midday solar for water heating.
For net-zero planning, the U.S. Department of Energy’s handbook outlines operational elements for net-zero new buildings and useful design considerations: Federal new buildings handbook for net zero energy.
Ventilation That Preserves Heat: Mechanical Ventilation with Heat Recovery (HRV/ERV)
HRV vs ERV — Which Suits Your Climate and Why
- HRV (Heat Recovery Ventilator): Exchanges heat between exhaust and incoming air without transferring moisture. Good where indoor humidity control is not critical.
- ERV (Energy Recovery Ventilator): Transfers both sensible heat and some latent heat (moisture). Useful in hot-humid or very cold-dry climates where moisture transfer reduces the load on HVAC.
For a direct comparison and climate guidance, see our detailed look at HRV vs ERV.
Sizing, Duct Layout, and Placement Tips for Small Homes
A practical rule-of-thumb: size ventilation to provide continuous fresh air based on occupancy and floor area — manufacturers often specify CFM per person/area. In small homes, locate intake and exhaust to supply bedrooms and living spaces while returning from kitchens and bathrooms. Use short, straight runs with smooth ducts to reduce fan power and noise. For duct layout and specific advice tailored to cabins and tiny homes, see ventilation for small homes.
Maintenance and Filter Guidance for Long-term Performance
Clean or replace filters on schedule. Inspect cores annually for mold or obstruction. Keep access panels easy to reach. A properly maintained HRV/ERV preserves indoor air quality and prevents ventilation from becoming a major energy penalty.
Research projections on national net-zero pathways note the role of ventilation and air-quality systems in reducing building energy while maintaining occupant health: Net-Zero america project report.
On-site Renewables and Energy Storage: Solar PV, Batteries, and Hybrid Inverters
Solar PV System Components and Basic Sizing Rules
Solar PV systems include panels, an inverter, mounting, and balance-of-system wiring. A good starting approach:
- Estimate annual household electricity use (kWh/year) from bills or monitoring.
- Size PV array to meet that annual use, then adjust for roof area, tilt, and shading.
- For many small homes, 2–7 kW arrays are common; for cabins or tiny homes, 1–3 kW may suffice. See example sizing guides for a practical reference: 5 kW solar guide and 7 kW solar sizing.
International standards and guidance on net-zero buildings cover generation accounting methods and reporting for on-site renewables: ISO net zero guidelines.
Battery Chemistries, Capacity Planning, and Round-trip Efficiency
Common chemistries:
- Lithium iron phosphate (LFP): Long cycle life, safe thermal characteristics.
- Nickel manganese cobalt (NMC): Higher energy density but typically shorter life and tighter thermal needs.
Capacity planning basics:
- Backup use-case: Size batteries to supply critical circuits for the intended outage duration (e.g., 3–12 kWh for essential loads in small homes).
- Daily shifting: Choose capacity to cover evening loads when solar is absent (e.g., a 5–10 kWh battery can shift midday solar to evening for many small households).
Round-trip efficiency (RTE) typically ranges 85–95%; account for these losses in sizing.
AC Coupling vs DC Coupling: When to Choose Which (comparison Table)
A brief comparison helps DIYers decide; link to our deeper guide on AC and DC coupling for wiring and performance details.
| System type | Typical use case | Pros | Cons |
|---|---|---|---|
| AC coupling | Add battery to existing grid-tied inverter | Flexible retrofit, simple for many installers | Slightly higher conversion losses in some setups |
| DC coupling | Integrated PV + battery system | Higher efficiency for new installs, single inverter | Requires system design up front, less flexible for retrofit |
Practical tips for DIYers
- Ensure roof structural capacity and orientation before panel purchase.
- Use monitoring to verify production vs demand; start grid-tied with export and add storage later.
- Hire a licensed electrician for point-of-interconnection, safety inspections, and permits.
Watch this step-by-step guide on wiring a 240v inverter to power your house for off-grid or whole home battery backup:
This video walkthrough helps visualize wiring, mounting, and practical production vs demand comparisons.
Passive Design and Thermal Mass: Orientation, Shading, and Material Choices
Siting and Orientation Basics for Solar Gain Control
Place the longest wall and most glazing to the equator-facing side (south in the Northern Hemisphere) to capture winter sun while using shading to limit summer overheating. Glazing ratios matter: too much glass increases heat loss; well-placed glass with appropriate SHGC reduces active heating needs.
Using Thermal Mass Effectively in Small and Large Homes
Thermal mass (concrete, stone, or dense earthen materials) stores heat during the day and releases it at night, smoothing temperature swings. In small homes, use mass inside the insulated envelope — polished concrete floors or insulated internal masonry walls are effective. For embodied-carbon-aware builds, consider recycled aggregate options; see recycled aggregate concrete guide.
Shading, Overhangs, and Glare-free Daylighting Strategies
Overhangs sized to block high summer sun while admitting lower winter sun help cut cooling loads. Use light shelves, deep reveals, and selective glazing to direct daylight deeper into rooms without glare. For detailed daylighting tactics, see glare-free passive design and the light shelves guide.
Global and industry context about passive measures and net-zero carbon buildings helps frame design choices: What is a net zero carbon building?
Water, Appliances, and Controls: Conservation, Efficiency, and EV Readiness
Rainwater and Graywater Systems for Non-potable Loads
Rainwater harvesting can supply irrigation and toilet flushing when local codes allow. Graywater loops (from showers and laundry) can route to irrigate gardens or subsurface systems after simple filtering. These systems lower potable water demand and the energy used by municipal treatment and pumping. Always check local regulations before installing.
Choosing High-efficiency Appliances and Induction Cooking
Select appliances with high efficiency ratings (look for Energy Star or equivalent). Induction cooktops convert electricity to cooking heat more efficiently than resistive electric ranges and improve kitchen ventilation demands compared with gas. Efficient refrigerators, dishwashers, and clothes washers cut baseline electricity and help a smaller PV system cover a larger share of use.
Smart Energy Management and EV Charging Basics
Smart controllers let you shift loads to solar production windows (water heater boost during midday, scheduled EV charging). For EVs:
- Level 1: Uses 120 V household outlets — slow but workable.
- Level 2: 240 V charger — faster charging and preferred for daily use.
Smart charging reduces peak grid draw and keeps charging aligned with on-site generation. Simple automation and a monitoring platform help validate performance after upgrades.
The Bottom Line: Prioritizing the 10 Net Zero Home Features
Cost vs Impact: Where to Spend Limited Budget First
Start with the envelope and airtightness — these usually deliver the highest energy reductions per dollar. Next, install efficient heating (heat pump) and balanced ventilation (HRV/ERV) to preserve the gains from a tight envelope. Add on-site renewables sized to your reduced annual demand, and then scale storage and smart controls as budget allows.
Checklist for New Builds and for Retrofits
- New build checklist: orient the house for passive solar, specify continuous insulation, choose high-performance windows, design for simple duct runs, and pre-wire for PV and EV charging.
- Retrofit checklist: air-seal attic and rim joist, upgrade insulation where accessible, replace old appliances with high-efficiency models, install a heat pump, add ventilation with heat recovery, then add PV.
For a detailed budget and building trade-offs when aiming for passive-house-level performance, consult our passive-house cost breakdown.
When to DIY and When to Hire Specialists
DIY-friendly tasks: air sealing, insulating accessible cavities, simple PV panel mounting (with electrical work subcontracted), and basic controls programming. Hire professionals for structural changes, major electrical interconnection, ground-loop geothermal installation, and combustion-to-electric conversions. If in doubt, get a design review and a Manual J/S or energy model from a qualified consultant.
Frequently Asked Questions
Can a small DIY budget achieve net zero performance?
The short answer is: yes, to a meaningful degree. Prioritizing envelope improvements (attic and rim-joist sealing, better insulation), swapping to efficient appliances, and installing a right-sized heat pump can cut energy use dramatically before solar is added. Many homeowners reach very low site energy consumption with staged upgrades.
For step-by-step retrofit actions and tool lists, see our air-sealing DIY guide. Measurement and monitoring help validate each investment so you spend where it pays off most.
Which feature reduces energy bills the most?
Improving the building envelope — insulation and airtightness — typically yields the largest single reduction in heating and cooling energy. Studies and industry experience (including Passive House data) show envelope upgrades often produce 30–60% savings depending on the starting condition.
Do I need batteries to call my home net zero?
No. A home is often considered net zero energy if on-site renewable generation matches annual consumption, even without storage. Batteries help with time-of-use mismatch, resilience, and reducing export losses, but they are not strictly required to reach net zero annual balance.
How should I prioritize features for a retrofit?
Start with low-cost, high-impact measures: air sealing, attic insulation, and efficient thermostatic controls. Next, replace major fossil-fuel systems with heat pumps and add balanced ventilation. Install PV after you’ve lowered demand so the system can be smaller and cheaper. Use monitoring to check progress between stages.
Are heat pumps suitable in cold climates?
Yes. Modern cold-climate air-source heat pumps maintain reasonable efficiency at low temperatures. Performance varies by model and installation quality; check cold-climate ratings, consider supplemental heat strategies, and pair the system with a tight envelope to reduce peak load. For system integration and cost context, consult installers and the Department of Energy guidance on net-zero building operation.