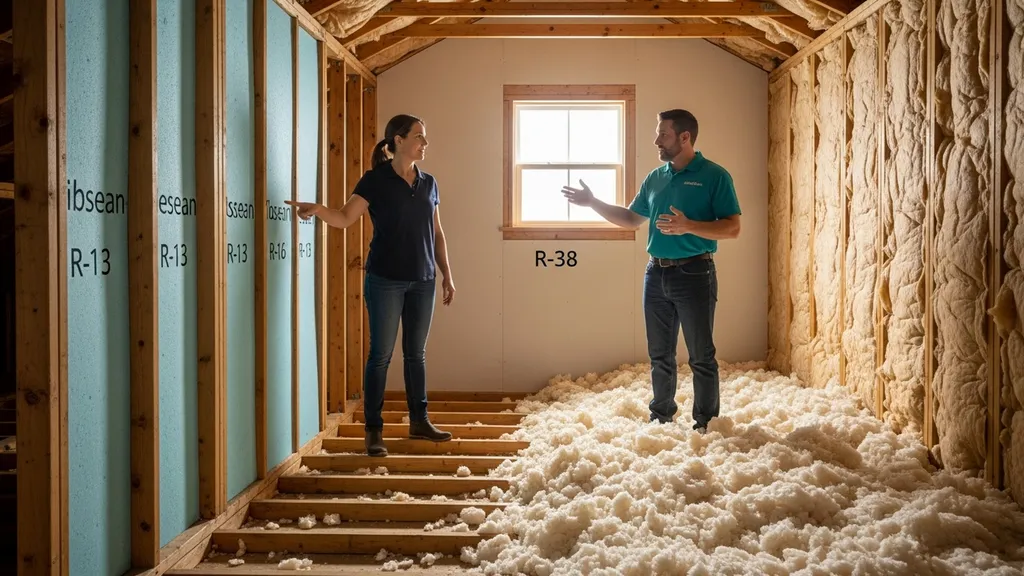
Compare R-13 and R-38 insulation: uses, material options, thickness, cost trade-offs, and clear recommendations for DIY builders and self-builders.
R-13 vs R-38 Insulation: Which Do You Need?
Choosing between R-13 vs R-38 insulation starts with a simple question: are you insulating a wall cavity or an attic floor? For DIY builders and self-builders the difference matters because R-13 typically fits a 2x4 wall cavity and R-38 is an attic-grade target that requires far more depth and yields much larger energy savings when applied to ceilings. This article compares the two, shows how different materials reach those R-values, explains thickness and framing trade-offs, and gives scenario-based recommendations so readers can pick the right approach for a budget-conscious, sustainable build.
TL;DR:
- R-13 is the typical fit for 2x4 wall cavities (~3.5" of fiberglass/matters), good for temperate climates and interior partition work.
- R-38 is an attic/ceiling target (roughly 10–14" depending on material) and usually delivers larger heating/cooling savings than upgrading wall R-values alone.
- Choose by assembly: use R-13 for shallow wall cavities or paired with exterior continuous insulation; choose R-38 for attic floors or where ducts and HVAC run through the attic.
| Typical use | Common materials | Typical thickness to hit R | R-value per inch (approx) | Pros | Best for |
|---|---|---|---|---|---|
| Wall cavity (2x4) | Fiberglass batts, mineral wool, cellulose, closed-cell spray | ~3.5" (R-13) | Fiberglass 2.9–3.4, Cellulose 3.2–3.8, Mineral wool 3.0–3.3, Closed-cell 6–7 | Fits standard framing, low cost, DIY-friendly | Temperate-climate exterior walls, interior partitions |
| Attic floor / ceiling | Blown cellulose, fiberglass loose-fill, batts, spray foam | 10–14" (R-38) | See column at left; blown cellulose ~3.2–3.8/in | Large energy impact when applied to attic, affordable with blown-in | Attics, cathedral ceilings (with depth), homes with HVAC in attic |
| Thin-cavity/high-R option | Closed-cell spray foam, exterior continuous foam, cork | 1.5–4" (to reach similar R) | Closed-cell 6–7/in | Saves space, adds air barrier, higher upfront complexity | Retrofits, tiny houses, off-grid cabins with limited cavity depth |
R-13 vs R-38 Insulation: Quick TL;DR and How to Use This Guide
The short answer for readers searching for "r13 vs r38 insulation" is: R-13 serves wall cavities (2x4) and small assemblies; R-38 is an attic/ceiling target that requires several times the material depth and typically pays back faster in heating/cooling savings when installed in attics. Use this guide to decide based on assembly type, climate, and available cavity depth. For background on how R-values work and the role of air sealing, see understanding R-value basics. For official recommended R-values by climate, refer to the Insulation Institute guidance and the Department of Energy.
Research and trade guidance note that if no insulation exists in an attic, adding R-30 to R-38 full-width batts or loose-fill is the standard recommendation for many homes (see the Insulation Institute guide: A guide to selecting fiber glass insulation products for new ...). The Department of Energy's overview on insulation explains how R-values vary with temperature, aging, and moisture and why location (wall vs attic) changes priorities: Insulation | Department of Energy.
R-13 Insulation: What It Is, Where It’s Used, Strengths and Weaknesses
Overview: Typical Materials and Cavity Sizes
R-13 commonly refers to the amount of thermal resistance that fits a standard 2x4 framed wall cavity—about 3.5 inches of material. Typical products sized to deliver R-13 are fiberglass batts, mineral wool batts of similar thickness, or loose-fill blown-in cellulose installed to target depth in retrofit cavities. In many building codes and product specs, R-13 is treated as the minimum for 2x4 framed walls in milder climate zones.
Strengths (cost, Fit for 2x4 Walls, Easy DIY Install)
- Fits standard 2x4 framing without changing wall thickness.
- Fiberglass and mineral wool batts are cut-and-fit friendly for DIYers; cellulose can be dense-packed if using a rental blower.
- Lower material volume makes initial outlay modest compared with deep attic fills.
- Good for interior partitions and non-critical exterior walls in temperate climates.
- See the close look at cavity choices in the R-13 vs R-15 comparison.
Weaknesses (limited Thermal Resistance, Not Enough for Cold-climate Attics)
- R-13 provides limited thermal resistance compared with R-21 or R-23 alternatives for 2x6 walls.
- In cold climates, a wall assembly with only R-13 will lead to higher heat loss and potential condensation issues unless combined with exterior continuous insulation.
- It offers little attic-level benefit; an attic with only R-13 under the roof deck will perform poorly compared with an R-38 attic floor.
- Wall moisture control matters: trap moisture or omit proper vapor control and thermal bridging—performance and durability suffer.
Best For: Use Cases and Project Examples
- Small, budget builds in temperate climates where 2x4 framing is a design constraint.
- Interior partition insulation where high R-value isn't required.
- Retrofit projects where opening walls for thicker insulation would be cost-prohibitive and exterior continuous insulation isn't an option.
- Example: A modest 2x4 exterior wall in a temperate coastal zone will perform adequately at R-13 if the wall is well air-sealed and paired with good attic insulation and mechanical ventilation.
For code context and recommended targets by climate zone, consult Energy Star's recommended R-values and the Department of Energy guidance linked earlier.
R-38 Insulation: What It Is, Where It’s Used, Strengths and Weaknesses
Overview: Typical Materials and How R-38 is Achieved
R-38 is an attic-oriented target commonly achieved with about 10–14 inches of fiberglass loose-fill or blown cellulose depending on settled density and the product's R/inch. Fiberglass batt options of R-38 typically require 12–14 inches. Installations that mix cavity insulation plus an added layer (for example, R-19 batts plus blown-in top-up) are common practical approaches.
For deeper guidance on attic targets and methods, see the attic insulation guide and specific roof approaches in the cabin roof insulation article.
Strengths (attic Thermal Barrier, Large Energy Impact)
- Adding R-38 across an attic floor often reduces annual heating and cooling loads more than equivalent increases in wall R-value because roofs exchange more heat.
- Blown-in cellulose and fiberglass loose-fill let DIYers top up attics quickly with a blower rental.
- R-38 in an attic helps protect ductwork and mechanical equipment if those are located in the attic box.
Weaknesses (space and Framing Needs, Higher Material Cost)
- Requires significant depth—may not fit in shallow cathedral ceilings or compact roof assemblies without changing framing or using high-R continuous insulations.
- Material and labor are higher than a single wall-bat upgrade, though payback can be faster due to attic thermal dynamics.
- Installing thick insulation incorrectly (blocking vents, compressing material) reduces performance.
Best For: Use Cases and Project Examples
- Standard residential attics in cold and mixed climates where the goal is to reduce heat loss through the ceiling plane.
- Homes with HVAC ducts or water pipes in the attic, where increased insulation reduces heating/cooling penalties and freeze risk.
- Example: Adding R-38 to an uninsulated attic in a mixed-cold climate tends to give a large short-term reduction in energy bills relative to upgrading walls alone; readers should consult local code and the Energy Star insulation map: Recommended home insulation r–values - energy star.
How Different Materials Get You to R-13 or R-38 (fiberglass, Cellulose, Mineral Wool, Spray Foam)
Fiberglass Batts and Loose-fill
Fiberglass has an R-value per inch roughly in the range of 2.9–3.4. That means R-13 is about 3.5 inches (standard 2x4 batts), while R-38 needs roughly 12–13 inches if using loose-fill or layered batts. Batts are straightforward for DIY wall installs; loose-fill and blown-in fiberglass are quicker for attics.
Blown-in Cellulose Performance and Settling Considerations
Cellulose typically yields about 3.2–3.8 R/in depending on installed density. To hit R-38 an installer will aim for roughly 10–12 inches blown-in across an attic floor. Dense-pack cellulose in wall cavities can approach R-13 in a 3.5" cavity but requires attention to settling and voids. Cellulose performs well with moisture buffering but requires careful air sealing to prevent migration.
Mineral Wool (rockwool) Characteristics
Mineral wool batts have R/in about 3.0–3.3 and resist moisture and fire better than fiberglass. R-13 mineral wool fits 2x4 cavities similarly to fiberglass and provides improved sound isolation. It's heavier and slightly more expensive than fiberglass but can be easier to work with when compressing around irregular framing.
See the side-by-side discussion in rockwool vs fiberglass.
Spray Foam Options (open-cell vs Closed-cell) and Achieving R Targets
Open-cell spray foam typically yields around 3.5–3.8 R/in and provides air sealing in one pass; closed-cell delivers about 6–7 R/in and adds structural benefit and a moisture retarder. That means closed-cell can reach R-13 in as little as 2 inches and R-38 with roughly 6–7 inches—useful where cavity depth is limited. However, spray foam has higher upfront cost, and DIY spray-foam kits carry safety and installation risks. For a deeper technical comparison of sprayed vs blown options, see spray [foam vs cellulose]( /blog/spray-foam-vs-cellulose-insulation).
Practical inches-to-R quick - R-13: Fiberglass 3.5", Cellulose 3.5", Mineral wool 3.5", Closed-cell foam ~2"
- R-38: Fiberglass loose-fill ~12–14", Cellulose blown-in ~10–12", Mineral wool batts ~12", Closed-cell ~6–7" (but expensive)
Note: Sprayman’s R-value guide provides manufacturer-style R/inch ranges for spray foams and is useful for sizing decisions.
Watch this step-by-step guide on beefing up attic insulation:
R-13 vs R-38: Cost, Thickness, and Space Trade-offs for DIY Projects
Thickness and Framing Implications (2x4 Walls, 2x6 Walls, Attic Joists)
- 2x4 walls (actual 3.5" cavity): typically R-13 fits without altering framing. Upgrading to R-21 requires 2x6 walls or exterior continuous insulation.
- 2x6 walls (actual 5.5" cavity): commonly accept R-19–R-21 batts; adding exterior foam raises assembly R even more.
- Attic joists: typical joist depth allows adding 10–14" of loose fill to achieve R-38. Cathedral ceilings often lack this depth and require rafter-depth changes or continuous exterior insulation.
When cavity depth is limited, consider closed-cell spray foam or continuous exterior foam to lift whole-assembly R.
Installed Cost Factors to Consider (materials, Rental Tools, Time)
DIYers should estimate cost by area and volume, not flat price lists. Key variables:
- Material type and coverage yield (manufacturer yield per bag or per batt).
- Tools and rentals (blower for loose-fill, PPE, utility knives, staplers).
- Time and labor (DIY hourly estimate vs contractor).
- Air-sealing materials (caulk, gaskets, tapes) and vapor control accessories.
A practical method: multiply floor/wall area by desired insulation depth to get cubic feet, convert to bags/rolls using yield data on product tech sheets, then add estimated rental days and consumables.
Simple Payback Example (how to Estimate Energy Savings)
The method, not raw dollar claims:
- Estimate current heat loss through the assembly using area × (ΔT) × U-value; U-value is 1 / assembly R.
- Compute U before and after adding insulation (e.g., ceiling at R-13 vs R-38).
- Multiply saved heat loss by heating degree days and fuel/electric cost to approximate annual savings.
- Compare installed cost (materials + rental + time) to annual savings to estimate payback.
For DIYers wanting calculators and climate-zone guidance, use the Department of Energy tools and Energy Star calculators referenced earlier.
For lifecycle and embodied-carbon comparisons, see the longer analysis in spray foam vs cellulose insulation pros cons and carbon impact.
Which Should You Choose? Scenario-based Recommendations for R-13 vs R-38
New Framed Walls: When R-13 is Acceptable vs When to Upgrade
- Choose R-13 if building with 2x4 walls in a mild coastal or temperate climate and budget/space is tight, provided the wall is well air-sealed.
- Upgrade to R-21 or use 2x6 framing with R-21 plus exterior continuous insulation if building in colder climates or when targeting net-zero-ready performance.
If constraints exist, consider exterior continuous insulation—see exterior foam guide.
Attics and Roof Assemblies: Why R-38 is Often the Right Choice
- For most DIY retrofits and new builds with standard attics, R-38 is often the most cost-effective step because ceilings are major heat loss planes.
- If HVAC ducts run through the attic, prioritize R-38 or more to cut heating/cooling penalties.
Retrofits and Limited Space: Hybrid Strategies (thin High-r, Exterior Foam)
- When cavity depth is limited (tiny houses, strawbale fits, tight roofs), use closed-cell spray foam or exterior continuous insulation to meet thermal goals without changing framing.
- For small buildings or sheds, pairing R-13 interior with 1–2" of exterior foam can produce assembly R closer to R-21–R-26.
Tiny-house and outbuilding readers can also apply R-13 on floors or walls where appropriate—see insulate a shed floor for floor-specific choices.
Off-grid, Tiny House, and Cold-climate Considerations
- Off-grid builds emphasizing low energy loads should lean toward higher attic R (R-38 or above) and minimize thermal bridges.
- Cold-climate cabins should prioritize continuous insulation or increased cavity depth; consult the off-grid cabin insulation guide for climate-specific tactics.
Summary recommendations (quick bullets):
- New 2x4 wall in mild climate: R-13 acceptable if air-sealed.
- Attic in cold/mixed climate: R-38 recommended.
- Limited cavity depth: use closed-cell or exterior foam.
- Budget DIY: top up attic to R-38 first for faster energy impact.
Moving From R-13 to R-38: DIY Installation Tips and Common Mistakes
Air Sealing First — Why It Matters More Than R-value Alone
Air leaks often carry more heat than conduction through insulation. Before adding insulation, seal attic bypasses, rim-joist gaps, and penetrations with caulk, spray foam, or gaskets. See practical tools in air sealing tools.
Vapor Control, Roof Vents, and Condensation Risks
- Understand the hygrothermal profile: in cold climates, keep the vapor control layer toward the warm side of the insulation; in hot-humid climates, consider vapor-permeable layers.
- Never block soffit or eave vents when topping attic insulation; install baffles to keep ventilation channels clear.
- See the step-by-step vapor guidance in vapor barrier installation.
Adding Insulation Over Existing (attic Layering Best Practices)
- When layering batts or blown-in over existing batts, avoid compressing old insulation—add loose-fill to achieve target depths.
- Maintain a continuous thermal layer and avoid creating cold spots over exterior walls.
- Keep walkways and service-clearance zones insulated with rigid board covers where needed.
Practical attic upgrade checklist to go from R-13 to R-38:
- Inspect existing insulation depth and locate attic bypasses.
- Seal air leaks at top plates, chase walls, and penetrations.
- Install baffles at eaves to preserve ventilation.
- Add blown-in cellulose or loose-fill fiberglass to target depth, monitoring depth markers.
- Re-check insulation distribution and add blocking over soffits if needed.
Safety, PPE, and Disposal Tips for Different Materials
- Fiberglass and mineral wool: use gloves, long sleeves, eye protection, and a dust mask or N95 respirator.
- Cellulose: wear dust protection; protect combustion appliance combustion air and clean up dust carefully.
- Spray foam: follow manufacturer PPE guidance; DIY kits create fumes and require ventilation and protective clothing.
- Dispose of packaging and offcuts per local waste rules. For damp or moldy insulation, consult remediation guidance and consider replacement.
Also consult moisture and drainage fixes for crawl spaces when insulation upgrades interact with site water issues: damp crawl space fixes.
The Bottom Line
For most DIYers, "r13 vs r38 insulation" comes down to where the insulation is installed: R-13 fits 2x4 walls and is a practical, low-cost choice for temperate climates; R-38 belongs in attics and usually delivers larger energy savings per dollar spent. Prioritize air sealing first, then insulate the ceiling to R-38 before chasing small wall upgrades unless building in a cold climate or using continuous exterior insulation.
Frequently Asked Questions
Can I stack R-13 batts to reach R-38?
Stacking R-13 batts will increase total R-value but is inefficient in most cases because batts compress, trap air differently, and may not layer evenly across joists. For attic floors, blown-in cellulose or loose-fill fiberglass applied to depth is usually easier and provides better coverage. If stacking in a wall, avoid compressing the batts—compressed insulation loses R/inch.
Is R-38 worth it in mild climates?
It depends on house form and heating/cooling loads. In many mild-climate homes, adding attic insulation to R-38 still reduces HVAC runtime and improves comfort, though payback is slower than in cold climates. Use the Department of Energy's tools to model energy savings for local heating/cooling degree days and fuel costs before committing.
Will adding R-38 make my home too airtight — do I need mechanical ventilation?
Adding insulation reduces heat transfer but does not automatically create airtightness unless air-sealing measures are performed. However, when sealing is comprehensive, balanced ventilation (ERV/HRV or exhaust systems) may be required per local code or IECC guidance to maintain indoor air quality. Plan ventilation when conducting major envelope upgrades.
Can spray foam replace R-38 and save space?
Closed-cell spray foam has a higher R/inch (about 6–7 R/in) and can reduce required thickness compared with batts or loose-fill. It can reach comparable performance to R-38 with less depth, useful when space is limited. Keep in mind higher material cost, installation complexity, and embodied-carbon trade-offs; consult product tech sheets and consider professional application for large coverage.
How do I check existing insulation R-value in my home?
Measure insulation depth and identify the material type, then use manufacturer R/inch figures or standard R/inch ranges (fiberglass 2.9–3.4, cellulose 3.2–3.8, mineral wool 3.0–3.3) to estimate R-value. For blended or settled materials, use conservative R/inch estimates. When in doubt, an energy auditor or thermal imaging test can validate performance and locate gaps.