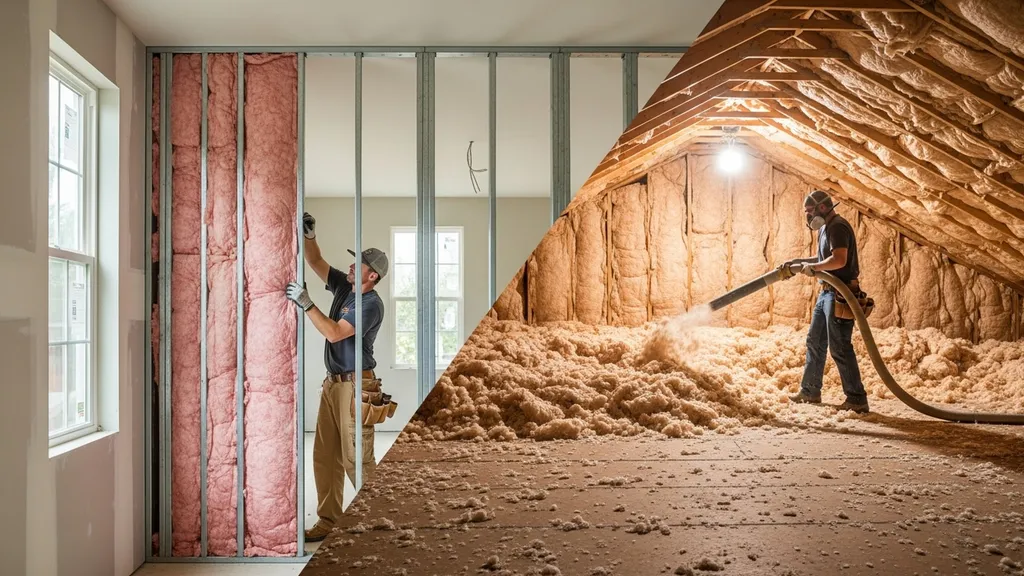
Compare R-15 and R-60: where each R-value makes sense, material trade-offs, thickness and cost considerations, and scenario-based recommendations.
R-15 vs R-60 Insulation: Which Do You Need?
Choosing between R-15 and R-60 matters for comfort, bills, and how you build. This article compares R-15 (common 2x4 wall batt) with R-60 (typical deep attic insulation), shows where each makes sense, lists material and thickness trade-offs, and gives scenario-based recommendations for DIY self-builders and budget-conscious owners. The comparison covers typical assemblies, realistic R/inch numbers, installation quality impacts, and steps to decide whether to upgrade attic insulation or stick with 2x4 wall batts — all aimed at practical decisions you can act on today. The primary search term for this article is r15 vs r60 insulation and you'll see it used in context below.
TL;DR:
- R-15 (roughly 2x4 wall batt) is low-cost, easy to install in new framing, and fine for mild climates; expect modest energy benefits but watch for thermal bridging.
- R-60 (deep attic loose-fill or thick spray foam layer) dramatically cuts roof heat losses in cold climates; requires more material depth, air sealing, and attention to ventilation.
- A hybrid (cavity insulation + continuous exterior foam or attic top-up) often gives the best cost-to-performance ratio for DIY retrofit and limited-depth builds.
R-15 vs R-60 Insulation: Quick Overview and Why This Comparison Matters
TL;DR Comparison Table
| Metric | R-15 (typical) | R-60 (typical) | Practical impact |
|---|---|---|---|
| Typical assemblies | 2x4 stud cavity with fiberglass batt or dense-packed cellulose | Attic with deep blown fiberglass or cellulose, or thick spray foam at roof/ceiling | R-15 suits walls; R-60 is an attic/roof target |
| Typical thickness ranges | 3.5" cavity (2x4), fiberglass batts ~R-3–3.5/in | Fiberglass loose-fill 18–20" (R~3/in) or cellulose 15–18" (R~3.2–3.8/in) | R-60 needs big depth in loose-fill; high R/inch products reduce thickness |
| Cost direction | Low material cost, lower labor | Higher material + labor for deep fill; spray foam significantly higher | Upgrading attic to R-60 often more cost-effective for heating savings than wall-only upgrades |
| Typical energy impact | Small to moderate in mild climates | Large reduction in roof heat loss in cold climates | R-60 gives bigger paybacks in cold climates |
| Climate suitability | Mild to mixed climates; interior partitions | Cold climates, long heating seasons, passive/near-passive homes | Choose per local heating degree days and budget |
For climate-based guidance, consult Energy Star's table of recommended home insulation R–values for different locations and assemblies: Energy Star's recommended home insulation R–values. Also check local building-code requirements and the International Energy Conservation Code (IECC) — code minima vary by climate zone and may require attic or wall R-targets higher than R-15.
R-15 vs R-60 Insulation: What R-15 Means (overview, Strengths, Weaknesses, Best For)
Overview: Typical Assemblies and Materials
R-15 most often refers to the insulation level delivered by a 2x4 stud cavity filled with fiberglass batt or dense-packed cellulose. Typical R-values per material run roughly: fiberglass batts ~R-2.5–3.5 per inch, cellulose ~R-3.2–3.8 per inch. So a 3.5" 2x4 cavity filled with standard fiberglass gives about R-11 to R-15 depending on product. R-15 is therefore the standard "cavity-only" approach for 2x4 framing in many budget builds.
Because R-15 lines up with common framing, it's the default for cost-conscious DIYers and small accessory buildings. If you want to compare nearby options, see our R-13 vs R-15 comparison.
Strengths of R-15
- Low upfront material cost and widely available batts make installation fast for new framing.
- Works well in mild climates where heating loads are moderate.
- Less thickness means lighter wall assemblies and fewer changes to window/door jambs or trim.
- Easier to DIY in new construction: cut-and-fit batt installation is straightforward for novices.
Weaknesses and Limits of R-15
- In cold climates, R-15 is inadequate for exterior walls if heating is a priority; heat loss through walls and thermal bridging at studs reduces whole-wall effective R-value.
- Cavity insulation alone does not address thermal bridging; continuous exterior insulation (CI) or deeper studs are needed for higher effective R.
- Air leakage and gaps in batt installation can reduce performance substantially. Air sealing matters at least as much as adding R-value.
- Not suitable for attic or roof assemblies where the roof is a major heat loss path.
Wall design affects whether R-15 is "good enough." For a compact, budget new build in a mild climate, R-15 in 2x4 walls plus careful air sealing and higher attic R can be a smart compromise. For framing choices that allow higher cavity R-values, read our guide on 2x6 vs 2x8 framing choices and see practical wall examples in our cabin wall assembly tips.
The Department of Energy has a general overview of insulation behavior and R-values that helps explain why R-15 in a thin cavity behaves differently than continuous insulation: The Department of Energy's insulation guide.
R-15 vs R-60 Insulation: What R-60 Means (overview, Strengths, Weaknesses, Best For)
Overview: Typical Assemblies That Reach R-60
R-60 is a common attic-target R-value for cold climates and high-performance builds. It's typically reached with deep loose-fill fiberglass or blown cellulose in the attic: for example, blown fiberglass at roughly R-3.0 per inch requires about 18–20 inches to reach R-60, while cellulose at ~R-3.2–3.8 per inch needs slightly less depth (about 15–18 inches). High-R/inch materials—closed-cell spray foam (~R-6–7/in) or rigid polyiso (~R-5.5–6.5/in)—can reach R-60 with far less thickness but at higher material and labor cost.
Before undertaking an attic top-up to R-60, consult practical attic options and assemblies in our guide to attic insulation options.
What Viewers Will Learn From an Installation Demo
Watch this step-by-step guide on installing attic insulation: blown-in cellulose using home depot rental machine DIY:
Strengths of R-60
- Large reduction in heat loss through the roof; in heating-dominated climates, moving an attic from R-19 to R-60 often yields measurable heating fuel savings.
- Loose-fill attic top-ups are one of the most cost-effective retrofits for cold-climate homes because the attic has large area but is easy to access.
- When paired with good air sealing at the ceiling plane, R-60 reduces drafts and improves occupant comfort.
Weaknesses and Trade-offs
- Material and labor costs rise with depth. Blown insulation needs machine rental or contractor service; spray foam requires professional crews and can be expensive.
- Ventilation strategy matters: adding insulation without correcting bypass air paths or ensuring soffit-to-ridge vents can create moisture problems. For off-grid cabins or tight roofs, see our how to ventilate an off-grid cabin.
- Structural clearance: older attic constructions may not have space for the needed depth without compressing insulation or changing roof geometry.
- High-R/inch alternatives (spray foam, rigid foam) reduce thickness but increase embodied carbon and upfront cost.
Best-for Use Cases and Installation Notes
- Best for cold-climate homes where heating dominates annual energy use.
- A top-up to R-60 makes sense for retrofit attics if ceiling-level air sealing is done first.
- For new builds or passive-house ambitions, combine deep attic insulation with continuous exterior roof or ceiling insulation as part of a continuous thermal envelope.
R-15 vs R-60 Insulation: Middle-ground and Hybrid Approaches (when a Mix Makes Sense)
Common Midrange R-values (R-30 to R-49) and Why People Choose Them
Many builders pick midrange attic values (R-30 to R-49) when budget, attic depth, or diminishing returns make R-60 less attractive. R-30 is often the minimum recommended in moderate climates; R-38–R-49 are common in mixed climates. Choosing R-30–R-49 reduces material and labor while still cutting significant attic losses.
Hybrid Assemblies: Cavity + Exterior Continuous Insulation
A cost-effective approach in walls is to pair cavity insulation (R-15 or R-20) with continuous exterior insulation (CI) such as rigid polyiso or mineral wool board. For example, R-15 cavity plus 1"–2" of polyiso can increase whole-wall effective R notably and interrupt stud thermal bridges. For roof and ceiling assemblies, exterior insulated sheathing or warm roof assemblies can reduce the need for extreme interior depths and protect roof structure from thermal cycling. See our deep-dive on exterior roof insulation performance for continuous-assembly examples.
Retrofit Strategies: Top-up vs Full Replacement
- Top-up attic insulation (adding loose-fill on top of existing) is fast, economical, and often the first-line retrofit.
- Full replacement or switching to spray foam is more invasive but can be required if there's a need to reconfigure roof ventilation or if the ceiling plane is leaky.
- For walls, consider dense-pack retrofit or instaling exterior continuous insulation rather than gutting for deeper studs; that limits disruption and often lowers cost.
Worth noting: the law of diminishing returns applies. Moving attic insulation from R-30 to R-49 yields a visible benefit; from R-49 to R-60 still saves energy, but the incremental energy savings per dollar spent fall. Embodied carbon of insulation types also matters for ecological projects—rigid foams store more embodied carbon than mineral wool or cellulose per unit R.
For related guidance on roof sheathing choices that pair well with continuous insulation, see wall sheathing and energy efficiency.
R-15 vs R-60 Insulation: How Material Choice and Installation Quality Change What R-values Mean
R-value Per Inch Examples and Practical Thicknesses
Typical R/inch values (approximate ranges):
- Fiberglass batts: ~R-2.5–3.5 per inch
- Blown fiberglass loose-fill: ~R-2.7–3.3 per inch
- Blown cellulose: ~R-3.2–3.8 per inch
- Polyiso rigid foam: ~R-5.5–6.5 per inch
- Closed-cell spray foam: ~R-6–7 per inch
Illustrative examples to reach R-60 (approximate):
- Blown fiberglass loose-fill: 18–22 inches (R~3.0/in)
- Blown cellulose: 15–19 inches (R~3.2–3.8/in)
- Closed-cell spray foam: 8–10 inches (R~6–7/in)
- Polyiso board stack: 9–11 inches (R~5.5–6.5/in)
These are illustrative, not guarantees — check manufacturer datasheets for product-specific R-values.
Air Sealing, Thermal Bridging and Moisture Impacts
R-value measures conductive heat resistance but doesn't capture air leakage or thermal bridging. A wall with R-15 batts but uncontrolled air leaks can perform worse than a well-sealed wall with lower nominal R. Similarly, studs and fasteners create thermal bridges that reduce effective whole-wall performance. Address these with:
- Continuous air barrier at drywall, sheathing, or exterior membranes
- Reduce thermal bridging with CI or advanced framing
- Place vapor control layers correctly for your climate; see our vapor barrier placement guide for sequencing and risk mitigation
Cost and Labor Differences by Material
Loose-fill cellulose and fiberglass are relatively low-cost per installed R for attic deep-fill, and contractors often provide blower rental for DIYers. Spray foam delivers high R/inch and excellent air sealing but has much higher material and labor cost and requires care for off-gassing and curing. Rigid foam costs vary by type (polyiso generally higher R/inch than EPS) and installation may require furring strips or mechanical fasteners to avoid thermal bridging.
For a side-by-side look at spray foam vs blown cellulose trade-offs, see our spray foam vs cellulose guide. If you are planning a tiny house with very limited cavity depth, consult the choices in best insulation for tiny homes.
R-15 vs R-60 Insulation: Which Should You Choose? Scenario-based Recommendations
Scenario 1 — Small, Mild-climate New Build on a Budget
Recommendation: Target R-15 in 2x4 walls, R-38 in attic. Use fiberglass batts for walls and blown-in attic fill when budget allows.
Pros: Low material cost, familiar installation, minimal framing changes. Cons: Will not offer deep winter comfort in cold climates; plan good air sealing at windows and doors.
Next steps: Measure planned cavity depth, focus on air barrier continuity, and follow our building basics checklist.
Scenario 2 — Cold-climate Home or Long-term Energy Savings Focus
Recommendation: Prioritize attic to R-60 or use a hybrid of R-20 cavity + CI on walls and R-60 attic. Consider dense-pack cellulose or thick loose-fill attic top-up plus a high-quality air barrier.
Pros: Strong energy savings over time, improved comfort, lower heating system sizing. Cons: Higher upfront cost; ensure ventilation and moisture control are correct.
Next steps: Air-seal the ceiling plane, then add blown insulation. Get an attic-blow quote if DIY is uncomfortable; use Energy Star and IECC targets to set R goals.
Scenario 3 — Tiny House or Limited Cavity Depth
Recommendation: Use high R/inch materials: closed-cell spray foam or multi-layer rigid foams. Aim for whole-assembly R rather than cavity-only R-values.
Pros: Minimize thickness while keeping performance. Cons: Spray foam costs and VOC considerations; rigid foam stacking raises vapor control and fastener issues.
See our best insulation for tiny homes for material choices and trade-offs.
Scenario 4 — Retrofit Attic-only Upgrade on an Existing Home
Recommendation: Top-up attic to R-49–R-60 depending on climate and budget, but only after aggressive ceiling air sealing and addressing soffit baffles/vent blocking.
Pros: High immediate energy return for moderate to low cost. Cons: Hidden air leakage can limit benefits and cause moisture issues.
Practical tip: Perform targeted air-sealing (recessed light boxes, attic hatch, plumbing stacks) before insulating. Our retrofit attic top-up tips cover sealing and moisture control steps.
Scenario 5 — Passive-house or Near-passive Ambition
Recommendation: Design continuous high-R assemblies. Use combined strategies: thicker cavity plus CI or a sealed spray-foam roof assembly. Attic and wall R-targets will be well above code; air-tightness and mechanical ventilation (MVHR/ERV) are required.
Pros: Minimal heating loads, predictable comfort. Cons: High design and construction discipline required; may need professional certification.
Whole-house energy and renewables sizing will respond to insulation choices — see how insulation reduces PV sizing needs in our tiny workshop solar sizing guide.
The Bottom Line
R-15 and R-60 serve different roles: R-15 is a common, low-cost cavity value for walls in mild climates, while R-60 is an attic target that delivers large heating-season savings in cold climates. For most DIYers, prioritize attic air sealing and an appropriate attic R-target first; combine cavity insulation with exterior continuous insulation where space or thermal bridging is a concern. In short: match your R-targets to climate, building assembly, and budget — and verify with code (IECC) and guidance like Energy Star's recommended home insulation R–values. The r15 vs r60 insulation decision should be made in the context of whole-assembly performance, not just nominal cavity numbers.
Frequently Asked Questions
Do I need R-60 in my attic?
It depends on your climate zone and heating fuel. Cold-climate homes (long heating seasons) often see the best payback by moving attic insulation to R-49 or R-60. Warmer climates will reach cost-effective limits earlier (R-30 to R-38). Use Energy Star's climate-based guidance to set a target, and always fix air leakage at the ceiling plane before adding large depths of insulation: Energy Star's recommended home insulation R–values.
Can I get R-60 in a 2x4 wall?
Not practically. A 2x4 cavity physically limits cavity-only R to roughly R-11–R-15 with common materials. To reach R-60 in a thin wall you must use very high R/inch materials stacked on the exterior (multiple inches of rigid polyiso or spray foam), or reframe for deeper cavities. A more practical approach is combining cavity insulation with continuous exterior insulation to raise whole-wall effective R.
Is spray foam the only way to achieve high R in thin spaces?
No. Closed-cell spray foam is one option because it offers high R/inch and air sealing, but multi-layer rigid foam (polyiso boards) can also deliver high R in a thin assembly when installed correctly. Each option carries trade-offs: spray foam has higher upfront cost and installation considerations while rigid foam requires careful detailing for joints, fasteners, and vapor control. See our practical comparison in the spray foam vs cellulose guide for more detail: /blog/spray-foam-vs-cellulose-insulation.
Will adding insulation cause moisture problems?
Adding insulation can create moisture risks if assemblies are not detailed for vapor and drying. The main risks come from uncontrolled air leaks that carry moisture into cold assemblies and from blocking ventilation pathways. Follow recommended vapor control placement for your climate, ensure attic ventilation paths remain clear (or switch to a sealed, conditioned attic strategy), and consult code guidance such as the DOE insulation overview for best practices: The Department of Energy's insulation guide.
How much will upgrading from R-15 to R-60 save on heating bills?
Savings vary widely by climate, home tightness, and fuel price. Upgrading attic insulation from low R to R-60 in a cold climate can produce substantial annual savings, while in mild climates the dollar savings shrink. Use a basic energy payback or savings calculator that factors in local heating degree days and fuel costs to estimate payback. Prioritize air sealing first — in many houses, sealing gaps yields as much or more savings than adding R-value alone.