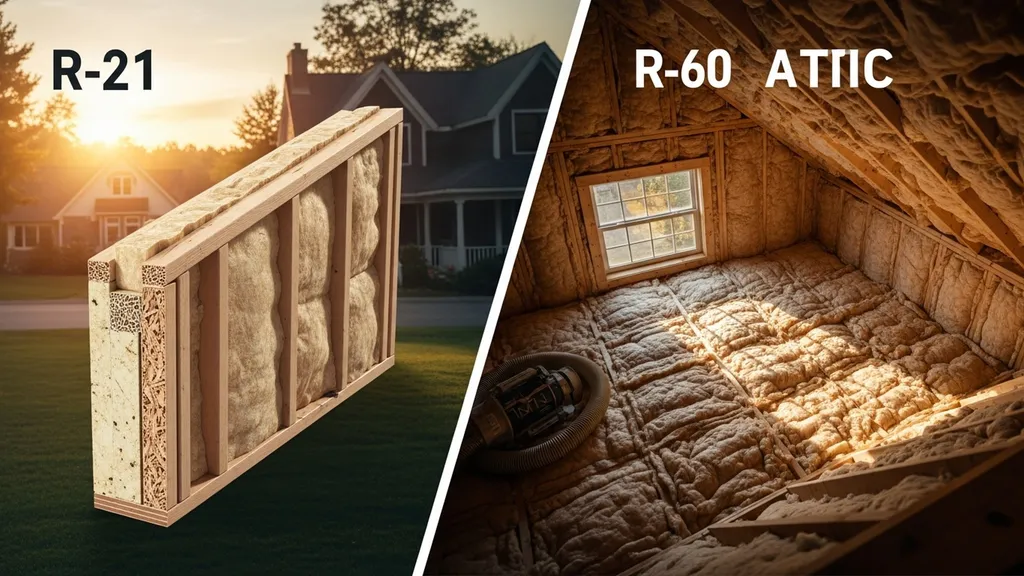
Compare R-21 and R-60: where each R-value is used, cost/space trade-offs, and scenario-based recommendations for DIY eco homebuilders.
R-21 vs R-60 Insulation: Which Do You Need?
Choosing between R-21 and R-60 insulation often comes down to where the insulation goes and what problem you’re solving: wall depth, attic volume, climate, and budget all matter. This guide on r21 vs r60 insulation explains why R-21 is typically a wall-cavity target (2x6 framing or equivalent) while R-60 is a common attic target in cold climates; it shows how to reach each R-value, the trade-offs in cost, space, and carbon, and scenario-based recommendations for DIY builders. Readers will learn practical assembly options, ventilation and moisture checks, and which investments give the biggest comfort and energy gains for small-budget projects.
TL;DR:
- R-21 in walls (≈2x6 cavity) gives solid year-round comfort for mild-to-moderate climates and is a cost-effective upgrade over R-13; expect medium cost and minimal framing changes.
- R-60 in attics (deep blown-in or hybrid spray/blown systems) delivers the biggest heating-season savings in cold zones; cost is higher but payback is often faster than wall upgrades alone.
- For most DIY builds, prioritize attic R-value in heating-dominated climates and aim for R-21 walls with either exterior continuous insulation or tight air sealing to reduce thermal bridging.
R-21 vs R-60 Insulation: Quick Overview and Why This Comparison Matters
R-value measures thermal resistance: higher means less heat flow. The comparison between R-21 and R-60 matters because they target different parts of the envelope with different constraints. R-21 usually refers to insulation level achieved inside a wall cavity—commonly a 2x6 framed wall packed with batt or dense-packed cellulose, or a comparable SIP or structural assembly. R-60 is an attic/ceiling target most often met with deep blown-in insulation or a thick spray-foam layer. Choosing one over the other isn’t an either/or decision for whole-house performance; it’s about how to allocate limited budget and space for the biggest energy and comfort gains.
Who This Guide is For:
- Budget-conscious DIYers planning new builds or retrofits who want clear trade-offs.
- Tiny-house and compact-home builders needing guidance on wall depth vs attic bulk.
- First-time self-builders weighing insulation upgrades against other envelope improvements.
- Small contractors looking for straightforward, actionable assembly options.
For national guidance on recommended insulation levels by location and assembly, see the Energy Star recommended home insulation R-values.
R-21 vs R-60 — At-a-glance Comparison Table (include a Simple Table)
| Feature | R-21 | R-60 |
|---|---|---|
| Typical application | Walls (2x6 cavity), some thick SIPs | Attics/ceilings, cold-climate roofs |
| Common assemblies | Fiberglass batts, mineral wool, dense-packed cellulose | Blown-in cellulose/fiberglass, deep spray foam, hybrid systems |
| Approx. thickness | 5.5" cavity (2x6), or thinner with CI | 18–24" loose-fill, 6–10" spray foam (varies by material) |
| Space impact | High if adding thicker walls (affects interior space) | Low impact on living space; uses attic volume |
| Cost per sqft (relative) | Medium | Medium–High |
| Best-for scenarios | Budget wall upgrades, tiny homes with limited attic | Heating-dominated climates, passive-ish builds, retrofits with good attic access |
| Climate influence | Works well in mild/moderate climates | Recommended for cold climates; returns diminish in mild zones |
For more on attic-level trade-offs and case studies at intermediate R-values, see our article comparing R-30 vs R-49 insulation.
What R-21 Means and Where R-21 is Typically Used (R-21 Side of the Comparison)
Overview of R-21 Applications
R-21 is commonly the target for a 2x6 stud cavity (nominally 5.5 inches). Achieving R-21 is straightforward with batts or dense-packed materials and is often the minimum upgrade recommended when moving from older R-13 2x4 walls. R-21 also appears in thicker SIPs or in assemblies that combine cavity insulation with modest continuous insulation outside the sheathing.
Strengths of Specifying R-21
- Fits standard 2x6 framing without deepening the wall, so interior living space isn't sacrificed.
- Cost-effective improvement over R-13; delivers noticeable comfort and lower heating/cooling loads.
- Compatible with common DIY materials: fiberglass batts, mineral wool batts, dense-packed cellulose.
- Easier installation and fewer moisture pitfalls compared with very thick wall builds.
Weaknesses and Limits of R-21
- Thermal bridging through studs reduces whole-wall effective R-value; studs themselves lower effective performance compared with continuous insulation.
- In cold climate zones, R-21 walls alone may be insufficient if the attic has low R-value or if windows are poor.
- Space limits for services (electrical, plumbing) in 2x6 walls can complicate retrofit wiring or insulation densification.
Research and general guidance about appropriate wall R-values across climates can be found in the Department of Energy’s insulation overview.
Best For: Typical Use Cases
- New builds in mild-to-moderate climate zones where increasing wall thickness isn’t feasible.
- Budget-conscious retrofits where improving attic insulation at the same time isn’t possible.
- Tiny houses or trailers where wall depth is strictly limited and attic/roof strategies are limited.
For guidance on when deeper framing (2x8) helps reach higher cavity R-values versus using continuous exterior insulation, see our wall framing options and for details on raising wall R-value compare our R-21 vs R-30 discussion at raising wall R-value.
What R-60 Means and Where R-60 is Typically Used (R-60 Side of the Comparison)
Overview of R-60 Applications
R-60 is most often an attic or ceiling goal in cold climates. That R-level can be met with about 18–24 inches of loose-fill cellulose or fiberglass, or with a hybrid where spray foam creates an air barrier and blown-in fill adds depth. R-60 is commonly recommended for heating-dominated residences where attic heat loss is the major load.
Strengths of Specifying R-60
- Large potential reduction in yearly heating energy loss where heat travels upward through the ceiling plane.
- Attics typically accept the thickness without eating living space; raised-heel trusses allow deep insulation over the exterior wall top plate without compressing insulation at the eaves.
- Blown-in materials make deep R-levels achievable quickly for DIYers or contractors.
Weaknesses and Limits of R-60
- Higher upfront cost and diminishing marginal returns beyond R-49–R-60 for many climates.
- Moisture and ventilation must be handled carefully; sealing the ceiling plane and managing roof/attic ventilation is essential to prevent condensation.
- Spray foam to reach R-60 across a roof deck can be expensive and has higher embodied carbon and VOC considerations.
For practical installation guidance and ventilation recommendations see our section below and consult the Energy Star recommended home insulation R-values. For material comparisons including carbon and performance trade-offs, read our spray foam vs cellulose comparison. Also consider exterior roof insulation options for high-performance roofs in our exterior roof insulation performance guide.
Before planning a major attic upgrade, check local code and the International Energy Conservation Code (IECC) guidance for climate-based minimums.
How to Achieve R-21 in Wall Assemblies — Practical DIY Options and Trade-offs
Option A: Cavity Insulation (fiberglass, Mineral Wool, Cellulose)
Overview: Install full-depth batts or dense-pack the cavity. Common in 2x6 walls, these materials can meet R-21 if installed without gaps or compression.
Strengths:
- Low to medium material cost.
- Familiar installation for DIYers; minimal specialty tools.
- Mineral wool resists moisture and is non-combustible.
Weaknesses:
- Stud thermal bridging reduces whole-wall effective R.
- Improper installation (gaps, compression) cuts performance dramatically.
Best for: New 2x6 framed walls or retrofits where external cladding isn't being changed.
Option B: Cavity Plus Exterior Continuous Insulation
Overview: Combine a thinner cavity fill (R-15 to R-19) with 1–2 inches of polyiso/XPS/mineral wool sheathing to achieve an effective whole-wall R ≈ R-21+ while reducing thermal bridging.
Strengths:
- Reduces thermal bridging through studs.
- Allows thinner interior cavity if wall depth is constrained.
Weaknesses:
- Adds cost and requires careful flashing and detailing at openings.
Best for: Cold climates or where wall performance needs to approach passive-house levels without extremely deep studs.
Option C: Spray Foam (open-cell vs Closed-cell) in Walls
Overview: Open-cell spray foam at 3.5–5.5" can achieve R-15–R-20; closed-cell provides higher R per inch (≈R-6–R-6.5) but is costlier.
Strengths:
- Air-sealing and insulation in one step; good for irregular cavities.
- Closed-cell adds some structural stiffness and moisture control.
Weaknesses:
- Higher embodied carbon and cost; closed-cell can trap moisture if assembly not correct.
Best for: Tight budgets for labor, complex cavity geometries, or where superior air sealing is a priority.
Installation Tips and Airtightness Notes
- Air sealing first: Seal top plates, rim joists, electrical penetrations, and windows before installing cavity insulation. A tight ceiling plane reduces required R-values.
- Vapor control: Follow the guidance in our vapor barrier placement article; placement depends on climate zone and assembly choice.
- Framing decisions: If you need higher cavity R without CI, consider deeper framing; see our wall framing options.
- Moisture management: For retrofit walls, consult our moisture control options before tightening the envelope to avoid trapping moisture.
Choose materials with proper installation: dense-packed cellulose resists settling and is neutral for many assemblies, while batts require meticulous fitting. If interior space is limited, continuous exterior insulation is often more effective than making walls deeper.
How to Achieve R-60 in Attics and Roofs — Practical DIY Options and Trade-offs
Option A: Blown-in Loose-fill (cellulose or Fiberglass) to R-60
Overview: Blow 18–24 inches of cellulose or fiberglass into attic cavities to reach R-60. Cellulose is denser and offers better sound control; fiberglass is lighter and resists moisture better.
Strengths:
- Cost-effective per R-value and widely used by contractors and DIYers.
- Easy to add in existing attics with an insulation blower.
Weaknesses:
- Requires careful air-sealing of the ceiling plane first; insulation over air leaks loses effectiveness.
- Can settle if not installed at recommended densities (use installers with experience).
Watch this step-by-step guide on installing attic insulation: blown-in cellulose using home depot rental machine DIY:
Option B: Deep Spray Foam or Hybrid (spray + Blown-in)
Overview: Spray 4–8" of closed-cell or open-cell foam as an air barrier, then top up with blown-in insulation to reach R-60. Closed-cell provides vapor control; open-cell is lower cost.
Strengths:
- Excellent air sealing; reduced risk of convective loops.
- Hybrid systems allow smaller foam volume and lower cost than full-depth foam.
Weaknesses:
- Higher material cost and higher embodied carbon for closed-cell.
- Requires trained installers and safety precautions.
See our spray foam vs cellulose comparison for lifecycle and performance trade-offs.
Option C: Raised-heel Trusses and Exterior Roof Insulation
Overview: Use raised-heel trusses to allow deep insulation above top plates without compressing at eaves, or apply continuous insulation on the roof deck to shift thermal mass outside the structure.
Strengths:
- Protects roof structure when exterior insulation is used; prevents cold top plates.
- Best approach when converting to a conditioned attic or when pursuing passive-house-style assemblies.
Weaknesses:
- More complex framing and roof detailing; higher upfront framing cost.
- Exterior roof CI can be more expensive in retrofit scenarios.
For performance-focused roof assemblies and passive-house considerations, see our exterior roof insulation performance article.
Ventilation and Moisture Control for High-r Attics
- Seal the ceiling plane thoroughly before adding insulation. Use gaskets, caulk, and spray foam at rim joists and penetrations.
- Maintain proper roof assembly ventilation if you choose a vented attic; for unvented conditioned attics, follow the Department of Energy guidance for air sealing and foam thickness to prevent condensation.
- For practical off-grid or small-building ventilation strategies, see our DIY ventilation for off-grid cabins.
- For code and detailed ventilation rules, consult IECC and the Department of Energy’s insulation guidance.
Comparing Costs, Space, and Carbon: R-21 vs R-60 Trade-offs for DIY Builders
Material and Labor Cost Considerations (qualitative)
- R-21 wall cavity insulation: Medium material cost, low-to-medium labor if installing batts. Adding continuous exterior insulation raises cost to medium–high.
- R-60 attic insulation: Medium for blown-in cellulose/fiberglass (labor may be DIY if rental blower used), high for deep spray-foam or exterior roof CI.
- Hybrid systems can reduce material cost but increase labor/complexity.
Worth noting: At the project scale, attic insulation often pays back faster in cold climates because the ceiling area is large relative to wall area and attic heat loss drives heating load.
Space and Framing Impacts — Walls vs Attic
- Walls: Achieving higher framed-wall R requires deeper studs or CI, reducing interior floor area or increasing foundation size. This is a major consideration for tiny homes.
- Attics: Use attic void that doesn't reduce living square footage; raised-heel trusses avoid cold corners at eaves.
Operational Energy Savings vs Embodied Carbon
- Operational savings from attic upgrades are typically large in heating climates. But adding lots of closed-cell spray foam raises embodied carbon and may offset some lifecycle gains.
- Blown cellulose has relatively low embodied carbon and is a strong choice for deep attic R-values from a lifecycle perspective; see our spray foam vs cellulose comparison for details.
Retrofit vs New-build Trade-offs
- Retrofits: Attics are often the highest-return retrofit location; adding blown-in cellulose to reach R-60 is a common cost-effective strategy.
- New builds: You can combine R-21 walls with CI or choose deeper walls if targeting near-passive-house results. Design choices up front (raised-heel trusses, continuous air barrier) reduce costly fixes later.
Other whole-house efficiency strategies — daylighting and passive solar shading — can lower heating and cooling loads so you don't need to push R-values as high; see our guide on light shelves and passive design for ways to reduce loads.
For other envelope areas worth improving during the same project, check our basement energy tips and resources on combining envelope upgrades with small renewables in our insulation for tiny workshops.
Which Should You Choose? Scenario-based Recommendations for R-21 vs R-60
If You Have a Tight Budget
Prioritize attic insulation first in heating-dominated climates: upgrade to R-60 in the attic if your current attic is below R-30. It gives high returns per dollar in many cold-zone retrofits. For walls, choose R-21 in 2x6 framing and focus on air sealing and windows.
If You Build in a Cold Climate
Aim for both: R-21 (or better with CI) in walls and R-60 in attic/ceiling. If you must choose, attic R-60 often reduces heating loads more effectively. Consider continuous exterior insulation or raised-heel trusses to minimize thermal bridging.
If You’re Doing a Tiny House or Compact Home
Wall depth and tongue-weight limits matter. Go for R-21 walls where possible, or use high-performance thin solutions: closed-cell spray foam or high-R rigid CI panels. For roofs, maximize attic/roof insulation within available headroom. See our tiny house insulation guide and budget tiny-home build tips.
If You Want Near-passive-house Performance on a Budget
Use a combination: moderate-to-deep wall insulation (R-21 cavity plus 1–2" CI or thicker SIPs) with a well-sealed ceiling and attic >R-60. Prioritize airtightness, mechanical ventilation with heat recovery, and minimize thermal bridges. For off-grid cabins and compact designs, consult our insulation choices for cabins and ventilation guide.
Example decision rules:
- Retrofit bungalow in a cold zone: Attic to R-60 first, then address wall-infiltration and window upgrades.
- New small home on a budget: R-21 walls using 2x6 plus 1" polyiso outside for reduced bridging, attic R-60 using blown cellulose with raised heels.
- Off-grid cabin with weight limits: Use dense-packed cellulose in walls and blown-in attic to R-60 where possible, pairing with a compact heat-recovery ventilator.
The Bottom Line
R-21 and R-60 serve different parts of the envelope: R-21 is a practical wall target for 2x6 construction, while R-60 is a high-return attic target in cold climates. For most DIY builders, prioritize attic insulation upgrades first in heating-dominant areas and combine R-21 walls with either continuous exterior insulation or airtightness improvements for the best balance of cost, space, and performance. The short answer on r21 vs r60 insulation: attic R-60 tends to deliver the largest heating-season savings, but walls at R-21 with good detailing avoid many moisture and thermal-bridge problems.
Frequently Asked Questions
Is R-21 enough for my walls if I have R-60 in the attic?
Yes, in many climates R-21 walls paired with an attic insulated to R-60 produce a comfortable, energy-efficient home. Attic heat loss often drives heating energy use, so a deep attic insulation install can outperform modest wall upgrades alone. That said, the effective performance of R-21 walls depends on detailing: thermal bridging through studs and air leaks must be addressed with continuous insulation or improved air sealing to realize full benefits. See the sections above on cavity plus exterior CI and air sealing.
Can I reach R-60 in an attic without spray foam?
Yes. R-60 is commonly achieved with blown-in loose-fill cellulose or fiberglass—about 18–24 inches depending on the product. Blown-in cellulose has relatively low embodied carbon and is DIY-friendly with rental blowers, provided the installer maintains target depth and density and the ceiling plane is well air-sealed first. The YouTube demonstration in the attic section shows a typical blow-in setup and common pitfalls to avoid.
Does increasing from R-49 to R-60 make a big difference?
Increasing from R-49 to R-60 yields smaller incremental savings compared with the jump from R-30 to R-49. You will see measurable reductions in energy loss, particularly in very cold climates, but the law of diminishing returns applies: payback periods lengthen and marginal gains fall. Evaluate based on your local heating degree days and fuel cost; meanwhile, address air leaks and duct sealing first for often larger, cheaper savings.
How does climate zone affect the R-21 vs R-60 decision?
Climate dictates which assembly gets priority. In heating-dominated (cold) zones, attic R-60 often delivers big savings; in mixed or cooling-dominated zones, extremely high attic R-values give less benefit and attention should shift to solar shading, wall insulation, and cooling strategies. Use Energy Star or IECC climate-based tables to inform minimums, then prioritize measures with the highest energy-return per dollar for your local conditions.
Should I prioritize continuous exterior insulation or thicker cavity insulation?
Continuous exterior insulation reduces thermal bridging and often delivers better whole-wall performance than simply increasing cavity R, especially where studs make up a large portion of the wall area. If wall depth is constrained, CI is usually the smarter long-term choice. If budget is tight and you can use 2x6 framing, cavity R-21 plus rigorous air sealing is an effective compromise. See our guidance on combining cavity and CI in the wall assemblies section for specifics and links to framing options.