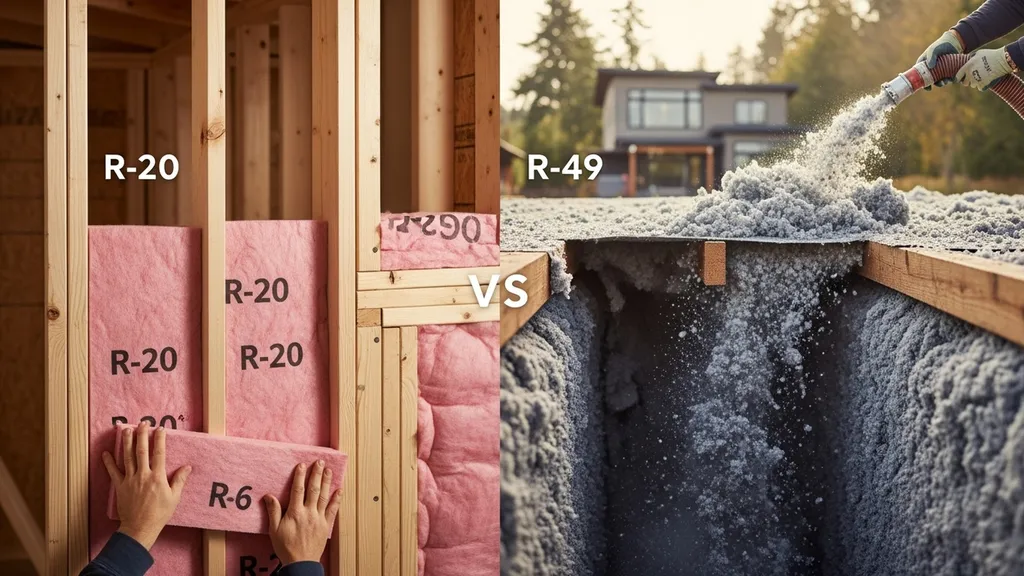
Compare R-20 and R-49: where each makes sense, material choices, retrofit strategies, and scenario-based recommendations for DIY eco-builds.
R-20 vs R-49 Insulation: Which Do You Need?
Choosing between R-20 and R-49 insulation begins with where the insulation will go and what problem you want to solve. For many DIY eco-builders the question is practical: should a 2x6 wall stay at R-20 or should you chase wall R-values closer to R-49 — or focus on the attic instead? This article compares R-20 vs R-49 insulation, explains how each is commonly built, shows retrofit options when you can only fit R-20 depth, and gives scenario-based recommendations so you can decide with confidence. The primary comparison keyword, r20 vs r49 insulation, appears throughout to help you find the right choice for walls, attics, and retrofit projects.
TL;DR:
- R-20 fits a standard 2x6 wall cavity (about 5.5" depth) and is the typical wall solution; R-49 is a common attic/ceiling target and delivers much higher thermal resistance for similar cost-effectiveness.
- If budget or framing limits you to R-20 depth, add 1–2" of high-R continuous exterior insulation or use closed-cell spray foam to approach R-49 performance in assemblies.
- Prioritize air sealing and attic insulation upgrade to R-49 first for the best heating-cost payback; use continuous exterior insulation for walls when chasing cold-climate performance or passive-house goals.
R-20 vs R-49 Insulation: Quick Overview and TL;DR
R-20 and R-49 describe total thermal resistance (R-value) of assemblies, not specific products. R-20 commonly refers to insulation in a 2x6 wall cavity; R-49 usually refers to deep attic insulation or layered ceiling assemblies. Research and industry guidance show that attic insulation often gives a bigger reduction in heating and cooling loads per dollar than adding the same R-value in walls, which is why R-49 is a common attic target. See the North American Insulation Manufacturers Association research discussed by the Social and Environmental Education Alliance on why insulating homes matters for context: Why we should insulate homes.
When This Comparison Matters for Diyers
- Choosing framing depth on a new build (2x6 vs deeper walls)
- Upgrading an older home where wall cavities are limited
- Planning attic insulation upgrades to meet winter heating needs
- Designing a passive-house or near-passive retrofit where high wall R and control of thermal bridges matter
R-20 vs R-49 Insulation: Comparison Table (quick Specs)
| Metric | R-20 (typical) | R-49 (typical) |
|---|---|---|
| Typical application | 2x6 stud wall cavity (interior wall insulation) | Attic/ceiling insulation or combined layered assemblies |
| Common materials | Fiberglass batts, mineral wool, dense-packed cellulose, open-cell spray foam | Deep blown cellulose, fiberglass loose-fill, layered batts, combinations with rigid foam |
| Approx. thickness (fiberglass/mat) | ~5.5 inches (2x6 cavity); fiberglass batts R≈3.1–3.4/in | 14–18+ inches blown cellulose or fiberglass (R per inch ranges below) |
| Typical R-value per inch (range) | Fiberglass batts ~3.1–3.4/in, cellulose ~3.2–3.8/in, closed-cell spray foam ~6–7/in, polyiso ~5.5–6.5/in | Same material R/in applies; deeper thickness required to reach R-49 |
| Relative cost | Low–medium for standard batts or cellulose | Medium–high if using thick spray foam or many inches of rigid foam; blown-in cellulose is cost-effective for attics |
| Typical DIY difficulty | Low–medium; batts and dense-pack doable for homeowners | Medium; blown-in and careful air sealing required, spray foam often pro-level |
| Common problems | Thermal bridging through studs, compressed batts reduce R, air leaks | Need for attic ventilation or sealed attic strategy, moisture management, clearance for depth |
For more on R-value basics and material behavior see the University of Maryland extension guide on home insulation: Home energy: insulation | university of maryland extension.
R-20 Insulation: What It Is, Strengths, Weaknesses, and Best Uses
Overview and How You Commonly Achieve R-20
R-20 refers to assemblies with roughly R-20 thermal resistance. The most common way to get R-20 in walls is a 2x6 stud cavity filled with insulation (about 5.5" net). Typical fills are fiberglass batts, mineral wool, dense-packed cellulose, or open-cell spray foam. Closed-cell spray foam can achieve higher R per inch but at higher cost. The Department of Energy provides a general primer on insulation types and R-values that helps explain how material R/inch determines required thickness: Insulation | Department of Energy.
Strengths for DIY and Budget Builds
- Fits standard 2x6 framing, so no extra framing cost.
- Fiberglass batts and cellulose are low cost and widely available.
- Easier DIY install: batts slide into cavities; dense-pack cellulose can be blower-installed by rental machine or contractor.
- When combined with careful air sealing, R-20 walls perform well in warm and mixed climates and deliver meaningful comfort improvements in mild cold climates.
Weaknesses and When R-20 Falls Short
- In cold climates R-20 alone in an exterior wall can allow excessive heat loss and increase condensation risk on sheathing unless continuous exterior insulation or thicker assemblies are used.
- Studs create thermal bridges; a 2x6 wall with no continuous insulation still loses heat through the framing members.
- Compressed batts or gaps around electrical boxes can reduce installed R-value significantly.
- For passive-house level targets, R-20 is usually insufficient for walls without additional measures.
For readers who need a primer on R-value fundamentals, see our understanding R-value basics. Also consider framing choices: a comparison of 2x6 vs 2x8 walls explains when deeper cavities make sense.
Best For: Specific Use-case Examples
- Budget-conscious new build in mixed climates: R-20 in a 2x6 wall plus a high-performance attic is a reasonable compromise.
- Retrofit where walls are constrained and exterior work is expensive: keep R-20, tighten air leaks, and add attic insulation first.
- Interior partitions or non-exterior walls where R-20 is more than adequate.
Remember: airtightness and proper air-sealing often produce more comfort and energy savings than marginal increases in cavity R-value alone.
R-49 Insulation: What It Is, Strengths, Weaknesses, and Best Uses
Overview and How You Commonly Achieve R-49
R-49 is a target commonly used for attic/ceiling assemblies in cold climates. Achieving R-49 usually means deep blown cellulose or fiberglass loose-fill (often 14–18+ inches depending on material R/inch), or a combination of batts and blown-in to reach the target. In wall assemblies, R-49 is impractical without very deep framing or thick continuous insulation layers.
Strengths for High-performance Builds
- Large reductions in heat loss through ceilings, where heat rises and losses are high; this typically gives strong payback on heating fuel.
- Blown cellulose in attics is cost-effective per R-value added and DIY-friendly with rented blowers.
- When combined with a well-sealed ceiling plane and controlled ventilation or an unvented sealed attic, R-49 ceilings help deliver predictable interior conditions desirable for passive-house aspirants.
The Energy Star guidance on recommended insulation R-values highlights attic targets and the advantage of focusing insulation where it buys the most reduction in heat transfer: Recommended home insulation r–values - energy star.
Weaknesses and Installation Considerations
- Achieving R-49 in walls is generally impractical without rebuilds (double-stud or trusses) and becomes expensive and bulky.
- Attic installations must address ventilation vs sealed attic strategy, potential moisture migration, and access/clearance for ducts and equipment.
- Using spray foam to reach high R per inch increases material cost and embodied carbon, and often requires pro installation for consistent performance.
Best For: Specific Use-case Examples
- Cold-climate homes where attic heat loss dominates heating loads: prioritize attic to R-49.
- New builds targeting low heating bills or near-passive performance where combined ceiling and continuous wall insulation strategies are planned.
- Situations where attic depth allows blown-in insulation without interfering with roof components or ventilation.
For a deeper attic-focused comparison, see our R-38 vs R-49 comparison.
R-20 vs R-49 Insulation: How They Perform Across Climates and Assemblies
Warm, Mixed, and Cold Climate Guidance
- Warm climates: Medium wall R (R-13–R-20) is often adequate; focus on solar control, shading, and airtightness. Attic insulation still matters to reduce cooling loads.
- Mixed climates: Balance is key. A 2x6 wall with R-20 plus continuous exterior insulation improves performance across seasons.
- Cold climates: Walls should aim higher or include continuous exterior insulation to reduce condensation risk and thermal bridging; attic targets of R-49 or higher are common recommendations.
These rules of thumb align with IECC and Energy Star guidance — check local code requirements before finalizing targets. For intermediate R steps (R-20 vs R-30) see our comparison of R-20 vs R-30 insulation.
Attic/ceiling vs Wall Performance Differences
Upgrading attic insulation gives a larger reduction in annual heating and cooling energy per incremental R than adding the same R to walls. In many retrofit budgets it makes sense to bring attic to R-49 before deep wall upgrades. Wall upgrades that include continuous exterior insulation reduce thermal bridging and often outperform a pure cavity-only approach.
Passive-house and Airtightness Interactions
High wall R alone does not produce passive-house results if airtightness and thermal-bridge control are ignored. Passive-house success depends on:
- High insulation levels (walls and ceilings),
- Continuous air barrier, and
- Mechanical ventilation with heat recovery (ERV/HRV).
To weigh energy savings and payback, our readers may find the passive house ROI analysis helpful in modeling costs and long-term savings.
For technical readers interested in compression effects and real-world installed R-values, the Insulation Institute's data on compressed fiberglass batts is a useful reference: Estimated r-values for compressed fiber glass batt insulation (pdf).
R-20 vs R-49 Insulation: How to Reach R-49 Performance When You Can Only Fit R-20 Depth
If wall depth limits you to R-20, there are four practical strategies to approach R-49-equivalent performance for the whole enclosure: use higher-R materials, add continuous exterior insulation, adopt hybrid layering, or rebuild the wall with deep assemblies such as double-stud or Larsen truss systems.
Use Higher-r Materials (polyiso, Closed-cell Spray Foam)
- Closed-cell spray foam: ~6–7 R/in, so 5.5" of closed-cell approaches R-33; add exterior foam or interior layers to get higher totals. Spray foam also reduces air leakage. Downsides include cost, VOCs during installation, and embodied carbon.
- Polyiso boards: High R per inch (~5.5–6.5/in) on the exterior can add significant R without increasing cavity depth.
Compare material pros and cons in our guide on spray foam vs cellulose.
Add Continuous Exterior Insulation — Pros and Cons
- Pros: Eliminates much of stud thermal bridging and raises whole-wall effective R. One to two inches of polyiso or mineral wool outside sheathing on a 2x6 wall can move effective wall R from R-20 to something closer to R-30–R-35 or higher when combined with cavity fill.
- Cons: Requires new window flashing details, changes trim and siding attachment, and may need thicker window jambs or returns. Proper WRB and flashing details are essential.
See our step-by-step exterior insulation guide for retrofit details and examples.
Hybrid Strategies: Dense-pack, Exterior Foam, and Interior Upgrades
- Dense-pack cellulose in the cavity plus 1–2" of exterior rigid insulation balances hygrothermal behavior while increasing total R.
- Interior insulation layers (rigid foam or mineral wool) can be used during major renovations but require adjustments to electrical and trim work.
- Consider carbon and health tradeoffs: cellulose is lower embodied carbon than closed-cell foam; polyiso has higher R per inch but varies in performance at low temperatures.
When to Consider Rebuilding Wall Assemblies (double-stud, Larsen Truss)
For true passive-house wall R (R-40+), deep-wall strategies like double-stud walls or Larsen trusses are common. These methods create thick, uninterrupted cavities for insulation and reduce thermal bridging. For a comparison of deep-wall framing options see double-stud vs larsen truss.
For a visual demonstration, check out this video on choosing the right type of exterior insulation (what:
R-20 vs R-49 Insulation: Which Should You Choose? Scenario-based Recommendations
Budget Retrofit (existing 2x6 Walls)
- Recommendation: Prioritize attic to R-49 first. Keep R-20 in walls but seal air leaks, insulate rim joists, and add 1" of exterior rigid foam where feasible.
- Checklist: Air-seal top plates and penetrations; dense-pack wall cavities if batt insulation is compressed; insulate and seal the attic hatch and ducts.
New-build Small Budget Home
- Recommendation: Build with 2x6 walls (R-20) plus 1–2" continuous exterior insulation to reduce thermal bridging. Insulate attic to R-49 with blown cellulose for best cost-to-performance.
- Checklist: Specify WRB and proper window flashing for exterior foam; prioritize a continuous air barrier.
Cold-climate or Passive-house Aspirant
- Recommendation: Aim for much higher wall R (double-stud or 2x6 with 3–4" exterior CI) and attic to R-49+. Focus equally on airtightness and mechanical ventilation with heat recovery.
- Checklist: Design for controlled drying of assemblies, hire specialists for hygrothermal modeling if needed, and budget for high-performance windows and detailing.
Tiny House or Mobile Home Constraints
- Recommendation: Use high R-per-inch materials (polyiso, closed-cell spray foam) and prioritize insulation in the ceiling and floor. See our mobile-home insulation guide for targeted strategies: insulation for mobile homes.
- Checklist: Keep weight and thickness limits in mind; address thermal breaks at connections and skirting.
Off-grid/cabin — Prioritizing Heating Load Reduction
- Recommendation: Maximize attic insulation to R-49, then add high-R-per-inch insulation to walls where possible. Consider a sealed attic and a small ERV/HRV if running off-grid heating.
- Checklist: Insulate to reduce peak loads, size the heating system for reduced hours rather than instantaneous peak, and consider renewable heat sources like wood stoves paired with thermal mass.
Across scenarios, three priorities rise repeatedly: air sealing, control of thermal bridges, and correct moisture management. These often deliver better value than simply increasing cavity R.
Installation, Moisture, and Cost Considerations for R-20 vs R-49 Choices
Material Selection and Installation Tips
- Do not compress batts: Compressed fiberglass or mineral wool loses rated R. Fit batts to cavity full depth without gaps.
- Air-seal before insulating: Seal top plates, sill plates, and penetrations with caulk, gaskets, or spray foam. Air leakage can defeat higher R-values.
- R-value per inch matters: If space is limited, choose closed-cell spray foam or exterior polyiso for higher R per inch, but weigh cost and embodied carbon.
- Protect vents and combustion safety: Keep required clearances around chimneys and combustion appliances, or convert to sealed combustion.
Moisture Control, Ventilation, and Stack Risks
- Decide between a vented attic and a sealed unvented attic. A sealed attic paired with continuous insulation and proper roof deck sealing can reduce condensation risk and simplify duct runs.
- Exterior insulation on walls changes the drying profile. In cold climates, adding enough exterior R to keep sheathing warm helps avoid condensation. Flashing and WRB detailing are essential when adding exterior foam.
- For damp spaces like crawlspaces, follow the fixes in our crawlspace guide: damp crawl space fixes.
DIY vs Pro Installs — When to Hire Help
- DIY-friendly tasks: installing batts, dense-pack cellulose with rented blower, basic air sealing, adding attic blown-in insulation.
- Hire pros for: large spray foam jobs, complex exterior insulation with new flashing/window detailing, hygrothermal modeling for cold-climate retrofits, and structural changes for deep-wall assemblies.
- Common DIY mistakes: leaving gaps at joists, blocking soffit vents when adding attic insulation, and failing to adjust window returns when adding exterior foam.
For natural fiber options and their DIY suitability see our natural fiber insulation guide. For sheathing and air-barrier choices that interact with CI, consult the wall sheathing guide.
The Bottom Line
R-20 is the practical default for 2x6 walls; R-49 is the practical default for attics and will usually deliver larger energy savings per dollar. If wall depth limits you, add high-R exterior insulation or use high-R-per-inch materials to improve whole-wall performance without rebuilding. Prioritize air sealing and attic upgrades first for the best short-term returns.
Frequently Asked Questions
Can I just add attic insulation to make up for low wall R-value?
Adding attic insulation is often the most cost-effective first move. Increasing attic R to R-49 reduces heat loss where most heat escapes (upwards), and it usually gives a better return than increasing wall R by the same amount. For many retrofits, bringing the attic to R-49 while improving air sealing will noticeably cut heating bills and improve comfort.
That said, if walls are cold enough to cause condensation on sheathing in winter or create major comfort problems at the envelope surface, you should address wall insulation or add continuous exterior insulation as a second step.
Is closed-cell spray foam the only way to get high R per inch?
No. Closed-cell spray foam has high R per inch (~6–7/in), and polyiso rigid foam also has high nominal R/inch (~5.5–6.5/in), but both have tradeoffs in cost and embodied carbon. Mineral wool and cellulose have lower R per inch but perform well for moisture buffering and sustainability. Choosing the right material depends on space constraints, budget, and environmental priorities. See our comparison of spray foam vs cellulose for detailed tradeoffs.
Will adding exterior foam create moisture problems?
Adding exterior foam changes how a wall dries, but it does not automatically cause problems when detailed correctly. Exterior continuous insulation keeps sheathing warmer and can reduce condensation risk in cold climates if enough R is applied. Proper WRB, flashing, and window jamb details are essential. For retrofit step-by-step guidance, consult the exterior insulation guide.
If in doubt, simple hygrothermal checks or consulting a building scientist are worthwhile before substantial exterior changes, especially in mixed or cold climates.
What R-value should I aim for in a tiny house?
Tiny houses benefit from high R per inch because wall and roof thickness are limited. Aim for the highest practical attic R (R-49 if possible) and use closed-cell spray foam or polyiso in walls to save space while boosting thermal resistance. Also prioritize airtightness and thermal breaks at windows and junctions. For mobile-home style constraints, see our guide on insulation for mobile homes.
How do I balance cost, carbon, and performance?
Balance depends on project goals. For low upfront cost with decent performance, blown cellulose in attics and dense-packed walls is a strong choice—good R per dollar and lower embodied carbon. If minimizing envelope thickness is critical, higher R-per-inch materials like polyiso or closed-cell foam may be justified despite higher embodied impact. Use airtightness, ventilation efficiency (ERV/HRV), and targeted continuous insulation to stretch budget and carbon goals effectively.
For guidance on sustainable material choices, our [sustainable materials guide](/blog/sustainable-building-materials-guide) provides context on embodied carbon and lifecycle considerations.