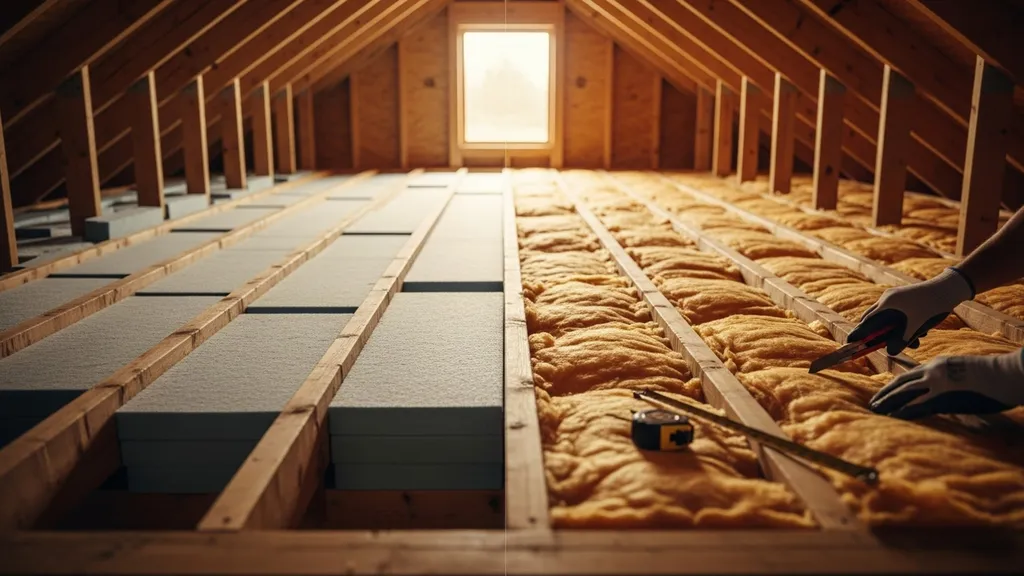
Compare R-19 and R-30 insulation: performance, thickness, cost, and which is best for walls, ceilings, and attics on a DIY budget.
R-19 vs R-30 Insulation: Which Do You Need?
Choosing between R-19 vs R-30 insulation matters when you’re planning an attic upgrade, filling 2x6 wall cavities, or retrofitting a small DIY build. This article compares their thermal performance, typical thicknesses, installation approaches, and where the extra R-value actually pays off. It will help budget-minded DIYers decide which R-level fits a space, climate, and construction constraint — and which materials to consider (fiberglass batts, mineral wool, cellulose, and spray foam).
TL;DR:
- Choose R-19 for 2x6 wall cavities and mild climates; it saves on material cost and fits shallower bays.
- Choose R-30 for attic bays or cold-climate ceilings where deeper cavities or layered approaches are feasible, for roughly 50% better resistance than R-19.
- If cavity depth is limited, pair lower-R cavity fill with continuous exterior foam or higher-R-per-inch materials rather than compressing batts.
R-19 vs R-30 Insulation: Quick TL;DR and When R-value Matters
TL;DR Recommendations
R-19 typically fits a 2x6 stud bay or a shallower attic joist; R-30 requires deeper joists or a layered approach in attics. For attics in cold zones, aim higher than R-19 — local guidance from the Energy star's recommended r-values shows region-specific targets. Use the attic as the priority: adding loft insulation (R-30 or more) usually yields faster payback than adding R to walls.
Why R-value Matters for DIY Builders
R-value measures thermal resistance; higher R slows heat flow. But R-value is only one factor: air sealing, thermal bridging, and insulation continuity can change the real-world effect of moving from R-19 to R-30. This article focuses on practical trade-offs — material thickness, cost-per-bay, installation techniques, and retrofit strategies — so you can choose the right mix for budgets and climate.
R-19 vs R-30 Insulation: Comparison Table — Quick Side-by-side
| Feature | Typical materials | Typical thickness (in) | R per inch (range) | Typical uses | Pros / Cons |
|---|---|---|---|---|---|
| R-19 | Fiberglass batts, mineral wool, some blown cellulose | Fiberglass/mw batts ~6.25", Blown cellulose ~4–6" settled | Fiberglass ~2.5–3.0, Mineral wool ~3.0–3.3, Cellulose ~3.2–3.8 | 2x6 wall cavities, shallow attic bays, intermediate floors | + Lower cost, fits 2x6; - Lower thermal resistance |
| R-30 | Dense fiberglass batts, layered cellulose, spray foam options | Fiberglass batts ~9–11", Blown cellulose ~8–10" | Same per-inch ranges; number reflects depth | Attic joists, 2x8 cavities, layered retrofit | + Better performance in cold climates; - Needs more depth, higher cost |
| Cost indicator | Batts vs blown vs spray | N/A | N/A | N/A | Batts cheapest per bag; blown competitive for attic coverage; spray foam expensive but higher R/in. For lab comparisons see the experimental study on fiberglass R changes. |
For material-level details and R-values by product, see the attic materials guide. Research on attic heat transfer for varying thicknesses is available in an academic study that compares R-11, R-19, and R-30 fiberglass assemblies, useful when evaluating incremental gains: Session%2013%20energy%20conservation.
R-19 vs R-30 Insulation: R-19 — What It is and When to Use It
Overview: Common Forms and Thicknesses
R-19 commonly appears as fiberglass batts sized for 2x6 walls (approximately 6.25" thick) and as a partial blown fill in shallower attic bays where full depth isn't available. Mineral wool batts labeled R-19 have slightly higher R per inch and better moisture tolerance than fiberglass. Cellulose can reach R-19 at lower thickness if installed dense-packed, depending on product settled density.
Strengths of R-19
- Material cost is lower per bay than thicker options. For many DIYers, R-19 batts are easy to carry and cut to fit, making them a practical first step in retrofits.
- Fits standard 2x6 framing without changing wall depth.
- When paired with good air sealing and a continuous exterior layer, R-19 can meet performance targets in mild climates or in accessory buildings.
Weaknesses of R-19
- In cold climates R-19 allows more heat loss; attic and roof targets are often higher in building codes and in Energy Star recommendations. The IECC sets higher ceiling minima for cold zones; for example, code excerpts explain varied minimums by climate zone — check the IECC chapter for specifics: Chapter 4 re residential energy efficiency.
- Compressing batts in tight spaces reduces R-value. So stuffing a batt into an undersized cavity will underperform.
- R-19 alone may not meet passive-house or high-performance retrofit goals without complementary continuous insulation and air-barrier work.
Best-for: Practical Use Cases
- R-19 is suitable for 2x6 exterior walls in temperate climates when paired with exterior insulating sheathing or for intermediate floors and garages where full attic R isn't necessary.
- Use R-19 in tight budgets where improving insulation quickly across many bays is the priority. For a material trade-off comparison between fiber types, see rockwool vs fiberglass.
- If you want the next-step comparison, our r-19 vs r-20 comparison shows how a small R change affects cost and performance.
R-19 vs R-30 Insulation: R-30 — What It is and When to Use It
Overview: Common Forms and Thicknesses
R-30 commonly appears as thicker fiberglass or mineral wool batts for attic joists (roughly 9–11" depending on product R/inch), dense-packed blown cellulose at greater depths, or layered approaches (R-19 topped with an additional layer perpendicular to joists). In new construction, a 2x8 wall or raised rafters can accommodate R-30 in the cavity. For retrofit attics, adding a second layer or switching to blown cellulose is typical.
Strengths of R-30
- Offers materially better thermal resistance; moving from R-19 to R-30 reduces conductive heat loss through the assembly by roughly 40–55%, depending on orientation and thermal bridging.
- Commonly recommended for attic applications in cooler climate zones and often cited in trade guidance (see insulation institute guidance on layering batts to increase R-values: Uploads).
- Less sensitive to small installation gaps than a thin layer might be when combined with proper air sealing.
Weaknesses of R-30
- Requires deeper cavities or a layered approach. In retrofit cases where joist depth is shallow, achieving true R-30 may require adding height (raised rafters), or installing continuous exterior insulation.
- Higher material and handling cost; spray foam can reach high R per inch but adds premium cost and safety/ventilation considerations for DIYers.
- Greater thickness can interfere with fixtures, recessed lighting, and attic access if not planned.
Best-for: Practical Use Cases
- R-30 is a solid default for attic ceilings in cool and cold climates, particularly when joist depth allows full thickness. For visual comparison of batt thickness and installation technique, watch a practical how-to that shows side-by-side batts and common mistakes:
Watch this step-by-step guide on installing ceiling insulation in a basement or crawlspace & why you should. r30, r21, r19, r13.:
- For walls where cavity depth is constrained, compare options on our r-20 vs r-30 article and consider changing stud depth — see the trade-offs in wall depth choices.
R-19 vs R-30 Insulation: Cost, Installation and Space Trade-offs
Material Cost vs Long-term Energy Savings
Material cost per square foot varies by product and region. Rather than fixed dollar figures, use local price checks and calculators. The DOE's insulation guidance helps estimate savings related to increased R-values and payback expectations: Insulation. As a rule of thumb, adding attic insulation (to move from low to higher R) often recoups cost faster than upgrading walls because roof heat loss is larger per square foot.
Installation Complexity and Retrofit Tips
- Batts: easiest for DIY in standard-depth cavities. Do not compress; leave a small air gap to avoid losing R-value.
- Blown cellulose: faster for attics with irregular cavities and better at filling voids; rental blowers are available and many retailers offer hourly rates for DIYers.
- Spray foam: best for air sealing thin cavities or achieving high R/inch, but it is expensive and has health and ventilation considerations for DIY installers.
If retrofitting to R-30 in an attic with existing R-19, a common DIY approach is to add a perpendicular second layer of loose batts or add blown cellulose over the joists. The Insulation Institute notes that layered R-values combine when installed correctly (see their guide linked earlier).
When Space is the Deciding Factor
If cavity depth prevents a full R-30, choose higher-R-per-inch products (closed-cell spray foam) or add continuous exterior insulation instead of compressing batts. For practical installation and material choices when exterior addition makes sense, see the exterior insulation guide. Also remember that air sealing often produces larger performance gains than small R increases; check the recommended tools in our air sealing tools guide before investing in thicker insulation.
R-19 vs R-30 Insulation: Thermal Performance and Climate Considerations
How Climate Zone Changes the R-value Need
Climate drives recommended R-values. Use Energy Star's map and the Department of Energy guidance to match targets to your climate zone: Insulation r values. In warm climates, diminishing returns appear earlier; in cold climates, higher attic R pays off. The decision also depends on whether you can reduce thermal bridging and get continuous insulation — these often outperform a simple bump in cavity R.
R-value Isn't the Only Performance Metric
Air leakage, thermal bridging through studs, and insulation continuity control heat flow as much or more than raw R. For example, an insulated wall with poor air sealing can perform worse than a slightly lower-R wall that is sealed and detailed. For budget-conscious green material options that consider embodied carbon and cost, see our budget green materials guide.
Combining Insulation Types for Best Results
A common high-performance strategy is to pair cavity fill (R-19 or R-30) with continuous rigid foam outside the sheathing. Where cavity depth is limited, choose dense-packed cellulose or mineral wool and add exterior foam board to reach target whole-wall R. If you need both air sealing and higher R in a thin cavity, compare trade-offs in our spray foam vs cellulose article — spray foam adds air-barrier value; cellulose is less expensive and has good thermal and acoustic performance.
R-19 vs R-30 Insulation: Which Should You Choose? Scenario-based Recommendations
New Construction: Wall and Attic Scenarios
- 2x6 exterior wall in cold climate: Prefer a deeper assembly (2x8 or add exterior continuous insulation) rather than relying on R-19 alone. Action: specify R-19 cavity + 1"–2" rigid foam outside, or use 2x8 studs to allow R-30 cavity.
- Attic in a cold climate: Aim for R-30 or higher at minimum. Action: install R-30 batts or dense-blown cellulose; add air sealing at ceiling plane.
Retrofit of Existing Home: Budget-first vs Performance-first
- Budget-first: If funds are limited and ceilings are shallow, choose R-19 where it fits, prioritize sealing attic floor gaps, and add blown cellulose where depth allows. Action: buy R-19 batts for walls/ceilings you can access; rent a blower for attic top-up.
- Performance-first: Target full attic depth for R-30 or more; use exterior insulation or raise rafters if walls need more R. Action: layer insulation in attic, add exterior continuous boards on walls, and hire a rater to model expected savings. For cost context, consult our passive house costs breakdown.
Tiny Houses, Sheds, and Outbuildings: Special Cases
- Tiny houses often have limited cavity depth. Use higher-R-per-inch materials, interior rigid board, or closed-cell spray foam (or safer alternatives). For lower-toxicity options, see safer spray foam alternatives.
- Sheds and outbuildings: R-19 may be adequate if the building is intermittently used. Use the shed insulation calculator for quick sizing and to compare R-19 vs R-30 equivalence.
Action steps for any scenario:
- Measure cavity depth accurately before purchasing.
- Avoid compressing batts; match product thickness to cavity.
- Prioritize attic air sealing and ventilation before adding insulation.
- Consult local code or an energy rater for climate-specific minimums.
The Bottom Line
For most DIYers, choose R-19 when you must fit a 2x6 cavity or when cost and space limit options; choose R-30 for attic ceilings and cold-climate envelopes where joist depth allows it. The r19 vs r30 insulation choice should be made alongside air-sealing, thermal-bridge reduction, and possible exterior continuous insulation to get the best real-world performance.
Frequently Asked Questions
How much thicker is R-30 compared to R-19?
Thickness varies by material. For fiberglass batts, R-19 is roughly 6.25" and R-30 is roughly 9–11" depending on product R/inch. Mineral wool and cellulose have slightly different R/inch, so thickness for the same R can be less or more. Always check manufacturer datasheets for exact thicknesses rather than assuming a single number.
Can I layer R-19 to get R-30?
Yes. Layering an R-19 batt with a second perpendicular layer or adding blown cellulose over existing batts can reach or exceed R-30. The Insulation Institute documents how layered R-values combine when installed without compression: [Uploads](https://insulationinstitute.org/wp-content/uploads/2016/01/BI473.pdf). Ensure the second layer doesn't compress the first and that you maintain ventilation clearances where required.
Does compressing a batt change its R-value?
Yes. Compressing a fiberglass or mineral wool batt reduces its effective R-value per bay. If you halve the thickness, you often drop below the labelled R because R per inch depends on full loft. Avoid stuffing oversized batts into shallow cavities; instead pick the correct thickness or use higher-R-per-inch materials.
Is R-30 worth it in warm climates?
In many warm climates, the incremental benefit of going from R-19 to R-30 is smaller than in cold climates, especially when cooling-dominated loads and shading reduce roof heat gain. Energy Star's guidance helps identify effective R targets by climate: [Insulation r values](https://www.energystar.gov/saveathome/seal_insulate/identify-problems-you-want-fix/diy-checks-inspections/insulation-r-values). Prioritize air sealing and radiant barriers in hot climates before chasing high R-values in cavities.
Do I need a vapor barrier with R-30?
Vapor control depends on climate, assembly, and insulation type. In many cases, it's better to plan for water management and vapor-permeable assemblies than a single vapor barrier. Material choice matters: closed-cell spray foam can act as a vapor retarder; cellulose and mineral wool are more vapor-open. Consult local code and consider hygrothermal guidance for wall assemblies rather than applying a one-size-fits-all rule.