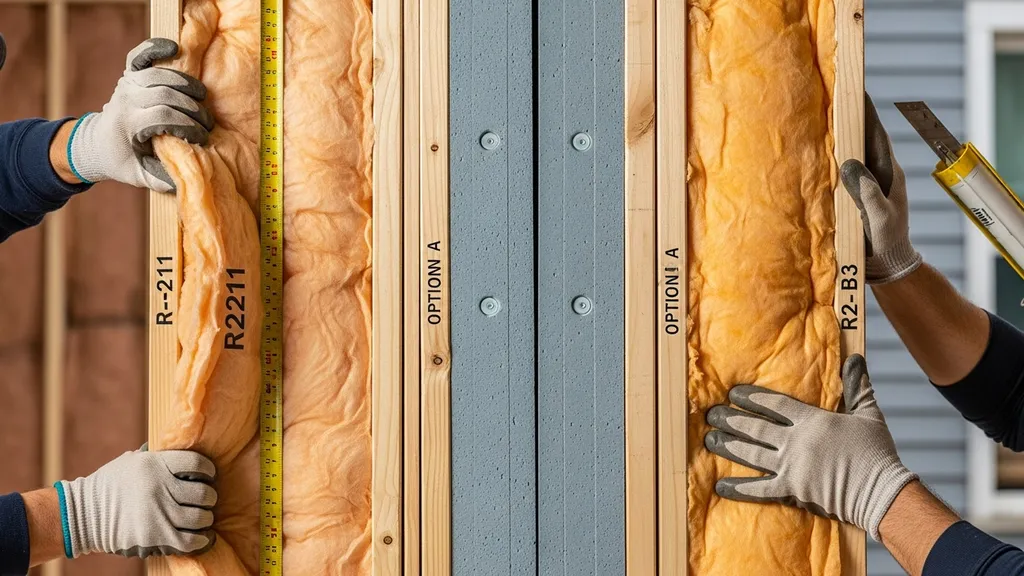
Clear, practical guidance to choose between R-21 and R-23 for walls and assemblies — performance, cost, and when an alternative makes more sense.
R-21 vs R-23 Insulation: Which Do You Need?
Choosing between R-21 and R-23 insulation is a common decision for DIY homebuilders planning 2x6 walls or retrofits. This article compares the two ratings, explains how each is achieved in real assemblies, and gives practical, scenario-based recommendations so you can decide whether to stick with standard R-21 batts or invest in R-23-level performance using denser batts, exterior foam, or higher-performance materials. If your goal is lower heating bills, better comfort, or meeting a specific code or passive-house target, this guide walks through performance, cost, installation, and workable alternatives.
For external source context, review Types of Insulation | Department of Energy.
TL;DR:
- R-21 is sufficient for most 2x6 framed walls in moderate climates and delivers ~90–95% of the thermal benefit of R-23 at lower cost.
- Choose R-23 when building for cold climate zones, pursuing passive-house targets, or when you cannot deepen cavities; R-23 usually comes from denser batts, foam plus batt hybrids, or closed-cell spray foam.
- For many DIY projects, adding thin continuous exterior foam or prioritizing air sealing and balanced ventilation yields more practical gains than squeezing an extra R-value inside the cavity.
R-21 vs R-23 Insulation: Quick TL;DR and Comparison Table
Short Answer: When R-21 is Enough
R-21 is commonly the target for standard 2x6 wood-framed exterior walls filled with fiberglass or mineral wool batts. For budget-conscious DIYers in climate zones 3–5, a well-installed R-21 cavity combined with careful air sealing, reduced thermal bridging, and a balanced ventilation system will usually meet energy targets and occupant comfort goals. Energy Star and other efficiency programs point out that correct installation and whole-wall performance are often more important than a single R-number in the cavity.
Short Answer: When to Prefer R-23
Choose R-23 when building in cold climates (IECC zones 6–8), when your design aims for Passive House or similar low-energy standards, or when wall depth is constrained but you can add thin continuous exterior insulation. R-23 may be achieved with high-density batts specifically sized for deeper cavities, by combining a standard batt with 1" of exterior foam, or by using higher-performance materials such as closed-cell spray foam. These options raise whole-wall R and reduce cold spots at framing members.
Comparison Table — Performance, Cost, Typical Assemblies
| Characteristic | R-21 typical products | R-23 typical products | Practical difference |
|---|---|---|---|
| Typical cavity | 2x6 cavity with standard batts | 2x6 cavity with high-density batts or batt + CI | R-23 gives ~9% higher nominal resistance in the cavity |
| Common materials | Fiberglass batts, mineral wool, cellulose | High-density mineral wool, closed-cell spray foam, batt + polyiso/XPS | Higher material density or added CI required for R-23 |
| R-value per inch (typical ranges) | Fiberglass ~3.1–3.4, mineral wool ~3.0–3.3 | High-performance foam or dense batt ~3.5–6.5 depending on material | Per-inch difference varies; whole-wall difference smaller after framing loss |
| Whole-wall impact | Good in moderate climates | Useful in cold climates or Passive House | Whole-wall R depends on framing fraction and thermal bridging |
| DIY availability | Readily available at big-box stores | May require specialty batts or exterior foam | R-21 is easier to source and install for DIYers |
(For details on product selection and per-inch values, the Insulation Institute's product guide is a useful technical reference.) A guide to selecting fiber glass insulation products for new ...
R-21 vs R-23 Insulation: What R-21 Means (materials, Typical Assemblies)
Definition and How R-21 is Achieved
R-21 is the nominal R-value commonly associated with a full 2x6 wall cavity filled to depth with standard batts. That value is reached by using materials with per-inch R ratings in the 3.0–3.6 range across a 5.5" cavity. Typical materials include glass-fiber batts, mineral wool (Rockwool), and dense-packed cellulose in retrofits. The quoted R-value assumes the batt fills the cavity without compression, gaps, or large voids.
Strengths of R-21
- Readily available and cost-effective for new builds and retrofits.
- Works well with advanced framing techniques that reduce thermal bridging.
- Compatible with common claddings, wall sheathing, and interior finish workflows.
- Mineral wool options add fire and moisture tolerance compared with fiberglass.
Weaknesses and Common Installation Pitfalls
The effective R-value frequently falls below nominal R if batts are compressed, misfit around wiring and plumbing, or left with gaps at the top and bottom plates. Compressed batts lose R/inch; a batt squashed into a 2x6 that was intended for a 2x8 cavity will underperform. Air leakage through framing defects or missing air barriers can make a well-insulated cavity feel cold despite correct R-values. For fundamentals on interpreting per-inch ratings, see our r-value basics.
Best-for: Typical DIY Wall and Retrofit Use Cases
R-21 is a solid, pragmatic choice for single-family DIY builds in temperate climates, for garage-adjacent rooms, and for cost-limited retrofits where adding exterior insulation is difficult. If you plan to use fiberglass or mineral wool batts, measure cavity depth, avoid compressing batts, and pair insulation with simple air-sealing measures such as gasketed plates and caulked top plates.
(ENERGY STAR provides recommended R-values by climate and highlights that correct installation is essential for performance: Recommended home insulation r–values - energy star.)
R-21 vs R-23 Insulation: What R-23 Means (how It’s Achieved and Where It Appears)
How Builders Get to R-23 (denser Batts, Hybrid Assemblies)
There are three common paths to R-23 in a 2x6 wall:
- Use higher-density batts manufactured to provide more R per inch in the same cavity depth.
- Combine a standard cavity batt with thin continuous exterior insulation (for example, ~1" polyiso or XPS) to raise whole-wall R without increasing stud depth.
- Use closed-cell spray foam that yields higher R/inch while also performing as an air and partial vapor barrier.
All three raise nominal cavity R or whole-wall resistance, but each has practical tradeoffs in cost, moisture management, and detailing.
Strengths of Choosing R-23
- Better cold-season performance and reduced heat loss in severe climates.
- When paired with continuous exterior insulation, reduces thermal bridging at studs and increases effective whole-wall R.
- Closed-cell spray foam provides insulation plus air sealing and some structural stiffening.
Weaknesses, Tradeoffs, and Availability
R-23 options often cost more. High-density batts may be sold as specialty products and less commonly stocked at big-box stores. Adding continuous exterior foam changes flashing, trim, and window detailing; you must extend window sills and adjust trim returns. Closed-cell spray foam requires PPE and is often applied by professionals; it increases embodied carbon relative to mineral wool or cellulose. For installation guides on continuous exterior insulation details, see our exterior foam guide.
Watch this step-by-step guide on installing ceiling insulation in a basement or crawlspace & why you should. r30, r21, r19, r13.:
Best-for: When R-23 is the Right Choice
Choose R-23 when:
- You're building in IECC zones 6–8 or targeting Passive House metrics.
- You have thin assemblies but can add continuous exterior insulation.
- You want both higher R and improved air-sealing benefits (closed-cell spray foam case).
A well-detailed R-23 hybrid (batt + CI) often delivers better occupant comfort than simply deepening cavities without addressing thermal bridging.
R-21 vs R-23 Insulation: Cost, Availability, and DIY Install Differences
Material Cost Comparison (order-of-magnitude Guidance)
R-23 assemblies typically cost more because they rely on specialty products (high-density batts), additional materials (continuous foam), or spray foam application. That additional cost should be weighed against expected energy savings based on climate and whole-wall effectiveness. For many DIYers, the step from R-21 to R-23 will be one of the more expensive envelope upgrades short of changing to structural insulated panels or insulated concrete forms.
Labor and Installation Differences for Diyers
- R-21 with standard batts: straightforward for an experienced DIYer; proper fit and air sealing are the main skills required.
- High-density batts: similar install steps but less forgiving on compression; measure cavities exactly.
- Batt + exterior foam: requires careful flashing, window extension, and compatible fasteners; expect more detail work around penetrations.
- Closed-cell spray foam: typically a pro job because of equipment, safety, and consistent coverage; improper DIY application can create voids or off-gassing issues.
For step-by-step guidance on sealing and tools that make the biggest performance difference, consult our air-sealing tools guide. Also follow good vapor control practice from our vapor barrier guide when changing assembly types.
Common DIY Pitfalls That Change Effective Value
- Compressing batts into undersized cavities reduces R and can create cold spots.
- Leaving gaps at plates and around wiring reduces whole-wall performance.
- Improperly flashed or detailed exterior foam can create water entry points.
- Overreliance on nominal R while ignoring thermal bridging at studs leads to disappointment.
Plan for quality control: cut around obstacles, use backing for top plate fills, and test airtightness with a blower door if possible. Even one small gap can cut comfort and increase energy use.
R-21 vs R-23 Insulation: Performance by Climate and Wall Type
How Climate Zones Affect Whether R-23 is Worth It
Cold climates justify higher R-values because the seasonal heating load is large and marginal gains yield larger energy savings. In milder climates, the incremental energy saved by moving from R-21 to R-23 is smaller, and payback periods lengthen. Use IECC climate zone guidance and local energy use estimates to decide. Remember: whole-wall performance, not just cavity R, determines in-service heat loss.
2x6 Wood-framed Walls vs Advanced Framed / Double-stud Walls
- Advanced framing reduces the percentage of framing (stud fraction), increasing whole-wall effective R for the same cavity insulation; this makes R-21 more effective.
- Double-stud or mass-plus-insulation walls create thicker cavities for higher R (R-23+ achievable by volume) but require careful moisture control and more labor.
- SIPs and ICFs deliver different performance dynamics; their R is measured as an assembly and often outperforms equivalent stud walls for the same thickness.
If you're using advanced framing, you may prefer R-21 batts plus exterior foam to get the best whole-wall performance with limited material cost.
Retrofit Scenarios: When to Add Exterior Foam vs Densify Cavity Insulation
In many retrofits you can't deepen cavities. Adding continuous exterior insulation (1"–2" of polyiso or XPS) raises whole-wall R and reduces thermal bridging without disturbing interior finishes. If wall depth is available, injecting dense-packed cellulose or installing high-density batts works. For off-grid cabins or small structures, consider the assembly that fits your site constraints; see our off-grid cold-climate guide for specific tactics.
For airtightness installation steps that pair with higher-R assemblies, see the airtight membrane guide.
R-21 vs R-23 Insulation: Alternatives and Workarounds If You Can't Get R-23
Add Continuous Exterior Insulation
A practical way to get the whole-wall performance of R-23 without thicker studs is to add 1" of continuous exterior foam over a standard R-21 cavity. This reduces thermal bridging at studs and often yields a larger effective gain than trying to compress more R inside the cavity. Proper flashing and trim detailing are required to avoid water problems; see our exterior foam guide for details. For small sheds and tiny houses, see how to insulate a shed floor for analogous low-profile strategies.
Improve Airtightness and Ventilation Instead of Chasing Small R Gains
Air leakage can dominate heat loss. Sealing gaps, adding a continuous air barrier, and installing balanced mechanical ventilation with heat recovery (HRV/ERV) will often improve comfort and reduce energy bills more than moving from R-21 to R-23. Tools and methods are outlined in our air-sealing tools resource.
Material Swaps That Increase Whole-wall Performance
- Move from fiberglass to dense-packed cellulose or high-density mineral wool to raise effective cavity R and improve acoustic performance.
- Use closed-cell spray foam in targeted areas for air sealing and added R/inch, but weigh embodied carbon and cost. For a head-to-head tradeoff, read the spray foam vs cellulose guide.
- If choosing between mineral wool and fiberglass batts, our comparison mineral wool vs fiberglass explains durability and moisture tolerance differences.
These swaps often deliver better real-world comfort than chasing a small nominal R increase.
R-21 vs R-23 Insulation: Which Should You Choose? Scenario-based Recommendations
Budget DIY New-build on a Moderate Climate — Recommendation
Recommendation: Use R-21 batts properly installed in a 2x6 cavity, apply tight air-sealing practices, and consider 1" exterior foam only if the budget allows. R-21 plus good air-sealing and sensible mechanical ventilation provides most of the comfort and efficiency needed in moderate climates. See the insulation basics guide if you need a refresher on interpreting R-values.
Cold-climate Self-build or Passive-house Target — Recommendation
Recommendation: Aim for R-23 or higher through a hybrid approach: R-21 cavity + 1"–1.5" continuous exterior foam, or use high-density batts or spray foam where budget permits. Prioritize whole-wall calculations, reduce thermal bridging, and design with proper vapor control; consult cold-climate resources such as our cold-climate design article.
Retrofit/limited-thickness Walls — Recommendation
Recommendation: Add continuous exterior insulation rather than trying to squeeze extra R into the cavity. This avoids interior disruption and improves whole-wall performance. Detail windows and flashing to accommodate the foam layer. Follow wall vapor control steps from our wall vapor barrier guide.
Tiny Houses or Cabins with Space Constraints — Recommendation
Recommendation: Use higher-R-per-inch solutions where space is tight: closed-cell spray foam or thin exterior foam combined with a standard batt. For off-grid cabins in cold zones, consider thicker double-stud walls or SIPs if you can manage cost and complexity; read the off-grid cold-climate guide for specifics.
Quick Decision Checklist
- Measure your cavity depth and framing fraction.
- Calculate whole-wall R, not just cavity R.
- Prioritize air sealing and ventilation before increasing cavity R.
- If you need more R but can't deepen the wall, add exterior foam.
For broader material considerations and embodied-impact tradeoffs, consult the sustainable materials guide.
The Bottom Line
R-21 is the pragmatic standard for most 2x6 framed walls and delivers strong value when installed correctly and paired with airtightness. Choose R-23 when you face cold-climate exposure, have passive-house goals, or cannot increase cavity depth — often achieved with denser batts, closed-cell foam, or thin continuous exterior insulation. Prioritize whole-wall thinking and air sealing; those moves usually beat chasing small cavity-R gains.
Frequently Asked Questions
Is R-23 worth it over R-21?
It depends on climate and goals. In IECC zones 6–8 or when targeting Passive House, R-23 or higher often makes economic and comfort sense. In milder climates, the incremental energy savings are smaller and may not justify the extra material and detailing costs. A whole-wall evaluation that accounts for studs, thermal bridging, and airtightness will show the actual benefit more accurately than a cavity-only comparison.
Can I convert an R-21 wall to R-23 during a retrofit?
Yes. Common retrofit strategies are adding continuous exterior insulation (1"–2") or removing interior finishes to densify cavities and install higher-density insulation. Adding exterior foam is often the least disruptive route, but it requires careful flashing and window trimming. See the exterior foam and vapor barrier sections above for the required detailing steps.
Does adding 1 inch of exterior foam equal R-2?
Not always. Polyiso has a nominal R of roughly R-5–R-6 per inch at room temperature but performance varies with temperature and product. XPS is closer to R-4–R-5 per inch. Rather than assuming a fixed equivalence, check the manufacturer's published R/inch and factor in whole-wall effects; continuous foam also reduces stud thermal bridging, which increases effective performance beyond just the foam's R-value.
Which insulation types reliably achieve R-23 in a 2x6 wall?
Options include high-density mineral wool or fiberglass batts made for 2x6 cavities, a standard cavity batt plus thin continuous exterior foam, or closed-cell spray foam applied to the full cavity. Availability varies by market: high-density batts may be specialty items, while exterior foam is widely available but requires detailing work. Use whole-wall calculations to verify your chosen assembly reaches the desired performance.
How does air sealing change my choice between R-21 and R-23?
Air sealing often delivers bigger comfort and energy improvements than small increases in cavity R. A leaky R-23 wall can perform worse than a well-sealed R-21 wall. For DIYers, investing time in gaskets, caulked top plates, sealed penetrations, and a continuous air barrier is typically more cost-effective than upgrading cavity R alone. For tools and methods, see the air-sealing tools resource and test with a blower door if feasible. For broader context on attic vs wall priorities, consult our attic insulation guide.