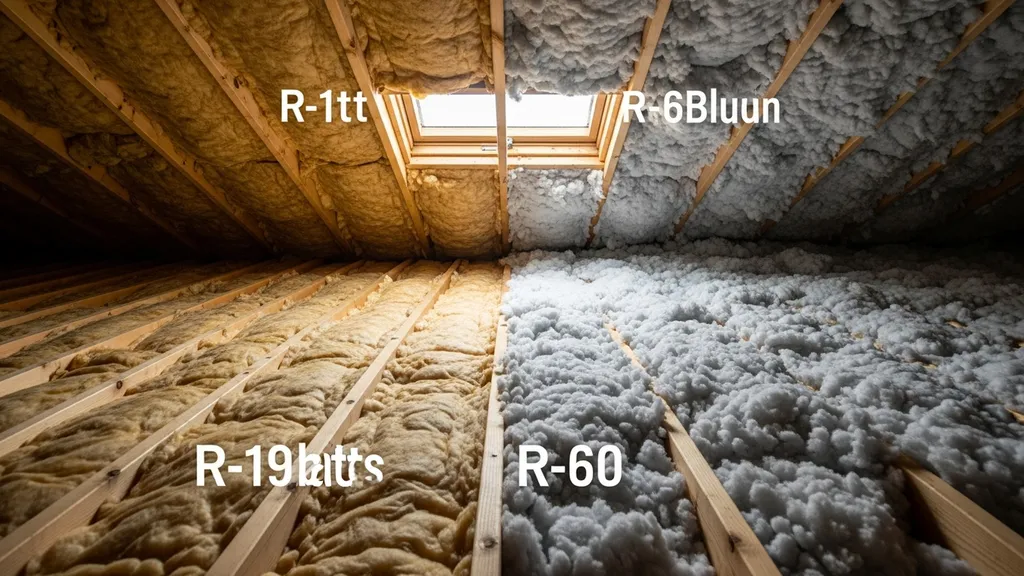
Compare R-19 and R-60 insulation for attics, walls and budgets—practical guidance to choose the right R-value for your DIY eco build.
R-19 vs R-60 Insulation: Which Do You Need?
Choosing between R-19 and R-60 insulation is a practical trade-off of space, budget, and climate for DIY eco builders. This article on r19 vs r60 insulation compares where each R-value makes sense—walls vs attics, typical material choices, installation effort, and when higher R is or isn’t worth the extra cost and embodied material. Read on for clear, scenario-based guidance and links to tools and government guidance to help you estimate payback and sizing.
TL;DR:
- R-19 is usually suitable for 2x6 wall cavities and mild-climate attics; it's low-cost, easy to install, and widely available.
- R-60 is primarily an attic strategy using deep blown cellulose or multi-layer systems; it cuts winter heating loads in cold climates but needs more depth, careful air-sealing, and ventilation.
- For most DIY projects, prioritize air-sealing first, then add insulation to regional targets (use the insulation savings calculator); choose R-60 when attic depth, climate zone, and off-grid heating goals justify the extra cost and embodied material.
| Metric | R-19 (typical uses) | R-60 (typical uses) |
|---|---|---|
| Typical application | 2x6 walls, some mild-climate ceilings, retrofits where depth limited | Attics in cold climates, deep-coverage retrofits |
| Approximate thickness | 5.5–6.5 in for batts (2x6 cavity), blown loose-fill ~4–6 in (compression varies) — (see Energy Star guidance) | 16–24+ in blown cellulose or loose-fill fiberglass, multi-layer batts to reach equivalent depth (depth varies by material; see Department of Energy) |
| Thermal performance (nominal) | R-19 | R-60 |
| DIY difficulty | Low–medium (batts straightforward; attention to fit) | Medium–high (deep blown installs, access and ventilation issues) |
| Typical cost range per sq ft | Lower material cost; readily available — check local quotes via calculator | Higher material + labor; more bags/installation time — check local quotes via calculator |
| Embodied carbon / eco notes | Lower total material for same area; natural fibers available | Higher material volume increases embodied carbon unless using recycled cellulose |
| Recommended climate/use | Mild climates, walls, budget retrofits | Cold climates, off-grid cabins, high heating-cost homes |
Note: numerical thickness ranges and payback depend on material and climate; consult the Department of Energy's insulation guidance (Insulation | Department of Energy) and use the site's insulation savings calculator to model local savings. Also see industry guidance on layering batts from the Insulation Institute PDF (useful when adding layers): DOE Releases New R-Value Recommendations (BI491.pdf).
Quick TL;DR — R-19 vs R-60 (comparison Table)
R-19 is a common, cost-effective R-value for 2x6 stud walls and some ceilings where cavity depth limits R. It typically appears as fiberglass or mineral wool batts sized for 2x6 cavities and offers an easy DIY install: cut to fit, avoid compression, and keep cavities free of gaps. Energy Star lists R-19 among common retrofit targets for certain zones; see the recommended levels at the Energy Star page for retrofit R-values (Recommended home insulation r–values - energy star). Use the linked guide to confirm whether R-19 meets your zone's minimum.
R-60 is an attic-focused target in colder zones. It generally requires 16–24+ inches of blown cellulose or multiple layers of insulation to achieve that R-value. Achieving R-60 is meaningful in high-heating-load houses and off-grid systems but gives diminishing returns per incremental R beyond about R-49–R-60 depending on climate and fuel cost; consult the Department of Energy’s overview for how R-value relates to thickness and performance (Insulation | Department of Energy). The additional material and labor increase upfront cost and embodied carbon but can reduce annual heating energy use in cold climates.
R-19 in the R-19 vs R-60 Insulation: Which Do You Need? — Overview and Use Cases
What R-19 is (materials and Typical Assemblies)
R-19 is a nominal R-value commonly supplied as:
- Fiberglass batts sized for 2x6 wall cavities (approx. 5.5–6.5 inches thickness depending on manufacturer).
- Mineral wool batts with similar nominal thickness but better handling at high temperatures and improved sound control.
- Some rigid panels or layered systems can reach R-19 equivalence but are less common.
R-19 often appears in existing 2x6 framed walls and in older ceilings where full attic depth isn't available. Cellulose and blown fiberglass can be installed to similar R levels; blown products will specify coverage per bag at a target R-value.
Strengths of Choosing R-19
- Low material cost and wide availability for DIYers.
- Fits 2x6 cavities without adding external depth or expensive framing changes.
- Easier to install correctly for novices: batts are cut and friction-fit or stapled in place.
- Compatible with common retrofit work where adding depth is not possible.
Weaknesses and Limitations
- Insufficient in most cold-climate attics where recommended targets rise to R-49 or R-60.
- Compression reduces effective R-value: stuffing thicker batts into shallower cavities lowers performance.
- Thermal bridging through studs significantly reduces whole-wall effective R; continuous insulation is needed for higher whole-wall performance.
Best-for Scenarios
- Mild climate homes where heating loads are moderate and retrofit cavity depth is limited.
- Wall assemblies in 2x6 framed houses where upgrading to continuous insulation is not feasible.
- Budget-conscious DIY retrofits where air-sealing is already in place and cost per square foot matters.
For more on how R-values work and why small differences around R-19 can matter less than airtightness, see understanding R-value and the close comparison at R-19 vs R-20 comparison.
R-60 in the R-19 vs R-60 Insulation: Which Do You Need? — Overview and Use Cases
What R-60 Looks Like in Practice (materials and Thickness)
R-60 is most commonly reached in attics using:
- Blown cellulose: 18–24+ inches depending on density.
- Loose-fill fiberglass: comparable depths but different settled R per inch.
- Multi-layer systems: an initial layer of spray foam or rigid board for air control plus blown fill to reach the balance.
Achieving R-60 requires significant depth. That depth affects attic access, roofline clearances, and may require deepening joists or changing roof build-up if converted to conditioned space.
Strengths of Choosing R-60
- Substantial reduction in heat loss through the attic in cold climates, which lowers annual heating energy use.
- When paired with strong air-sealing, the marginal energy savings from raising attic R from R-38 to R-60 can be meaningful in high-load, off-grid, or very cold environments.
- Blown cellulose uses recycled paper and often has favorable embodied-carbon metrics compared with some foam products.
Energy.gov outlines how R-value scales with thickness for different materials and stresses that type, thickness, and density matter for performance (Insulation | Department of Energy). Use that guide to estimate depth by material.
Weaknesses and Trade-offs
- High material volume increases upfront cost and embodied carbon (unless using recycled cellulose).
- Installation is more demanding: blower equipment, even coverage, and attention to vents and soffits.
- Diminishing returns: beyond a certain R (varies by climate), each additional R saves less annual energy per dollar invested.
- Deeper insulation complicates attic ventilation, storage, and retrofits of mechanical systems in the attic.
Best-for Scenarios
- Cold-climate homes and cabins where heating is the dominant energy use.
- Off-grid or net-zero projects where reducing heating fuel (and thus generator or PV backup needs) is a priority.
- New builds where attic depth and roof assembly can accommodate required thickness without costly rework.
See the attic insulation guide for practical layering techniques to reach higher R-values while handling ventilation and access.
Other R-value Options and Hybrid Strategies in the R-19 vs R-60 Decision
Intermediate R-values and Stepped Approaches (R-30–R-38)
Many DIY builders choose a middle ground such as R-30 or R-38 in attics. These intermediate targets often deliver a large portion of the achievable energy savings while requiring far less depth than R-60. For example, adding a top-up of blown cellulose over existing batts can be a cost-effective path to R-38 or R-49 before deciding on the bigger investment of R-60. For a closer look at these trade-offs see R-19 vs R-38 comparison information at R-19 vs R-38 comparison.
Combining Materials and Air-sealing
A practical hybrid strategy:
- Step 1: Prioritize airtightness with targeted spray foam or caulk and weatherstripping. Airtightness reduces infiltration losses and often yields larger savings per dollar than adding R alone—see passive house air sealing.
- Step 2: Add a mid-level batt (R-19 or R-30) in cavities.
- Step 3: Top up with blown-in cellulose to reach the desired total R in the attic.
This staged approach minimizes waste (you don't tear out what works), lets DIYers spread cost over time, and preserves options like adding continuous rigid insulation externally if deeper whole-wall performance is needed.
When to Use Rigid Board or Spray Foam with Lower/higher R-values
- Rigid continuous insulation (CI): Adding CI outside sheathing can reduce required cavity R and reduce thermal bridging. Use when exterior work is planned or when improving whole-wall performance for passive-house targets.
- Spray foam: Closed-cell spray foam provides high R per inch and excellent air-sealing. It can allow lower nominal cavity R while maintaining low infiltration but raises embodied carbon and cost. For trade-offs between spray foam and other types, see spray foam vs cellulose and the site's discussion of natural alternatives at natural fiber insulation guide.
Material pairing examples:
- Rim-joist and small penetrations: closed-cell spray foam for air and moisture control, then batts or blown-in for bulk R.
- External continuous foam + internal batts: reduces stud thermal bridge and may allow lower interior R for same whole-wall performance.
Costs, Materials and DIY Installation: R-19 vs R-60 Practical Checklist
Material Costs and Labor Considerations
Do not rely on fixed national prices—use local quotes or the insulation savings calculator to estimate costs and payback. That said, practical cost drivers include:
- Bags/rolls required: Blown cellulose volume grows fast with R-target; estimate coverage per bag at target R from product spec sheets.
- Labor or rental: Blown-in installs require blower rental or hiring a crew; batts need less equipment but more time per cavity.
- Accessibility: Attics with tight kneewalls or obstacles increase labor.
A simple DIY estimating approach:
- Calculate attic area in sq ft.
- Determine existing insulation R and depth.
- Use manufacturer bag coverage charts to compute bags required to add the delta-R.
- Add blower rental time or pro installation hourly rates if not DIY.
Installation Challenges and Safety
- Wear appropriate PPE: NIOSH-approved respirator, gloves, goggles when handling fiberglass, mineral wool, or cellulose.
- Avoid compressing batts—compressed insulation loses R per inch.
- Prevent blocking soffit vents when adding deep blown insulation; use baffles to maintain airflow.
- For deep R-60 installs, ensure attic access supports blower hoses and bag staging; consider hiring a contractor if access is tight.
Air-sealing and Ventilation Checklist
- Seal top plates, attic hatches, recessed lights (or use airtight housings), and duct penetrations first—these are common leakage paths.
- Maintain continuous attic ventilation paths at eaves and ridge if using vented attic design.
- If converting to an unvented (conditioned) attic with spray foam at roofline, ensure roofing and condensation risks are addressed per local code.
Useful tools and resources for airwork are listed in the site's air sealing tools.
DIY vs Pro: When to Hire Help
- Hire a pro for: dense-pack or deep blown installs where achieving even depth is critical, complicated ventilation rework, or when local codes require insulation to be installed by certified contractors.
- DIY is reasonable for: installing batts in accessible framing, topping up shallow blown-in if comfortable with equipment, and most air-sealing tasks.
Before large installs, get multiple local quotes and use the insulation savings calculator to estimate payback under your energy rates.
For a visual demonstration, check out this video on everything you need to know about attic insulation:
How to Decide: Climate, Assembly and Budget Scenarios for R-19 vs R-60
Mild Climates and Tight Budgets: When R-19 or R-30 is Fine
In climate zones with moderate heating needs, R-19 or R-30 in the attic is often acceptable provided the building is well air-sealed. Prioritize:
- Blocking major air leaks.
- Ensuring adequate but not excessive attic ventilation.
- Adding insulation incrementally (batts + blown top-up) to reach cost-effective R.
Use Energy Star recommended retrofit levels as a minimum guide for your zone: Recommended home insulation r–values - energy star.
Cold Climates, Cabins, and Off-grid Systems: When Push Toward R-60
For cabins, off-grid homes, or very cold climates:
- R-60 in the attic reduces peak heating loads and may reduce required generator/fuel capacity for off-grid systems.
- Combine high attic R with strong air-sealing and good wall insulation, plus mechanical ventilation with heat recovery if aiming for tight envelope performance.
- Consult the cold-climate tips at cold-climate cabin tips for systems-level choices.
Small Builds, Tiny Houses and Mobile Homes: Space and Weight Constraints
Tiny homes and mobile units rarely have the cavity depth or practical attic space for R-60. Strategies include:
- Using high-R per inch materials (closed-cell spray foam) selectively.
- Adding exterior rigid insulation to boost whole-wall R without losing interior space.
- See the mobile home insulation guidance for space-constrained approaches.
Step-by-step Decision Checklist for DIY Builders
- Determine your climate zone and consult Energy Star/DOE recommended attic R.
- Measure existing cavity depth and current insulation.
- Seal air leaks and fix HVAC duct leaks first.
- Model energy savings with the insulation savings calculator.
- If depth and budget allow, aim for R-49–R-60 in cold zones; otherwise choose R-30–R-38 plus targeted air-sealing.
- For passive-house or net-zero goals, pair moderate cavity R with continuous exterior insulation and airtight detailing—see passive house air sealing.
For moisture-sensitive foundations and crawlspaces, read fix damp crawl spaces before adding insulation that might change vapor profiles.
Which Should You Choose? Clear Recommendations by Reader Type
First-time Self-builders on a Tight Budget
- Priorities: air-seal, correct vapor control, then insulation.
- Recommendation: R-19 in walls (2x6) and R-30–R-38 in attic as affordable starting points. Top up with blown-in later when budget permits.
- Quick checklist: Air-seal top plates and penetrations → install R-19 batts correctly without compression → add attic top-up.
Small Contractors and Retrofits
- Priorities: achieve reliable installation, meet code and client expectations.
- Recommendation: Use a hybrid: spray foam or rigid CI for tricky air barrier spots + blown cellulose to reach target attic R when clients require higher performance.
- Quick checklist: Offer staged upgrades, provide blower door numbers to show gains.
Tiny-house and Mobile-home Builders
- Priorities: maximize R per inch, maintain light weight and low embodied volume.
- Recommendation: Use high-R per inch materials (selective closed-cell foam or exterior CI) and aim for airtightness. R-60 is usually impractical.
- Quick checklist: Choose materials that give highest whole-assembly R without expanding wall thickness; use tested seals for windows/doors.
Net-zero and Passive-house Oriented Builds
- Priorities: whole-assembly performance, airtightness, mechanical ventilation with heat recovery.
- Recommendation: Balanced approach—moderate cavity R + continuous exterior insulation + meticulous air-sealing often beats simply increasing cavity R to R-60. If attic is deep and budget permits, R-60 plus airtightness is acceptable.
- Quick checklist: Design for continuous thermal control, test with blower door, use mechanical ventilation, and model loads before choosing extreme attic R.
If also insulating outbuildings or garages, consult garage insulation options and use the shed insulation calculator for small-structure math.
The Bottom Line
The r19 vs r60 insulation choice comes down to where you are building and what you want to achieve: R-19 is cost-effective and fits 2x6 cavities, while R-60 is an attic strategy for cold climates or off-grid systems where extra depth and expense are justified. Prioritize air-sealing, model payback with the insulation savings calculator, and choose R-60 only when climate, depth, and heating goals make the extra material and labor worthwhile.
Frequently Asked Questions
How much thicker is R-60 than R-19?
R-60 typically requires considerably more depth than R-19. For blown cellulose or loose-fill fiberglass, R-60 often means on the order of 16–24 inches of material, while R-19 in batt form fits a 2x6 cavity (about 5.5–6.5 inches depending on product). Exact thickness varies by insulation type and manufacturer; consult product R-per-inch charts.
Use the Department of Energy's insulation guidance to compare R-per-inch for specific materials and estimate the depth you’ll need for your chosen product (Insulation | Department of Energy).
Can I add blown-in insulation over R-19 batts?
Yes. Adding blown-in cellulose or fiberglass over existing batts is a common DIY retrofit and can be an efficient way to raise total attic R without removing existing material. Make sure the existing batts are not compressed and that you avoid blocking soffit vents—install baffles where needed to keep ventilation paths open.
When layering, follow manufacturer instructions about vapor retarders and mixed-material interactions; see guidance from industry sources (for example, the Insulation Institute PDF on layering techniques) for best practice (DOE Releases New R-Value Recommendations (BI491.pdf)).
Is R-60 worth it for a mild climate?
In mild climates, R-60 rarely pays back quickly. Most energy savings are captured by going from low R to moderate R (for example R-11 or R-19 up to R-30–R-38) and by sealing air leaks. Use the insulation savings calculator to model local energy prices and climate impacts before committing to R-60.
If you’re pursuing comfort with limited heating loads or aiming for a passive-house standard, consider continuous exterior insulation and airtightness rather than only increasing attic R to R-60.
Will higher R-values cause moisture problems?
High R alone doesn't cause moisture issues, but changing where insulation is placed (for example, moving insulation or converting vented attic to unvented assembly) can alter vapor and condensation dynamics. Proper vapor control, ventilation, and attention to local climate matter. The EPA and other sources provide guidance on moisture and mold prevention; assess assemblies in the context of your climate and consult local building code or a building-science professional for complex situations.
For crawlspace and foundation moisture issues that may interact with insulation choices, see the site's recommendations on how to fix damp crawl spaces.
What should I do first: air-seal or add insulation?
Air-sealing should come first. Stopping uncontrolled infiltration reduces heating and cooling loads more cost-effectively than simply adding more insulation. After sealing major leaks (top plates, penetrations, attic hatch, ducts), add insulation to reach your target R. The site's air sealing tools page lists materials and methods appropriate for DIYers.
After sealing and insulating, validate results with a blower door test if possible; that provides measurable feedback and helps prioritize follow-up work.