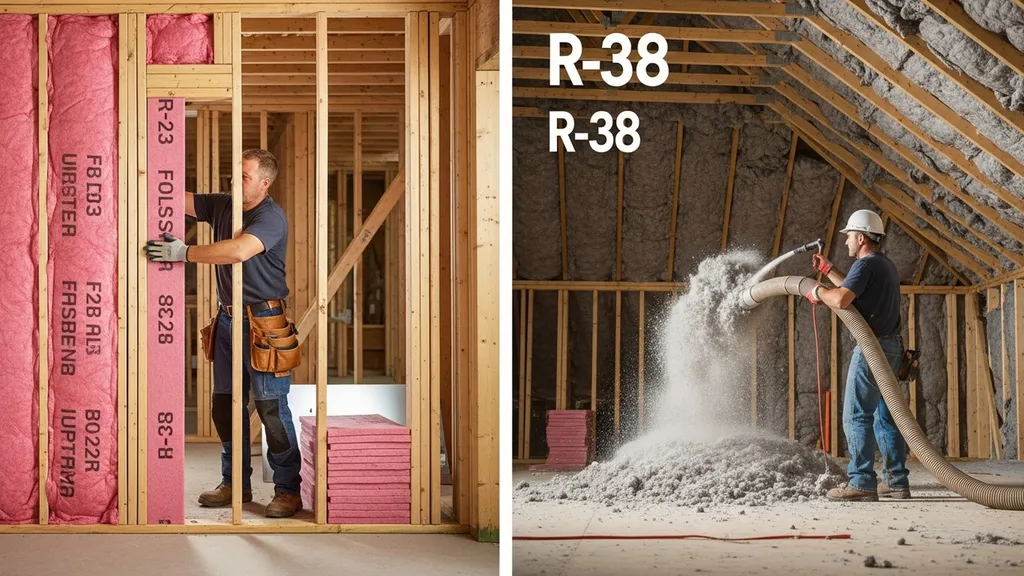
Compare R-23 and R-38: where each R-value belongs, how to achieve them, pros/cons by material, and practical recommendations for DIY eco-builders.
R-23 vs R-38 Insulation: Which Do You Need?
Choosing between R-23 and R-38 insulation is a common decision for DIY eco-builders deciding where to spend limited budget and how to size wall and attic assemblies. This comparison of r23 vs r38 insulation explains where each R-value is typically used, how common materials reach those targets, and practical trade-offs (space, cost, moisture, and performance) so you can pick the right assembly for your build or retrofit.
TL;DR:
- R-23 is the typical target for 2x6 framed exterior walls and small retrofit cavities; it's achievable with standard batts or layered rigid foam and is cost-effective for wall assemblies.
- R-38 is the common attic/ceiling target in many climate zones (often ~10–13 inches of fiberglass or cellulose); choose it when floor/ceiling heat loss dominates or you need much lower heating loads.
- Use high R/inch materials (closed-cell spray foam or rigid polyiso) when depth is limited; always pair with air sealing, continuous insulation, and proper moisture control for the rated performance.
R-23 vs R-38 Insulation: Quick Overview and TL;DR
Short Answer: When Each R-value is Typical
R-23 is commonly the nominal R for 2x6 wall cavities filled with fiberglass, mineral wool, or cellulose, or a combination of cavity insulation plus a thin layer of continuous exterior insulation. R-38 is widely used for attic and ceiling insulation in colder climates and for projects aiming to cut heating loads substantially. Recommendations for home R-values vary by climate; the insulation institute's design guidance PDF provides practical recommendations for attic and wall targets. For detailed fundamentals on R-values and per-inch ranges by material, see our understanding R-value basics.
Comparison Table: Key Specs, Typical Locations, and Materials
| Aspect | R-23 | R-38 |
|---|---|---|
| Typical use | 2x6 exterior walls, some floor cavities | Attics/ceilings, deep cathedral ceilings |
| Typical assembly | 2x6 cavity batt or cavity + 1"–2" CI | Full-depth attic batts or blown-in cellulose |
| Approx depth needed (fiberglass) | ~6" (2x6 cavity) | ~10–13" (attic fiberglass/cellulose) |
| Common materials | Fiberglass batts, mineral wool, cellulose, foam + batt | Blown cellulose, fiberglass batts, layered rigid foam |
| Cost/complexity | Lower cost; DIY-friendly | Higher material volume; attic access and ventilation issues |
| Climate guidance | Moderate climates or continuous insulation on walls | Cold climates and passive-house targets; see IECC/DOE guidance |
Notes on R-per-inch: Fiberglass batts typically deliver ~2.9–3.8 R/in, cellulose ~3.2–3.8 R/in, and closed-cell spray foam ~6–7 R/in, though values vary by product and installation quality. The U.S. Department of Energy offers a clear overview of insulation performance and recommended placements in different climates: see the Department of Energy's insulation guide.
R-23 vs R-38: When R-23 is the Right Choice
Overview: Where You Commonly Find R-23
R-23 most often appears as the nominal fill for a 2x6 framed exterior wall. That makes it the default for many budget-conscious self-builders who want better thermal performance than an R-13 or R-15 2x4 wall without upsizing every stud bay. R-23 also shows up in rim-joists and some floor assemblies where cavity depth is limited.
Industry guidance such as Energy Star's recommended R-values lists wall targets by climate and location; refer to the Energy Star insulation table for guidance on cost-effective levels.
Strengths of Using R-23
- Wall-optimized: Fits a 2x6 cavity without changing framing, so it minimizes structural changes and window/door jamb rework.
- Cost-effective: Less material volume than deep attic insulation, and batts are widely available at retail and easy for DIY installs.
- Simpler detailing: Less need for tall soffits or deep eaves treatment compared with thick roof assemblies.
Weaknesses and Risks of Undersizing
- Whole-wall performance matters: cavity R-23 does not include thermal bridging through studs. Adding 1"–2" of continuous exterior insulation or a high-performance sheathing helps raise whole-wall R-value.
- Not enough for cold climates alone: In northern zones, higher attic R and continuous insulation may be required to meet energy targets; walls at R-23 are a piece of the puzzle, not the whole solution.
- Moisture and air control still required: A poorly sealed R-23 wall will underperform. Follow an air-barrier and vapor-control strategy to protect insulation and structure — for practical airtight membrane techniques see how to install airtight membrane walls roofs.
Best For: Common DIY Scenarios
- New small home framed with 2x6 studs where budget is limited and exterior continuous insulation will be added later.
- Retrofits where wall depth can't be increased and an R-23 batt can be dense-packed or combined with 1" foam.
- Builders who prioritize simple DIY installation and lower upfront cost over extreme thermal performance.
For trade-offs between 2x6 and deeper wall framing when you want higher R without exotic materials, see our article on 2x6 vs 2x8 wall trade-offs.
R-23 vs R-38: When R-38 is the Right Choice
Overview: Where You Commonly Find R-38
R-38 is the usual target for attic and ceiling insulation in many climate zones and for builds aiming to substantially reduce heating and cooling loads. In attics, R-38 often corresponds to about 10–13 inches of fiberglass or cellulose, depending on material. For cold climates or passive-house-oriented projects, R-38 may be the minimum for ceilings; deeper levels such as R-49 or higher are common for very cold zones. The Department of Energy's insulation overview and model codes (IECC) guide what’s recommended by climate zone.
Strengths of Using R-38
- Strong reduction in ceiling heat loss: Attics are a major heat-loss path; upgrading to R-38 often yields one of the quickest energy-return gains.
- Retrofit friendly: Blown-in cellulose or fiberglass in attics reaches R-38 without framing changes, making it a high-impact retrofit move.
- Variety of methods: Use deep batts, blown-in loose-fill, or layered rigid + cavity insulation to achieve R-38 depending on constraints.
Weaknesses and Trade-offs (space, Cost)
- Depth and ventilation: Reaching R-38 in roof assemblies can create depth and ventilation challenges, especially in cathedral ceilings where ventilation channels and vapor control must be preserved.
- More material, more labor: Attic projects require larger material volumes and careful installation to avoid gaps and compression.
- Moisture traps if misapplied: Deep insulation without proper air sealing and ventilation can allow warm, moist air to condense within assemblies. For guidance on how ventilation and deep insulation work together, consult the ultimate guide to ventilation for small eco homes.
Best For: Common DIY Scenarios
- New builds in cold climates where minimizing heating loads matters.
- Retrofits prioritizing attic performance before wall upgrades because attic work often yields higher short-term energy savings.
- Off-grid cabins or tiny homes where space permits and the owner wants to reduce fuel use for heating.
R-23 vs R-38: Fiberglass Batt Options
Overview: How Batts Reach R-23 and R-38
Standard fiberglass batts are sized to match cavity depths. A 2x6 cavity (nominal 5.5" deep) commonly carries an R-23 batt designed for that depth. R-38 is seldom obtained from a single standard stud cavity; in attics you use thicker batts (jumbo or attic-specific) or stack layers to reach R-38. For example, R-19 + R-19 stacked can approach R-38 in some installations, but compression and fit matter.
Strengths (cost, DIY Friendliness)
- Affordable material and broadly available at lumberyards and big-box stores.
- Familiar DIY installation: cutting, fitting around pipes, and stapling faced batts are within reach for many homeowners.
- Low embodied impact compared to some foams, especially when choosing mineral wool or fiberglass with recycled content.
Weaknesses (gaps, Compression, Thermal Bridging)
- Performance depends heavily on installation quality. Compression reduces effective R, gaps allow convective bypass, and poor fit around wiring or on top of insulation reduces whole-assembly R.
- Batt insulation offers no air barrier by itself; an airtight layer or sealed drywall is needed to stop air movement.
- Not ideal for irregular cavities; blown-in materials or spray foam handle odd shapes better.
Best For: Recommended Use-cases
- Filling 2x6 wall cavities to achieve R-23 when studs are straight and cavities are accessible.
- Attic work where deep batts are practical and the attic floor can be leveled and prepared.
- Projects where the owner will perform a careful self-install and address air sealing separately; for batt fundamentals and smaller R-steps see our r-13 vs r-15 guide.
For R-per-inch guidance and manufacturer's data, the Insulation Institute provides technical product comparisons: Uploads.
R-23 vs R-38: Blown-in Cellulose and Loose-fill Options
Overview: Achieving R-23 and R-38 with Blown-in Materials
Blown cellulose and loose-fill fiberglass are common for both attic and retrofit wall fills. Cellulose typically has ~3.2–3.8 R/in and can be dense-packed into wall cavities for R-23 in 2x6 walls or thickly blown into attics to reach R-38 without altering framing.
Strengths (coverage, Retrofit-friendly, Fire Treatment)
- Excellent coverage around obstructions and irregular cavities; dense-packing reduces convective loops.
- Retrofit-friendly: blow-in methods let you add insulation without removing interior finishes in many cases.
- Treated for fire and pests; cellulose includes fire-retardant additives.
Weaknesses (settling, Moisture Sensitivity)
- Settling can reduce effective R-value over time if not installed at proper density. Studies and manufacturer data show proper dense-pack techniques reduce settling risk — consult installation specs and installer references.
- Cellulose is hygroscopic: if a wall or attic has chronic moisture, cellulose must be avoided or moisture addressed before installation. For crawl space moisture prep, see fix damp crawl space tips.
- Requires blower equipment and experienced installers for consistent density; a poor install can leave voids.
Best For: Retrofits and Irregular Cavities
- Filling existing 2x6 walls without full gutting when air sealing is handled at the same time.
- Attics where deep coverage is needed and the goal is to maximize R per dollar.
- Owners who want a lower embodied-carbon option compared with some foams. For an in-depth comparison of spray foam and cellulose trade-offs see our spray foam vs cellulose guide.
R-23 vs R-38: Spray Foam and Rigid Foam Strategies
Overview: Closed-cell vs Open-cell for R Targets
Closed-cell spray foam provides high R/inch (~6–7 R/in) and also acts as an air barrier, making it possible to meet R-23 or R-38 in thinner assemblies. Open-cell spray foam has lower R/inch (around 3.7–3.8) and is less vapor retarding. Rigid foam boards (polyiso, XPS, EPS) are used as continuous exterior insulation to raise whole-wall performance without increasing stud depth.
Strengths (air Barrier, High R/inch)
- Closed-cell foam allows thin-wall or shallow-ceiling builds to hit meaningful R-values without deep framing.
- Spray foam seals gaps and reduces air leakage when applied correctly, improving energy performance beyond R-value alone.
- Rigid foam provides continuous insulation that reduces thermal bridging through studs.
Weaknesses (cost, Embodied Carbon Considerations)
- Material cost is significantly higher than batts or cellulose, and spray foam installation is typically contractor-only for closed-cell products.
- Closed-cell foam has higher embodied carbon; lifecycle considerations are important for eco-builders. See our deep dive on environmental comparison in spray foam vs cellulose insulation pros, cons and carbon impact.
- Vapor control and drying paths change with foam thickness; building-science-informed detailing is necessary.
Best For: Tight Assemblies and Thin-depth Needs
- Mobile homes, tiny houses, or renovations where cavity depth is limited and high R/inch is needed—see our best insulation for mobile homes for specifics.
- Assemblies where an integrated air barrier and insulation reduce the need for separate layers.
- Passive-house retrofits where minimizing thermal bridges in a limited footprint is a priority.
For safety, ventilation, and VOC guidance, consult building science resources and product data sheets, and consider professional application for closed-cell spray foam.
R-23 vs R-38 Insulation: Which Should You Choose? Scenario-based Recommendations
Below are scenario-driven recommendations with prioritized checklists so you can match R-target, materials, and next steps to your project.
If You’re Building New on a Budget (starter Self-build)
Recommendation: Target R-23 in walls with 2x6 studs plus 1"–2" continuous exterior foam where feasible; in the attic aim for at least R-38 if climate demands it.
- Priorities: Air sealing first, then wall cavity insulation, then attic insulation.
- Materials: R-23 fiberglass or mineral wool batts for walls; blown cellulose or attic batts for ceiling.
- Next steps: Use the insulation savings calculator to model payback and prioritize attic vs walls.
If You’re Retrofitting an Older Home with Wall Cavities
Recommendation: Dense-pack cellulose to reach R-23 in 2x6 walls where possible; upgrade attic to R-38 as first-line, then address wall insulation.
- Priorities: Fix water leaks and damp areas, air-seal common leakage points, then insulate.
- Materials: Dense-packed cellulose for walls, blown cellulose for attic.
- Next steps: Inspect rim joists and add targeted spray foam or rigid foam where cavities are shallow.
If You Have a Cold-climate Cabin or Off-grid Home
Recommendation: Prioritize attic R-38 or higher, combine R-23 walls with exterior continuous insulation, and consider closed-cell spray foam for rim-joists and tight spaces.
- Priorities: Maximize attic depth and continuous insulation, ensure ventilation strategy supports deep insulation, and minimize thermal bridging.
- Materials: Blown cellulose in attic, closed-cell spray foam for rim-joists and narrow cavities, 2" polyiso exterior for walls when budget allows.
- Next steps: Model heating loads and fuel needs; deep attic insulation often yields the largest fuel savings.
If You’re Optimizing for Passive-house-level Performance
Recommendation: R-23 walls alone aren’t enough. Use high whole-wall R (continuous exterior insulation plus cavity fill), target attic R well above R-38, and focus on airtightness and mechanical ventilation (MVHR).
- Priorities: Airtightness testing, continuous insulation, thermal-bridge-free details, controlled ventilation.
- Materials: Combination of dense-packed cavities, exterior polyiso or mineral wool boards, and selective spray foam where needed.
- Next steps: Use blower-door testing and whole-house energy modeling to set targets.
This video compares the options to help you decide:
R-23 vs R-38: Cost, Payback, and Energy-savings Considerations
Factors That Affect Cost and Payback
- Material choice: Foam costs more per R, cellulose and fiberglass are cheaper.
- Labor vs DIY: Professional spray foam or dense-pack installs add contractor costs; batts and basic blown-in work can be DIY if skills and equipment are available.
- Access and retrofit difficulty: Accessing closed cavities, removing finishes, or working in tight attics raises labor time.
- Local energy prices and heating fuel types: Payback is faster where electricity or heating fuel is expensive.
How to Estimate Energy Savings for Your Climate
Use simulation tools or calculators to compare incremental savings between R-23 and R-38 in your specific climate. Our insulation savings calculator lets you model regional heating degree days, fuel prices, and incremental insulation costs to estimate simple payback.
For rigorous modeling and code references, consult the IECC and federal guidance; the Department of Energy's insulation page includes links to standards and performance basics.
When Deeper Insulation is Worth the Extra Cost
- When attic or roof heat loss dominates bills (attic is often the first target).
- When chasing net-zero or near-passive targets; incremental R has diminishing returns, but early steps like attic R-38 often give large relative gains.
- When future retrofit disruption is costly; adding continuous exterior insulation at build time avoids later cladding removal.
Get local contractor quotes and run scenarios with the savings calculator before committing to higher-cost materials like closed-cell spray foam.
R-23 vs R-38 Insulation: Installation Checklist and Common Mistakes
Top DIY Installation Tips to Meet Rated R-value
- Prepare surfaces: Repair leaks, fix rot, and ensure cavities are dry before insulating.
- Air-seal first: Seal rim joists, top plates, and penetrations; see our air-sealing DIY guide.
- Match insulation to cavity: Use batts sized for cavity depth to avoid compression; if stacking, avoid compressing lower layer.
- Protect ventilation paths: In rafter bays leave clear ventilation channels or use baffles to maintain airflow for vented roofs.
- Verify with testing: Consider a blower-door test and thermal imaging to find missed spots.
Common Mistakes That Reduce Effective R (compression, Gaps, Poor Ventilation)
- Compression of batts inside cavities, which lowers effective R.
- Gaps at edges and around obstacles that allow convective bypass.
- Blocking ventilation channels in attics, causing moisture issues and reduced performance.
For a checklist of leakage hotspots, see common air leakage points. For airtight membrane installation guidance, see how to install airtight membrane walls roofs. Framing choices that affect cavity depth and ease of installation are covered in our framing a house DIY guide.
When to Hire a Pro
- Closed-cell spray foam application (requires equipment, safety protocols).
- Dense-pack cellulose in walls when interior finishes remain in place (to ensure proper density).
- Complex roof assemblies where condensation risk is high.
The Bottom Line
For most budget-conscious DIY eco-builders, choose R-23 for 2x6 wall cavities and prioritize airtight detailing; reserve R-38 for attic/ceiling work or when climate and energy modeling show significant returns. The r23 vs r38 insulation decision should balance cavity depth, material choice, and complementary steps like continuous insulation and air sealing.
Frequently Asked Questions
Can I double layer R-23 to get R-38?
Yes, stacking layers can reach higher nominal R-values, but watch for compression and proper fit. For example, two R-19 batts stacked can approximate R-38 in an attic, but compressing batts in a shallow cavity reduces effective R. In wall cavities, stacking is rare—better solutions are deeper framing, continuous exterior insulation, or dense-packed materials.
Does thicker insulation always mean lower energy bills?
Not always. Thicker insulation reduces conductive heat loss, but airtightness, thermal bridging, and ventilation also drive real-world savings. After a certain point, incremental R returns diminish. Use an energy model or our insulation savings calculator to quantify expected savings for your climate and fuel costs.
Are there moisture risks with deep insulation in attics?
Yes. Blocking ventilation or installing deep insulation without proper air sealing can allow warm, moist air to condense in roof assemblies. Maintain ventilation channels where required, use baffles at eaves, and resolve any roof leaks or venting problems before adding insulation. For detailed ventilation interactions, see our ultimate guide to ventilation for small eco homes.
How do climate zones change the R-value I need?
Climate zones determine code and recommended R-values; colder zones need higher R in ceilings and walls. Refer to the IECC and the Department of Energy's insulation guidance for climate-specific recommendations and to decide whether R-23 walls or R-38 attics are sufficient for your project goals.
Can I achieve R-38 in a 2x6 wall?
Not within a single 2x6 cavity using common fibrous materials. To reach whole-wall R-38 with 2x6 framing, combine cavity insulation (R-23) with substantial continuous exterior insulation, or redesign framing to 2x8 or use high R/inch materials like closed-cell spray foam. Evaluate whole-wall R rather than cavity R alone when aiming for high performance.