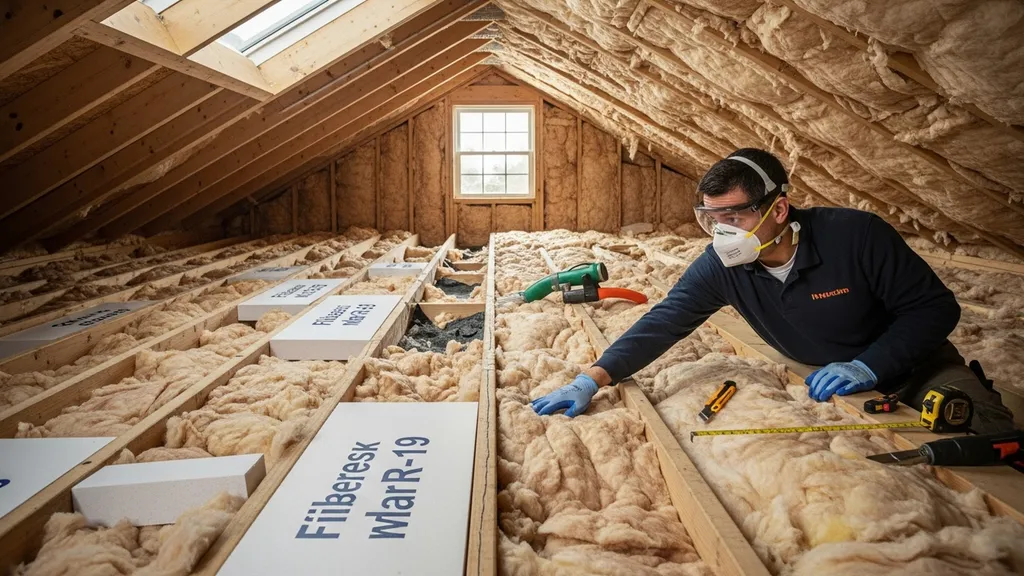
Side-by-side comparison of R-13 and R-49: where each R-value makes sense, DIY installation tips, hybrid options, and scenario-based recommendations.
R-13 vs R-49 Insulation: Which Do You Need?
Choosing between R-13 and R-49 comes down to where you’re insulating, the climate you live in, and how much attic or wall depth you have to work with. This article compares r13 vs r49 insulation for common DIY and self-build scenarios, explains material choices, shows practical hybrid approaches, and gives step-by-step guidance so you can match performance to budget and skills.
TL;DR:
- Choose R-13 for standard 2x4 wall cavities and low-cost batt installs; it’s DIY-friendly but offers limited attic performance.
- Choose R-49 for attic floors in cold climates; reach it with blown cellulose/fiberglass or layered batts but plan for depth, ventilation, and higher labor.
- Use hybrids (rigid foam + R-13, or R-13 + air sealing) when wall depth, budget, or embodied carbon constraints make R-49 impractical.
| R-value | Typical thickness & common materials | Common uses | DIY difficulty | Pros / cons | Best for |
|---|---|---|---|---|---|
| R-13 | ~3.5 in (fiberglass batt), some mineral wool, thin rigid | 2x4 stud walls, interior partitions | Low — batts are easy to install | Low cost per roll, fits standard walls; whole-wall performance reduced by stud thermal bridging | Standard 2x4 wall insulation, budget retrofits |
| R-19 / R-21 | ~4.5–6 in (R-19 batt fits 2x6 partial), R-21 for dense batts | 2x6 walls, some cathedral ceilings | Moderate | Better cavity fill in 2x6 framing; still limited without continuous insulation | 2x6 wall builds or modest upgrades |
| R-30 | ~8–10 in (batts/blown) | Attic floor in moderate climates | Moderate | Good balance of depth vs performance | Attics with room for depth but not full R-49 |
| R-49 | ~12–15 in (blown cellulose/fiberglass or layered batts) | Attic floor, very cold climates | Moderate to high — blown installs or deep batts | Strong attic resistance for heating loads; diminishing returns above R-49, needs ventilation and access | Cold-climate attic upgrades, high-performance retrofits |
(Source: product specifications and guidance from industry resources such as the Insulation Institute and the U.S. Department of Energy. See links in sections below for official R-value recommendations.)
R-13 vs R-49 Insulation: When R-13 is the Practical Choice
Overview — What R-13 Represents
R-13 is the common R-value for fiberglass batts sized for 2x4 stud cavities (about 3.5 inches thick). It also appears in some thin mineral wool batts and lower-thickness rigid panels. R-13 is a cavity-level insulation value: it measures the resistance of the installed material, not the whole wall assembly. The U.S. Department of Energy lists R-13 as a standard for many 2x4 framed walls in moderate climates; Energy star provides climate-based guidance showing where R-13 meets cost-effective thresholds.
Strengths
- Easy to buy and install: pre-cut batts fit 2x4 studs and are widely available.
- Low upfront material complexity: no special tools or blower needed for basic installs.
- Fast installs for interior partitions, retrofit walls with accessible cavities, and some shed or tiny-house builds.
- Lower embodied energy for some mineral wool and cellulose alternatives when compared to thick foam layers (materials choice matters).
Weaknesses
- Whole-wall R-value falls short of cavity R due to thermal bridging through studs and plates. A 2x4 wall with R-13 batts typically performs closer to R-9–R-11 at the assembly level unless you add continuous insulation or advanced framing.
- Not sufficient for attic floors in cold climates — attic R-recommendations usually target R-38 to R-60 in many cold zones, so R-13 is far short of that.
- Compressing batts to fit irregular cavities reduces R-value; careful fit and alignment are required.
- Moisture or air leakage left unaddressed will negate much of the theoretical R-value.
Best for (use Cases and Examples)
- Standard new builds framed with 2x4 walls where code and budget align to R-13.
- Interior non-bearing partitions and garage walls.
- Retrofit projects where adding depth or continuous exterior insulation is impractical.
- Projects that plan for incremental upgrades: install R-13 now and add rigid continuous insulation later or before cladding.
For readers considering upgrades between nearby cavity options, see our comparison of R-13 vs R-23 and our piece on advanced framing techniques that reduce stud fraction and improve whole-wall performance.
R-13 vs R-49 Insulation: When R-49 is the Practical Choice
Overview — What R-49 Represents
R-49 is typically an attic-floor target in cold or heating-dominated climates. It’s achieved with about 12–15 inches of blown cellulose or fiberglass, or with layered batts. The Department of Energy lists R-38–R-60 attic targets depending on climate zone, with R-49 commonly recommended for many colder zones; their guidance shows the rising attic R targets as climate gets colder see the DOE insulation guide. For attics with limited headroom, some builders aim for R-30–R-38 instead.
Strengths
- High attic R reduces heating loads significantly in cold climates; research and government guides show stronger returns when moving from low attic R to mid/high R early on (diminishing returns increase as you go very high).
- Flexible installation methods: blown cellulose/fiberglass achieves depth without seams; layered batts can be used where blowers aren't available.
- Works well when combined with robust air sealing at the ceiling plane; insulation performs poorly when warm air leaks past soffits or recessed fixtures.
Weaknesses
- Requires attic depth and careful attention to ventilation and soffit baffles so roof vents aren’t blocked.
- Blown-in installations often require rental equipment (insulation blower) or professional installers for even coverage and density control.
- Higher material volume increases embodied carbon compared with thin cavity R-values; choice of material (cellulose vs fiberglass vs spray foam) alters the environmental profile.
- Diminishing returns: beyond a point (often above R-49 or R-60 depending on climate), additional R yields small incremental energy savings relative to extra cost and embodied energy.
Best for (use Cases and Examples)
- Cold-climate homes where heating loads dominate and attic depth allows 12–15 inches of insulation.
- Retrofits where attic floor access exists and you can add a continuous layer without disturbing roof structure.
- Owners seeking deep energy reductions as part of a net-zero or low-energy goal — often paired with air sealing and ventilation upgrades.
For a deep dive into attic materials and recommended R-values, see our attic insulation guide. To compare common attic options for reaching R-49, consult our comparison on cellulose vs fiberglass.
R-13 vs R-49 Insulation: Intermediate Options and Hybrid Strategies (R-19, R-30 and Layering)
Common Intermediate R-values and Where They Fit
Intermediate choices bridge constraints between wall cavity depth and attic headroom. Examples:
- R-19/R-21: Fit 2x6 walls or deeper framed cavities; common when moving from 2x4 to 2x6 construction.
- R-30: A reasonable attic target where full R-49 isn’t possible due to limited depth.
- R-38: Often a code or practical target in mixed climates.
These stepped choices let builders balance framing, cost, and energy performance without committing to full-depth attic fills or heavy continuous foam.
Layering Batt + Foam Board (hybrid Assemblies)
A common DIY-friendly hybrid: install R-13 batts in a 2x4 wall and add 1–2 inches of rigid foam on the exterior or interior to raise whole-wall performance. Rigid foam types differ:
- Polyiso: High R per inch, perform well above grade; compare performance in our foam board comparison.
- EPS / XPS: Lower R/in but sometimes better moisture tolerance depending on assembly.
- Mineral wool + foam: Sometimes used for fire resistance and improved acoustics.
Layering works well when you can't reframe but want to reduce thermal bridging. For cathedral ceilings with shallow slope, layered approach lets you keep existing rafters while improving overall R.
When to Choose a Hybrid vs Jump to R-49
- Choose a hybrid when wall depth or headroom is limited, when embodied carbon of thick foam is a concern, or when budget limits deep blown installs.
- Jump to R-49 in the attic when you have the depth, prioritize heating savings, and can handle blower rental or pro installation.
For more comparisons near these values, see R-13 vs R-21, R-15 vs R-23, and R-30 vs R-38. Industry buyer guides also summarize R per inch and material trade-offs if you want a quick product-level checklist (see a recent buyer guide overview). Leyton’s 2025 buyer guide outlines per-inch R-values and common applications.
R-13 vs R-49 Insulation: Cost, Labor, and Embodied Carbon Tradeoffs
Material and Labor Considerations (DIY vs Pro)
R-13 installs are typically low-cost in labor: roll or batt installs are straightforward for an average DIYer. R-49 attic fills often require either rented blower equipment and several hours of work or a professional crew for blown insulation. Labor time, access difficulty (attic hatch, kneewall, obstacles), and waste disposal (for retrofit removals) affect total cost.
Use an insulation savings calculator to model energy savings and payback across different R-targets and fuel prices. That tool helps you compare scenarios like adding R-13 + 1" polyiso vs a full blown R-49 attic top-up.
Embodied Carbon and Environmental Impact of Common Materials
Different insulation materials come with different embodied energy:
- Cellulose: Made from recycled paper, lower embodied carbon, absorbs fewer fossil-fuel inputs.
- Fiberglass: Lower material cost and long-standing performance; embodied carbon is moderate depending on glass source and manufacturing.
- Spray polyurethane foam: High embodied carbon and off-gassing concerns; offers air-sealing benefits that sometimes reduce required R in assemblies.
Lifecycle studies from building science sources and lifecycle databases show cellulose often has the lowest carbon intensity among common loose-fill insulations, while spray foam is higher. For detailed lifecycle and performance tradeoffs, see our comparison of spray foam vs cellulose.
How to Estimate Payback and When Higher R Pays Off
Higher R pays off faster in:
- Cold climates with long heating seasons.
- Homes with high heating fuel prices.
- Buildings with poor existing insulation and substantial leakage.
Estimate payback by modeling energy savings (use the insulation savings calculator) and factoring in labor. Keep in mind diminishing returns: each additional R adds less annual energy saving than the previous R. Air sealing and daylighting of thermal bridges usually yield better early returns than adding small amounts of extra R in some cases.
Also consider moisture control and code: assemblies that use exterior continuous insulation may change vapor dynamics. Consult local code or ASHRAE standards for complex assemblies to ensure compliance.
R-13 vs R-49 Insulation: Which Should You Choose?
Scenario a — Budget Retrofit in Mild Climate
Recommendation: Prioritize air sealing and add R-13 in wall cavities; aim for R-30 in the attic if possible.
- Why: In milder climates, reducing drafts and fixing attic bypasses typically saves more energy per dollar than pursuing deep attic R.
- Materials: Fiberglass batts for walls, blown fiberglass or cellulose for attic top-up to R-30.
- Checklist: Verify attic ventilation, install baffles at soffits, seal penetration points, and plug attic bypasses.
Scenario B — New Build in Cold Climate Aiming for Low Energy Use
Recommendation: Target R-49 or higher in the attic and use 2x6 walls (R-19–R-21) plus continuous exterior insulation.
- Why: Heating loads dominate; deep attic R and whole-wall continuous insulation reduce heating demand significantly.
- Materials: Blown cellulose or dense-packed cellulose for attic, polyiso or exterior mineral wool as continuous insulation for walls.
- Checklist: Design for adequate attic depth, detail vapor control strategy, consider mechanical ventilation (HRV/ERV), and consult net-zero guidance like our how to build a net-zero home.
Scenario C — Attic-only Upgrade with Limited Headroom
Recommendation: Aim for R-30–R-38 if you can't reach full R-49; consider compact high-R rigid board over ceiling if headroom is tight.
- Why: Blown options require depth; rigid foam on top of ceiling joists raises effective R without as much depth.
- Materials: Add 2–3 inches of polyiso over existing joists, then fill remaining bay with R-13/19 batts.
- Checklist: Maintain ventilation paths, keep baffles at soffits, and avoid compressing batt materials.
Scenario D — Off-grid Cabin or Tiny House Tradeoffs
Recommendation: Use high-performance, low-embodied-carbon strategies: dense-packed cellulose in walls and attic where possible; prioritize air sealing and thermal mass.
- Why: Off-grid builds value low energy demand and lightweight transport; cellulose offers a good performance-to-carbon ratio.
- Materials: Cellulose for walls/attic, rigid foam selectively for exterior continuous insulation if moisture can be managed.
- Checklist: See our guide on off-grid cabin insulation for transport and assembly tips.
This video compares the options to help you decide:
R-13 vs R-49 Insulation: Practical DIY Installation Tips and Common Mistakes
Air Sealing and Inspection Before Adding Insulation
- Inspect and seal: Seal attic bypasses, rim joists, recessed fixtures, and plumbing stacks before insulating. A little sealing often reduces required R by stopping convective heat loss.
- Sequence: Air barrier first, then insulation. If you add rigid foam to walls, install it outside sheathing before cladding where practical.
Material-specific Install Tips (batts, Blown Cellulose, Spray Foam)
- Batts: Cut to fit, avoid compression, keep insulation tight to the cavity face without gaps. Use unfaced batts when a separate vapor retarder or air barrier is present.
- Blown cellulose/fiberglass: Maintain depth markers and even distribution. Rent a proper blower or hire installers for large areas. Avoid overpacking cellulose into cavities intended for airflow around baffles.
- Spray foam: Use closed-cell only where needed for structural or air-sealing properties; pay attention to manufacturer cure times and ventilation during application.
Safety, Ventilation, and Attic Access Tips
- PPE: Use goggles, gloves, and N95 during handling; respirators for spray foam.
- Ventilation: Maintain soffit-to-ridge ventilation where required; when converting attic to conditioned space, change strategy to roofline insulation and ensure roof assembly remains dry.
- Access: Create a safe walkway in attics, protect insulation from foot traffic with OSB or plywood platforms if you'll be using the attic.
For small builds and shed projects where R choices interact with limited space, see our guides on how to insulate a shed floor and use the shed insulation calculator to test options. For low-carbon alternatives, check our piece on using cork insulation.
The Bottom Line
The r13 vs r49 insulation choice depends on location and assembly: use R-13 for standard 2x4 walls and budget installs, and R-49 for attic floors in cold climates where depth allows it. Prioritize air sealing and thermal-bridge reduction first, then raise R-value with hybrids (rigid foam + batts) when full-depth R-49 isn’t practical.
Frequently Asked Questions
Can I layer R-13 to reach R-49?
Layering multiple R-13 batts to reach R-49 is impractical in most cases because of the depth required (roughly 12–15 inches for R-49) and the risk of compression, settling, and air gaps. A better approach is combining cavity insulation (R-13) with continuous rigid foam on the exterior or using blown-in insulation on the attic floor to achieve the depth without many seams.
For attic upgrades, blown cellulose or blown fiberglass is the standard way to reach R-49 with even coverage; for walls, exterior rigid foam plus R-13 batts gives a higher whole-wall R without changing framing.
Is R-49 necessary in all climates?
No. R-49 is most appropriate for cold, heating-dominated climates where it significantly reduces fuel use. In milder climates, R-30 to R-38 in the attic paired with thorough air sealing will often deliver a better cost-to-performance result. Refer to the Energy star recommended r-values and the DOE insulation guidance to pick R-values by climate zone.
Will insulation reduce condensation and moisture problems?
Insulation alone won’t control moisture. You need a proper vapor and air control strategy tailored to your climate and assembly. For example, adding exterior continuous insulation can shift dew points outward and reduce interstitial condensation risk, while closed-cell spray foam locally reduces vapor diffusion but has higher embodied carbon. Consult ASHRAE or local building code guidance for specific vapor retarder placement rules and consider drying potential of assemblies.
How does insulation thickness affect headroom and framing choices?
Insulation thickness directly affects headroom in attics and interior space in rafter bays or cathedral ceilings. If you can’t increase depth, use higher-R-per-inch materials (like polyiso) or change framing to 2x6 studs or deeper rafters. Advanced framing strategies (24-inch on-center, reduced stud fraction) also improve whole-wall performance without increasing insulation depth.
When planning, balance the thermal target with the structural framing and any interior clearances; for off-grid or tiny-house projects, see our off-grid cabin insulation guide for examples of depth and transport tradeoffs.
What are the best materials to use to reach R-49 in the attic?
Common approaches to reach R-49 include blown cellulose, blown fiberglass, or layered batts totaling 12–15 inches. Cellulose offers lower embodied carbon and good settled density; fiberglass is lighter and resists moisture better in certain conditions. The best choice depends on access, ventilation, budget, and environmental priorities—see our comparison of cellulose vs fiberglass for material-level tradeoffs.