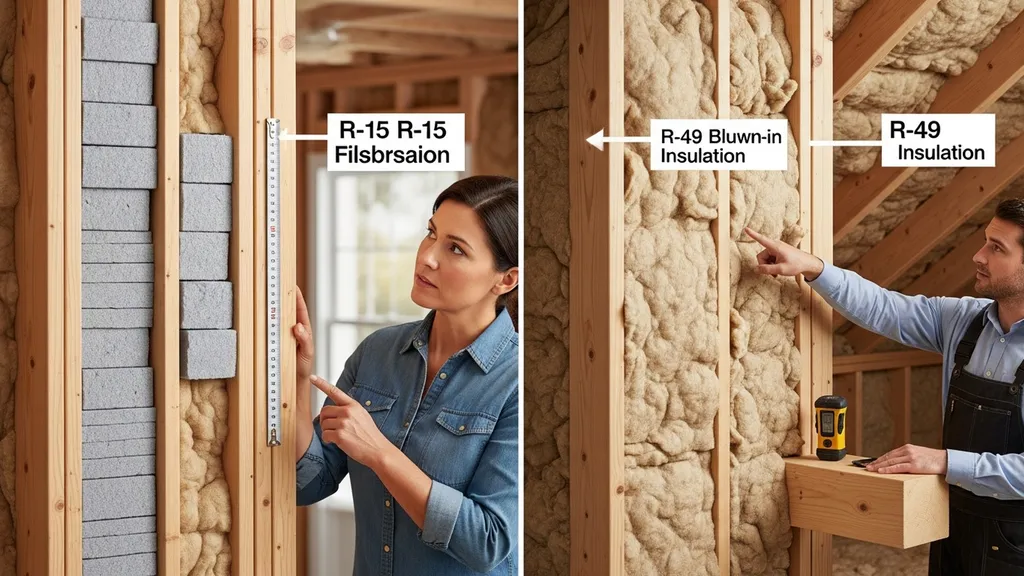
Compare R-15 and R-49 insulation, where each belongs, cost and climate guidance, and DIY retrofit tips to pick the right R-value for your project.
R-15 vs R-49 Insulation: Which Do You Need?
Choosing between R-15 and R-49 insulation shapes the thermal performance and budget for a DIY build or retrofit. If you’re weighing whether to fill existing 2x4 wall cavities or invest in deep attic insulation, this comparison explains where each R-value fits, the materials and assemblies that achieve them, and practical retrofit tips to help you decide. Read on to learn how climate, space, and airtightness change which R-value is the smarter choice and what to do next.
TL;DR:
- R-15 usually equals a standard 2x4 cavity (about 3.5–3.75 in) and is best for existing 2x4 walls or low-budget projects; works well when paired with exterior continuous insulation.
- R-49 is a deep-cavity target (often 12–16 in of loose-fill depending on material) recommended for attics in cold climates to sharply reduce heating load.
- If you must choose, prioritize air-sealing and ventilation first; then use layered approaches (R-15 cavity + exterior foam or added blown-in in attic) to get high effective R without full rebuild.
R-15 vs R-49 Insulation: Quick TL;DR and Comparison Table
Short Verdict
For many DIYers the question is practical: do you insulate the existing 2x4 walls with R-15, or spend more to get R-49 in the attic or roof? R-15 fits shallow cavities and is cost-effective and DIY-friendly; R-49 is a common attic target in cold climates and delivers much stronger thermal resistance. Energy Star and the U.S. Department of Energy publish recommended R-values by climate and location; use those tables to check whether upgrading attic insulation or increasing wall continuous insulation gives the best return for your climate and heating fuel mix (Energy star's recommended r-values).
At-a-glance Comparison Table
| Feature | R-15 | R-49 |
|---|---|---|
| Typical assembly | 2x4 wall cavity (interior cavity) | Attic/roof deep loose-fill or layered roof assembly |
| Common materials | Fiberglass batts (high-density), mineral wool, dense-packed cellulose | Blown-in cellulose, loose-fill fiberglass, layered batts + blown-in |
| Typical thickness | ~3.5–3.75 in (2x4) | ~12–16 in (material dependent) |
| Typical applications | Existing 2x4 framed walls, partition walls | Attic floor, cathedral ceilings, raised-heel trusses |
| Relative cost | Low | Medium–High |
| Energy savings potential | Moderate (depends on bridging and airtightness) | High in heating-dominated climates |
| DIY-friendliness | High | Medium (attic blown-in is DIY-possible; dense-pack may require blower/rental) |
Notes: Recommended R-values vary by climate zone and by location in the home; see the Energy star recommended r-values for tables that map R targets to climate zones.
R-15 vs R-49 Insulation: What R-15 Means
Overview — Typical Assemblies That Achieve R-15
R-15 corresponds to the thermal resistance commonly used in 2x4 stud wall cavities. Builders typically reach R-15 with higher-density fiberglass batts, mineral wool designed for 2x4 cavities, or dense-packed cellulose in a shallow cavity. The cavity thickness is roughly 3.5 to 3.75 inches. In exterior walls R-15 is often paired with a layer of continuous insulation outside the sheathing to reduce thermal bridging through studs.
See our primer on understanding r-value for how R-values stack across materials and assemblies.
Strengths of R-15
- Lower upfront cost and faster installation for new 2x4 framing or retrofit of existing shallow walls.
- Readily available materials and familiar installation methods for most DIYers.
- Fits standard framing without needing to change exterior dimensions.
- Works well when combined with exterior continuous insulation to reduce stud thermal bridging.
Weaknesses and Common Pitfalls
- Studs create thermal bridges that reduce the effective wall R-value; a framed wall with R-15 in cavities will perform significantly less than R-15 across the whole wall assembly.
- R-15 alone is often insufficient in cold climates where attic and wall targets are higher.
- Improper installation—compressed batts, gaps, or voids—can cut performance by 10–20% or more.
- Wall insulation alone won't fix air leaks; airtightness and ventilation are required for predictable savings.
Industry guidance (for example from the Insulation Institute) notes attics often require R-30 to R-49; wall R-values are lower because of cavity depth and assembly differences, so check local code and climate tables (A guide to selecting fiber glass insulation products).
Best-for: Practical Use Cases
- Existing 2x4 homes where adding depth is impractical.
- Budget-conscious new builds that use 2x4 framing and add a modest exterior continuous insulation layer.
- Interior partitions and non-load-bearing walls where higher R isn't needed.
- Projects where DIY speed and minimal structural changes matter.
If your walls are limited to 2x4 depth, you can still improve whole-wall performance by adding exterior continuous insulation or reducing thermal bridging with structural choices.
R-15 vs R-49 Insulation: What R-49 Means
Overview — Where R-49 is Commonly Used
R-49 is a deep-cavity target most commonly seen in attic floor assemblies in cold climates or in high-performance new builds that emphasize low heating loads. Achieving R-49 in practice uses loose-fill or blown-in materials (cellulose or fiberglass), or layered constructions such as cavity insulation plus additional blown-in on top of joists or in the rafters on raised-heel trusses. Use our attic insulation guide to match attic depth and material to climate.
Also see detailed material comparisons in our guide to the best attic materials.
Strengths of R-49
- Substantially lowers conductive heat loss in heating-dominated climates; attics with R-49 reduce the load on a heating system much more than lower R-values.
- Loose-fill installations can be installed relatively quickly for large attic areas and are often a cost-effective retrofit.
- Deep insulation in the attic complements air-sealing strategies to produce clear, measurable energy savings.
Weaknesses and Trade-offs
- Higher material and labor costs compared with filling 2x4 cavities.
- Achieving R-49 in wall or roof planes may require thicker framing or a redesign (raised-heel trusses, thicker rafters).
- Without proper vapor control and ventilation, adding deep insulation in roof assemblies can create condensation risk in cold climates.
- For areas where cooling dominates, attic R-49 helps but must be paired with ventilation and radiant control to perform optimally.
The Leyton insulation buyer guide reviews options and R-value charts which can help compare approaches and material choices for deep-cavity installs (Insulation buyer guide 2026).
Best-for: Practical Use Cases
- Attic floor retrofits in cold climate, heating-dominated homes.
- New builds using raised-heel trusses or cathedral roofs designed to accommodate deep R.
- Off-grid cabins or tiny homes that prioritize low heating energy use (where weight and space permit).
- Projects targeting very low heating loads where return on investment favors deeper attic insulation.
R-15 vs R-49 Insulation: Alternatives and Hybrid Approaches
Layered Strategy: R-15 Cavity + Exterior Continuous Insulation
One common strategy is to keep R-15 in the 2x4 cavity but add continuous insulation (polyiso, XPS, or mineral wool boards) outside the sheathing. This reduces thermal bridging through studs and raises whole-wall effective R without rebuilding the wall. Continuous insulation thickness depends on the material and the target effective R.
High-performance Alternatives: Spray Foam and Rigid Foam
Spray polyurethane foam (closed-cell) provides higher R per inch and acts as an air barrier, which can reduce the need for very deep cavities. Rigid foam sheathing (polyiso or EPS) can be used outside sheathing to boost whole-wall R. Each has trade-offs: foam products often have higher embodied carbon and require careful detailing for vapor control; natural-fiber boards and mineral wool offer lower-carbon alternatives.
For a material-focused comparison, see our piece on spray foam vs cellulose and the ultimate guide to natural fiber insulation.
Blown-in and Dense-pack Options to Reach R-49 Without Rebuild
Attic floors are the obvious place to reach R-49 with blown-in cellulose or fiberglass. For wall cavities, dense-pack cellulose or fiber can sometimes increase R beyond standard batt values without opening exterior cladding, but reaching R-49 in a wall without changing cavity depth is unlikely.
When Thermal Bridging Matters Most
Thermal bridging through studs, rafters, and foundations reduces the effective R of an assembly. In framed walls, continuous exterior insulation or a thermal break at the framing plane is the most effective way to reduce bridging. Use the Department of Energy's resources for system-level planning and to match strategy to climate and building type (Insulation | Department of Energy).
What you’ll see in practice: a modest cavity R plus a thin layer of continuous foam often beats a thicker cavity-only approach for whole-wall performance, especially in cold climates.
Before the video below: this clip shows real installations comparing shallow cavities (R-15 style) and deep attic insulation (R-49 style), and demonstrates layered strategies you can apply on a DIY retrofit.
Watch this step-by-step guide on beefing up attic insulation:
R-15 vs R-49 Insulation: Cost, Embodied Carbon and Simple Payback Comparison
How to Compare Upfront Cost vs Lifetime Energy Savings
Do not rely on generic price claims. Instead, use a method:
- Step 1: Estimate incremental installed cost per square foot to go from R-15 to R-49 for the assembly you plan to change.
- Step 2: Model annual energy savings for your home with that incremental R. Use an energy model or the insulation savings calculator to translate the R-change into heating/cooling savings for your climate and fuel type.
- Step 3: Compute simple payback by dividing incremental cost by annual energy savings.
This method accounts for local fuel prices, heating system efficiency, and climate, which are the main drivers of payback.
Embodied Carbon Differences by Material Type
Materials like cellulose and mineral wool have lower embodied carbon than petrochemical foams. Spray polyurethane and extruded polystyrene generally have higher embodied impacts. When low embodied carbon is a priority, favor cellulose, recycled-content fiberglass, or mineral wool; then use detail strategies (continuous mineral wool board, thicker walls) to reach target whole-assembly R.
For help on choosing lower-impact products on a budget, see our article on budget-friendly green materials.
Using a Simple Payback Example (method, Not Fixed Numbers)
Rather than post a fixed payback number, follow the three-step method above. Example calculation inputs you will need: square footage of the assembly, incremental installed cost per square foot, your local heating fuel cost, and modeled annual energy reduction from your chosen R upgrade. The insulation savings calculator supports these inputs.
Where Incentives and Rebates Change the Math
Local utility rebates and state programs can cut installed costs or offer tax incentives. Check your utility and state energy office for current programs—rebates can transform a marginal payback into a compelling investment.
R-15 vs R-49 Insulation: How Climate and Building Specifics Decide Which You Need
Climate-zone Guidance and When Deeper R Matters
Climate zone drives whether R-49 is worthwhile. Heating-dominated climates with long, cold winters will see bigger absolute energy reductions from attic R-49 than mild climates. Use the Department of Energy climate-zone guidance to map recommended R-values to your location and building type.
Hot-humid and Mixed Climates: Moisture-first Considerations
In hot-humid climates, vapor and moisture control are the priorities. Deep attic insulation reduces heat transfer, but moisture management and continuous air barriers matter more for long-term durability. In many mixed climates, balanced strategies—air-sealing plus moderate R plus ventilation—deliver the best comfort-to-cost ratio.
Cold Climates and Off-grid Homes: Why R-49 is Often Chosen
Off-grid cabins and remote homes with expensive fuel or limited solar capacity often pursue higher R (attic R-49 plus tight building envelope) to cut year-round energy demand. See our off-grid cabin insulation guide for cold-climate specifics and assembly strategies.
Small-build Specifics: Tiny Houses, Cabins, and Slab/icf Differences
Tiny houses and mobile homes often have limited cavity depth; the insulation for mobile homes guidance helps prioritize continuous insulation or higher-R-per-inch materials. For foundations and slab edges, insulated concrete forms (ICF) offer integrated R and mass; read our ICF primer at ICF foundations overview.
Always pair R-targets with airtightness and a plan for controlled ventilation appropriate for the climate.
R-15 vs R-49 Insulation: Which Should You Choose? Scenario-based Recommendations
Decision rules: consider space available, climate, energy target, and budget.
Scenario A: New 2x4 Framed House on a Tight Budget
Recommendation: Use R-15 in cavities, add at least R-3 to R-5 of continuous exterior insulation if budget allows. This raises whole-wall performance without changing framing. Focus first on airtightness and a good mechanical ventilation plan.
Scenario B: New Build in a Cold Climate Aiming for Low Heating Load
Recommendation: Invest in attic R-49 (or higher where code/targets suggest), use raised-heel trusses for full insulation depth at eaves, and consider exterior continuous insulation on walls. Combine with high levels of airtightness; consult our passive-house airtightness guide.
Scenario C: Attic-only Retrofit on an Older Home
Recommendation: Prioritize air-sealing the attic plane, then add blown-in cellulose or fiberglass to reach R-49 if your climate and budget support it. Blown-in is often the fastest DIY retrofit pathway to R-49.
Scenario D: Tiny House or Off-grid Cabin
Recommendation: Evaluate weight and space limits. If cavity depth is small, high-R-per-inch materials or exterior continuous insulation can help. For off-grid energy minimization, invest where it cuts heating load most: continuous wall R plus attic depth where possible.
Scenario E: Targeting Passive-house or Net-zero Energy
Recommendation: Aim for whole-assembly performance rather than a single R number. A compact envelope with high attic R (often ≥R-49), careful thermal-bridge design, continuous insulation, and airtightness plus balanced ventilation will be the path. Pair insulation decisions with mechanical systems sizing.
For garage and unconditioned spaces, see our guidance on garage insulation options to avoid overspending on areas where lower R is acceptable.
R-15 vs R-49 Insulation: Installation and Retrofit Tips for DIY Builders
Air-sealing and Vapor Control Before Adding Insulation
- Air-seal first: Use caulk, spray foam, or gaskets at top plates, rim joists, penetrations, and around chimneys. Air-sealing reduces the amount of insulation required to achieve the same comfort.
- Check for moisture issues: Fix leaks, rot, and pest entry before insulating.
See our air-sealing tools checklist for materials and methods.
Tools, Materials, and Safety Tips for DIY Installs
- PPE: Dust mask or respirator, gloves, long sleeves, and eye protection for fiberglass or cellulose work.
- Tools: Stapler for batts, insulation knife, blower rental for loose-fill, and a depth marker for attics.
- When to rent: Blower machines for blown-in cellulose/fiberglass are often worth renting for attic projects.
Common Retrofit Traps and How to Avoid Them
- Compressing batts in cavities reduces their R. Cut batts to fit without compression.
- Blocking ventilation channels at eaves when topping joists with blown-in insulation—maintain clear baffles for soffit airflow.
- Ignoring rim joists and band joists—these are frequent air-leak and thermal-bridge points; insulate and seal them well.
Small upgrades like weatherstripping doors also compound savings; review our door weatherstripping tips for easy wins. For damp crawl spaces, fix drainage and seal before insulating; see fix damp crawl space.
Checklist for a Successful DIY Upgrade
- Assess air leaks and fix them.
- Inspect and repair moisture or pest damage.
- Choose a material and method suitable for your cavity depth and climate.
- Maintain ventilation paths and plan for mechanical ventilation if tightening the envelope.
- Use the insulation savings calculator to model expected energy impacts.
Call a pro if you plan closed-cell spray foam, complex vapor control, or if the assembly interfaces with combustion appliances.
The Bottom Line
For many DIY projects the smarter move is to pair R-15 cavity insulation with exterior continuous insulation or to invest in attic R-49 where the climate and heating fuel make it cost-effective. Use the r15 vs r49 insulation decision with a focus on airtightness, vapor control, and the whole-assembly R rather than a single number.
Frequently Asked Questions
Is R-49 always better than R-15?
Not always. R-49 gives much more thermal resistance in attic or roof assemblies and is often the right choice in cold, heating-dominated climates. But for constrained wall cavities or budget projects, combining R-15 cavity insulation with exterior continuous insulation can achieve equivalent or better whole-wall performance. The right choice depends on climate, where the insulation goes (wall vs attic), and whether you pair insulation with air-sealing and ventilation.
Can I reach R-49 in a 2x4 wall without rebuilding?
Reaching R-49 in a 2x4 wall is not practical; you would need many inches of high-R material or a thick external build-up. Instead, consider adding continuous exterior insulation or using high-R-per-inch products (rigid foam or spray foam) to raise effective wall R without rebuilding the framing. Dense-pack cellulose can increase cavity performance but won't approach attic-level R without extra layers.
How much energy will I save if I upgrade from R-15 to R-49?
Energy savings depend on climate, existing airtightness, heating fuel, and the area being upgraded. The proper way to estimate savings is to model the specific upgrade with local climate data or use the insulation savings calculator. That tool lets you compare the annual energy reduction for a given R-change and your home's characteristics.
Does higher R-value affect moisture risk?
Yes. Adding insulation changes temperature and moisture paths in assemblies. Deep insulation in roof assemblies or insulating from the interior without proper vapor control can create condensation risk in cold climates. Always evaluate vapor control strategies, ventilation, and local climate rules when increasing R-value—especially when switching to impermeable materials like closed-cell foam.
Are some insulation materials better for DIY than others?
Yes. Fiberglass batts and mineral wool are often the easiest for novice DIYers in wall cavities. Blown-in cellulose or fiberglass is DIY-feasible for attics if you rent a blower. Spray foam is more complex and generally best done by professionals due to equipment, overspray, and vapor-control implications. Choose materials you can install correctly, and prioritize air-sealing and ventilation for the best outcome.